
(Image/Wayne Scraba)
Today, big high quality electronic tachometers are a common sight at drag strips and in fast street cars. Modern electronics have turned tachometers into precise and reliable instruments (provided, of course, they’re installed and wired correctly).
There are dozens of different electric (or electronic) tachometers available. Some have more features than others. We’ll look at some of those features today.
One of the most important is the shift light. Honestly, it changed drag racing. Instead of concentrating on the sweep of the tach, the driver can now grab gears the instant he (or she) catches a glimpse of an illuminating shift light.
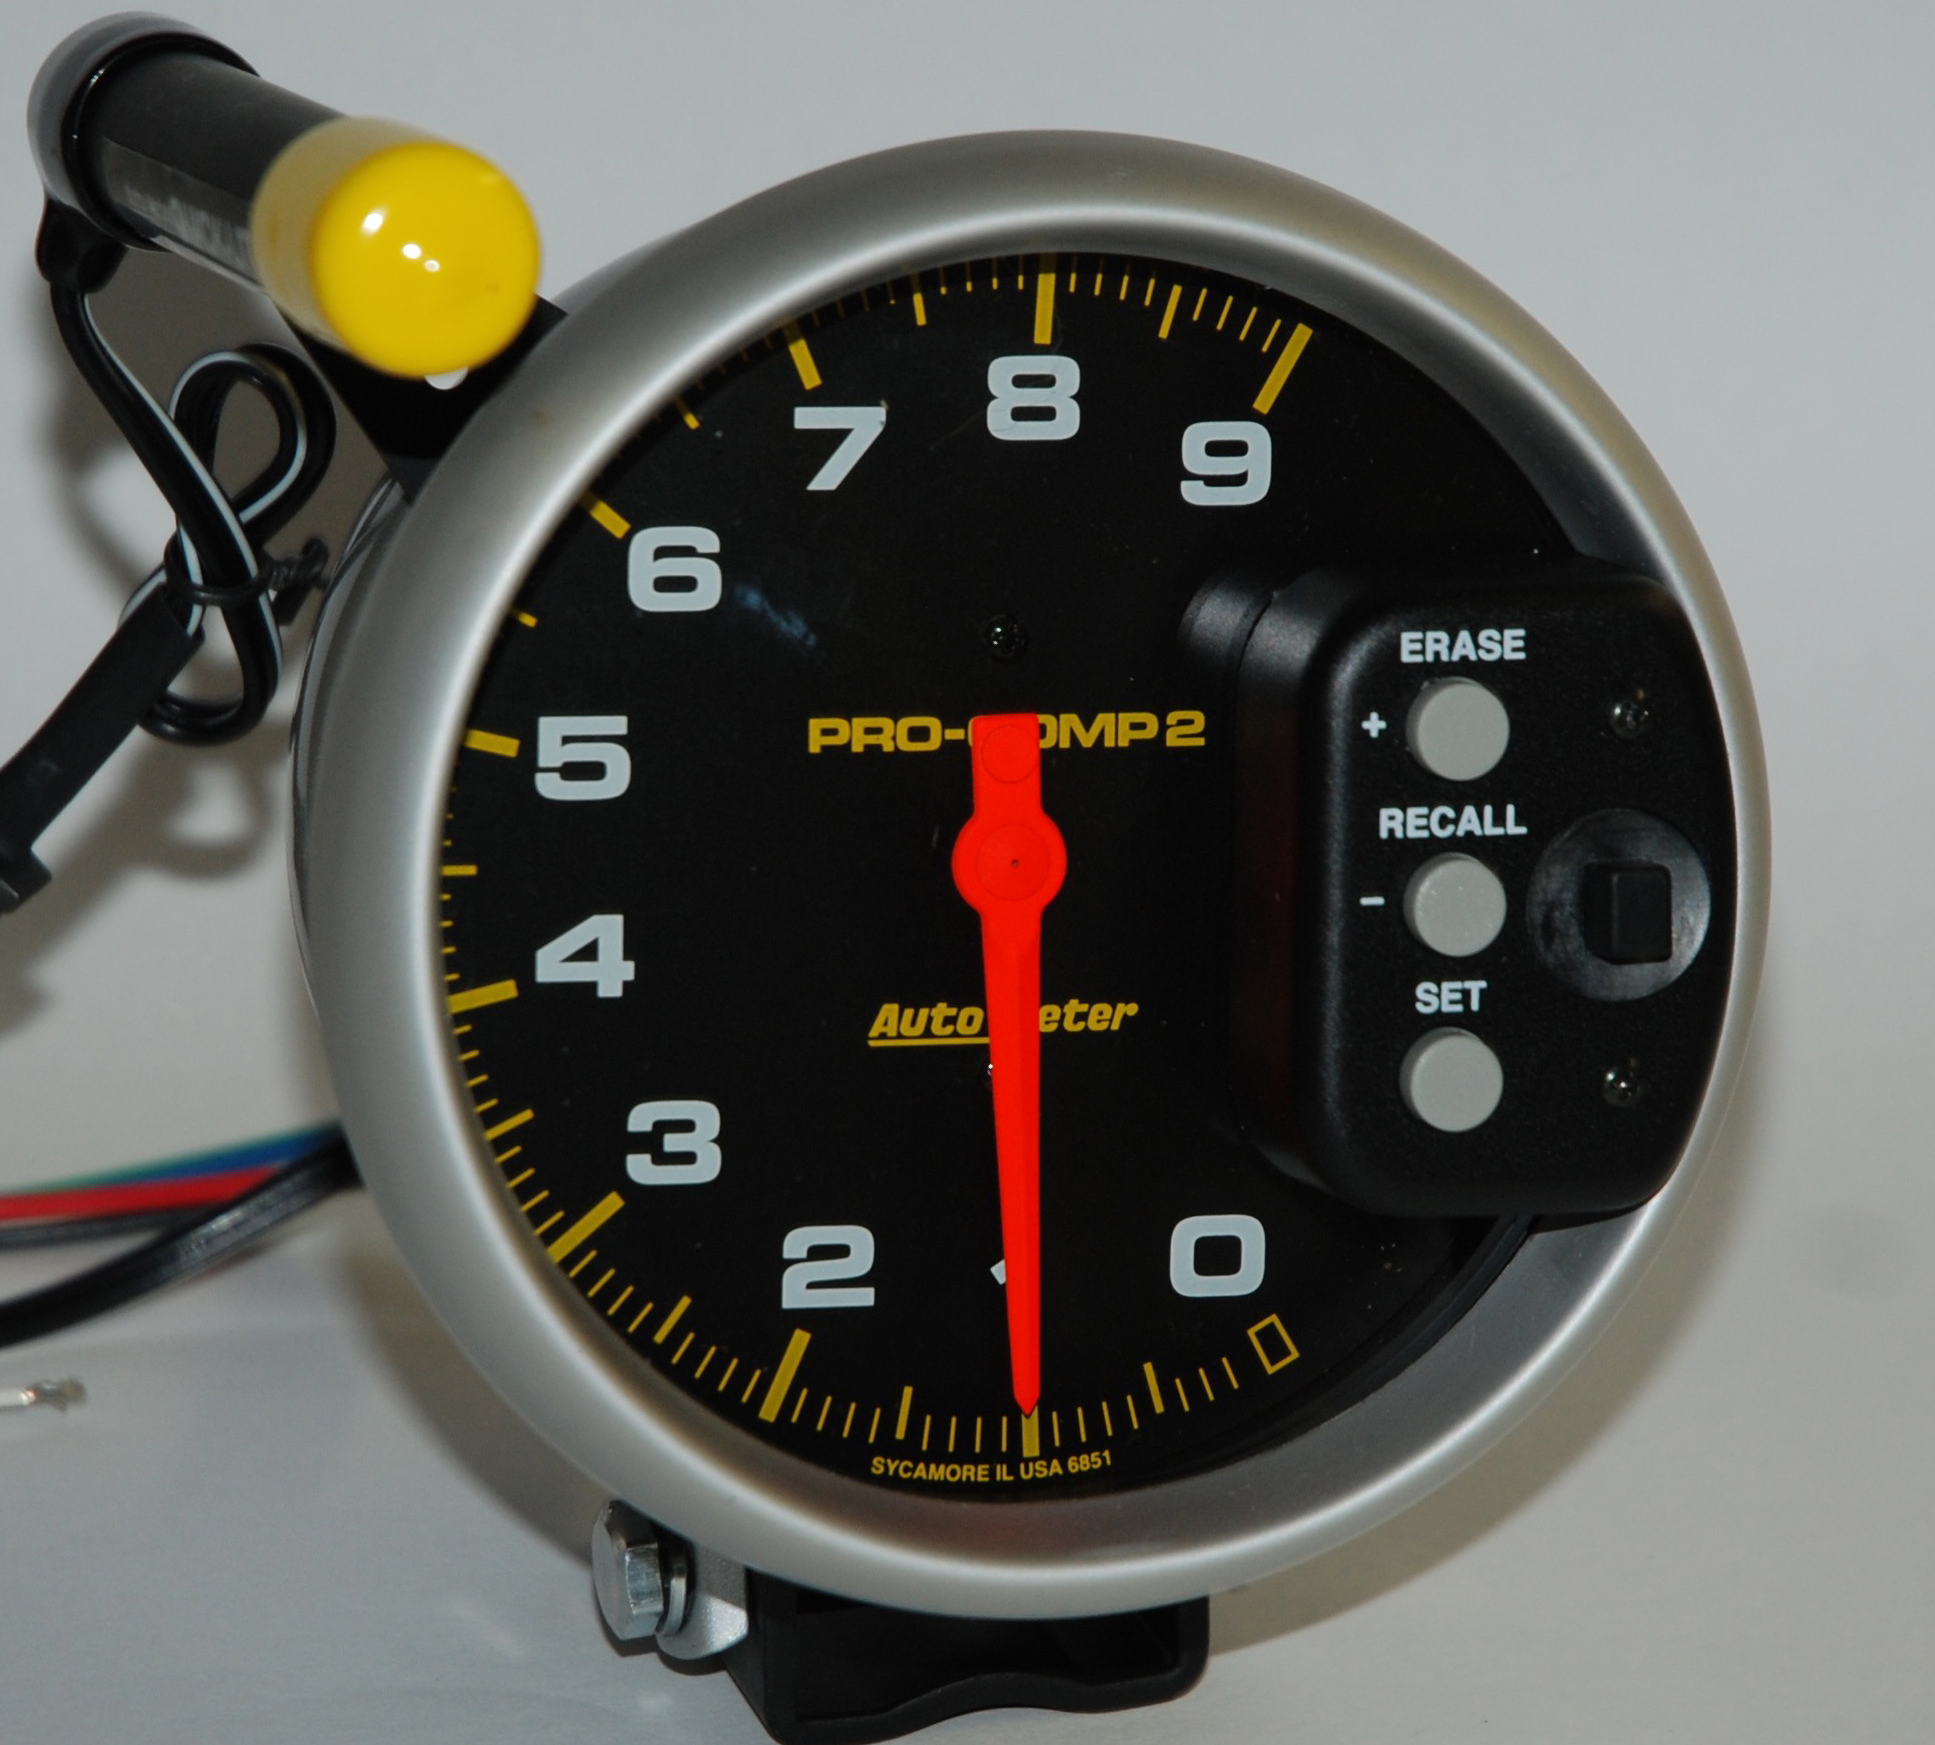
Summit Racing offers all sorts of different shift light tachs. A really good example of a rock-solid shift light tachometer is Auto Meter’s Pro-Comp 2 tachometer shown in the accompanying photos.
This tach includes a two-stage shift light which provides you with two shift settings to allow the fast revving first gear a different RPM shift point than the remaining gears. They also have another useful feature called “Peak RPM Memory Recall” which displays the highest RPM achieved during a race. (More on that later.)
When it comes to setting up the tach, consideration number one is the location. The old “on the column” arrangement might not always be the best choice, but on a tach such as this, with a huge five-inch face (along with a shift light), it’s hard to miss. A great “impossible-to-miss” location is right on the dash top.
There’s another option and that’s where the tach mount is integrated into the roll cage. Racers often include a tach mount on the left front roll cage down tube. We’ve also seen them where a bracket has been mounted to the forward firewall brace. In this case, the tubular bracket came up through the OEM defroster vent.
Depending upon the car, any of these locations will work. But in some cars (particularly ones with a low driver’s seat), the location of the tach can block the view of the Christmas tree. You have to consider that the car can be in either lane before permanently installing your tach.
In some mount situations, it’s likely impossible to see the tree with the tach mounted to the right. In others, it’s impossible to see the tree with the tach mounted to the left. The solution is to try different mount locations with your tach in your car with you sitting in the driver’s seat.
So far so good, but how do you work with the basic features of a modern shift light tachometer? Using the Auto Meter Pro Comp 2 tach shown in the accompanying photos as the example, the face has a “function” panel on the right hand side of the face.
According to Auto Meter, this is how to set up the two-stage shift-lite tach:
- “To enter the setup mode, apply power to the tach with the engine off (no RPM signal to the tach).
- Press and release the “SET” button. The pointer will move from 0 RPM to 1,000 RPM. This is the indicator for the Low Set shift point.
- Press and release the SET button to review and/or set the Low Set shift point.
- Using the “erase” and “recall” buttons, move the pointer to the desired RPM for the Low Set shift point.
- Once the pointer is positioned at the desired RPM, press & release the SET button to exit low set mode.
- Press and release the “erase” button. The pointer moves from 1,000 to 2,000 RPM. This is the indicator for High Set shift point.
- Press and release the SET button to review and/or set the High Set shift point.
- Using the “erase” and “recall” buttons, move the pointer to the desired RPM for the High Set shift point.
- Once the pointer is positioned at the desired RPM, press & release the SET button to exit High Set mode. To store the settings you must push & release “recall” until pointer reaches zero.
NOTE 1: If the Low Set shift point has been changed, the High Set shift point will also be changed to the same value.
NOTE 2: If you prefer to use only one shift point, do not connect the blue wire as shown in the diagram in the wiring section and only set the High Shift Point.
Blue wire? What’s with that? Simple. In order to accomplish the change in RPM shift points, something must tell the tach the gears have been changed. The tach has five wires protruding from the back of the case: Blue (switch); White (dash lights); Red (ignition switch +); Black (engine ground); Green (coil negative -, or “tach terminal” on an electronic ignition box).
In addition, the shift light connector protrudes from the back of the tach case, but wiring is a simple matter of plugging the female connector into the existing male connector at the back of the tach. Auto Meter notes that for shipping purposes, this two-wire harness is left unplugged.
That Blue wire is likely the only “unfamiliar” wire at the back of the tach. This wire must be hooked up to a normally open momentary switch. This allows for the change from high to low RPM shift points on the tach. When the momentary switch is closed, the Low Set mode on the tach will be in effect. When the switch is open, the High Set mode will be in effect.
It’s common for many racers to use a transmission-mounted switch. In such a case, when the car is in first gear, the switch is closed which in turn, places the tach in the Low Set mode. Once first gear is “pulled” or air-actuated, the switch returns to the open position, and the tach reverts to the High Set mode.
That’s not the end of it. Some tachs, such as our Auto Meter example, have a recall button on the tach face. That recall button is simply a tell tale. It will tell you how high you went on the shift point. Good news or bad, it’s important. Prior to each lap down the quarter mile, press the “Erase” button. This will clear the memory from the previous pass and it’s ready to record again.
Something many folks forget is “radio noise.” We’re talking about radio interference and inductive crossfire. Sure, those things can ruin performance, but they can also raise havoc with your tachometer. Radio frequency interference (RFI) produces a false triggering effect on crank trigger and electronic distributor ignitions. Because an electronic tachometer counts the number of times the ignition fires in a crankshaft revolution, additional random, false triggering causes erratic and inaccurate tach movement.
Auto Meter tells us their tachs are internally protected with circuits that are engineered to filter out a majority of the “noise” associated with racing conditions. When this noise reaches a high level, however, the tach sees it as legitimate ignition firing and responds accordingly.
Auto Meter notes that a racecar does not always demand full capacity of the ignition system. If radio interference is present, it will most likely show up at the top end, in high gear where the most horsepower along with the highest ignition load is produced.
Tachometers with memory features will give indication of this condition with abnormally high memory readouts. To combat radio noise, use quality spiral core ignition wires, use ignition wire sleeves, and be sure that wires to ignition components such as the crank trigger are properly installed.
Shifty business? Absolutely.
For a closer look at a shift light tach, check out the accompanying photos.

A “shift light” tach is standard equipment on many racecars today. Rather than watch the sweep of a needle across the tach face, you can concentrate on driving. Figure in a fast revving engine combination and you can see why shift lights are important. There are a number of different shift lights on the market, but one that’s used on many Auto Meter tachometers are LED models. Aside from being much smaller in size than conventional shift lights, the LED is extremely bright. Essentially, a pinpoint of high-energy light is aimed at you. When the engine (and tach) reaches the shift point, then the LED illuminates. The yellow cover you see is removed for racing. (Image/Wayne Scraba)

The wiring hook up on something like an Auto Meter Pro-Comp 2 tach (with a two stage shift light) is a bit different. There are five wires coming out of the back of the tach (not counting the shift-lite connector). The shift-lite connector only goes on one way (don’t force it) and the main wires are all color-coded. See the text for more information. (Image/Wayne Scraba)
Something else to think about when picking a tach is the RPM range in which it registers. A tach that reads to 10,000 or 11,000 RPM might be perfect for a high winding, small cubic inch Competition Eliminator drag race motor, but it certainly isn’t practical on a stock-rod 454 bracket motor that will never see the other side of 7,800 RPM. What’s needed here is a tach face that’s maxed out at 9,000 RPM or so. (Image/Wayne Scraba)

The actual shift light can be positioned just about anywhere on the tach face. For most applications, Auto Meter suggests that you place it at roughly the 10:00 o’clock position on the tach face. (Image/Wayne Scraba)
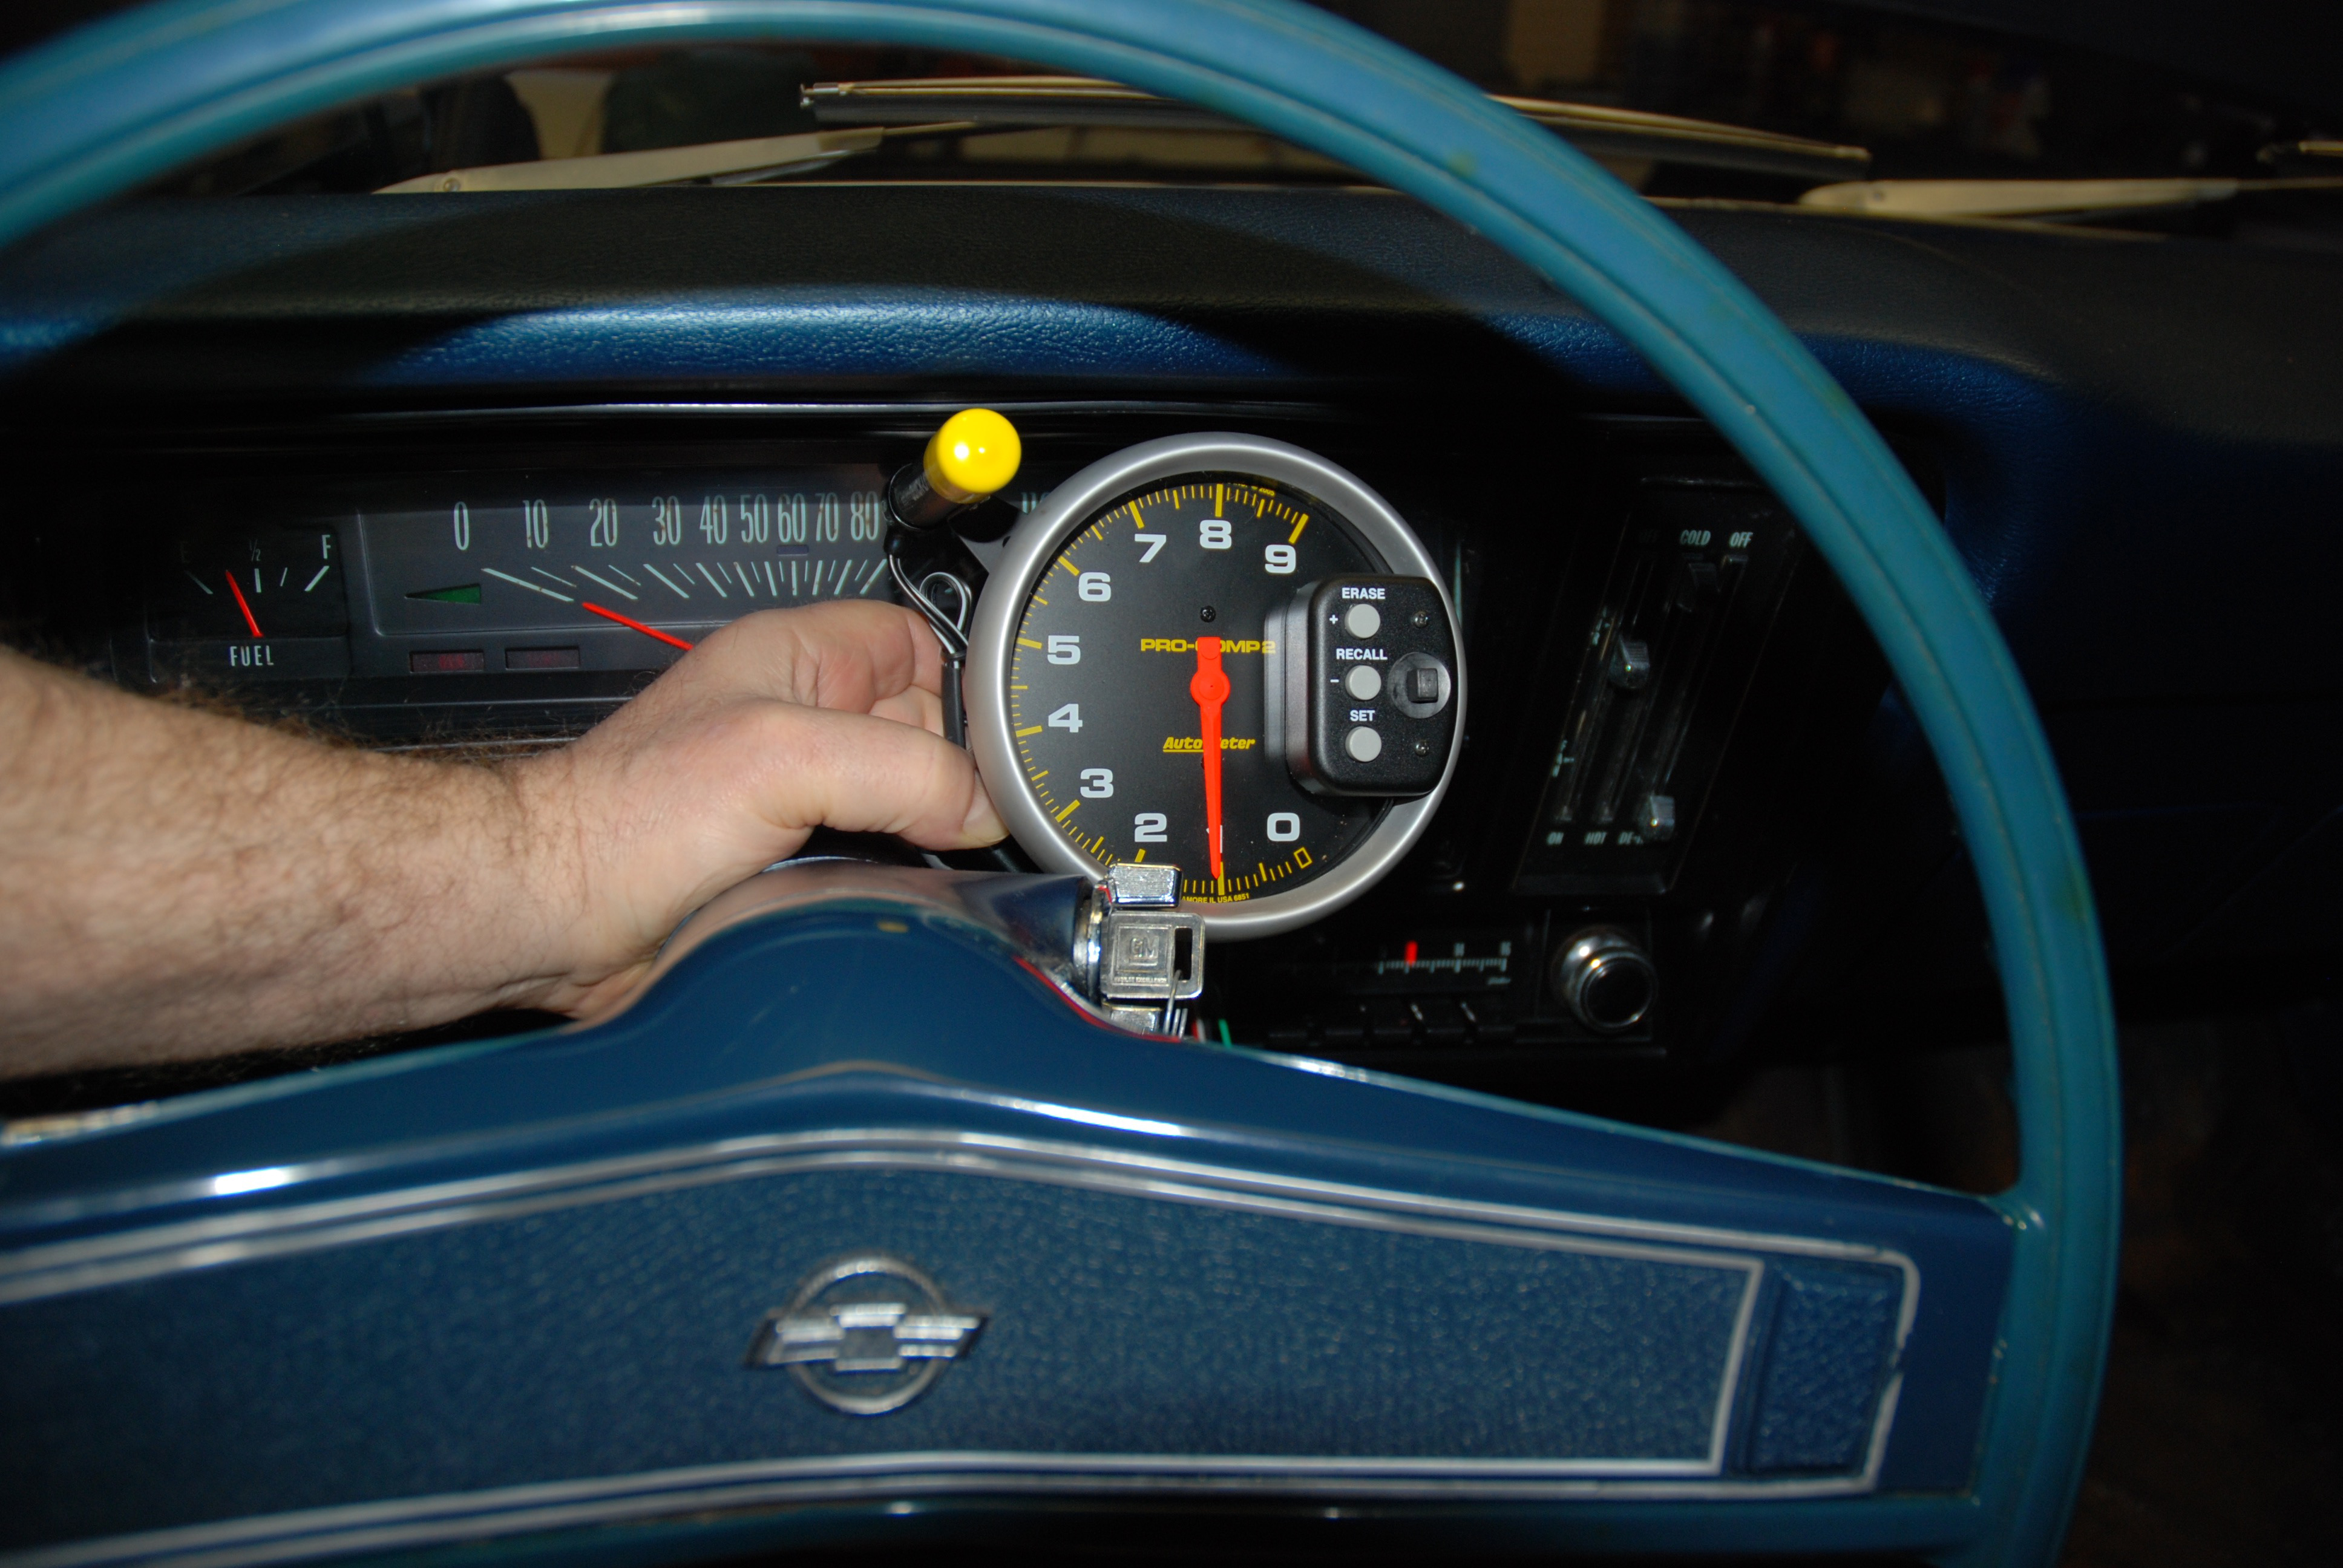
On the dash, the tach body contacts the windshield and Auto Meter tells us that’s not the best situation. It’s a bit out of the way on the left of the column, but it works and fits (tightly) on the right side of the column. (Image/Wayne Scraba)

When mounting the tach, it’s a good idea to try it in various mounting locations in the car. Here, we’ve tried the tach right on the dash and also on the steering column. (Image/Wayne Scraba)

Some of today’s tachs incorporate the “two stage” shift light that provides two different “redlines” for your car. Here’s why it’s important: In order to accelerate, your car uses mechanical “leverage” in the form of gearing to move forward. Due to the RPM drops between gears, this usually means that the car will run quicker and faster (and probably with more consistency) if first gear is “short shifted”. In many combinations, the 1-2 shift point can be 400-500 RPM less than the 2-3, (and/or 3-4 and 4-5) shift points. Auto Meter’s Pro Comp 2 has the ability to provide for different redlines and shift points. (Image/Wayne Scraba)
Any idea where to hook green wire on a LS2 6.0L with stock ignition?? Thank you. MikeC
don’t have the quick 2 prunge connector on my tach.already equipped with a dot kinda shift light the black goes to ground and can i connect the other one to my tach. green wire?