When building a daily driver for an avid off-roader, who also happens to be a high school student in Southern California, there are a some unique challenges you need to consider. First, you’ll need to think about any recovery needs while on the trail. You’ll also want to account for the bumper car course that is a typical high school student parking lot.

For our build, we felt a pair of Smittybilt XRC steel bumpers were a necessity to take on both challenges.

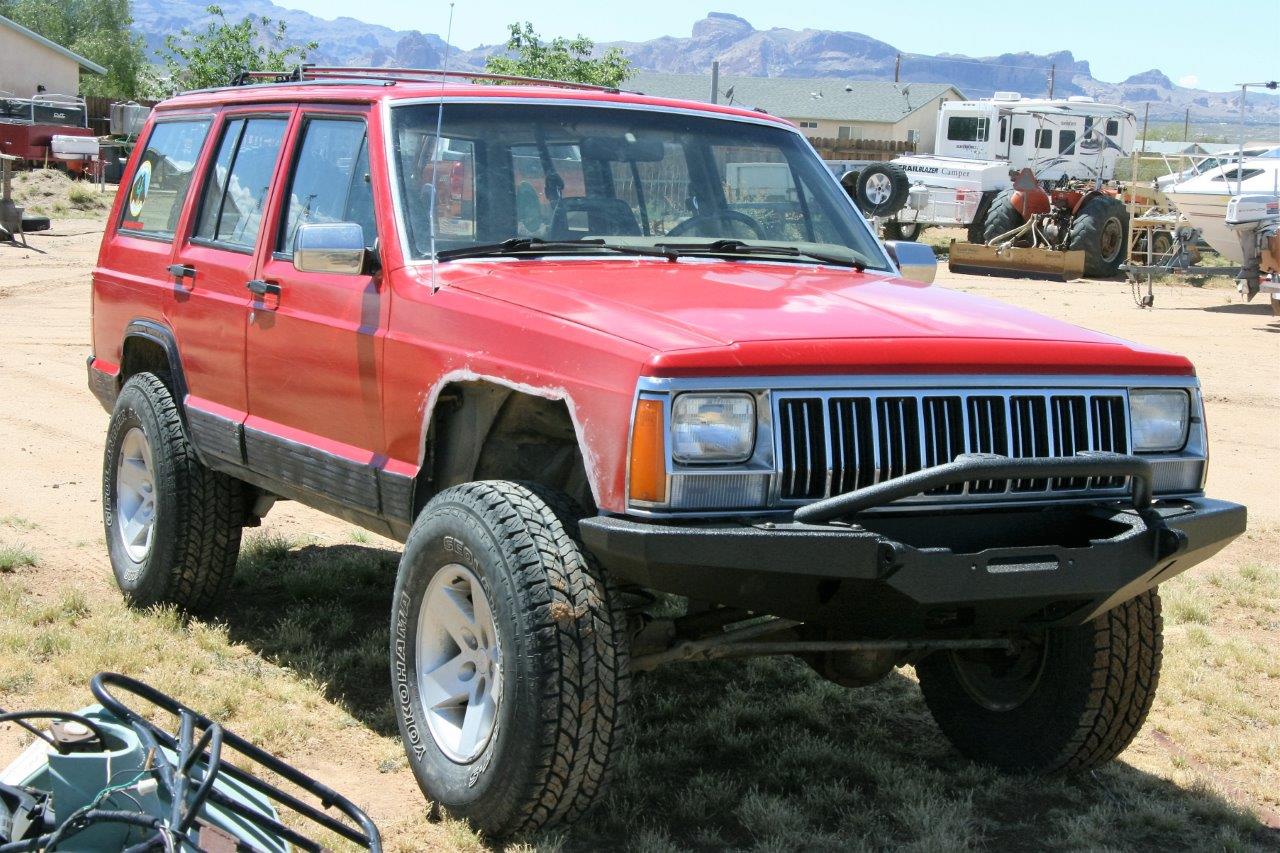
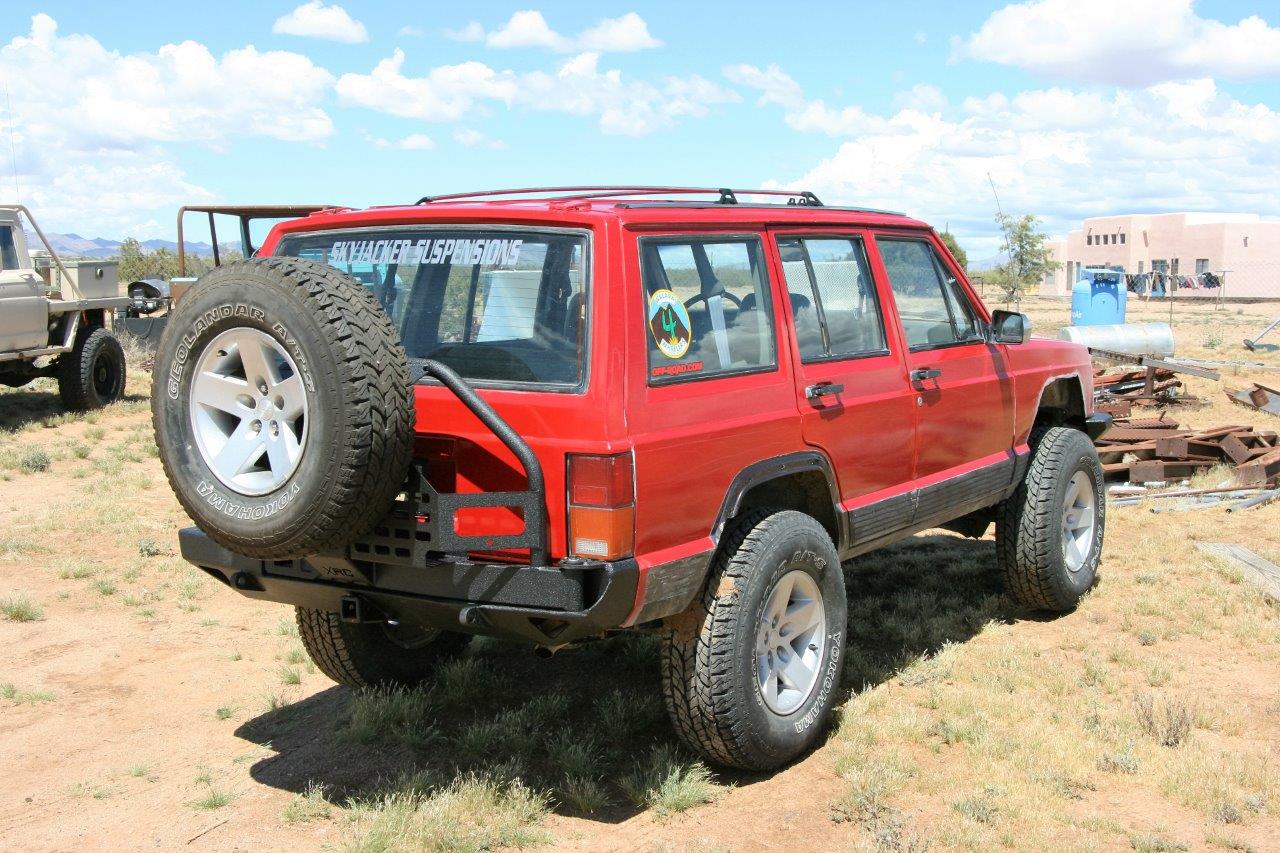
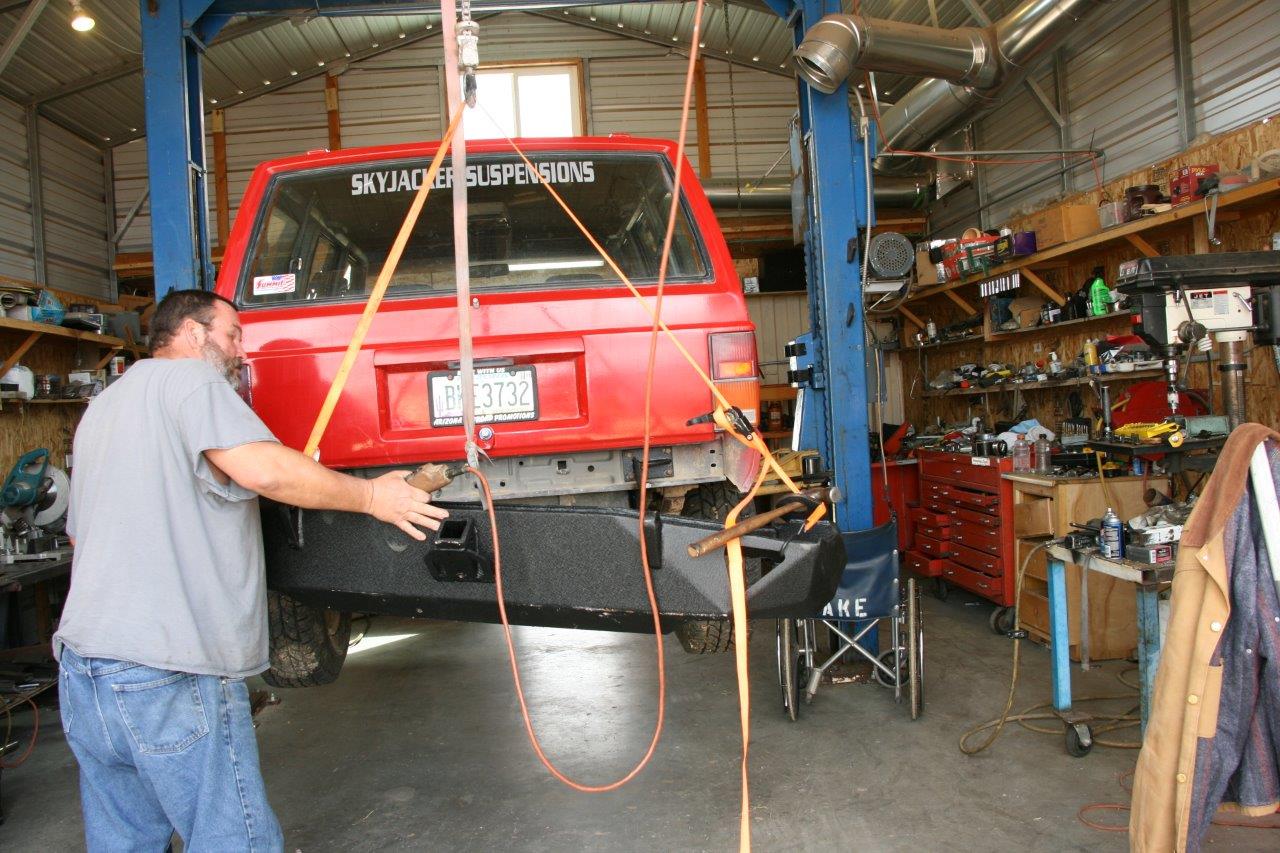
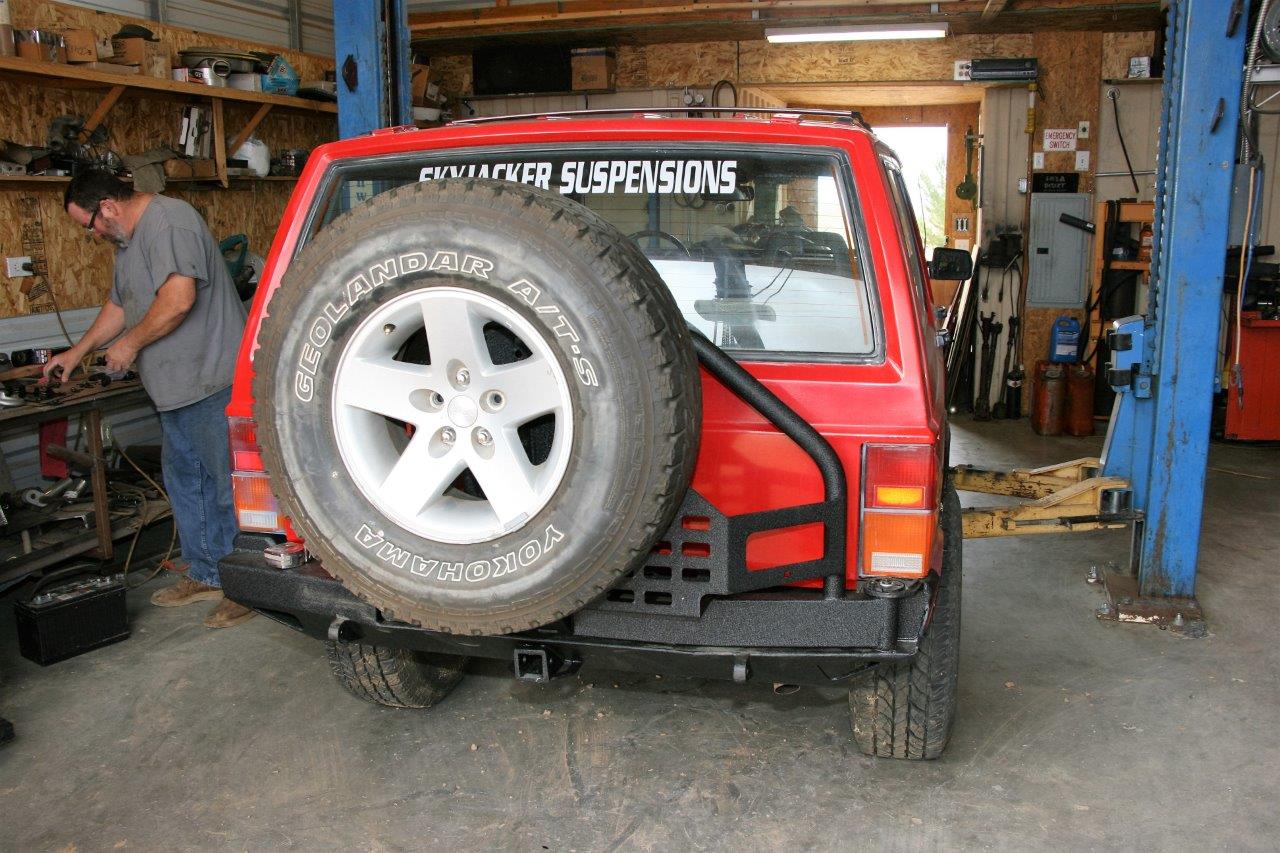
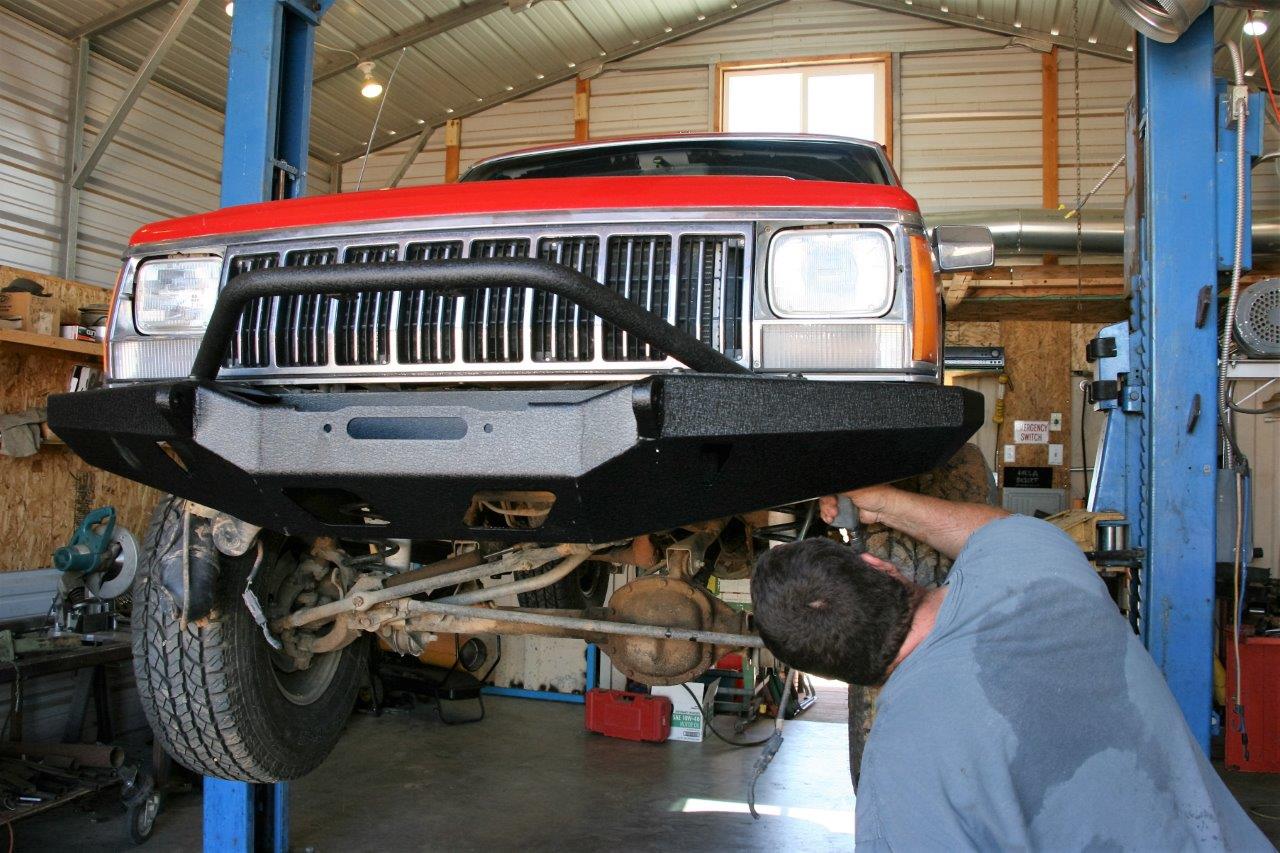
We’re currently in the process of building a 1990 Cherokee Laredo that will be my grandson’s daily driver to school and work and will also serve as an off-road weekend warrior for camping trips. We’ve already lifted the Cherokee and gave it a set of Rubicon wheels and Yokohama Geolandar A/T tires and replaced its injectors

Now we need to protect it with steel.

XJ-model Cherokees are one of the best “bang for your buck” Jeeps available today, but new parts for them are being dropped from some catalogs because of their age. Smittybilt, among a few others, is maintaining a good selection of aftermarket parts for them, and you can still find them through companies like Summit Racing.

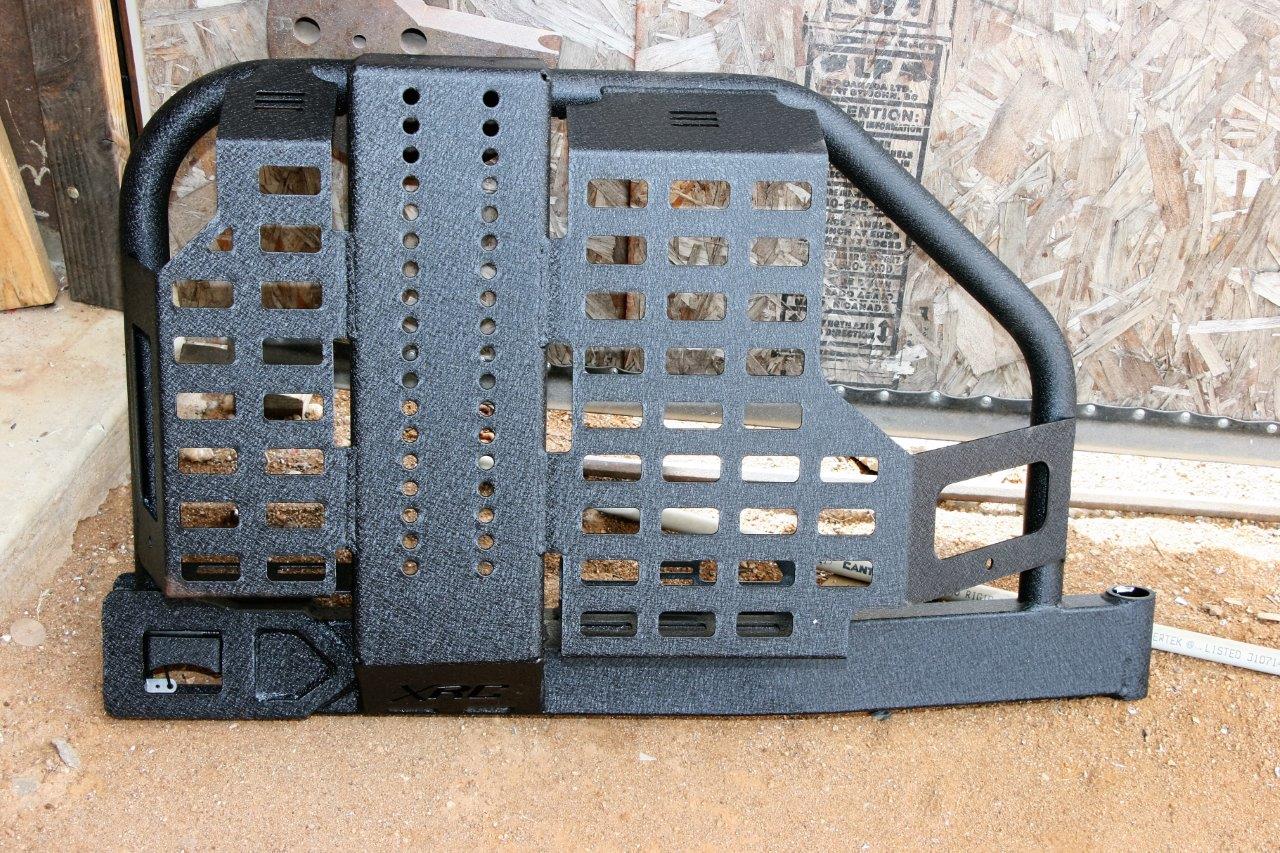
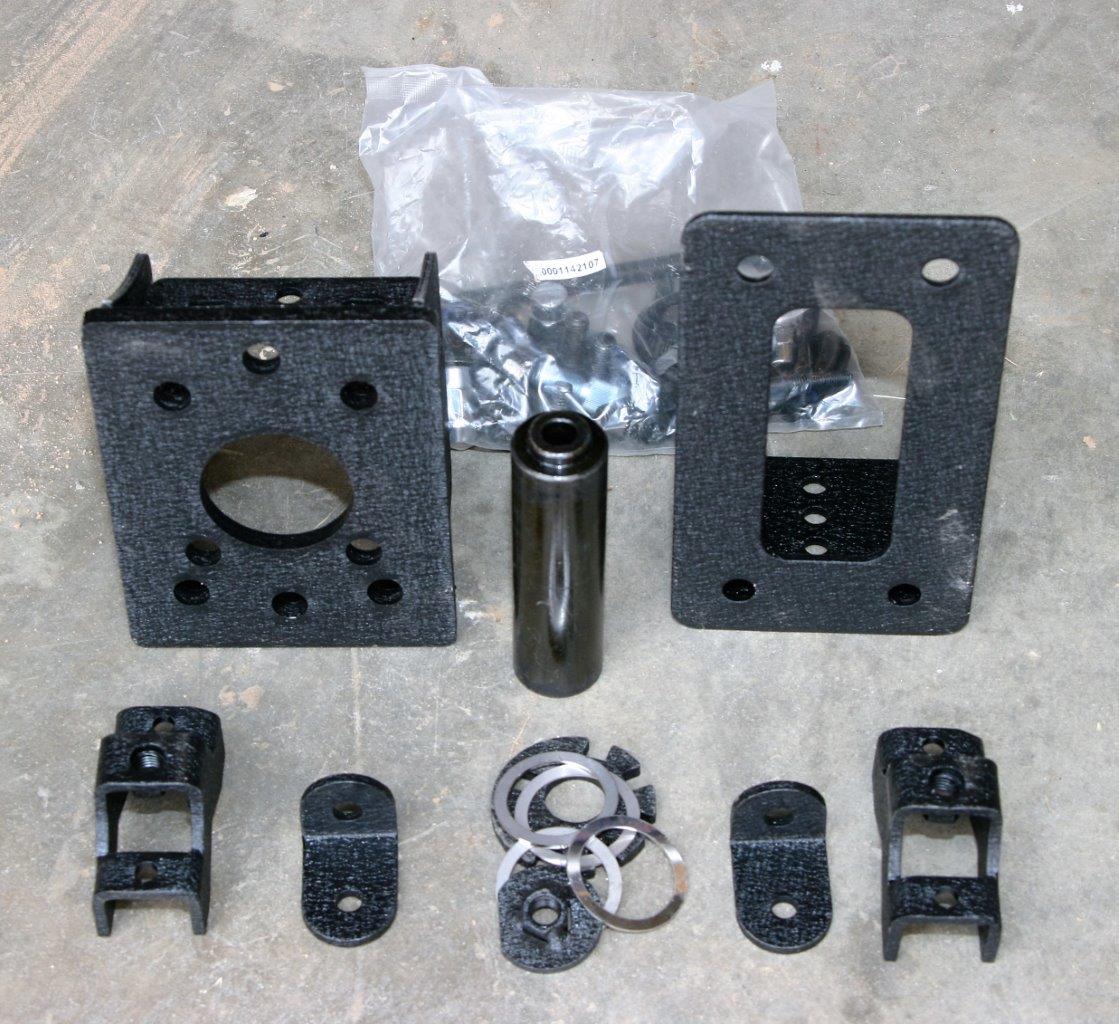
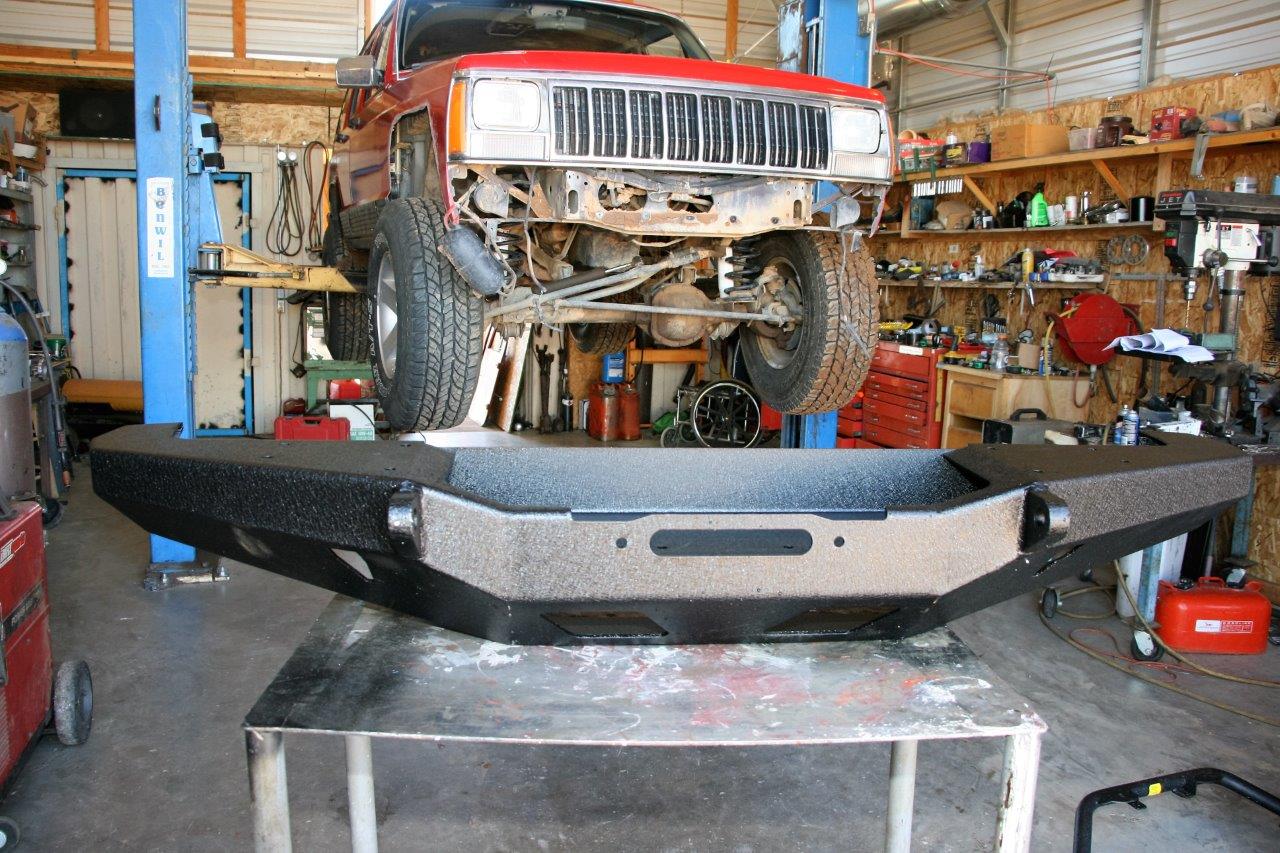
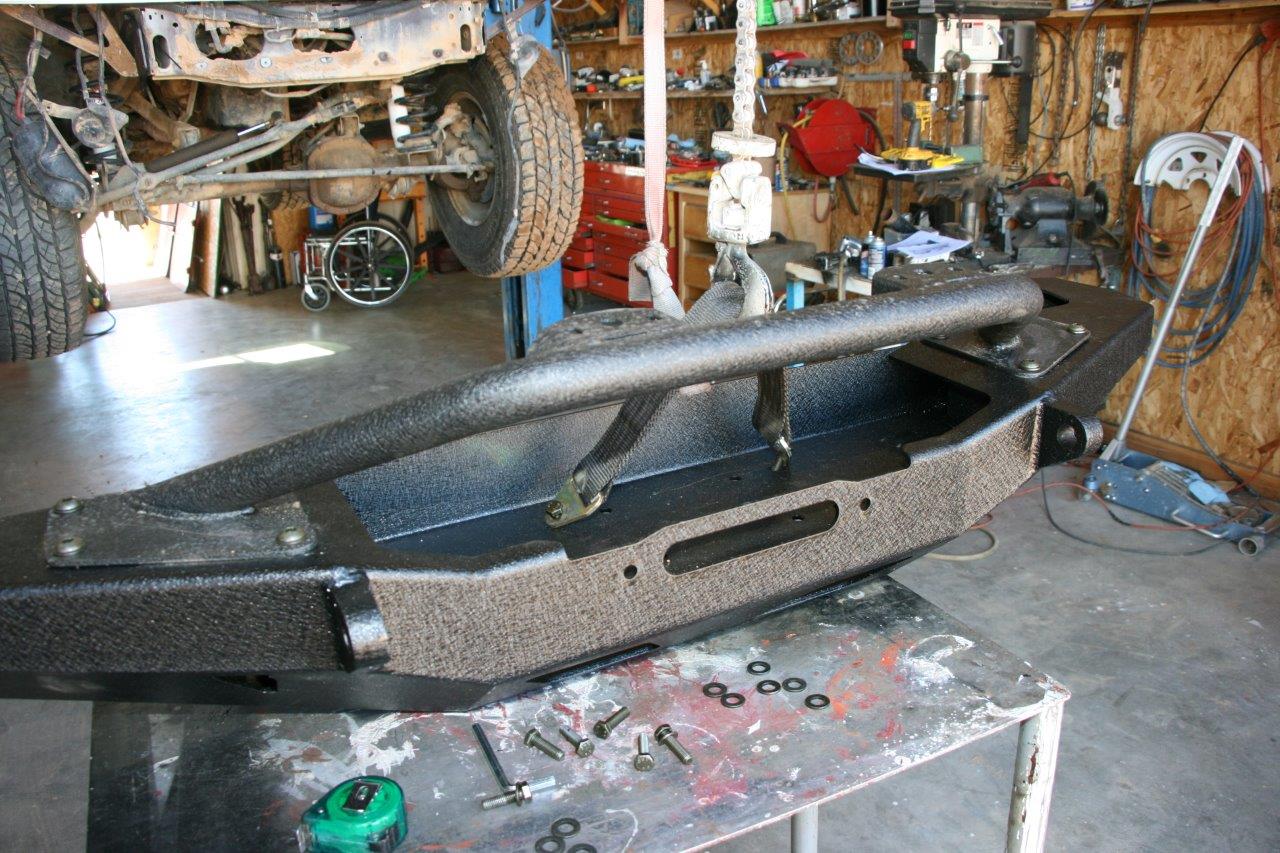
We had a few minimal requirements for our bumpers. They needed to have the ability and rating to tow, and we also wanted heavy-duty recovery attachment points, a spare tire carrier, winch and auxiliary lighting mounts, and enough strength to survive daily trips to a high school parking lot. Smittybilt XRC bumpers (#76810 and #76851, front and rear, respectively) fit our requirements to a T!

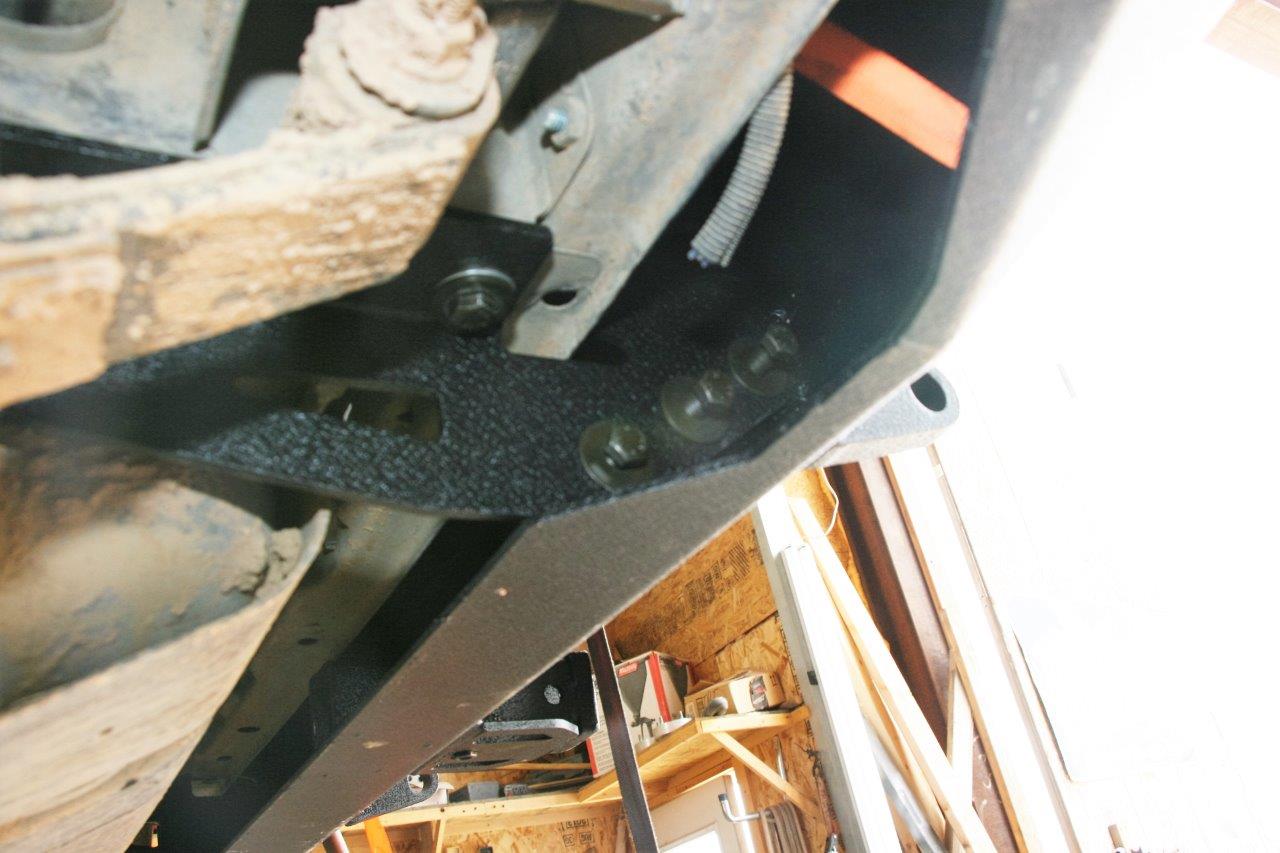
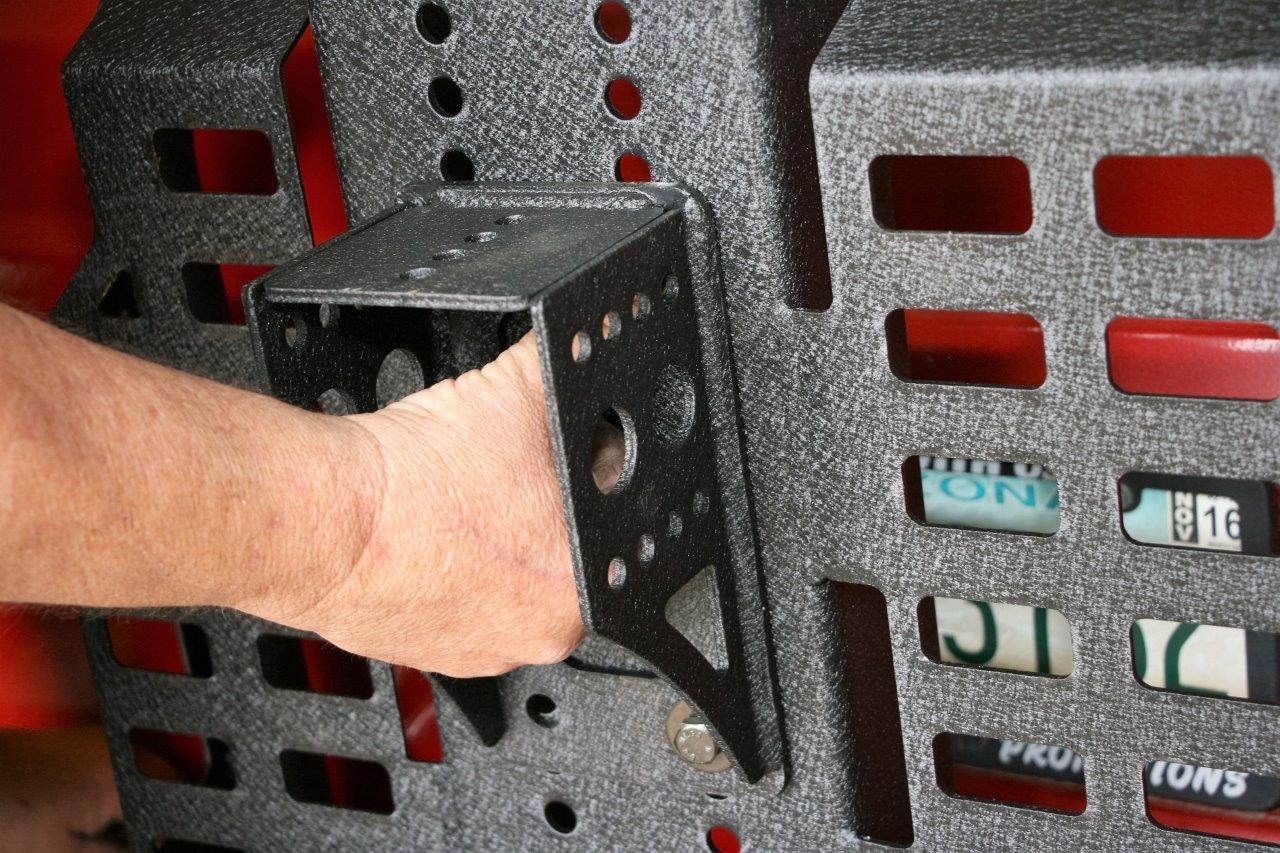
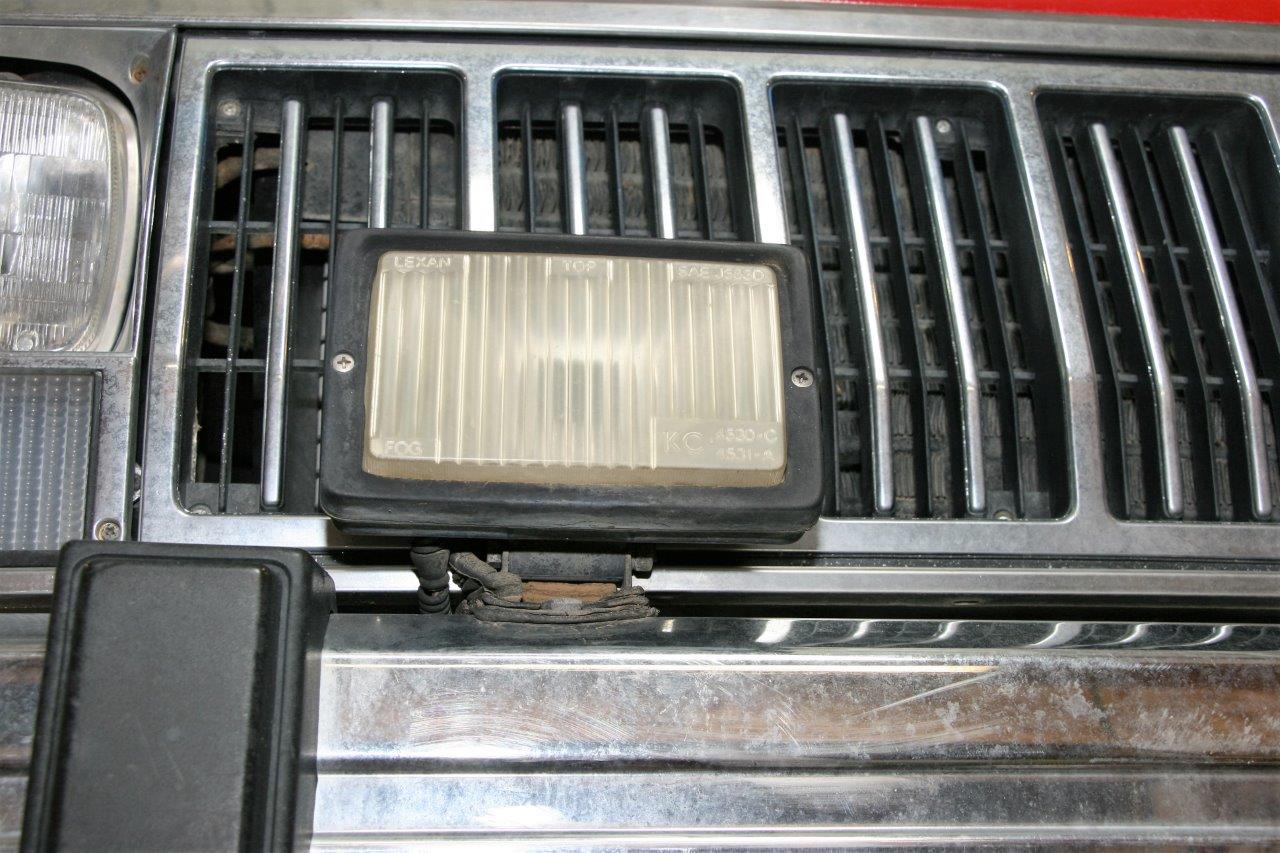
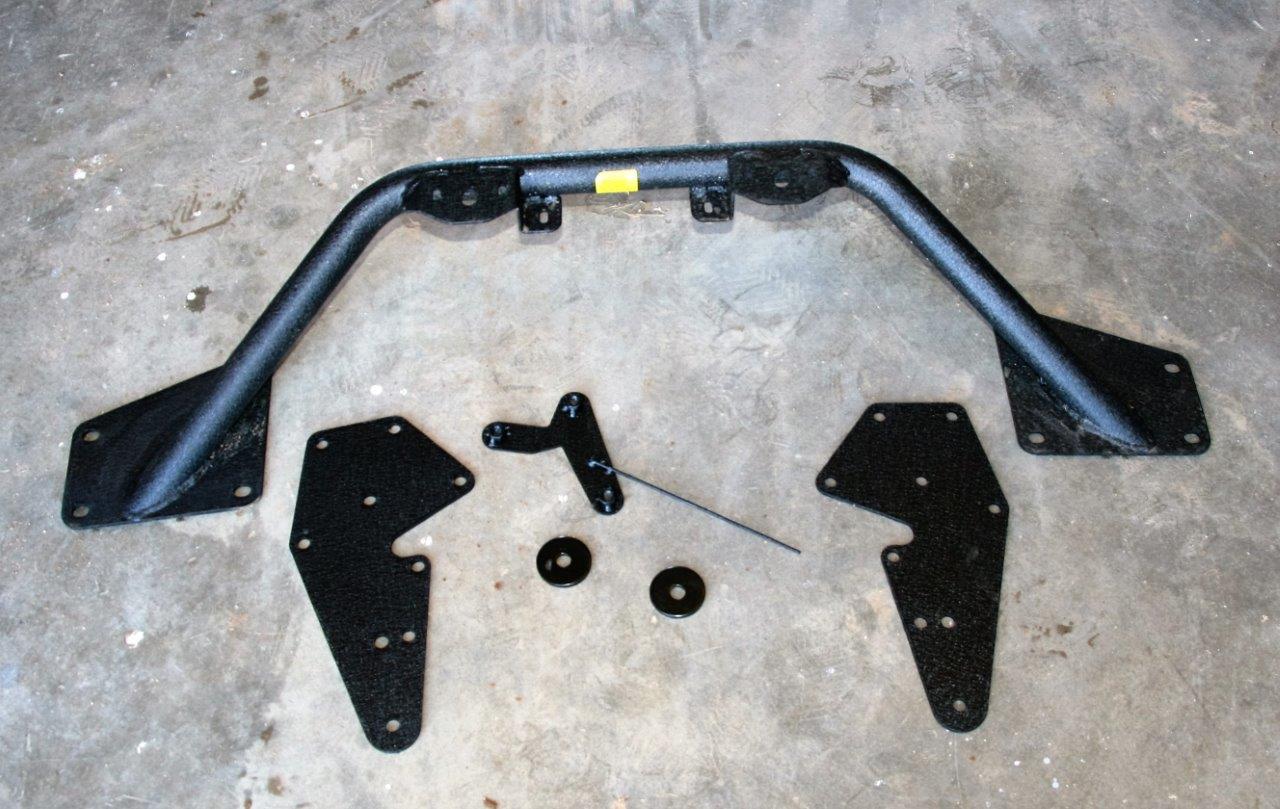
XRC bumpers are manufactured from 3/16-inch cold-rolled steel that is robotically welded to exact specifications. With raised corners for better entry and exit under the most extreme conditions, they’re engineered to provide maximum ground clearance. They have solid-mounted D-rings, are welded on the inside and out, and then finished with a two-stage textured matte black powder coat. The rear bumper is equipped with a class III hitch for towing; the front bumper is equipped with a built-in winch plate to accommodate up to a 12,000-pound rated winch.  There’s even an option for an XRC front bull bar, which is  manufactured from 1.75-inch tubing and has two light tabs.

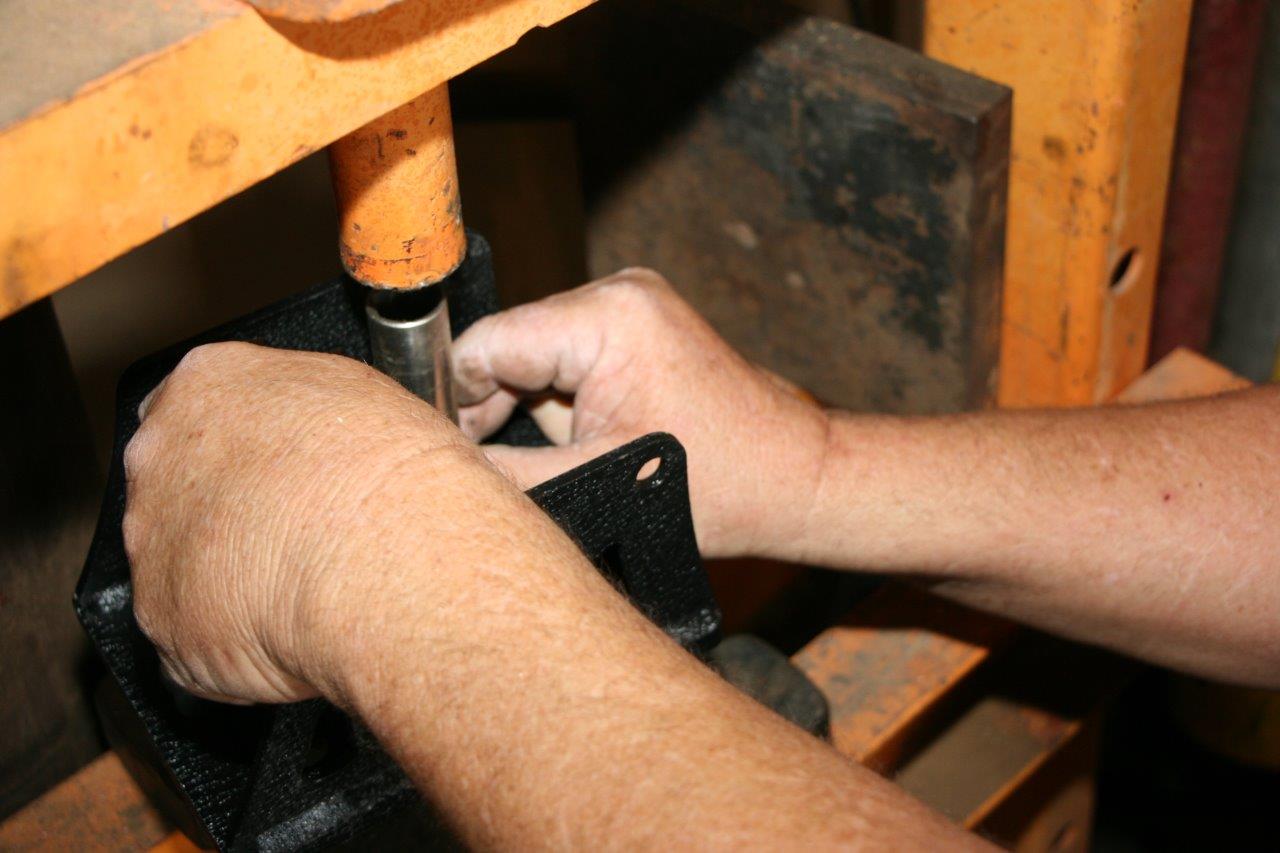
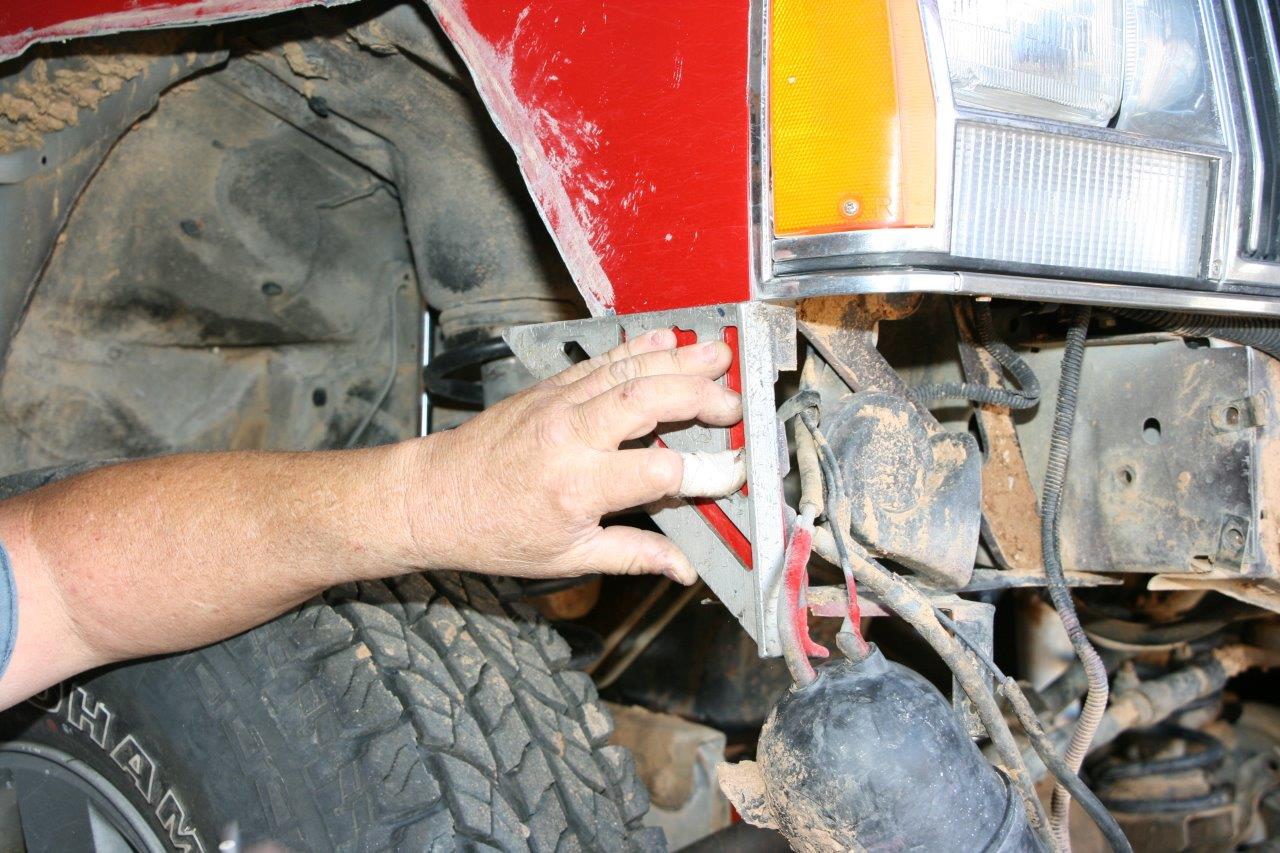
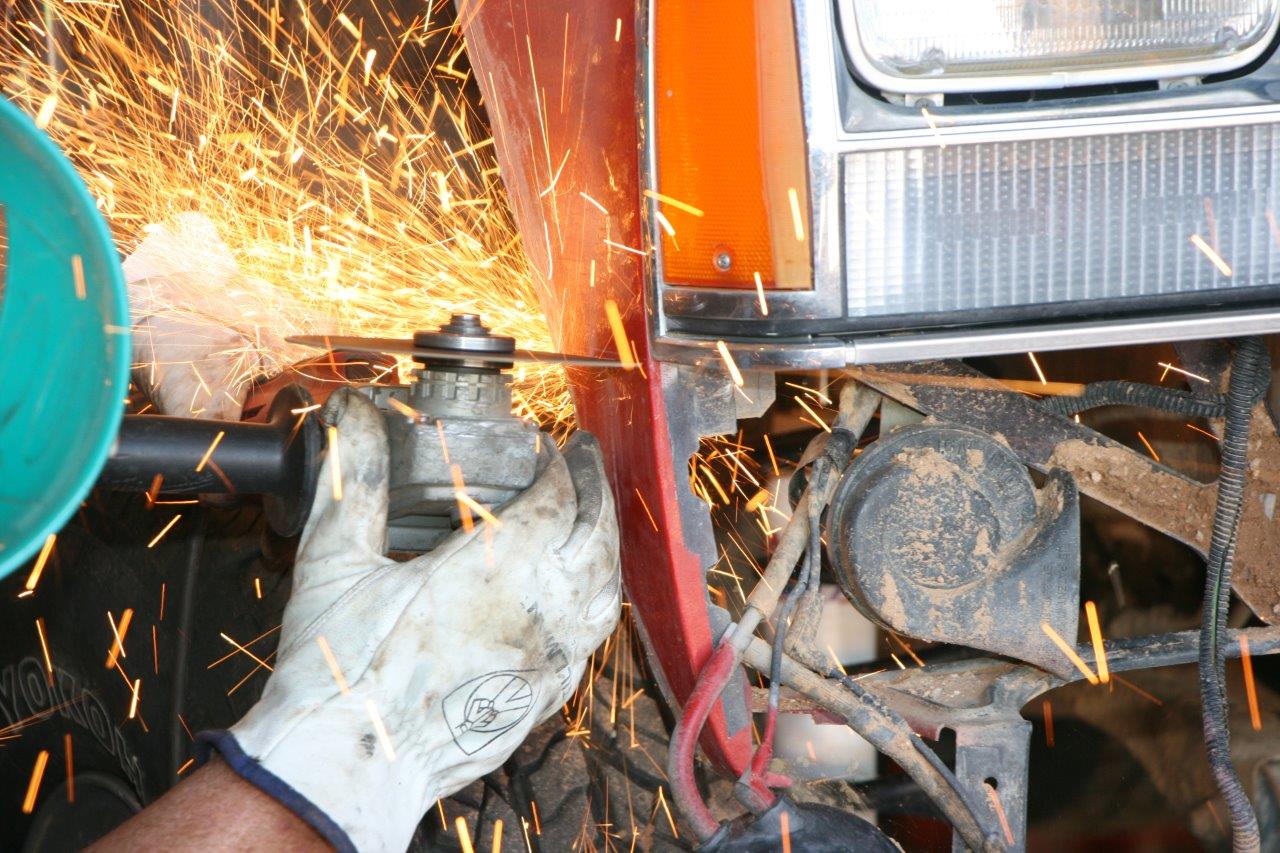
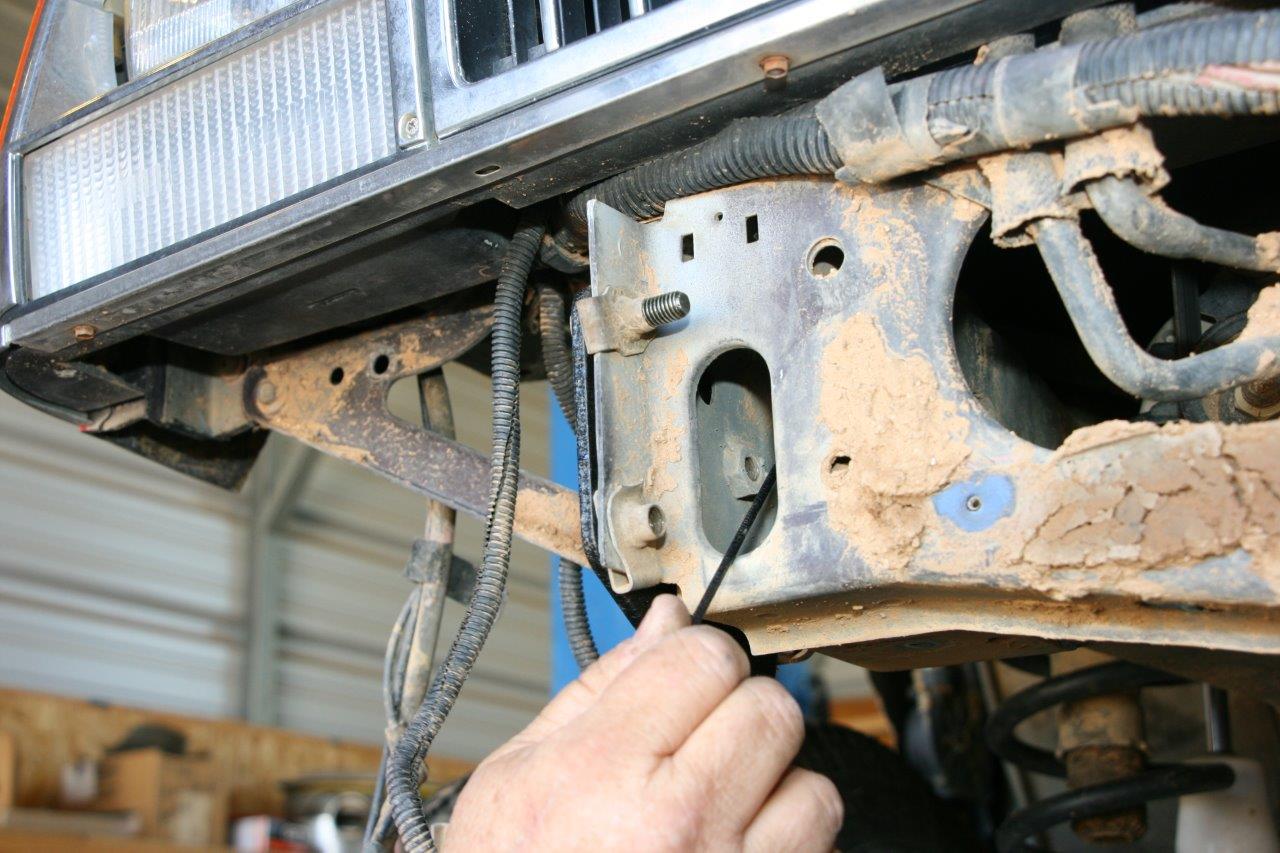
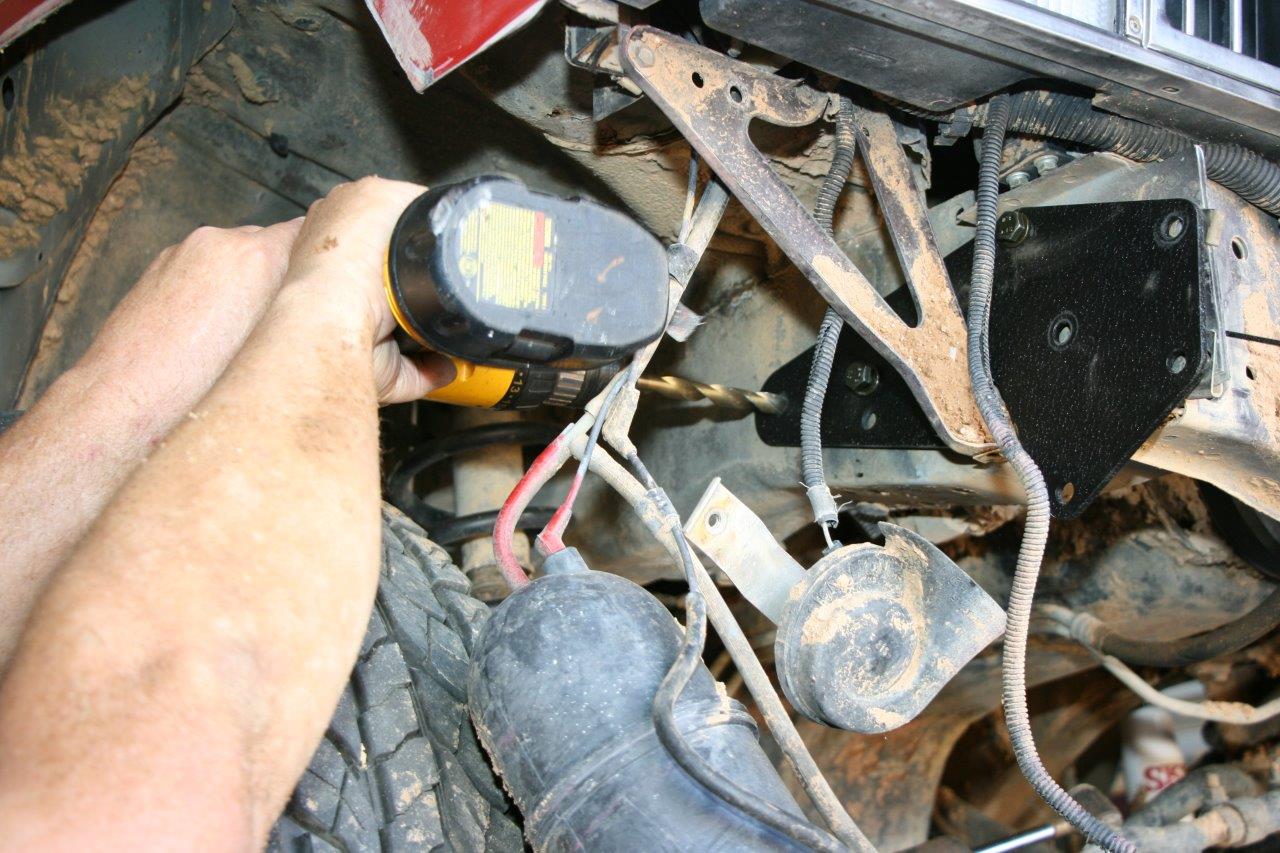
Mounting heavy-duty bumpers—like our XRC bumpers—can be a problem on unibody vehicles if they have a poorly designed mounting system. Fortunately, Smittybilt XRC bumpers are designed for mounting on our unibody XJ, so we didn’t anticipate any problems.

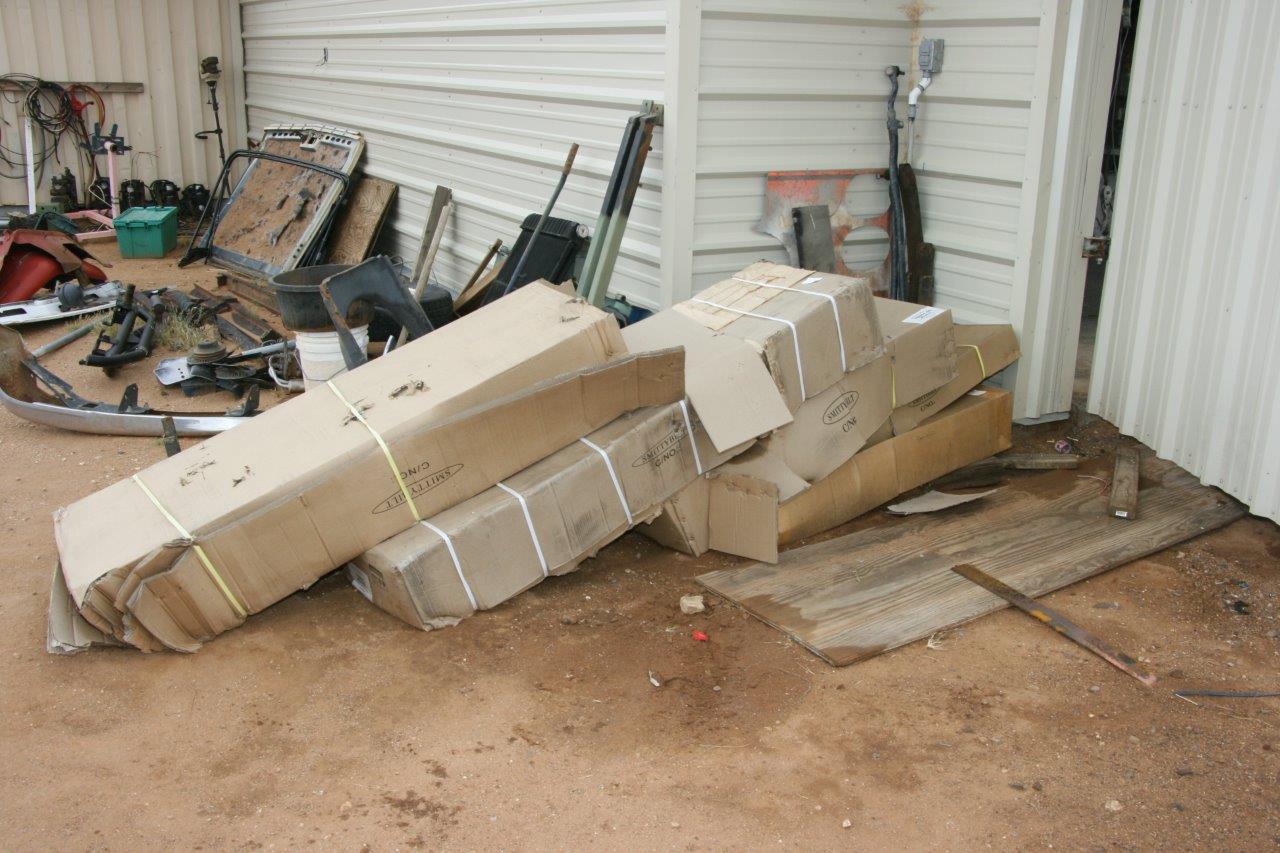
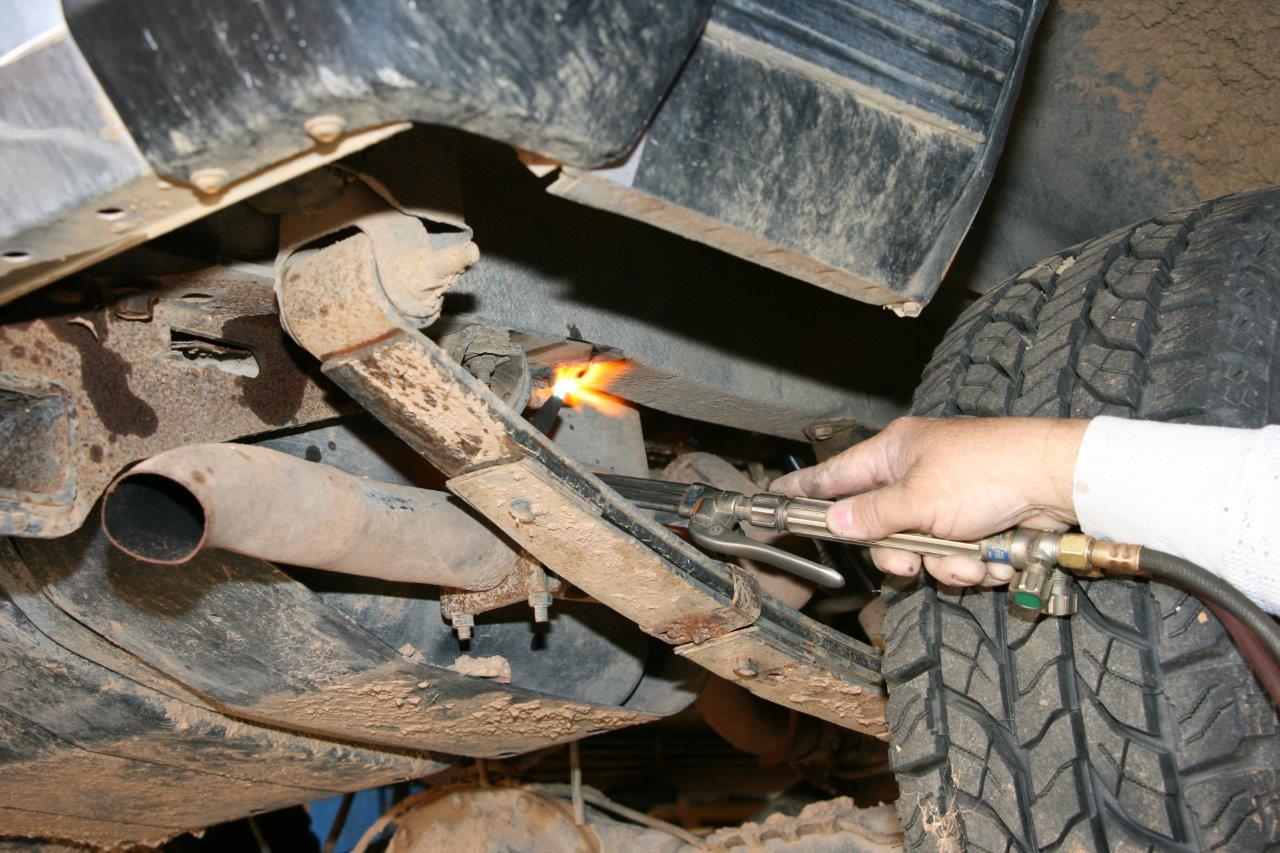
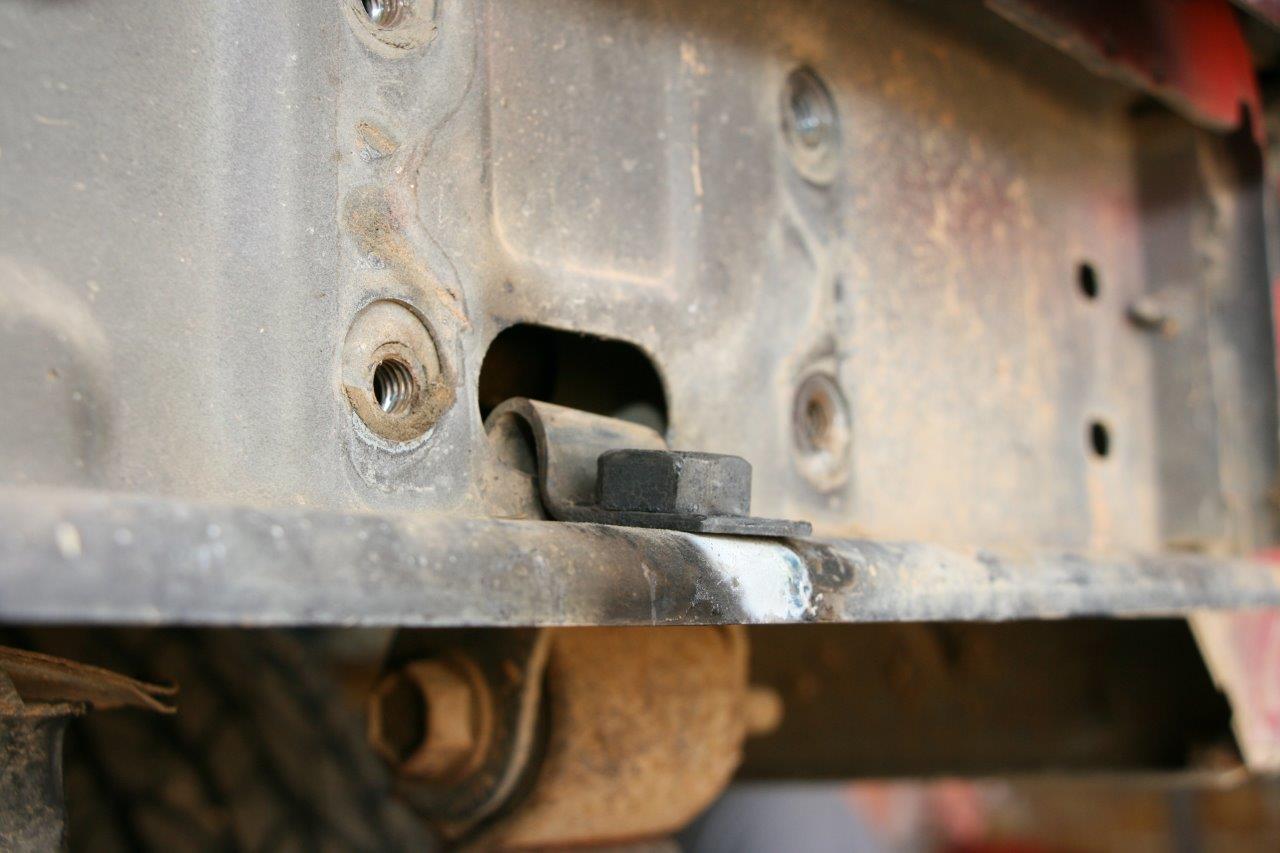
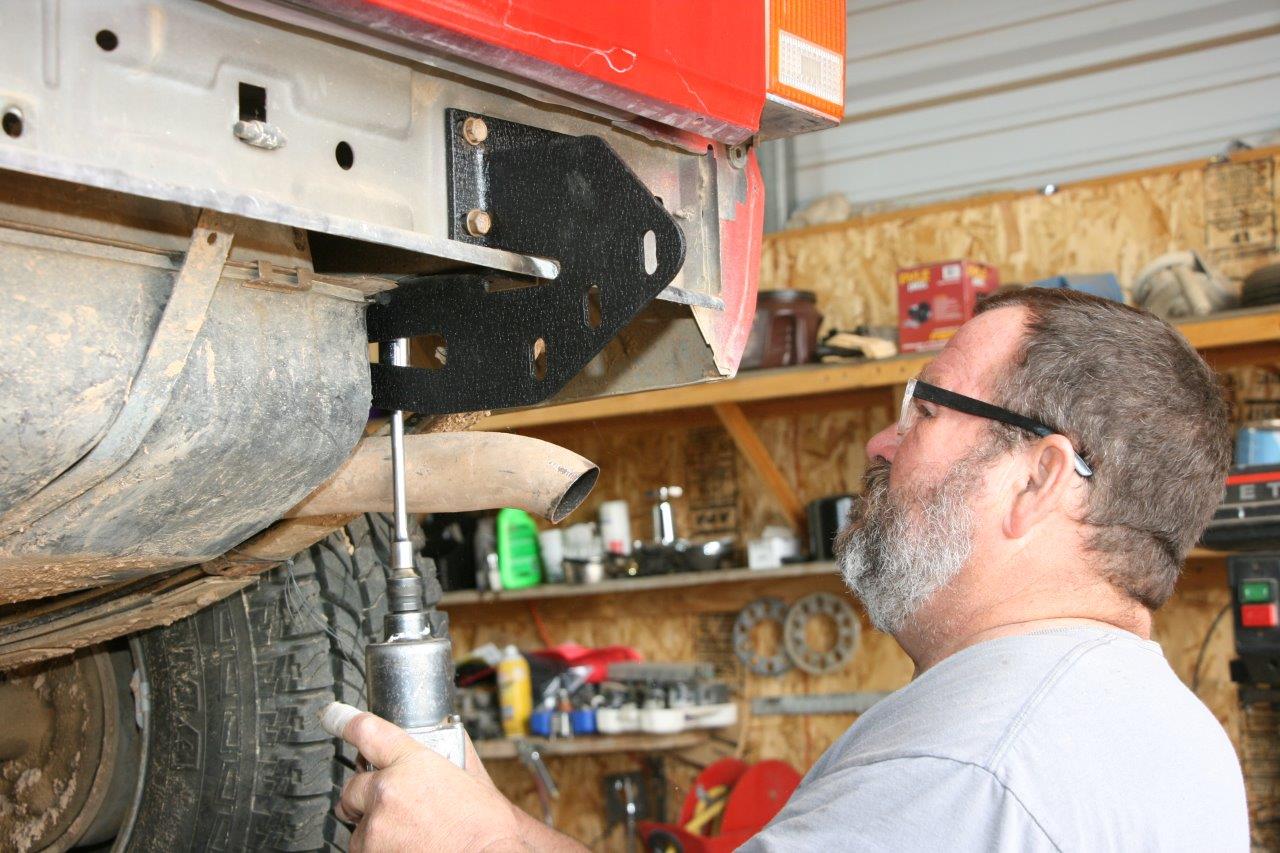
Follow along to see how our installation went down.

xj jeep cherokee with front off road bumper upgrade
jeep cherokee xj with off road upgraded bumpers
big boxes stacked in warehouses
steel off road upgrade bumper for the xj Cherokee
rear spare tire carrier upgrade for jeep cherokee xj
tire mounting brackets for smittlybilt xj cherokee bumper
heating bolts to break loose
body mount holes on a jeep xj cherokee
bolting up mounting brackets for a jeep xj cherokee off road bumper
rear bumper brackets for off road upgrade jeep cherokee xj
fitting a rear off road bumper on an xj cherokee
installing a spare tire carrier and off road bumper on an xj cherokee
bolting spare tire carrier to bumper
pressing wheel studs into spare tire mount
adjustable spare tire carrier on Cherokee off road bumper
jeep cherokee xj with off road bumper and tire carrier
oem fog lights on a jeep cherokee xj
charcoal canister location on jeep cherokee xj
jeep cherokee on lift prior to aftermarket off road bumper install
off road bumper parts spread out on garage floor
off road bumper for an xj cherokee on workbench
checking cutting template for bumper install on an xj cherokee
cutting away body sheetmetal for off road bumper install on an xj cherokee
removing steering box on an xj jeep cherokee
installing reinforcement plate to xj cherokee for bumper install
drilling bumper mounting holes on an xj cherokee
installing an off-road pumper on an xj cherokee

Not only does the Smittybilt XRC front bumper add to the Cherokee’s security, it also improves its look, plus giving it front attachment points should recovery become needed and will accept a winch.

The XRC rear bumper protects the rear and carries the spare tire, a HiLift jack, and a gas can. It also has a hitch receiver and a pair of D-ring attachment points.

It’s “Christmas in July” when the packages from Summit Racing appear at the door; however, they are heavy, large, and awkward, and you may need some help to move them around.

Well designed and powder coated, the heavy-duty XRC steel bumper is built for many years of trail riding and parking lot bumper cars.

You can mount the spare tire carrier at almost any height you want, depending upon the tire’s diameter. This swing-away carrier also holds the HiLift jack and gas can.

The two rectangular pieces are the adjustable tire carrier. They’re adjustable so that the wheel’s offset can be easily accommodated.

A hoist makes it much easier to remove the OEM bumper, even though you may need to heat some of the bolts to break them loose.

There are rear body panel holes on both sides of the Cherokee, insert the Smittybilt nut plates. The plates’ welded nuts match pre-existing holes in the body.

Install the bumper mounting brackets but do not tighten at this time.

There are bolts below the “frame” and on the sides.

Before assembling the bumper and tire gate, make sure the bumper matches its mounting brackets.

Install the tire gate onto the XRC bumper per the Smittybilt instructions, adjust the tire gate, and attach the bumper to the Cherokee. Make sure the bumper is aligned with the body properly and tighten all the mounting bolts at this time.

Bolt the stationary bracket to the tire gate using the four supplied ½-inch bolts.

Install the wheel mount studs into the adjustable wheel mount plate. The studs may be pressed into place—as shown here—or drawn in by tightening the washer and nut.

Determine where to locate the adjustable wheel mount plate onto the stationary bracket per the Smittybilt instructions.

Affix the spare tire to the tire gate and carefully swing the gate slowly and carefully into its position on the bumper. Make sure it fits and locks into place properly. Instructions show you how to make the latch adjustments.

Moving up to the front; be sure to disconnect the OEM fog light harness before removing the bumper.

You’ll have to relocate the charcoal canister after you’ve installed the bumper. You’ll notice we had already removed the OEM fender flares. Cash likes to play in the mud, and we thought we had it all cleaned off but we only dampened it here.

Unbolt and remove the factory front bumper, end caps, valence, fog lights, and all other hardware from the Cherokee.

The Smittybilt XRC front bumper bull bar is designed to mount on top of the XRC front bumper. It’s manufactured from 1¾-inch-diameter round steel tubing and has Smittybilt’s two-stage black-textured powder-coating applied. It has two light tabs and accommodates up to a 9-inch light or an LED light bar.

From previous experience, we mounted the bull bar to the front bumper prior to installing the bumper. It’s much easier to assemble it when the bumper is not on the vehicle.

If you have a first generation Cherokee, you will need to cut the front fenders before you can install the bumper. Scribe a line on the fenders that is even and straight back from the grille, as shown here.

To cut the fenders you use a hacksaw, tin snips, or a cutting wheel like we did.

Remove the three OEM steering box bolts. Be sure to support the steering box after unbolting it. Install the bumper mounting plate to the outside of the “frame” rail. Secure the steering box and mounting plate using the provided 7/16x4-inch bolts.

Install the passenger side mounting plate to the outside of the “frame” rail.

With the mounting plate secured in its proper position, use the three middle holes in the plate as a template and drill three holes through the outer wall of the frame only.

If you don’t have a hoist, you’ll need at least two people—and probably a third—to position the front bumper and bolt it into place.

Author: Jim Brightly

A former editor of Truckin’ and Trailer Life magazines, and tech editor of Four Wheeler, Petersen’s 4-Wheel & Off-Road, and Family Motor Coaching magazines, Jim Brightly is now a semi-retired photojournalist living, writing, and wheeling in northern Arizona. He’s been building and wheeling Jeeps for more than fifty years.