car plumbing

Whether it’s in your bathroom or on your race machine, car plumbing can be an exercise in frustration—especially when you finish the job, turn on the faucet or switch on the pump, and discover you have more leaks than flow.

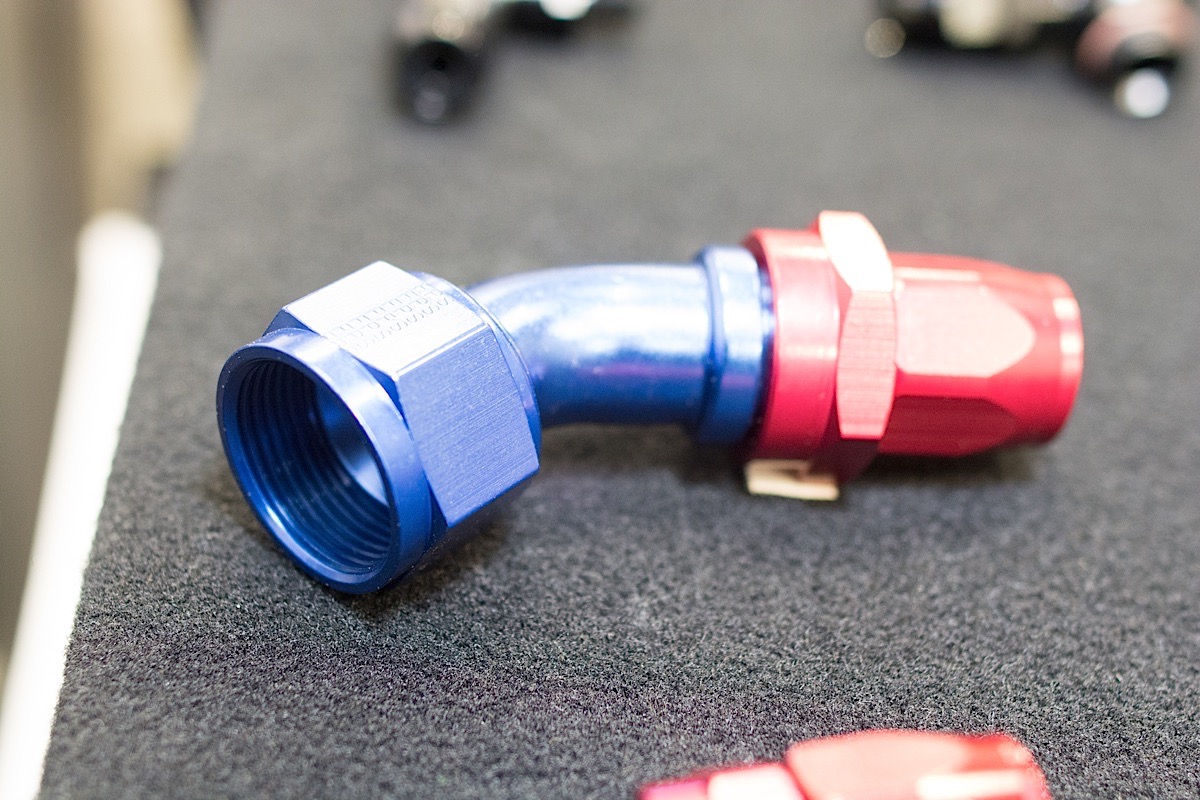
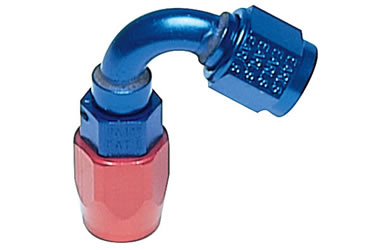
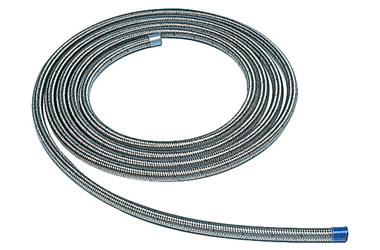
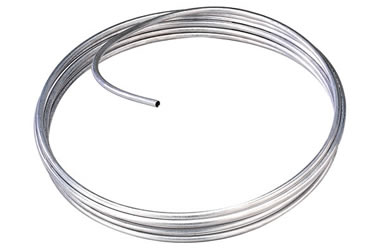
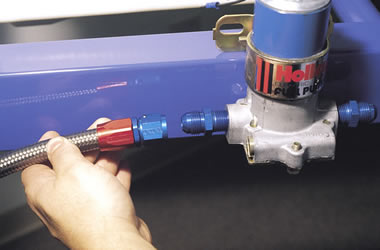
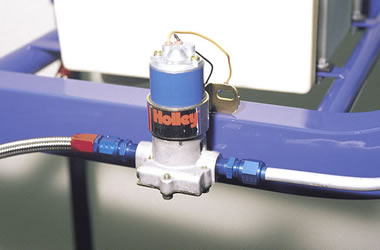
While we can’t really help you with your bathroom, we can show you how to assemble leak-free hose and fittings for your car, with a little help from the plumbing guys at Earl’s. We’ll be plumbing a Holley “blue” electric fuel pump using Earl’s Swivel-Seal AN fittings, Perform-O-Flex braided hose, and Summit Racing 3/8-inch steel hard line.

The basic assembly procedures we’ll use in our example apply to most automotive plumbing. We also have a list of tools that will help you do a first-class plumbing job, plus some general tricks and tips to make you the AN Plumbing Master of the Universe. Well, at least of your neighborhood.

Hose and Fitting Tips

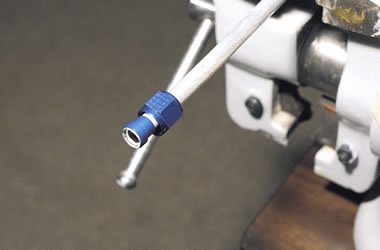
1. You’ve probably heard this one before, but AN stands for Army-Navy. Established many years ago by the U.S. military as a common measurement for hose and fittings, it designates the outside diameter (o.d.) of the rigid metal tube that is compatible with each size fitting. These dash sizes are expressed as the numerator of the fraction, with the denominator always being 16. For example, a –04 port is 4/16, or 1/4 inch.

Here’s a list of common AN to fractional equivalents:
-02 AN = 1/8 inch
-03 AN = 3/16 inch
-04 AN = 1/4 inch
-05 AN = 5/16 inch
-06 AN = 3/8 inch
-08 AN = 1/2 inch
-10 AN = 5/8 inch
-12 AN = 3/4 inch
-14 AN = 7/8 inch
-16 AN = 1 inch
-20 AN = 1 1/4 inches
-24 AN = 1 1/2 inches
-32 AN = 2 inches

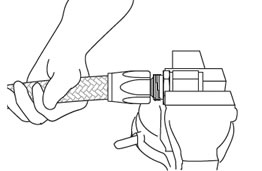
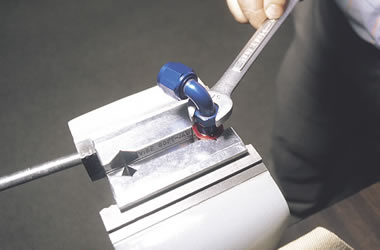
2. Over-tightening is one of the most common ways to destroy an aluminum fitting. It can distort a fitting’s seat or cone, making it prone to leaks.  Dirt and debris on the sealing surface can also cause a fitting to leak. Make sure to clean out a hose/fitting assembly with solvent after putting it together to remove shavings or other debris.

3. Believe it or not, vacuum hoses take more abuse than any other type. It is important to match the hose to the vacuum rating of your application. If a hose is installed beyond the minimum bend radius, or has been kinked or damaged, its vacuum rating will be reduced. For severe vacuum applications, such as dry sump oiling systems, an internal support coil may be needed. Earl’s has these coils in various inside diameters.

4. Abrasion is one of the leading causes of hose failure, hence the popularity of hose like Earl’s Perform-O-Flex hose with tough stainless steel braided covers. For racers looking for less weight, Earl’s Pro-Lite 350 hose has a braided nylon cover and weighs far less than steel braid-covered hose. No matter which type of hose you use, make sure to route it to avoid sources of heat and contact with other components. Use support clamps to keep the hose from flopping around and rubbing against frame rails, headers, and other stuff.

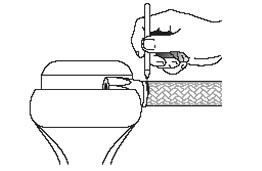
5. When cutting braided hose, clean up any burrs and ragged edges on the end of the hose. This helps to ensure a secure, leak-free seal between the hose and the fitting. Wrap the end with electrical tape before cutting to help minimize burrs and ragged edges.

swivel seal AN hose fitting
coil of braided stainless steel hose line
coil of steel hard line hose
using a hacksaw to cut hose illustration
marking a hose for cutting illustration
AN hose installation illustration
installing an AN fitting onto a hard line
cutting a section of hard line tubing
installing a flare fitting onto hard line tubing
bending a piece of hard line tubing
inserting a plumbing fitting into a holley fuel pump
holley electric fuel pump mounted to vehicle frame

Earl’s Swivel-Seal AN fittings have been around for years, and are a great choice for a high- quality plumbing job. The anodized aluminum fittings rotate, making it easier to route your plumbing where you need it to go. Swivel-Seal fittings are available in a wide range of AN sizes and configurations from straight to 180 degree bends. We used -8 AN fittings on our sample fuel system.

Stainless steel braided hose, like Earl’s Perform-O-Flex hose, is finding its way onto more and more street-oriented cars. That braid not only looks cool, it also protects the hose from sudden death by abrasion, punctures, and tears. Perform-O-Flex hose is compatible with most fluids (brake fluid excepted), can handle pressures up to 1,500 psi, and endures temperatures from -40 to 300 degrees F.

Summit Racing’s hard line hose comes in two flavors—steel and stainless steel,—any of which is ideal for plumbing fuel line, nitrous systems, or other applications requiring hard line. For brakes, use only the steel or stainless steel line—no aluminum allowed. Summit Racing also has the required tube nuts and sleeves to finish the job.

AN Hose and Fitting Assembly Our sample braided hose and fitting were already assembled, so we borrowed some illustrations from the Earl’s catalog to show you how to properly cut braided hose. First, measure the length of hose needed, allowing for bends and fitting length. Place the hose in a vise, tightening it just enough to hold the hose in place without squeezing or distorting it. Wrap the area to be cut with electrical tape to prevent the braid from fraying. Use a hacksaw with a 32 teeth-per-inch blade, a Dremel-type rotary tool, or Summit’s handy Hose Cutter to cut the hose to length as shown. Keep the cut as square as possible to ensure a secure, leak-free seal with the fitting.

Put the socket end of the hose fitting in the vise; use aluminum jaw inserts to protect the fitting from damage. Insert the hose into the socket until it butts against the threads. Gently pull the hose out until there is a 1/16 to 1/8 inch gap between the hose end and the bottom of the socket threads. Mark the hose as shown with a black felt pen. This reference mark will show you if the hose gets pushed out of the fitting during assembly. Blow out the assembly with solvent and compressed air to remove stray bits of braid or metal shavings.

Lubricate the inside of the hose, the socket threads, and the cutter threads on the nipple part of the fitting with Earl’s Assembly lube or 30-weight engine oil. Remove the hose and socket from the vise, and put the nipple end of the fitting in the vise jaws. Push the hose and socket onto the nipple until the socket threads can be started. Carefully turn the hose until the threads engage. Stop when the assembly becomes too hard to turn by hand.

Use a properly sized AN wrench and finish tightening the assembly until there is no more than a 1/16-inch gap between the socket and the nipple. Check the mark you made on the hose to make sure it did not back out of the socket.

On to the hard line: First, measure out the appropriate length, taking into account any necessary bends. Cut the line with a tubing cutter, making sure to cut the end as square as possible. Deburr the cut end and slip a tube nut and sleeve onto the line.

Flare the line with the flaring tool. If using AN fittings, a 37 degree flaring tool is required to ensure a tight, leak-free seal. SAE-style fittings, like those used on brake line, have a 45 degree flare. This is what the end result should look like.

If you run hard line, you gotta have a way to bend it. This Summit Racing tubing bender lets you bend tubing up to 1/2 inch o.d. without kinking. It sure beats trying to bend line over your knee.

The Earl’s AN hose/fitting assembly is connected to the inlet side of our Holley electric fuel pump. The fitting in the pump is an Earl’s -8 AN to 3/8 inch pipe adapter. Hand tighten the fitting, then snug the connection with the appropriate AN wrench. A small squirt of oil or assembly lube helps things go together easier.

The hard line is connected to the outlet side of the Holley pump, using the procedure outlined in the previous step. Once all the connections in the system have been made, check for leaks, fix as necessary, then congratulate yourself on a plumbing job well done!

Parts List

Earl’s Five-Inch Vise Jaw Liners (EAR-005ERL)
Earl’s Hose Assembly Lube, Eight-ounce bottle  (EAR-184004ERL)
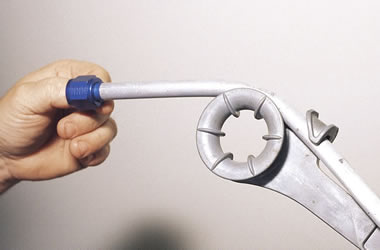
Summit Double-End AN Wrench Set (-3 to -20 AN) (SUM-900125)
Summit 37 Degree Flaring Tool Kit (SUM-900311)
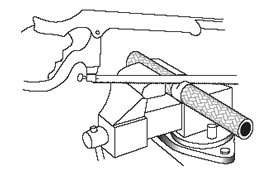
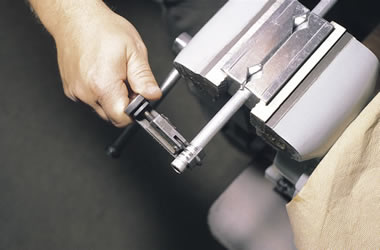
Summit Tubing Cutter (SUM-900500)
Summit AN Hose Cutter (SUM-900040)