cutting Aeroquip fuel hose
hose end socket
close up of a fitting on a hose end
Aeroquip’s soft vise jaws holding a fuel line fitting
tightening the fitting on a fuel hose
finished -10 AN hose assembly
pressure testing a fuel hose
fuel line fittings on a Spectra Premium gas tank
-10 AN hose end fitting
string attached to a AN wrench
measuring a MagnaFuel electric fuel pump
MagnaFuel stainless steel fuel bypass fitting
a pair of magnaflow fuel filters
fuel line routing under the chassis of a vintage drag race car
doubler plate for a classic car fuel system bulkhead in trunk
filter and pump doubler plates on floor of a classic car trunk
Fuel Filter bolted to the frame of a race car
fuel line routed along frame rail of a race car
Fuel line bulkhead fitting on a classic car
MagnaFuel high flow fuel pressure regulator

The first step is to cut the Aeroquip fuel hose. A fine tooth hacksaw can be used, but we like using a cut-off wheel on a 4 ½-inch angle grinder as it leaves fewer stray wire ends. We wrap the hose tightly with duct tape and clamp it before making the cut. Once the hose is cut, tap the debris out of the cut hose. We usually give it a blast of compressed air to make sure the hose is really clean.

Next, push on the hose end socket. Sometimes you have to twist it a bit to get the hose to seat correctly inside the socket. This is where a nice clean, square cut can pay dividends.

Always mark the hose behind the socket before assembly. The reason is the socket can back out when you thread in the hose end nipple. The mark shows you where the socket needs to be repositioned if it does back out.

We really like assembling hose with Aeroquip’s soft vise jaws. They have a magnetic insert and you simply drop them onto your bench vise. Make sure to leave 1/16-inch or so of the socket above the vise jaws. Lube the threads of the hose end nipple carefully before assembly. This is one place where you shouldn’t be stingy with lubricant.

Thread in the hose nipple and tighten. Don’t use an aluminum hose wrench for this job! Those wrenches are designed to tighten hose assemblies to aluminum adapters. If you use one to assemble a hose end, the jaws will flex and mar the fittings. We use a tight fitting open-end wrench for this job. Tighten the hose nipple to the point where the hexes are aligned and the gap between the last nipple hex and the socket is no wider than a fingernail.

This is our finished -10 AN hose assembly. Follow these steps with other sizes of hose. Tip: Don’t use this assembly method for Teflon-lined hose. We prefer to use crimped ends for those.

Next, we install a set of Earl’s test fittings to test the assembly for leaks (this is one place to use those aluminum wrenches). We charged the assembly with twenty pounds of air, then submerged it under water. A bubble is evidence of a leak—in this case, a leak at the flare where we didn’t tighten the test fitting enough.

We bought a brand new Spectra Premium gas tank from Summit Racing. The old one was fine, but we don’t like welding on a used gas tank. Additionally, the new tank has metal internal baffles around the sump; the OE Buick Grand National tanks have plastic baffling. The -10 AN Aeroquip bulkhead fitting is for the pickup. The smaller -8 AN fitting on the left is for the return line. We carefully drilled the holes for the fittings and let a local shop weld them in place.

We built this -10 AN hose for the pickup inside the tank. The end you see here fits on the bulkhead fitting. The end you can’t see is slash cut, and is held in place by the tank baffling (one baffle bent over the other). This puts the slash cut in the rear section of the sump, where fuel tends to collect under acceleration and not leave the pickup sucking air instead of fuel.

Tech Tip! See the string on the wrench and the duct tape surrounding the sender hole in the tank? Both will save you a lot of grief when attaching the pickup hose to the bulkhead fitting inside the tank. An arm just fits in the hole, with little space to move it inside the tank. Since the AN wrench is aluminum we couldn’t use a magnet to get it out. The string will let us fish it out if (OK, when) we dropped it. The duct tape around the sender hole saved me from going to the local clinic for a zillion stitches.

This is our MagnaFuel electric fuel pump. This pump is a flow-through model, which means the fuel passing through cools the pump, allowing it to run continuously. The pump is designed for fuel injection, but can be adapted for a carburetor with a different regulator and bypass valve. Yes, it’s a big pump!

Here’s the MagnaFuel stainless steel fuel bypass. There’s a big needle inside that operates much like a carburetor bowl needle—once a specific fuel pressure level is reached, the fuel is bypassed back to the tank via a return line. This greatly reduces fuel aeration (air in the fuel) and helps stabilize fuel pressure. This MagnaFuel pump can pull a prime, so you can mount it above the gas tank with no issue.

The folks at MagnaFuel recommend using two filters—one before the pump and one after. They have internal filter elements that are easy to clean and replace when needed.

Given the size of the pump and filters, packaging was an issue. We mounted the pump and pre-filter under the rear axle kickup. This was a good spot, but we were concerned about ripping the sheetmetal due to the weight of the components.

We found the mounting solution after looking through several aircraft airframe repair manuals we have on hand: doubler plates. We used one for the fuel pump and one for the pre-filter. The idea is to distribute the load and prevent the pump and filter from tearing the kickup sheetmetal. We fabbed the plates from aluminum.

Here are filter and pump doubler plates as they sit in the trunk. We can cover them with a trunk mat to keep that sleeper vibe.

Fuel flows from the pump to the after-filter shown here. We installed it on the passenger side frame rail, just ahead of the lower trailing arm pickup point. The clamp is an aircraft fuel pump piece from Weldon. Our setup keeps the filters readily accessible.

We routed the -8 AN fuel line from the after-filter inside the OEM frame rail channel. We used Earl’s cushioned clamps to secure the line to frame. We spaced the clamps evenly—it looks more professional.

The fuel line wraps over the frame rail near the leading edge of the door, then runs upward between the fender and the inner fender. We installed an -8 AN bulkhead fitting on the inner fender. This makes it easy to connect and disconnect the fuel line in the engine compartment.

Our MagnaFuel high flow fuel pressure regulator can be installed right on the engine. Moroso has recently released brackets that allow this regulator to be installed on the carburetor. If we decide to use one on the Buick, we can run a relatively short -8 AN line from the fender to the regulator.

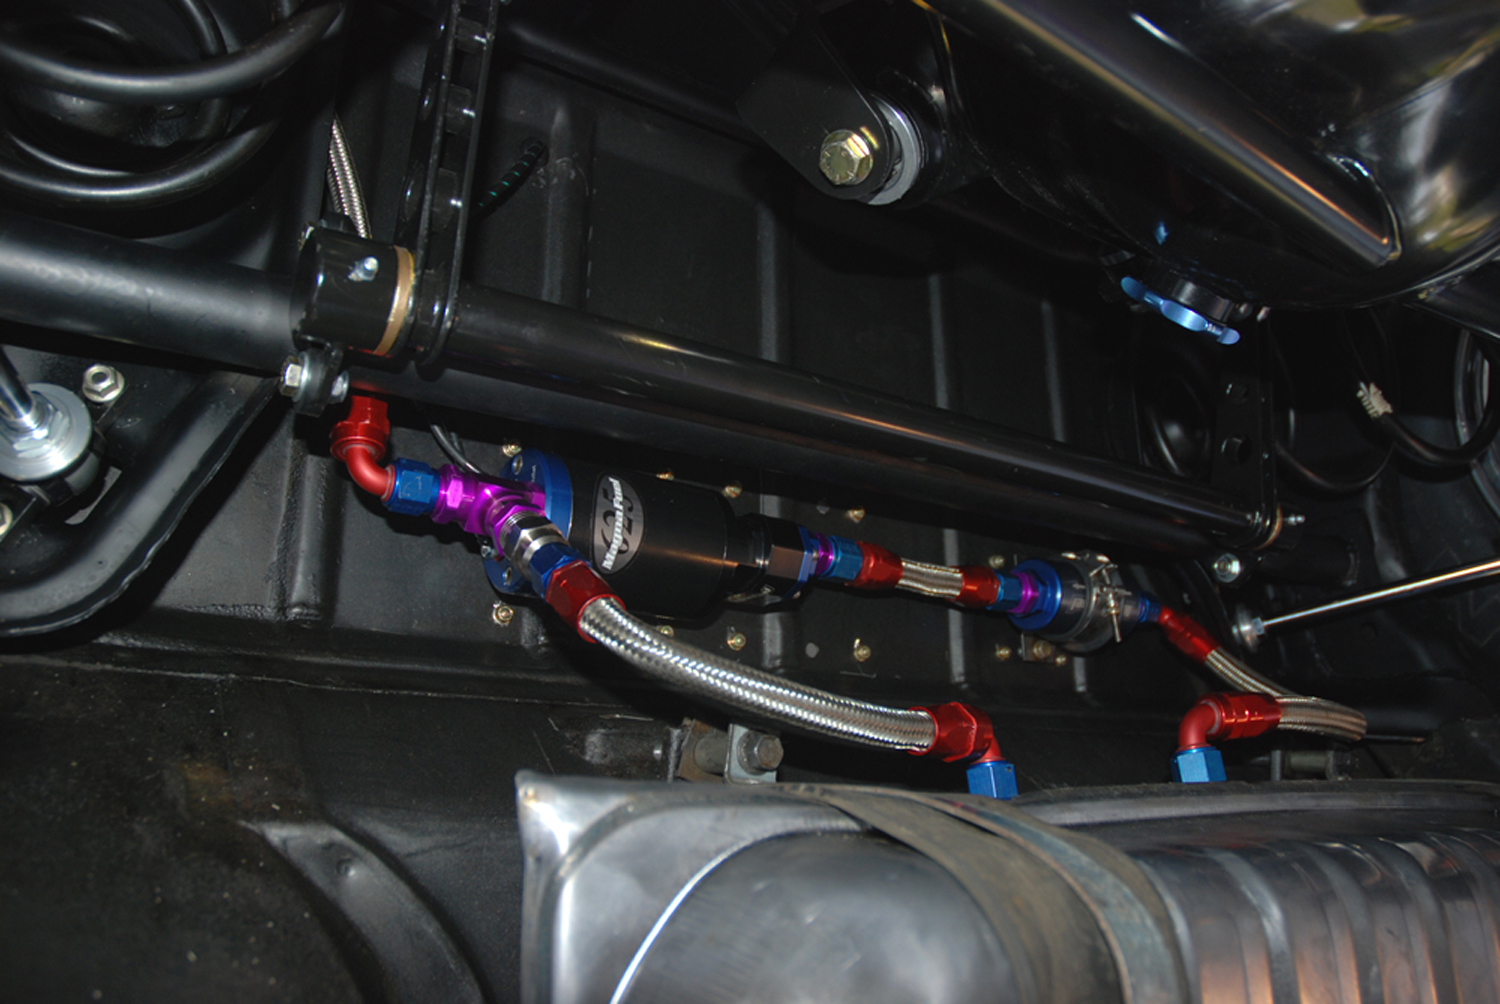
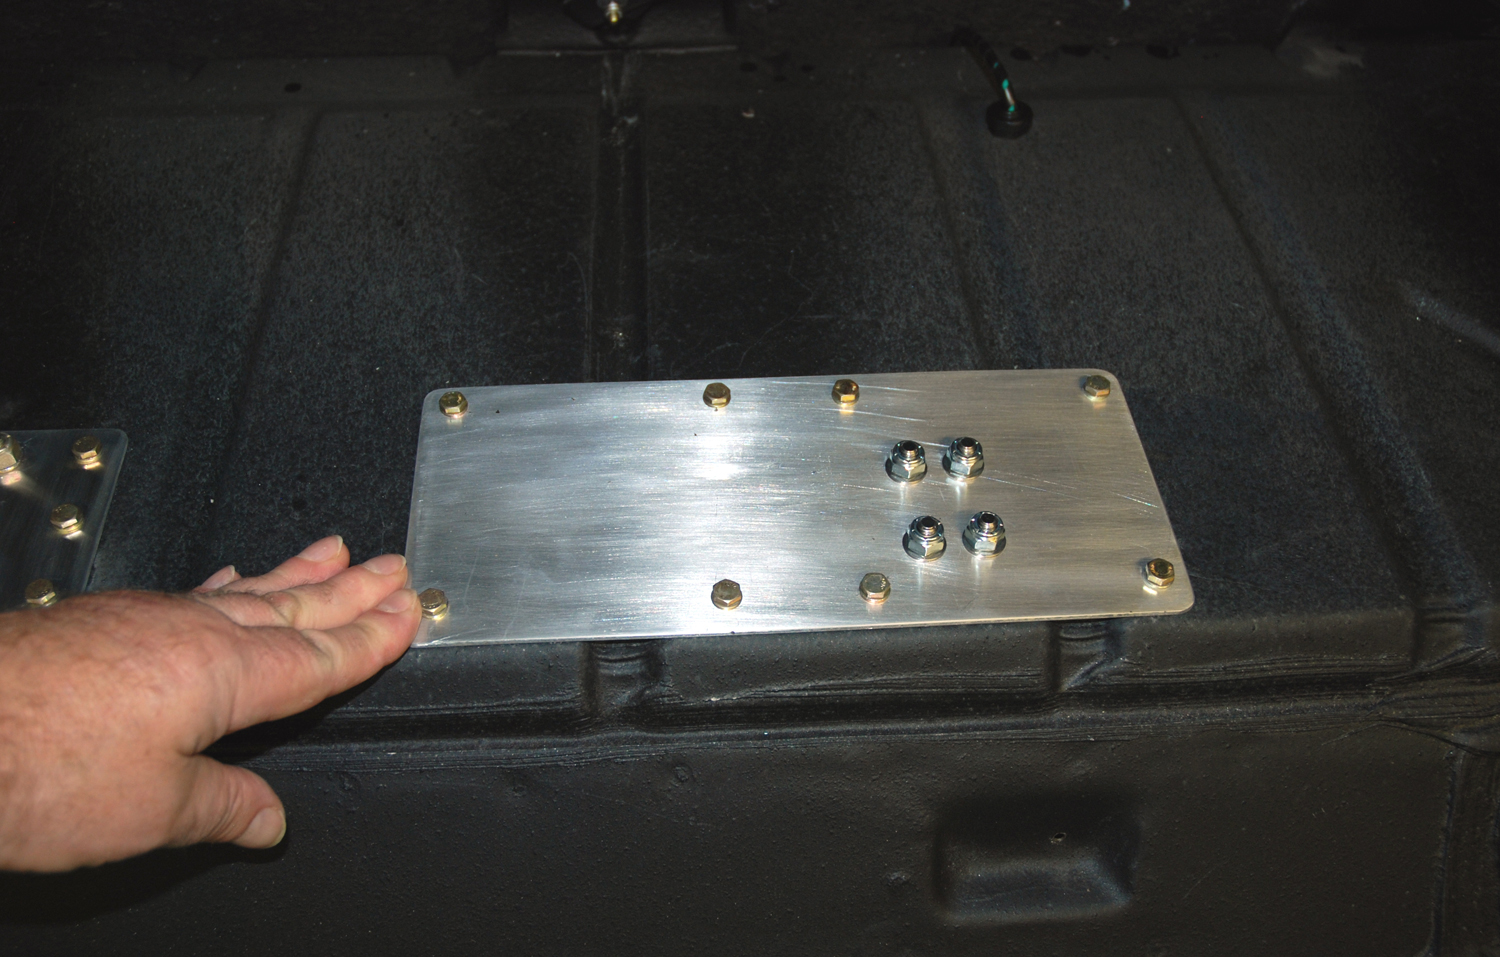
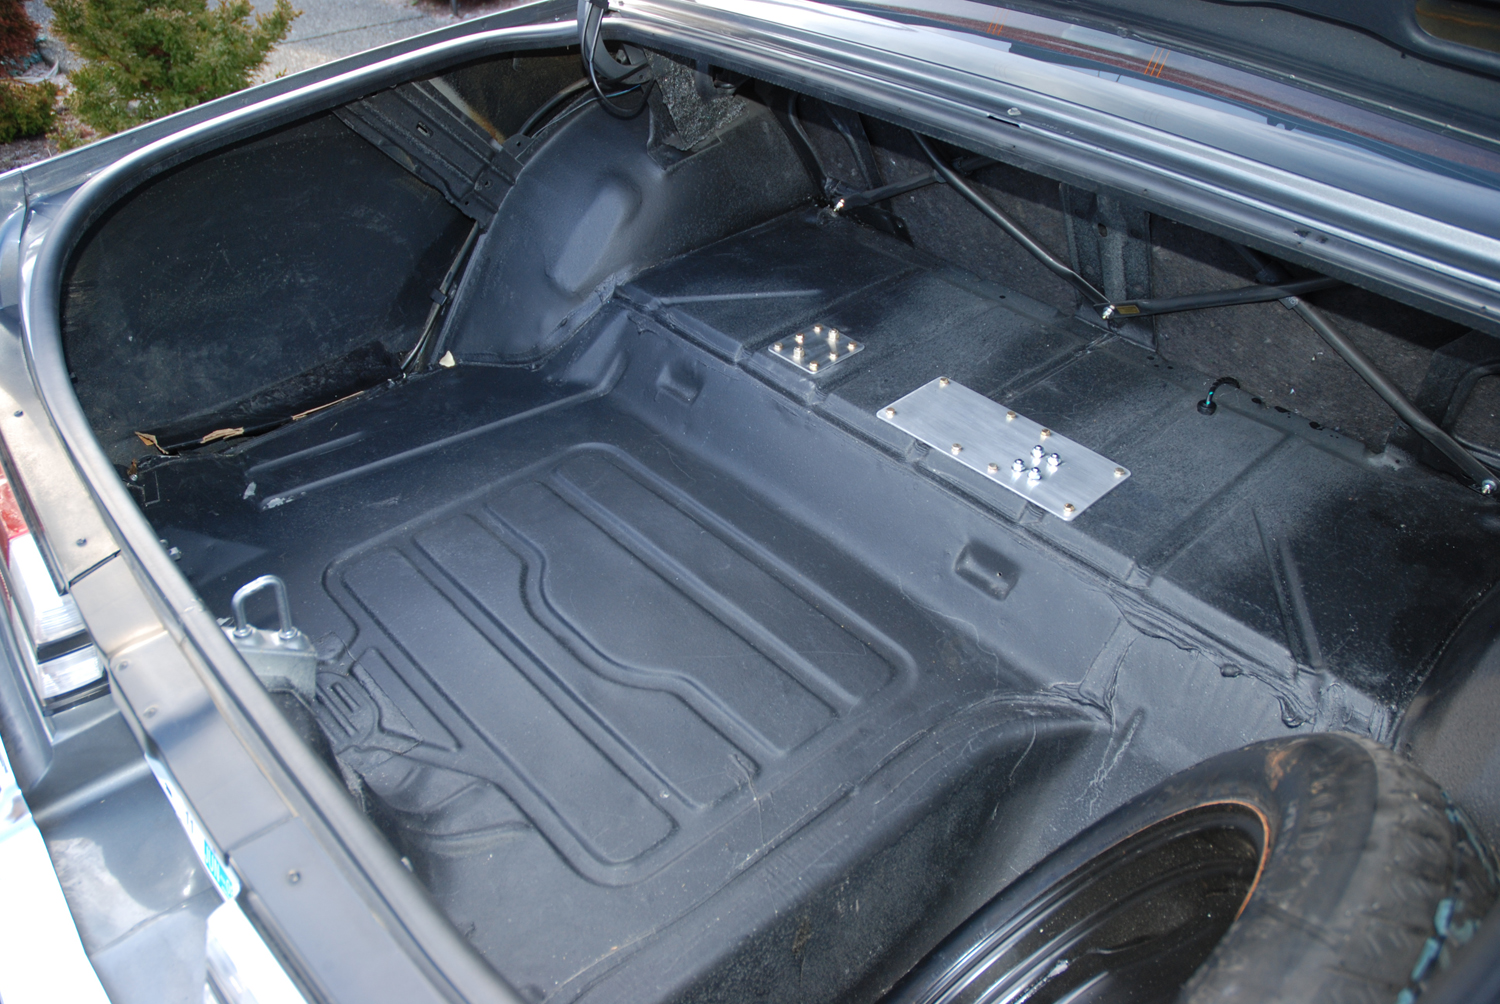
There are a couple of ways to build a high-flow fuel system for your hot rod. You can build a setup with a fuel cell and all sorts of trick plumbing that looks like it came right off a Pro Stock race car. If you want to keep the sleeper look, you can make a system using a stock-style fuel tank—but one that flows fuel like there’s no tomorrow.

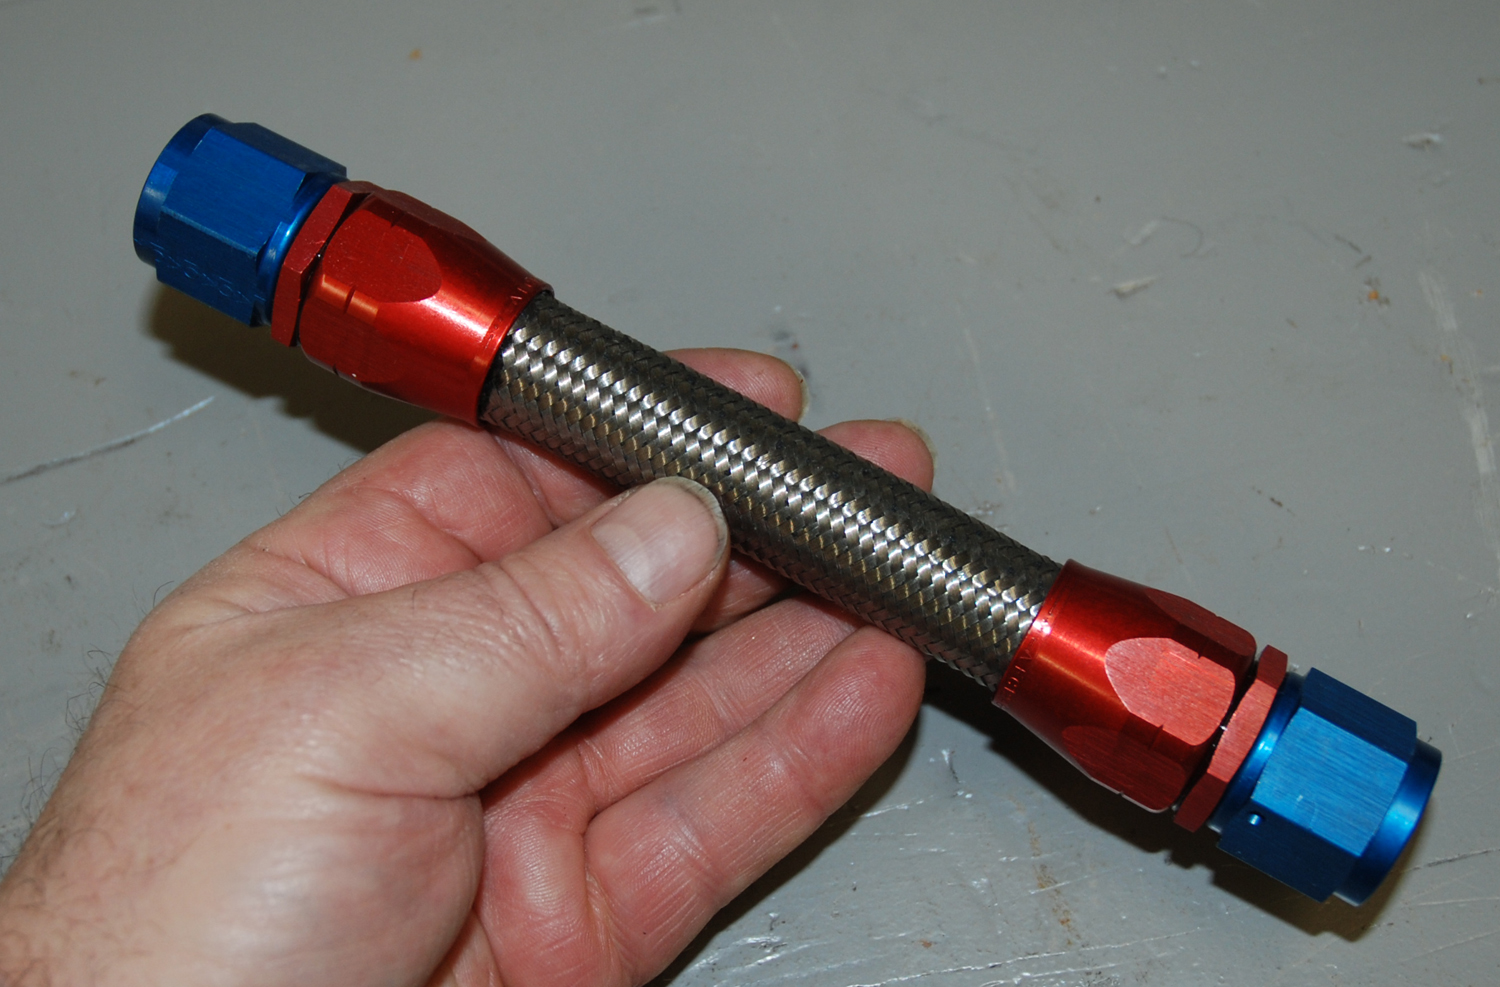
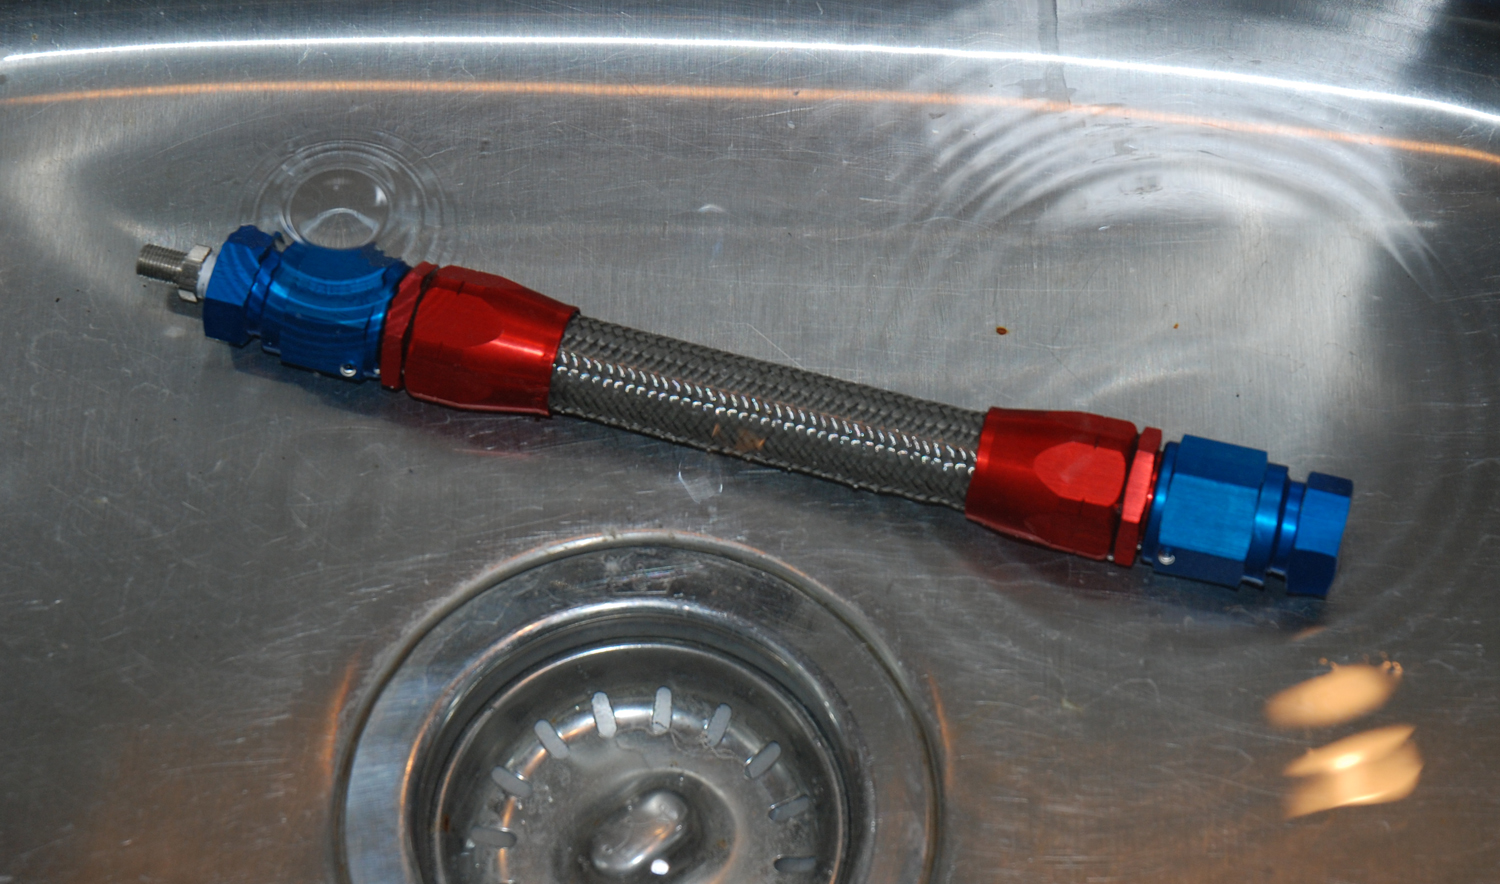
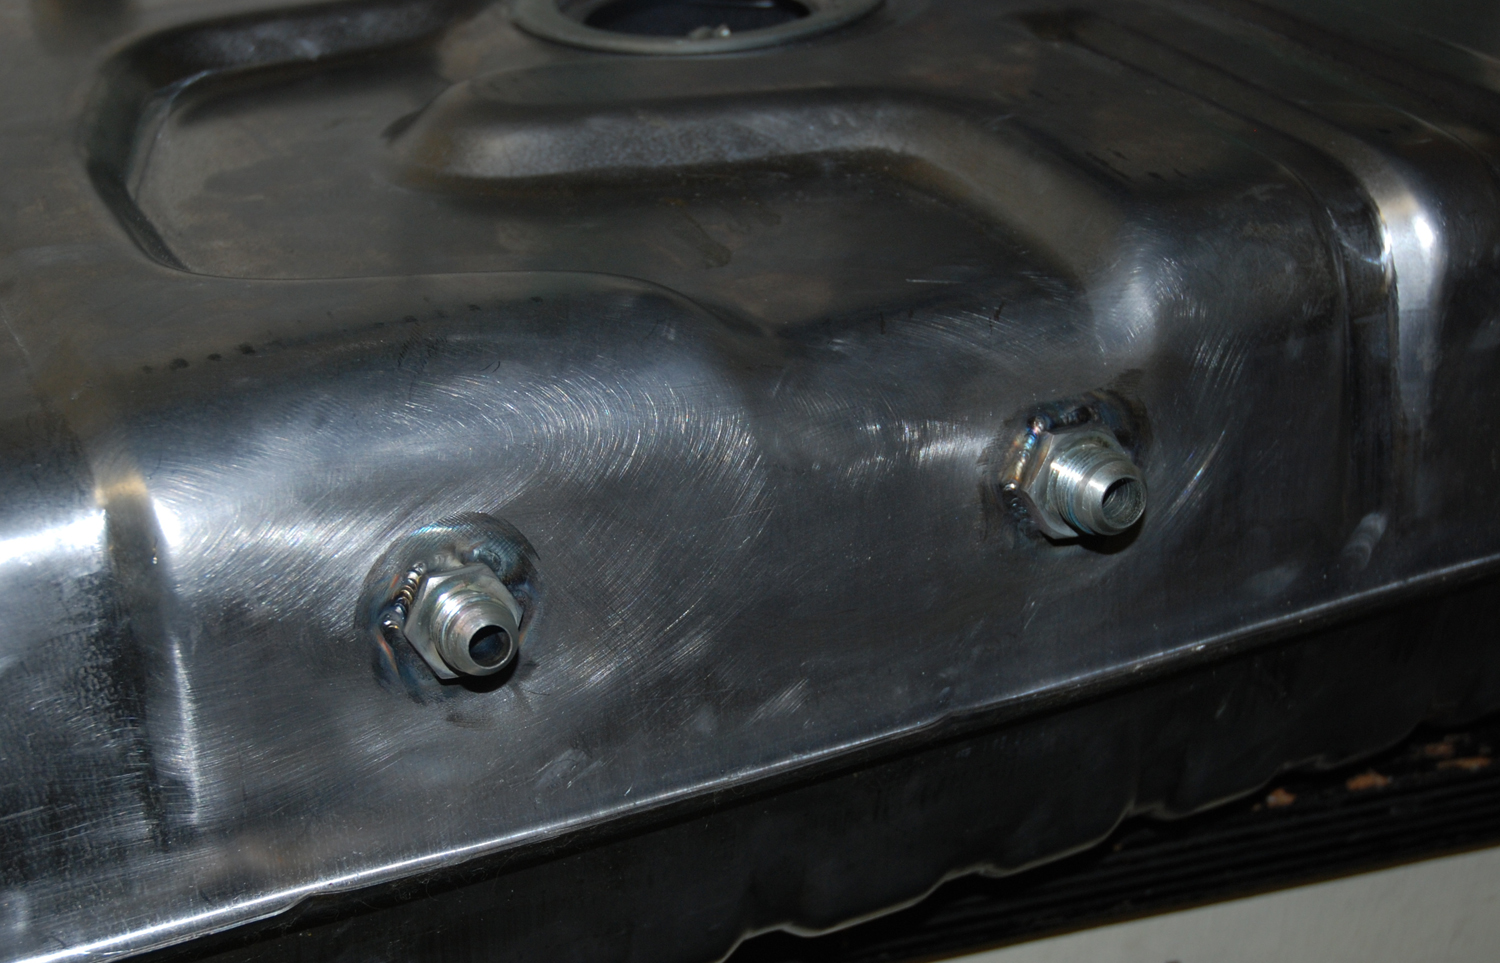
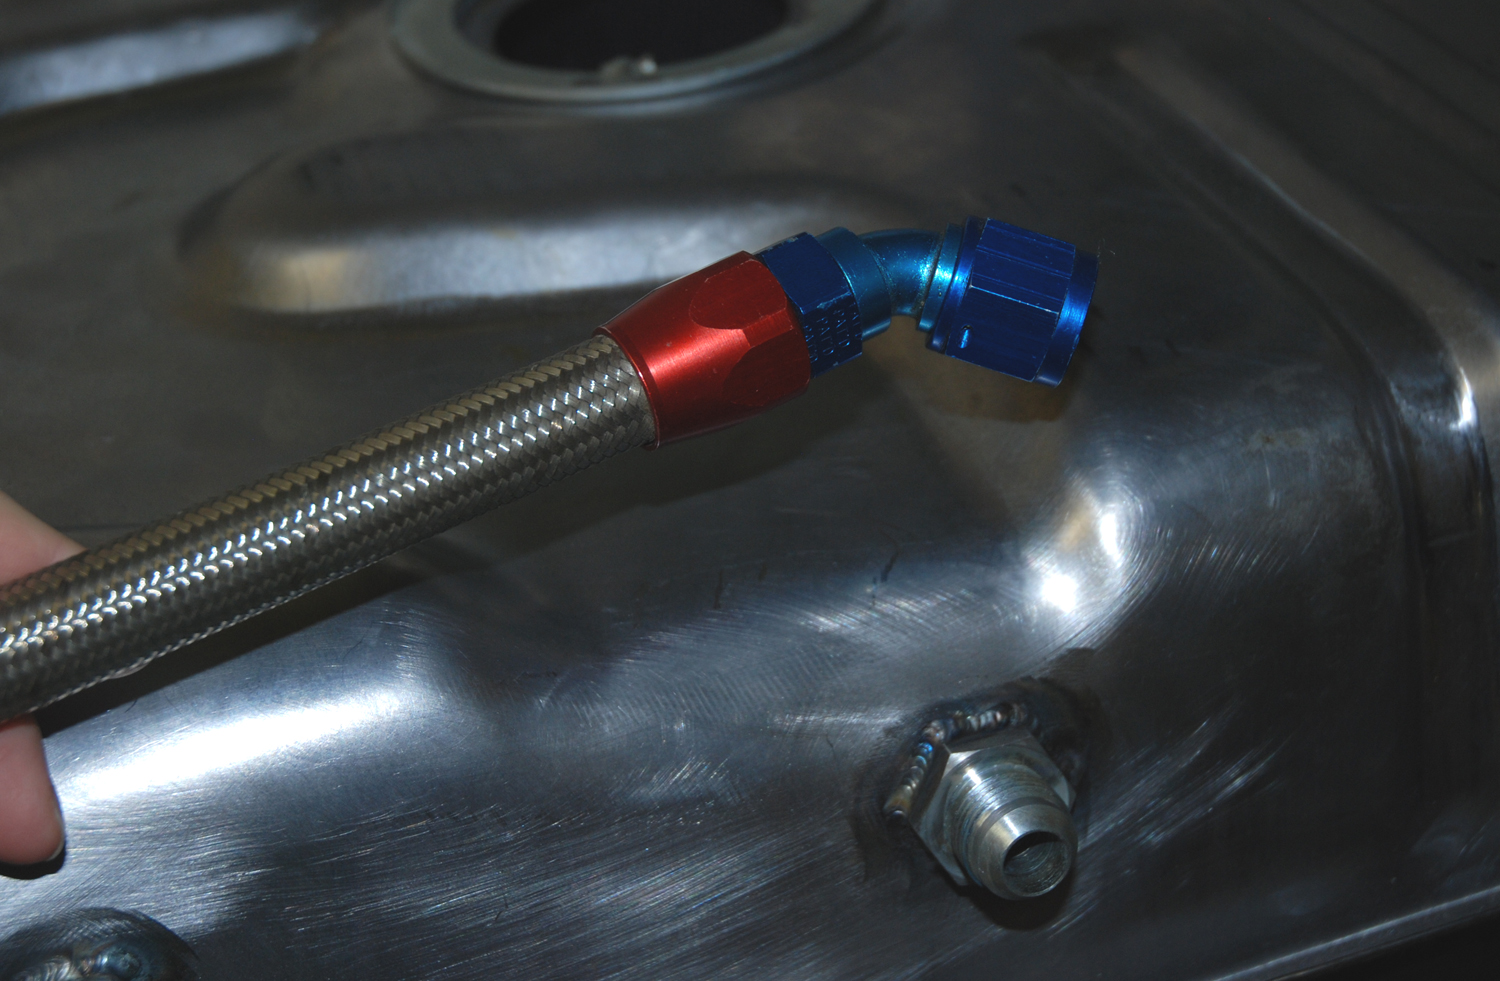
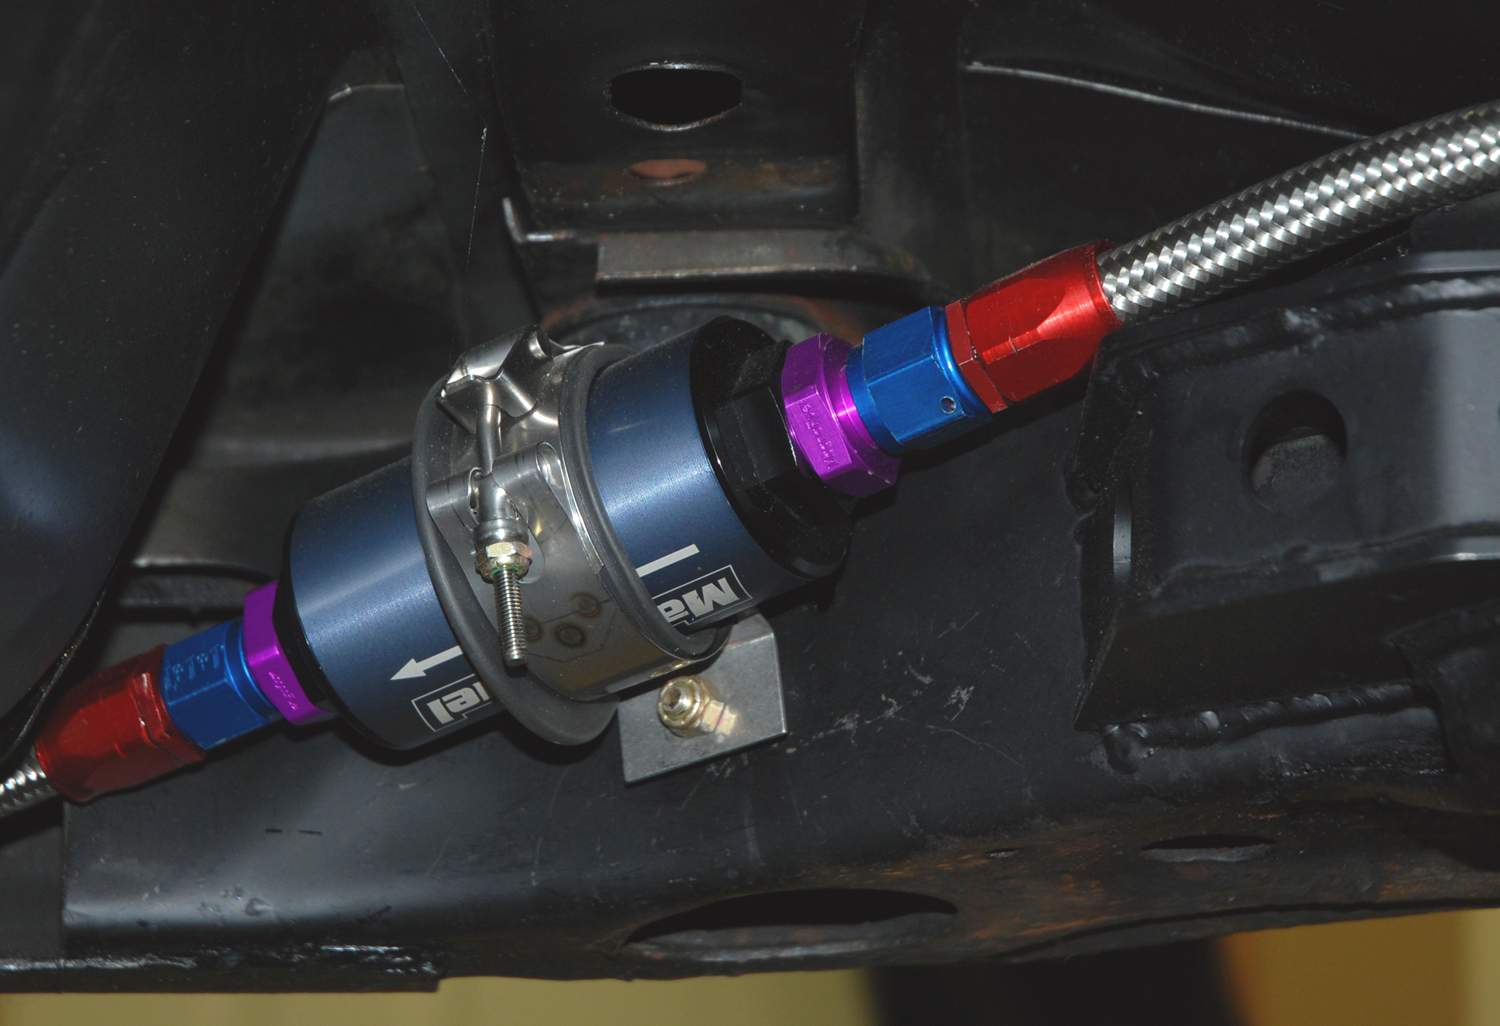
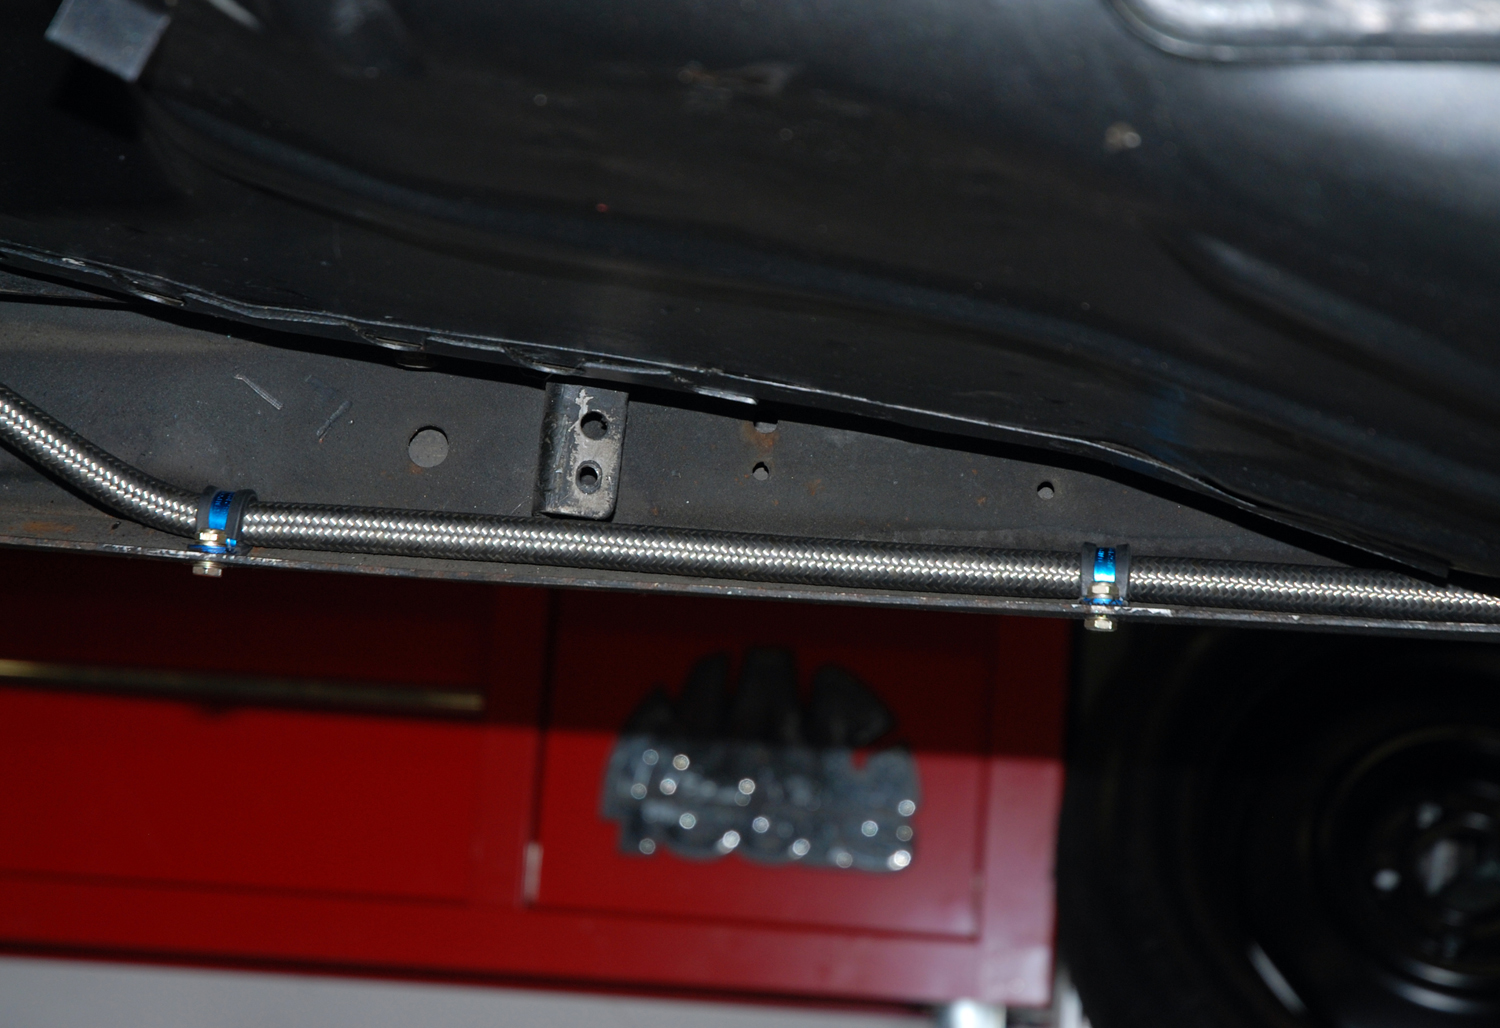
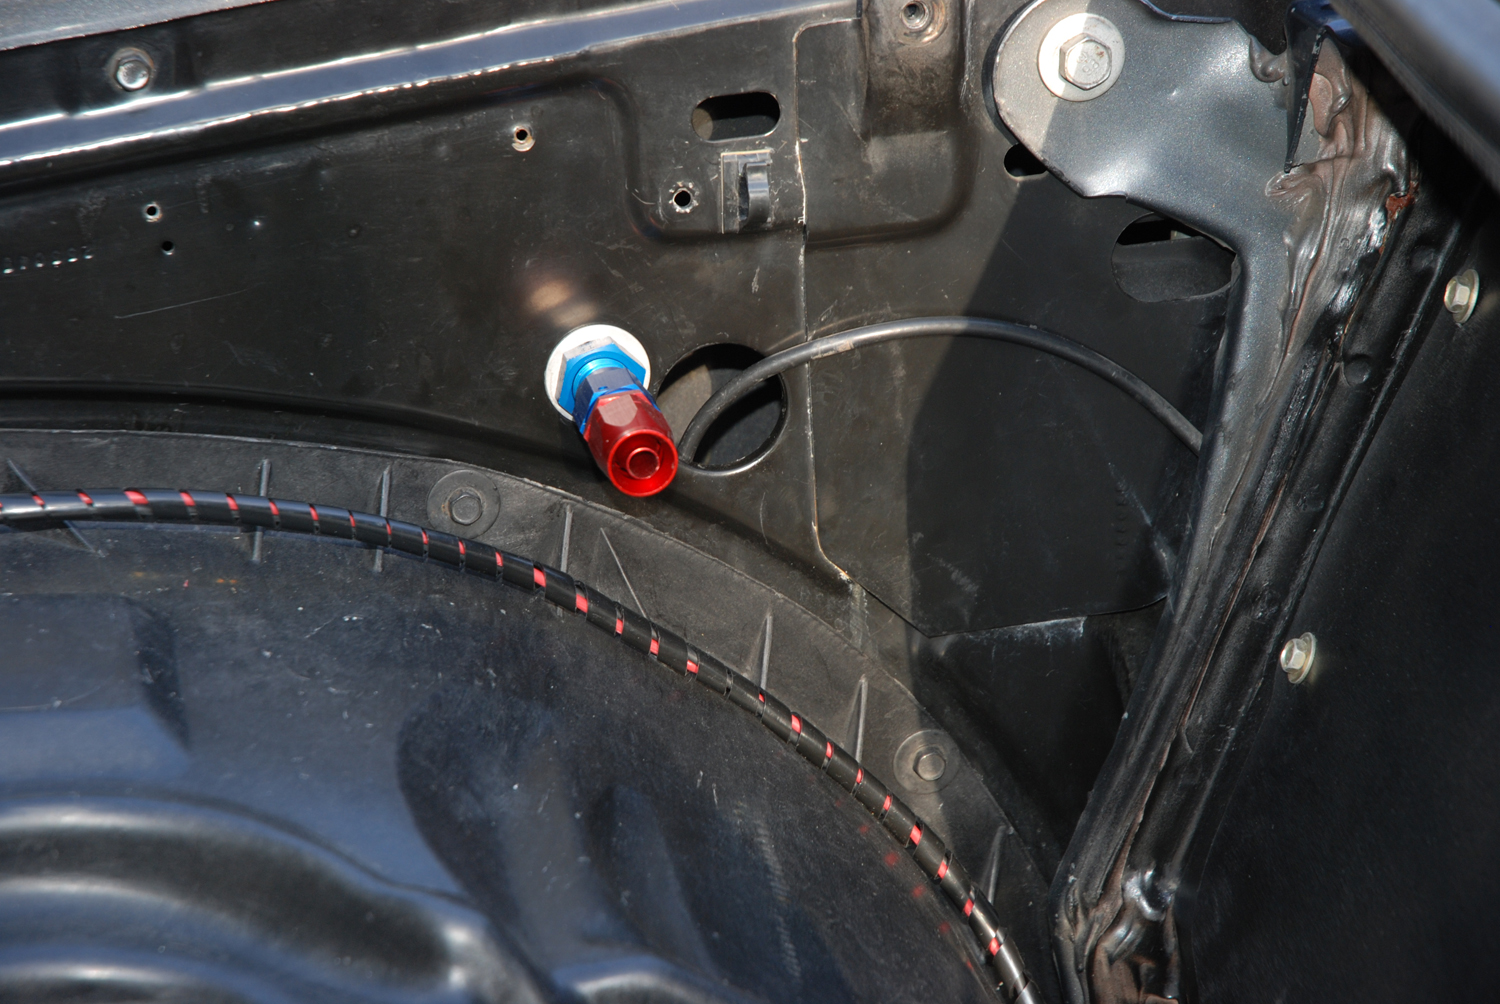
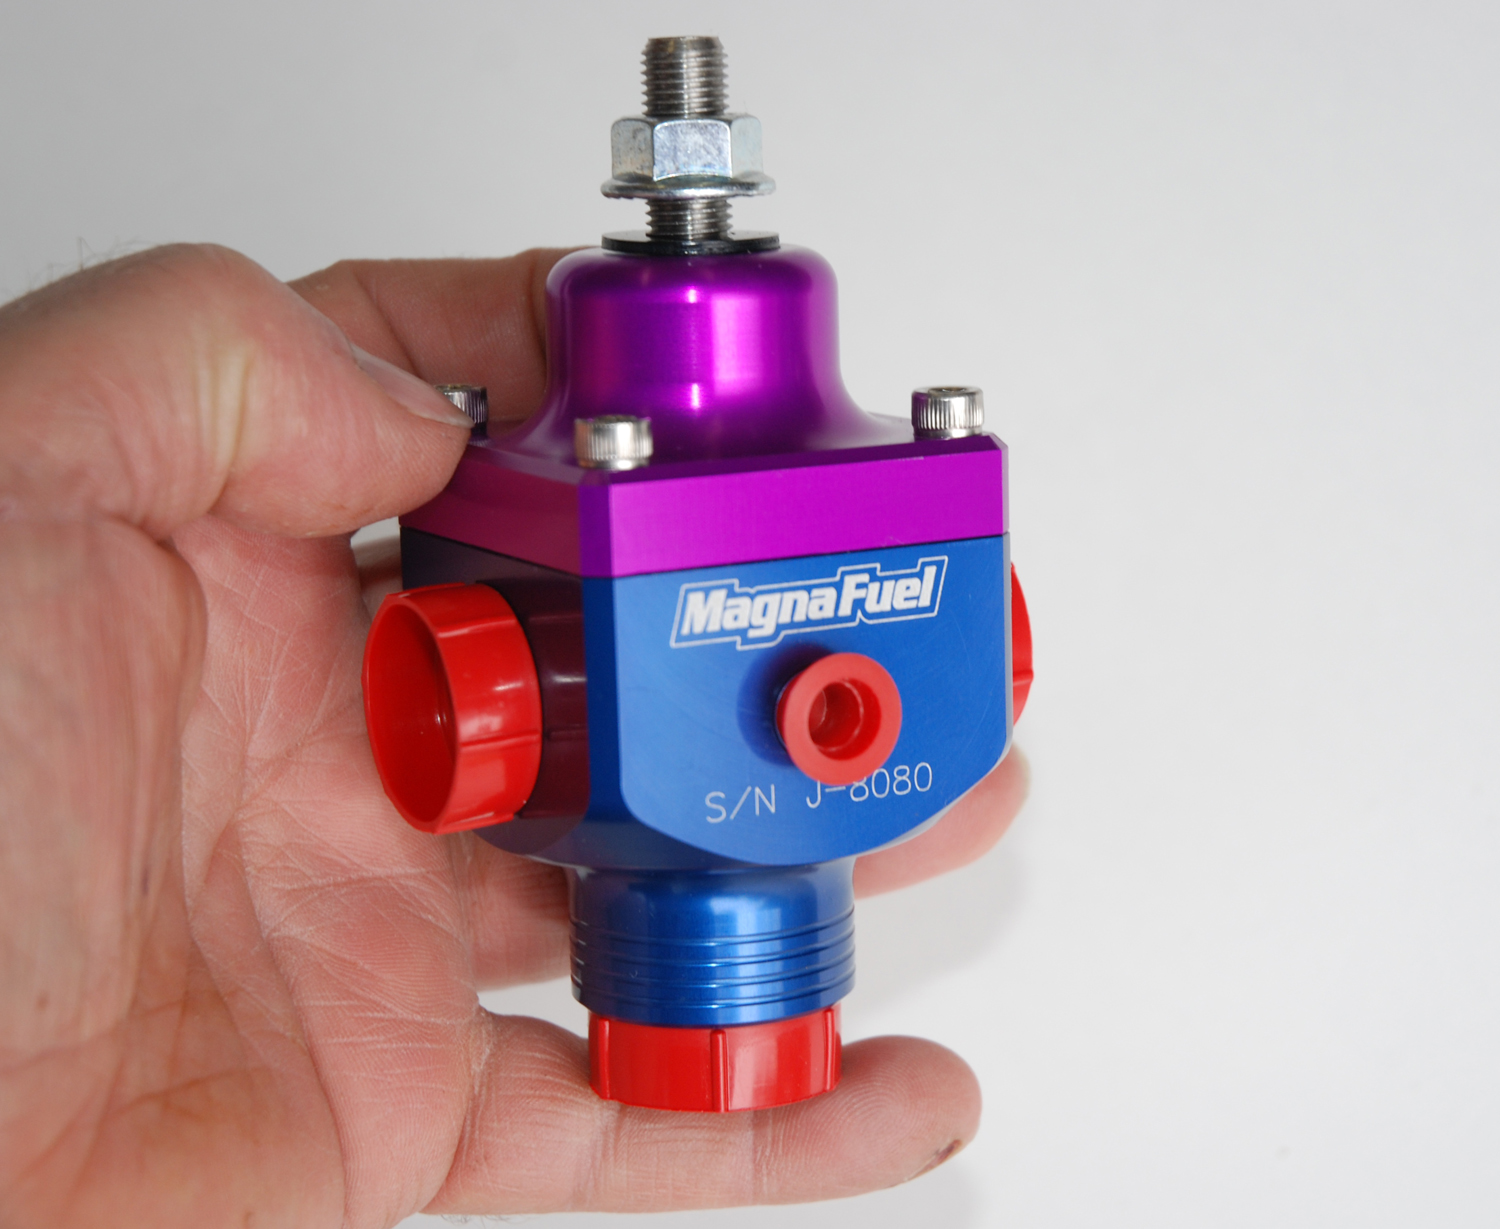
We recently pieced together a stock-appearing, high-flow fuel system for a Buick Regal with a 572 cubic inch big block Chevy. It’s a slick, almost invisible system based on a Spectra Premium fuel tank, Aeroquip hose and fittings, and MagnaFuel fuel system components. Scroll through the slide show to see how it was done.

Parts List

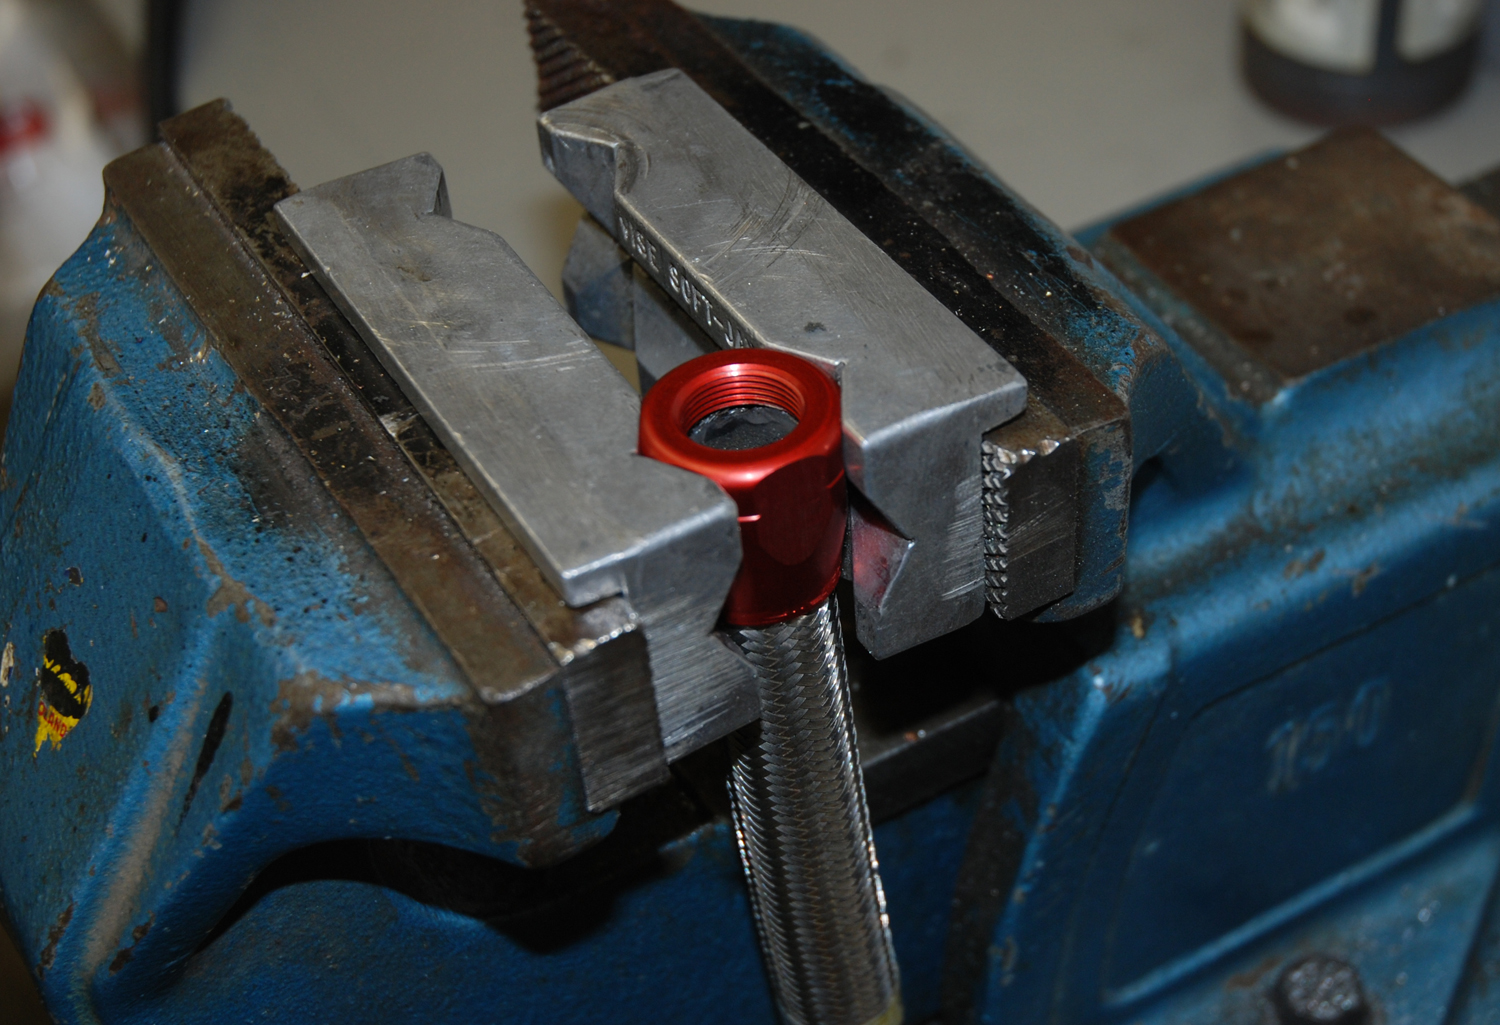
Aeroquip Vise Jaw Insert
Aeroquip Assembly Lube
Aeroquip Hose end wrench set
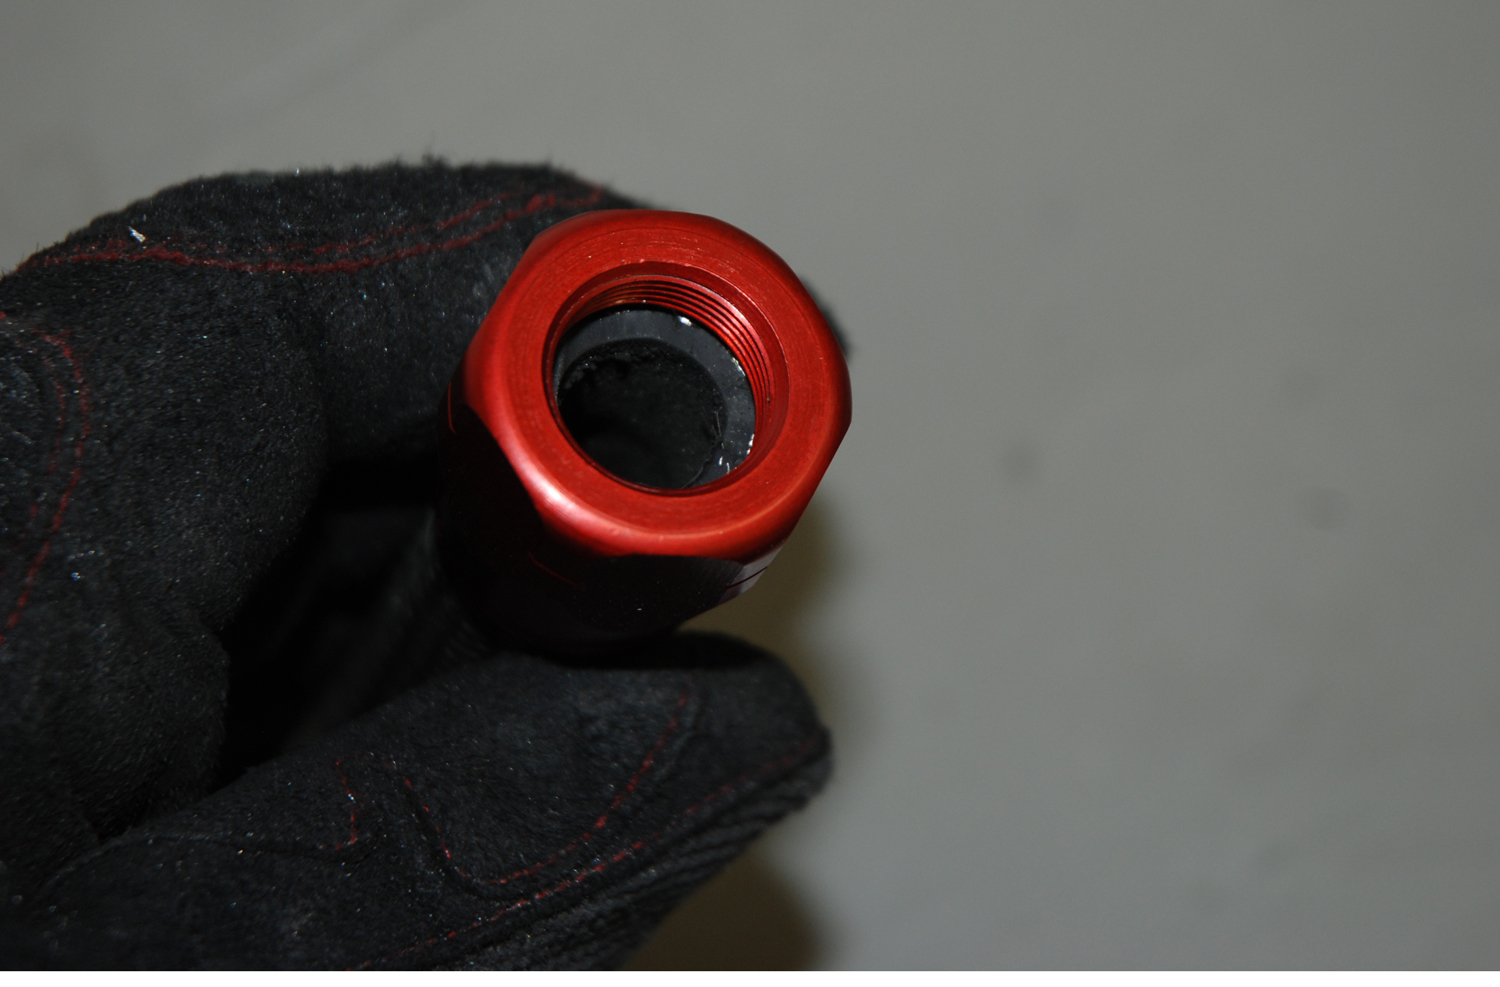
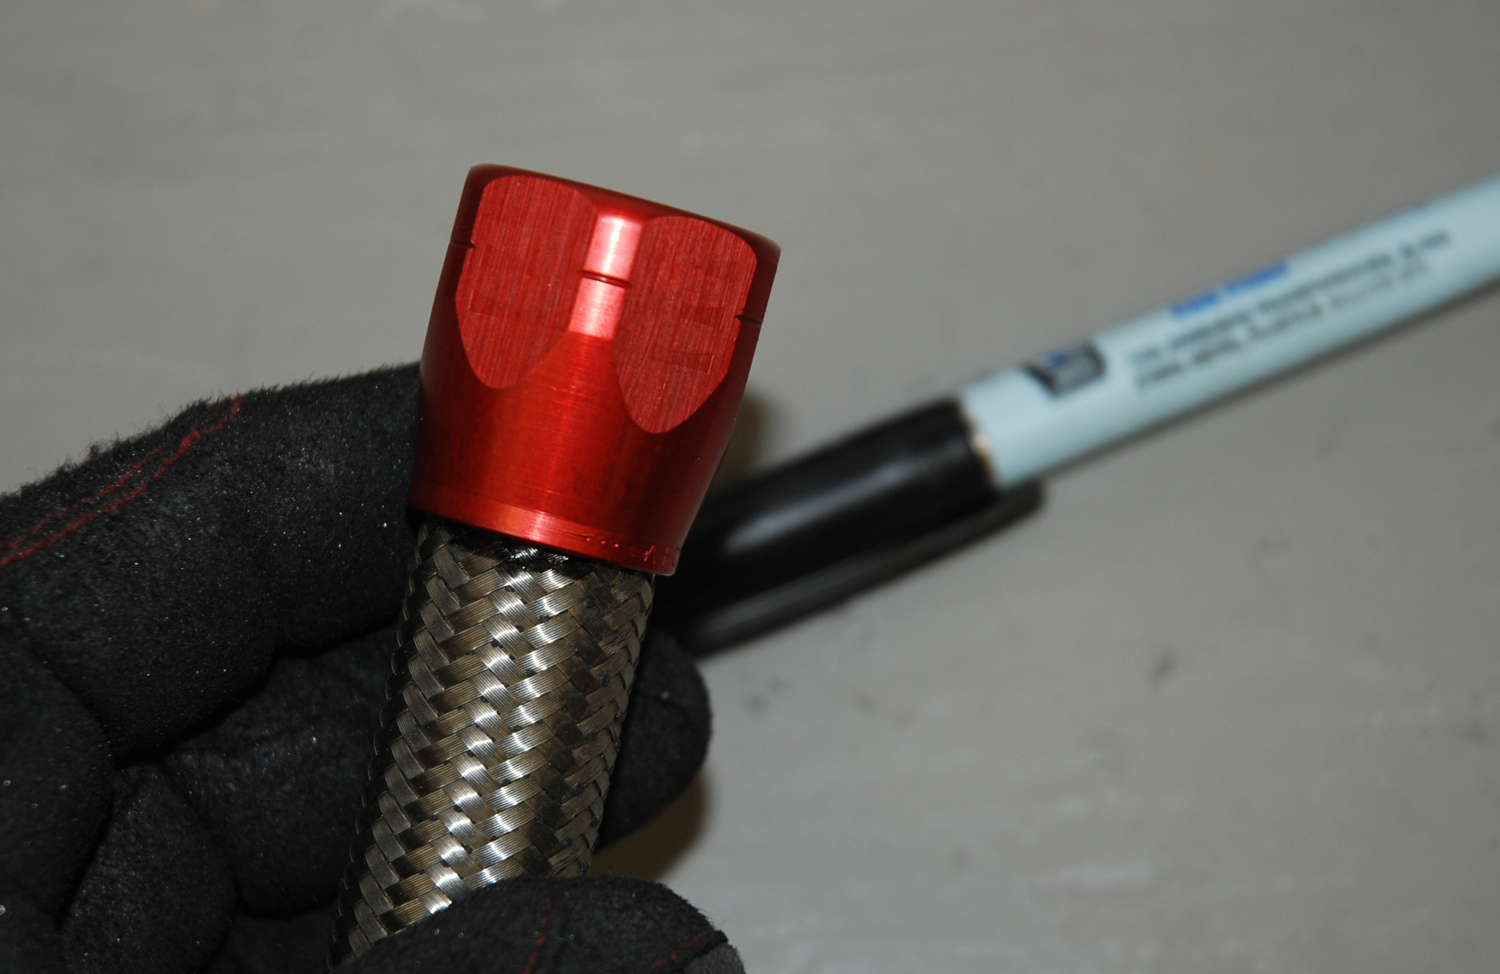
Aeroquip AQP -10 AN stainless braided hose, 6 feet
Aeroquip AQP -8 AN stainless braided hose, 20 feet
Aeroquip AQP -10 AN hose end, 90 degree
Aeroquip AQP -10 AN hose end, straight
Aeroquip AQP -8 AN hose end, 90 degree
Aeroquip AQP -8AN  hose end, straight
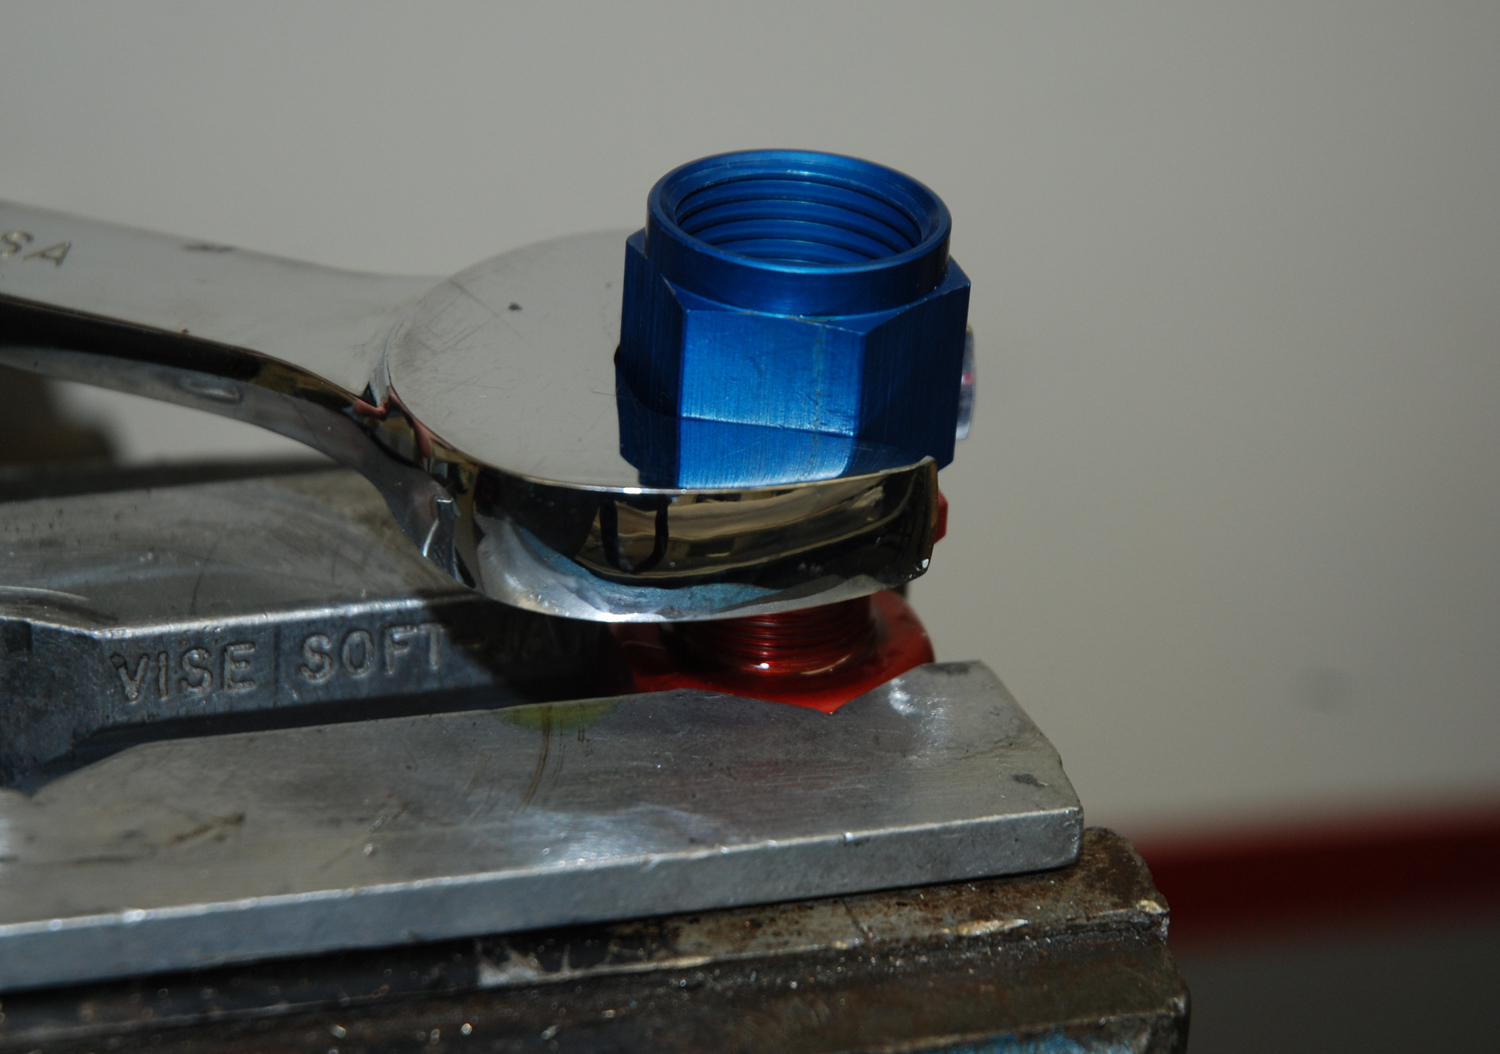
Aeroquip -10 AN steel bulkhead fitting
Aeroquip -8 AN steel bulkhead fitting
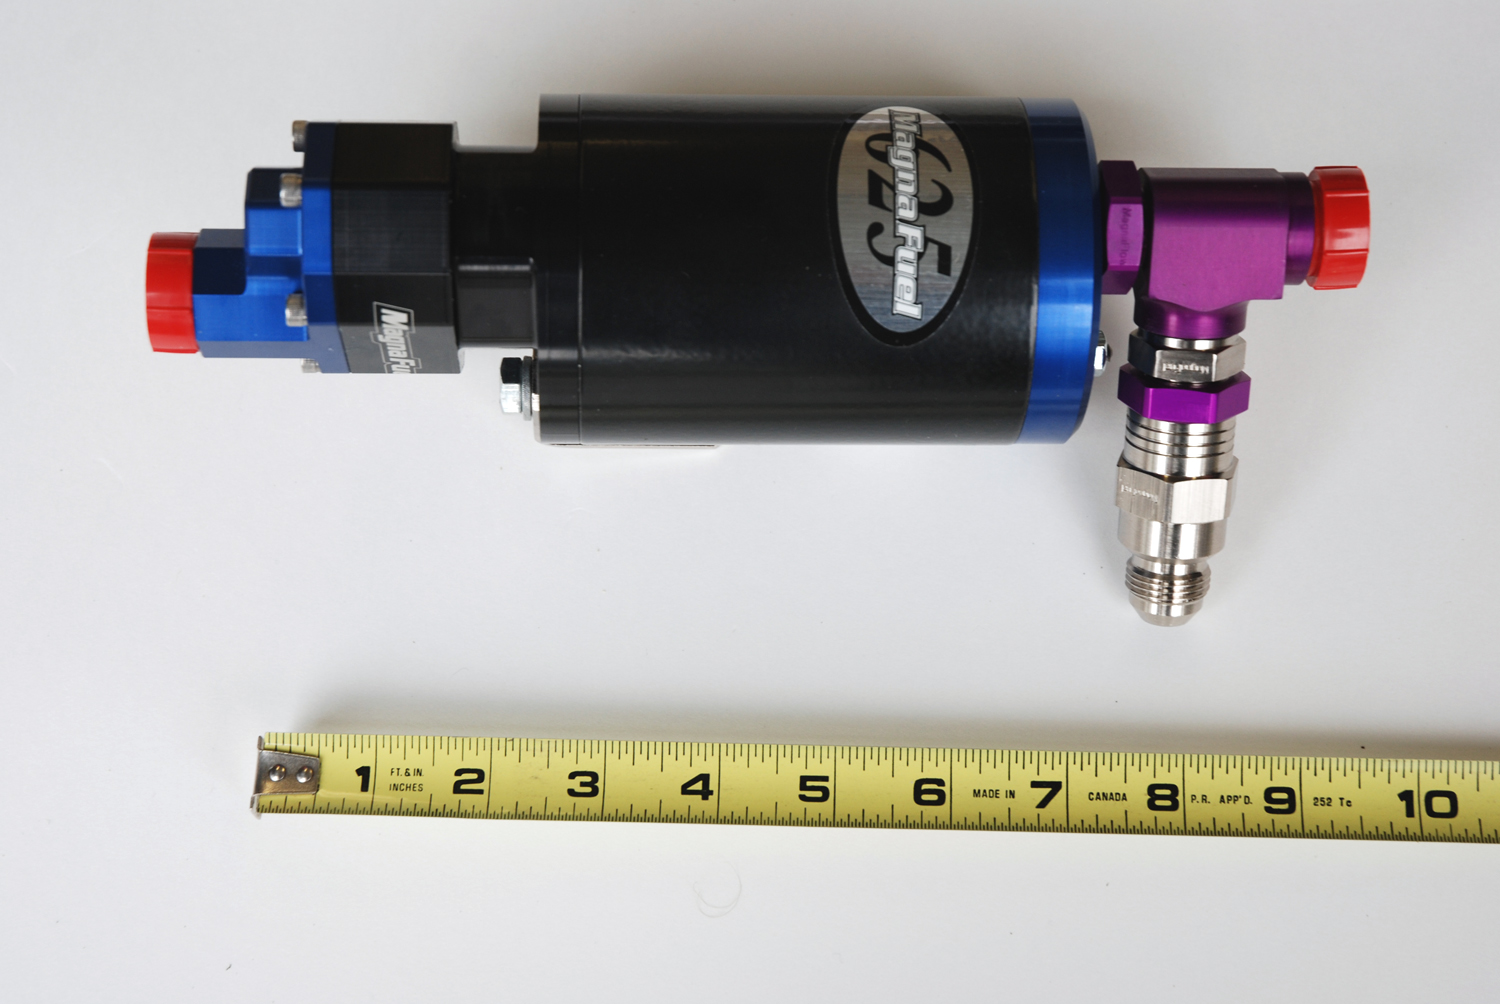
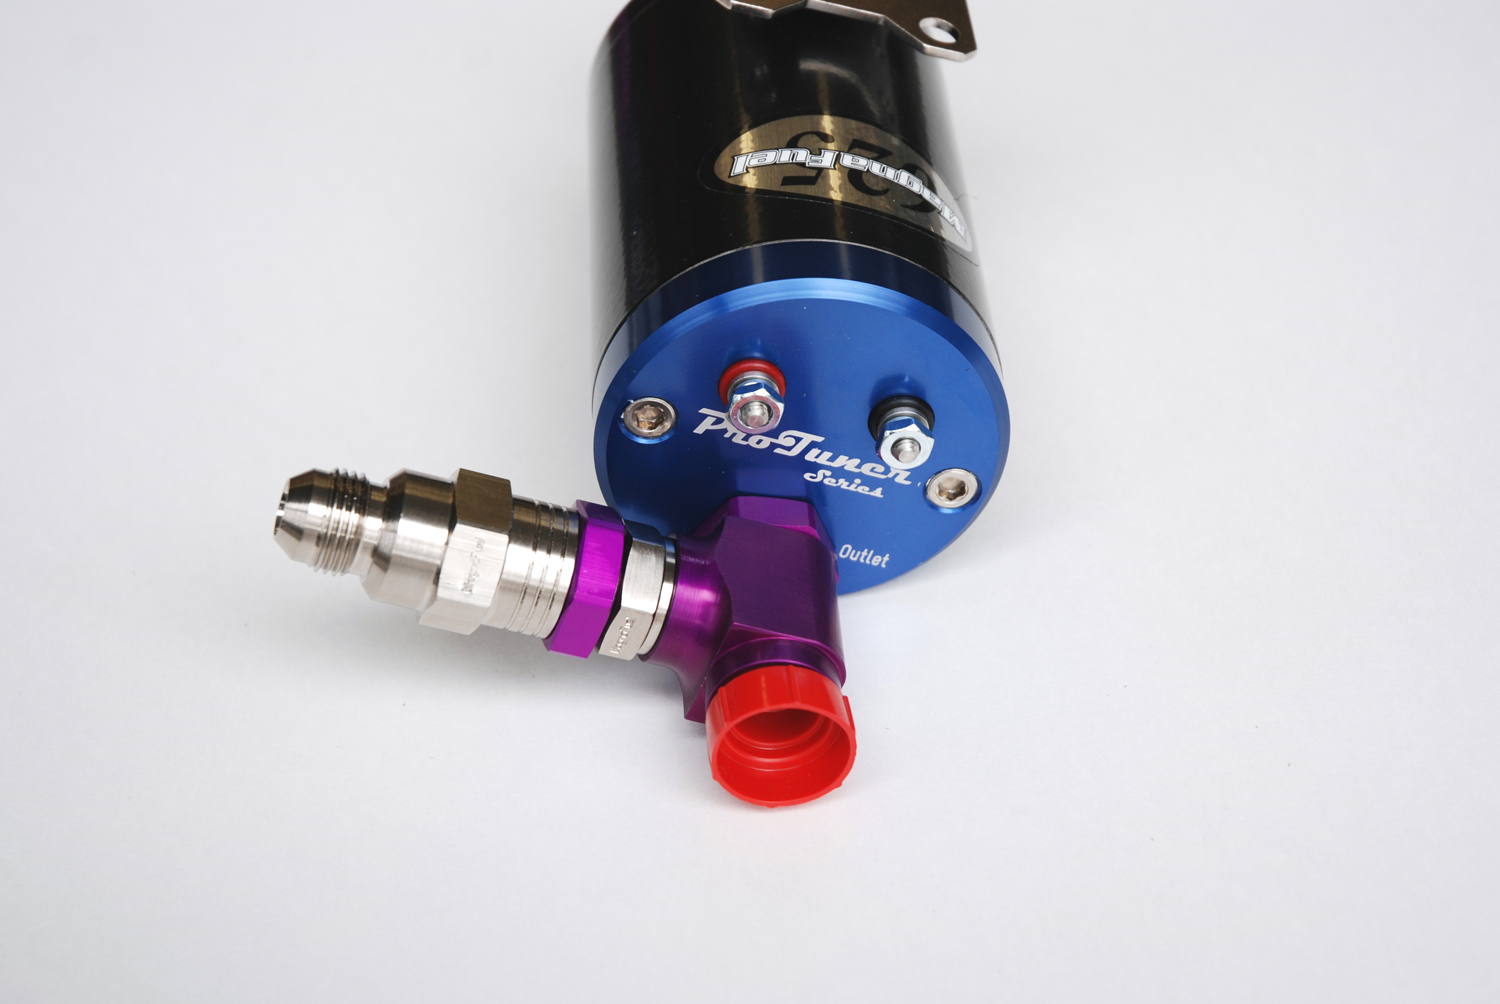
MagnaFuel ProTuner 625 Series electric fuel pump
MagnaFuel Fuel Filter, -10 AN inlet
MagnaFuel Fuel Filter, -8 AN inlet
MagnaFuel Pressure Regulator, 4-12 PSI
Spectra Premium Fuel Tank, 1984-87 Buick Grand National
Earl’s Cushioned Hose Clamps, 5/8-inch
Earl’s Cushioned Hose Clamps, 1/2-inch

Author: Wayne Scraba

Wayne Scraba is a diehard car guy and regular contributor to OnAllCylinders. He’s owned his own speed shop, built race cars, street rods, and custom motorcycles, and restored muscle cars. He’s authored five how-to books and written over 4,500 tech articles that have appeared in sixty different high performance automotive, motorcycle and aviation magazines worldwide.