Save for the occasional holiday parade, it’s not uncommon for gearheads in the northern parts of the planet to store their vintage vehicles for the winter. For a lot of folks, snow, frozen temps, and road salt combine to make driving in a classic car or truck a lot less fun during those cold-weather months.
But seasonal storage isn’t just a matter of pulling into your garage and walking away—it’s critically important to follow a few simple winterization guidelines to make sure your classic ride is ready to fire back up in the spring.
Perhaps more importantly, putting your vehicle up for long-term storage is a great chance to inspect it for rust, wear, or any other issues that you’ll want to address during the off-season.
So we’ll give your our seven step plan to classic vehicle winterization below. This isn’t necessarily a complete list, as your specific vehicle may have unique maintenance demands, but this should cover the mechanical basics for long term storage. (Depending on where you store your vehicle, factors like critters, weather, and sun exposure play a major role here too.)
***
Story Summary Overview:
- Proper preventative maintenance is critical during winter or seasonal storage
- It helps ensure the vehicle will stay safe during storage & will start up afterwards
- At the very least, we recommend 7 key steps:
- Change Oil & Filter
- Wash, Wax & Detail
- Check Gear Oil & Chassis Lube
- Inflate & Inspect Tires
- Stabilize Fuel
- Connect Trickle Charger
- Cover It
***
Our 7 Step Winterization Routine for Classic Vehicles
***
1. Change Oil & Filter

Even if you didn’t do enough summer cruising to require an oil change based on mileage alone, it’s always good practice to change your oil before putting a vehicle up for long-term storage. That’s because, thanks to engine blow-by, motor oil becomes gradually contaminated every time you fire the ignition.
Chemical contaminants in that old oil can attack bearings and seals inside your motor, so suffice it to say, you don’t want your engine soaking in it for months at a time.
Note: Many older engines, particularly those with flat tappet cams, demand zinc-enriched (ZDDP) oil. We’ll skip a lengthy explanation why, but in a nutshell, back in the 1990s, oil companies had to reduce the zinc levels in their oils, as the zinc could harm catalytic converters. That means these new oil formulations can potentially be detrimental to engines that were originally designed for higher zinc levels. Read way more about the importance of zinc here.
***
2. Wash, Wax & Detail (Including the Chassis!)
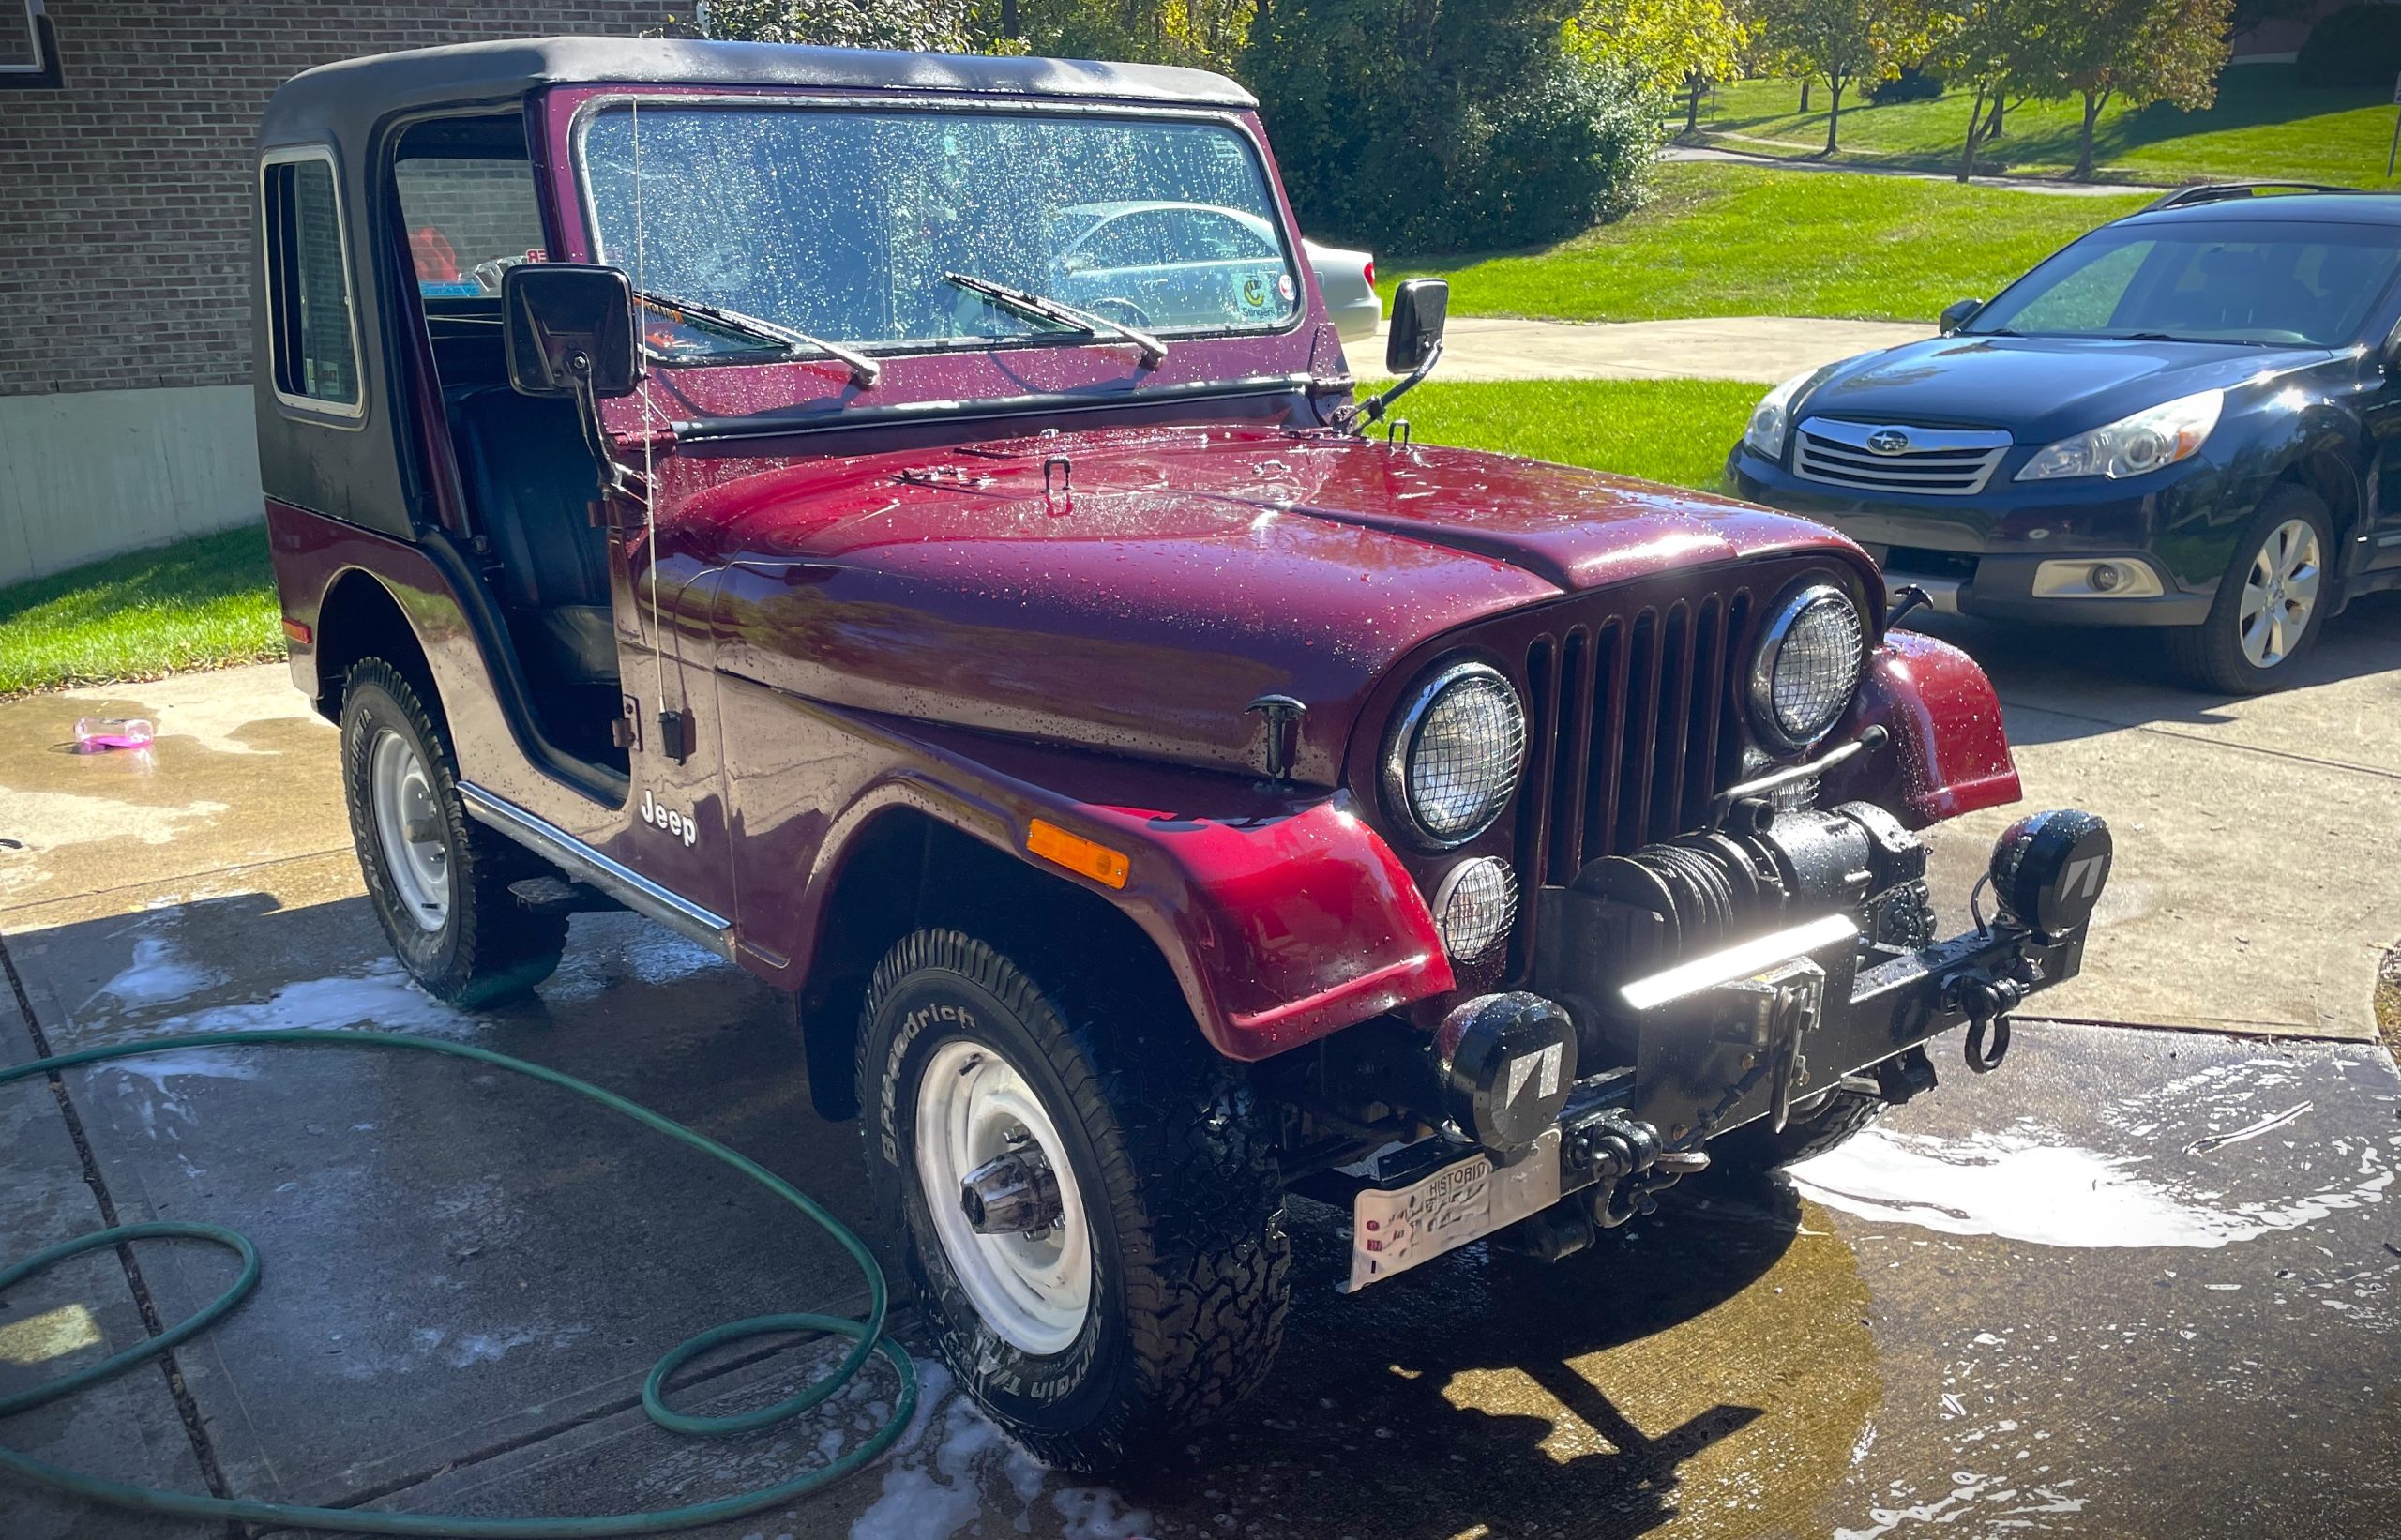
This is an obvious one, but important nonetheless. You don’t want to store a dirty vehicle. Over time even a seemingly-innocuous glob of gunk can etch chrome or permanently stain your paint. You’ll also want to wash and de-grease your chassis, just to make sure it’s squeaky-clean prior to its hibernation.
And when you detail your ride, you’ll be able to get up-close-and-personal with it, so you can look for potential issues like rust, rubbing lines/hoses, or weeping gaskets that can be addressed in the off season.
Finally, you’ll see in point seven below that we recommend you cover your vehicle during long-term storage–and you never want to pull a cover over any dirt, grit, or grime that’s collected on your paint.
***
3. Check Gear Oil & Lube Chassis/Hinges
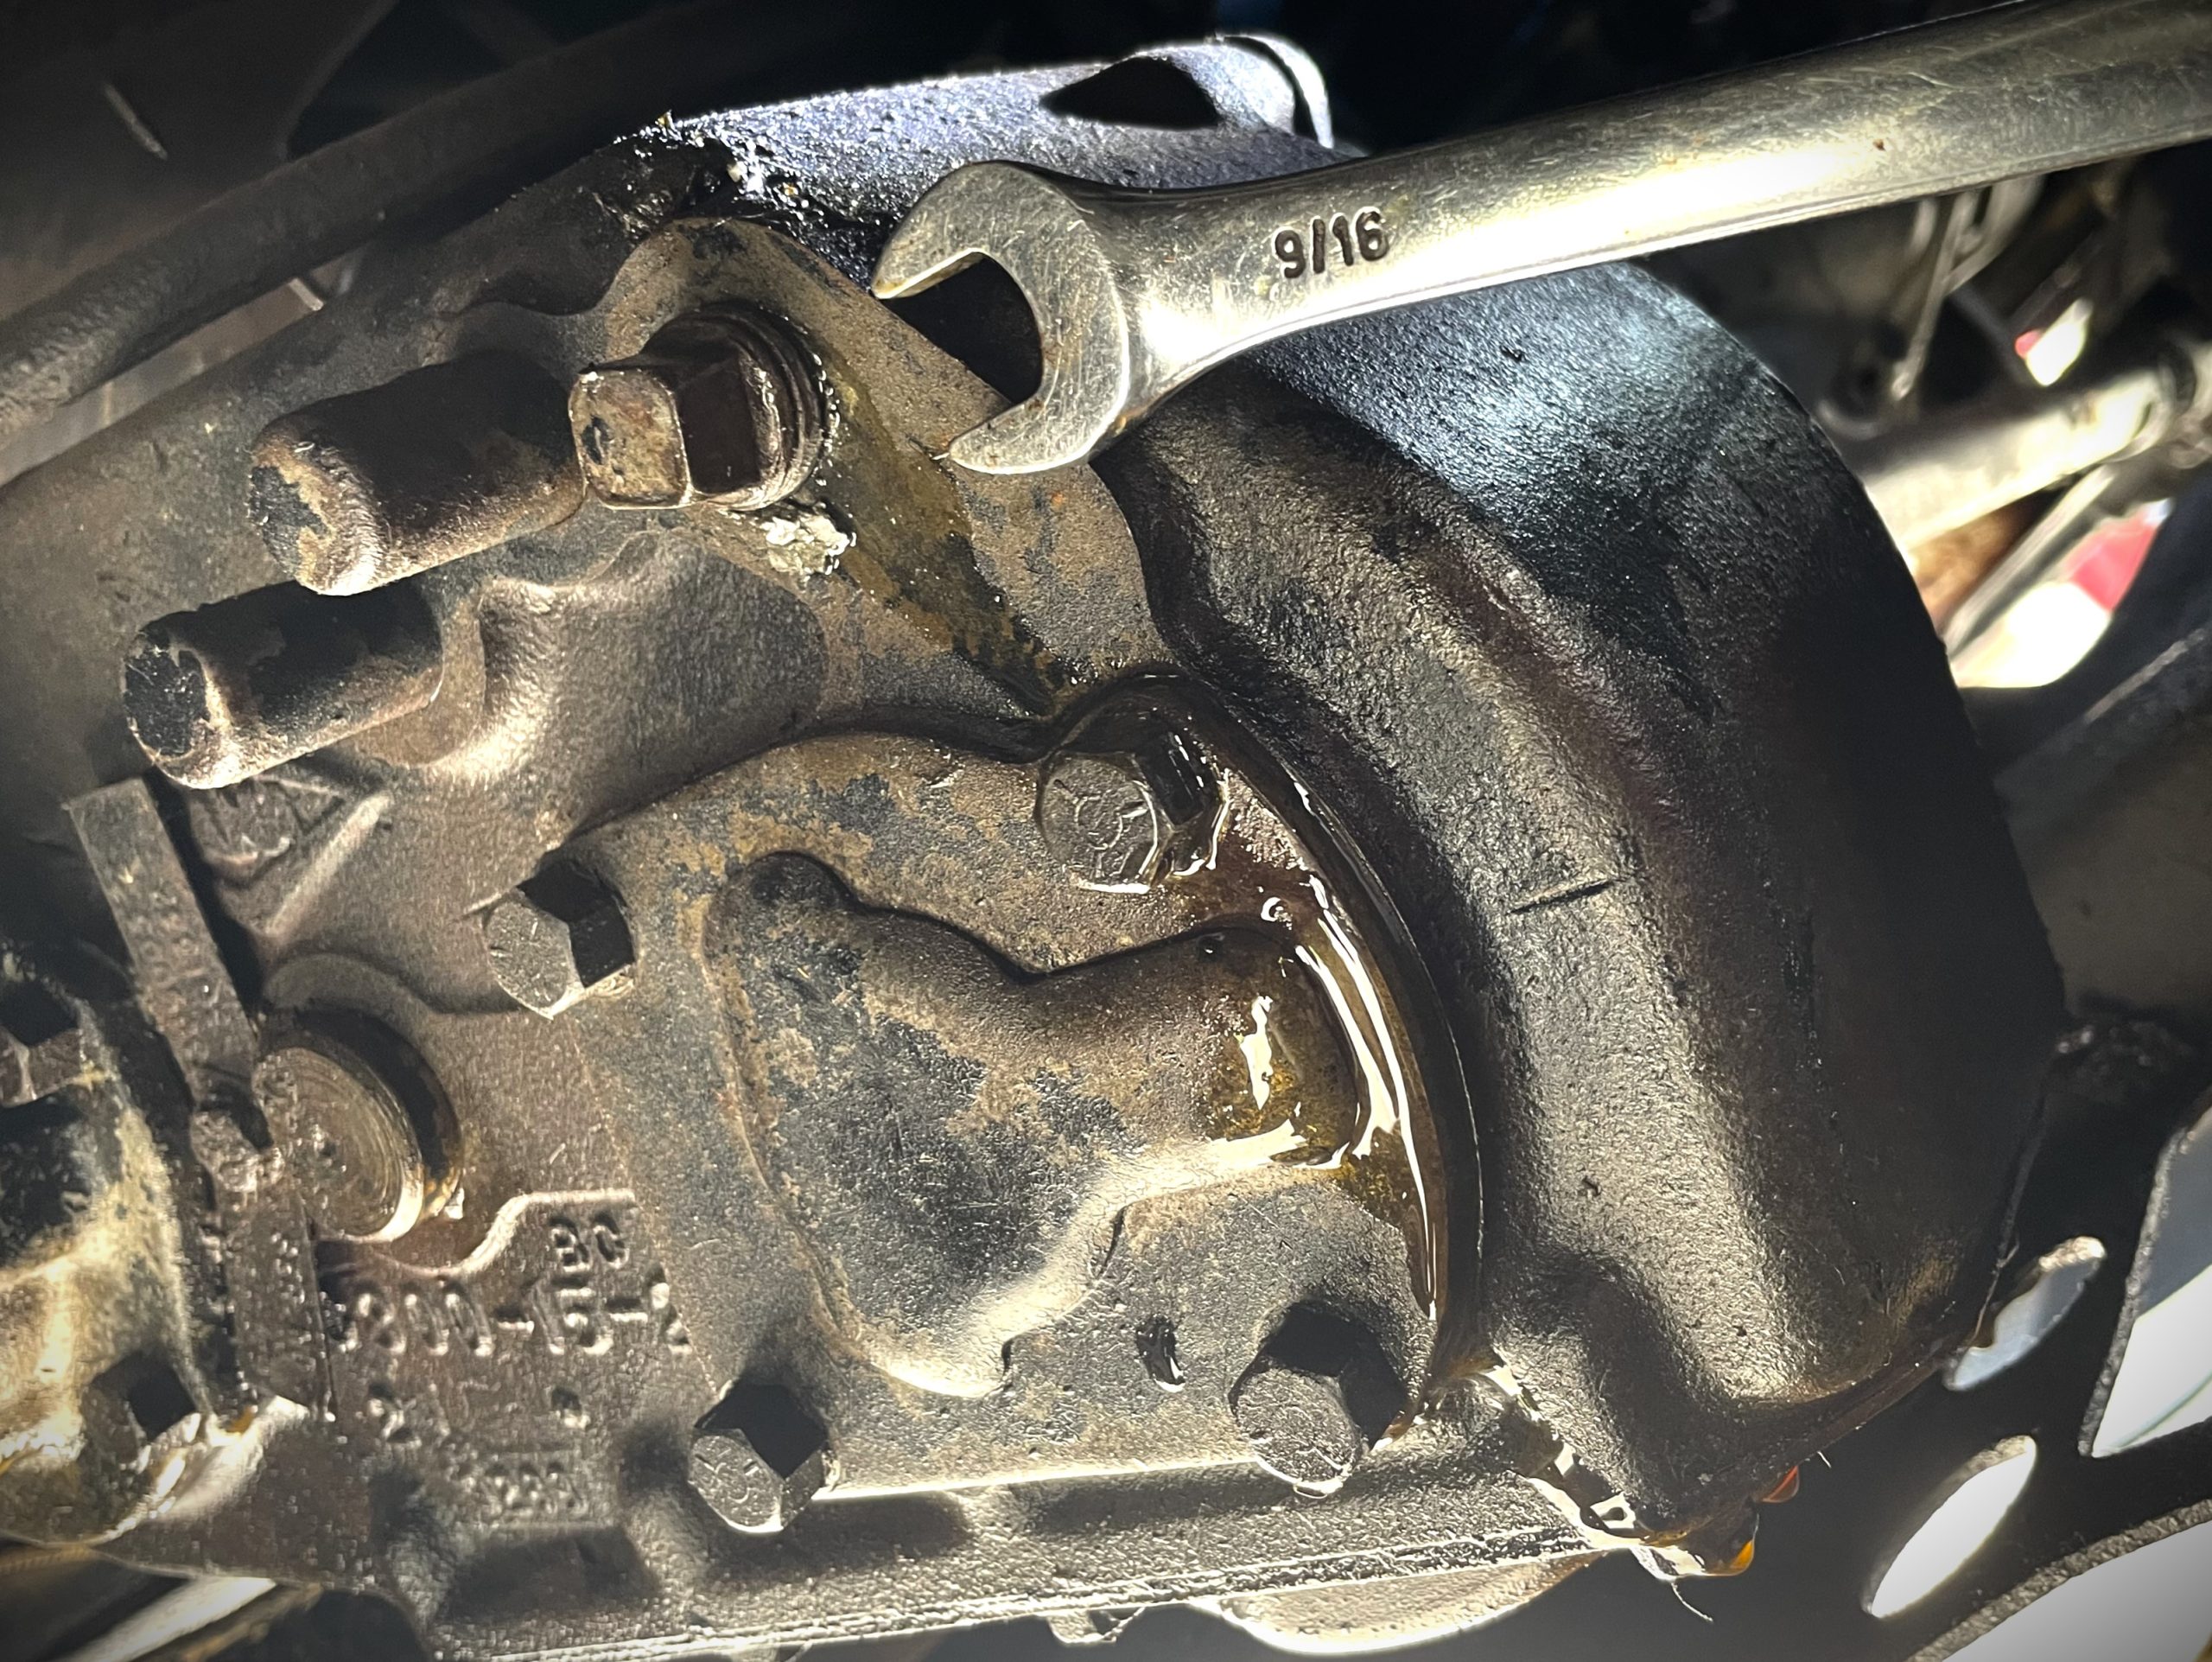
This is probably part of your regular seasonal maintenance anyway, but it’s extra important to do before long-term storage—poorly lubricated mechanisms like to seize up after they’ve been sitting for a while.
Start with checking the gear oil levels in your axle(s) and transmission (and obviously the transfer case too, if you’ve got a 4×4). Then bust out the chassis lubrication guide in your shop manual and hit all the grease nipples for, say, your steering knuckles, driveshaft yoke, U-joints, and clutch bellcrank.
And don’t just worry about the chassis, make sure to lubricate the less-critical stuff too, including door, hood, and hatch hinges, along with any place that incorporates mechanical movement as well (like cable-operated HVAC pulls, seat sliders, and window cranks).
***
4. Inspect & Inflate the Tires
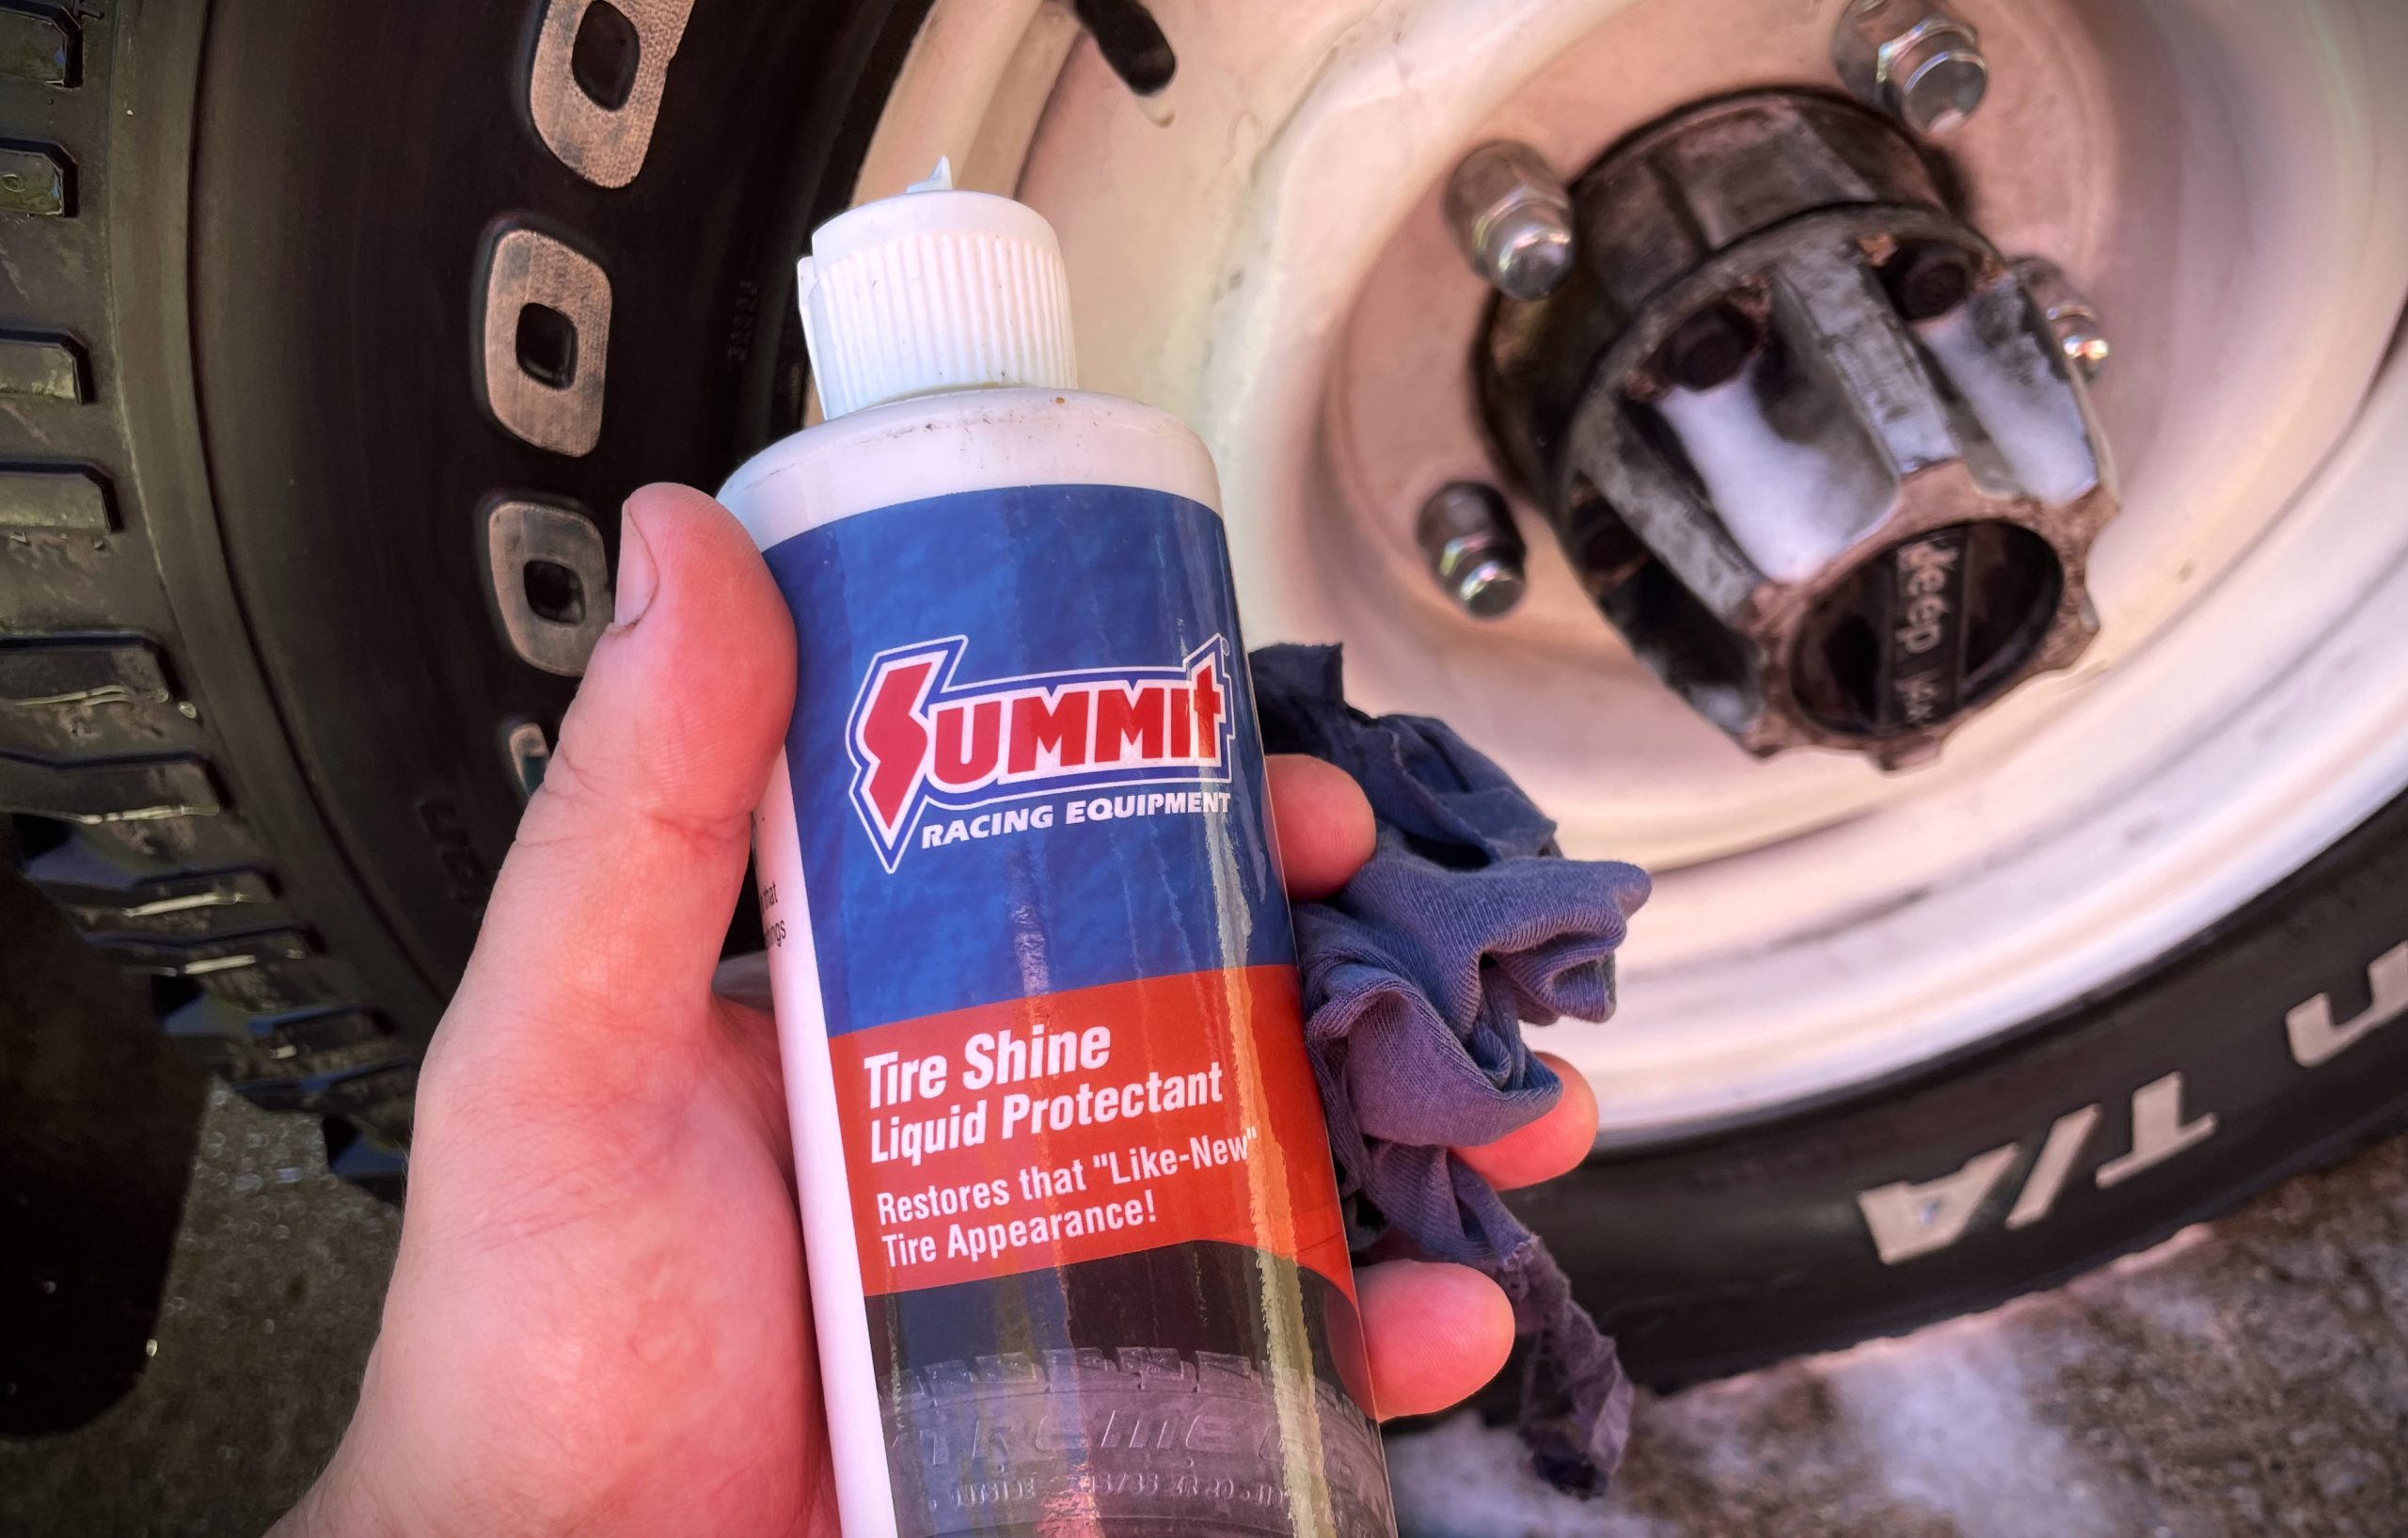
This is particularly important if you’re running vintage-style bias-ply tires on your classic car or truck, but regardless of your tire construction, you should always check the PSI before the vehicle goes into long-term storage. We tend to slightly(!) over-inflate the tire to compensate for the gradual deflation over time, coupled with the effect of colder, denser air on the tire pressure.
There’s a raging debate on whether you should keep a vehicle suspended on jackstands for long-term storage to avoid deforming or flat-spotting the tires, and we won’t wade into that discussion here. That said, in our experience, seasonal storage for three or four months isn’t likely to harm a modern tire (bias-ply or radial) that’s properly inflated.
Still though, it’s always a good idea to check the PSI every few weeks or so while the vehicle is in storage, to ensure you don’t have a significant leak somewhere—the last thing you want is a rim resting on a crushed tire bead thanks to a completely deflated tire.
If you’re really concerned about flat spots forming on your tires during long term storage, a nice set of tire saver ramps will prevent that from happening.
***
5. Top-Off & Stabilize the Fuel
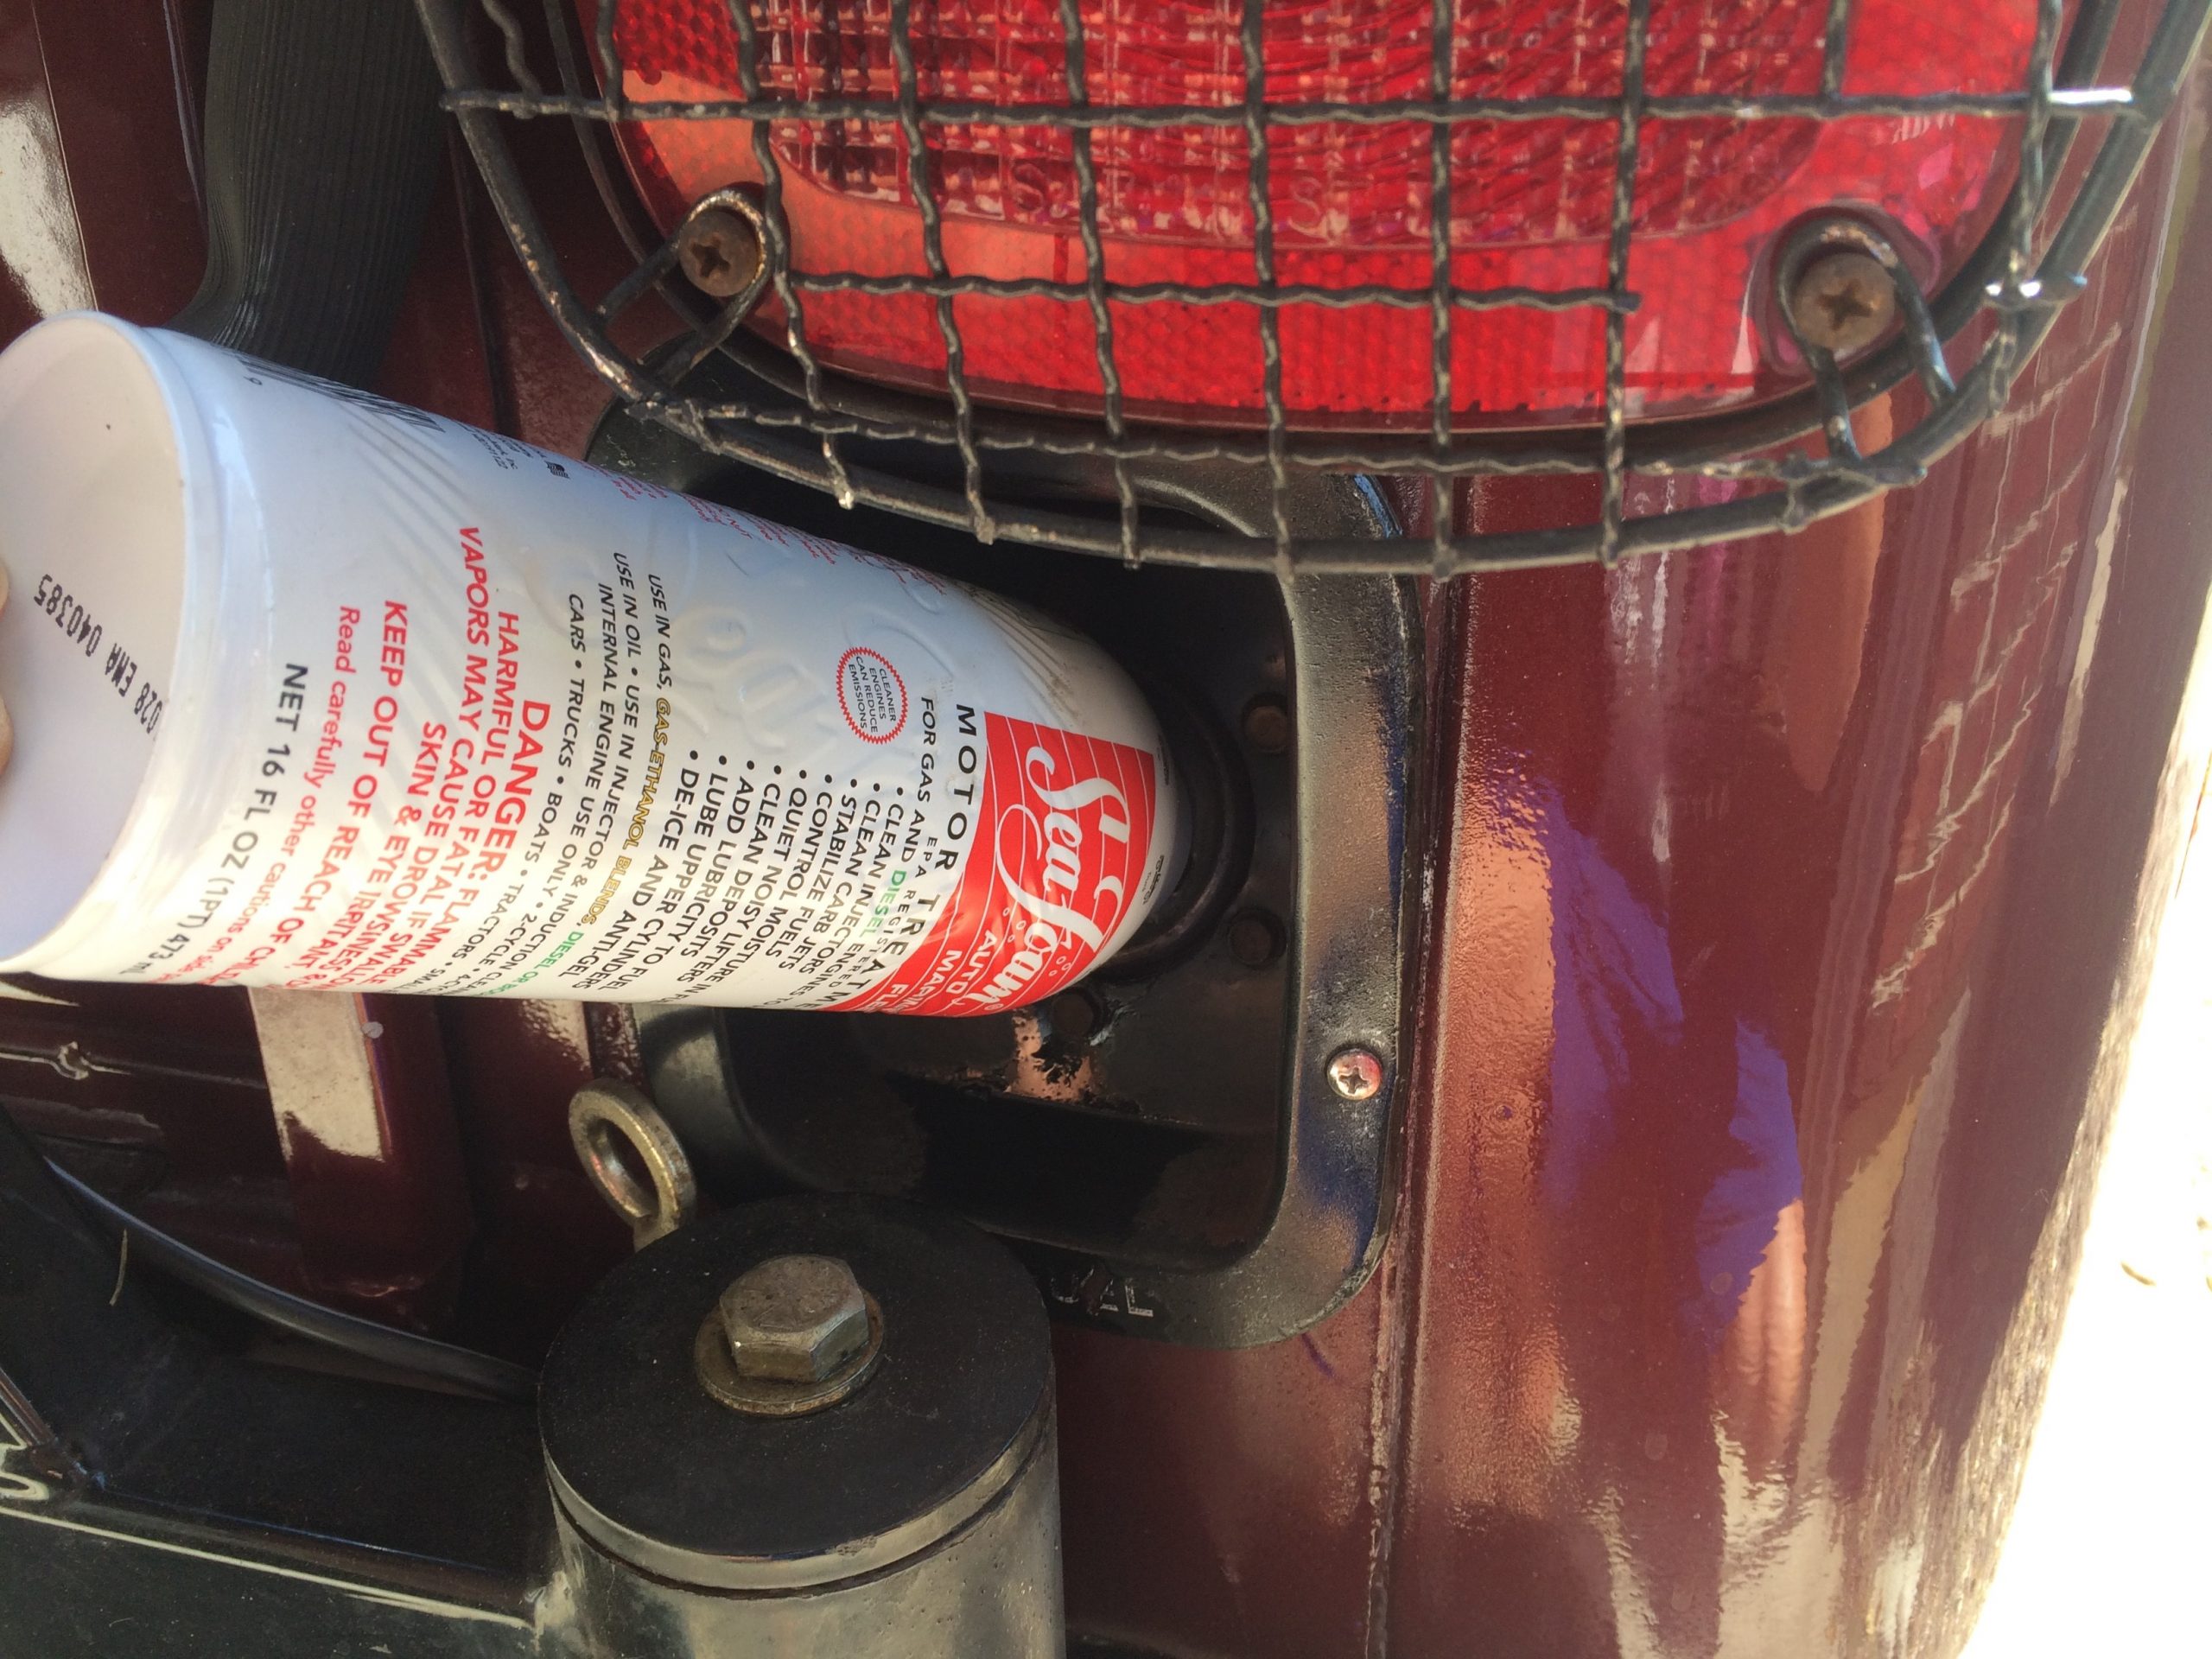
Without diving into a full-blown chemistry lecture here, it’s safe to say that fuel doesn’t like to sit for too long. Give it enough time and it will essentially separate into water and varnish, neither of which is any good for your engine, tank, or fuel lines.
That’s where a good fuel stabilizer comes in. It will prevent that from happening and ensure your fuel stays fresh and ready to feed your engine in the spring. While manufacturers vary, most stabilizers we’ve come across can effectively preserve fuel for one to two years.
Though some folks argue that you should completely drain the fuel system for seasonal storage*, in our experience, a quality fuel stabilizer eliminates the need for such a hassle. In fact, we completely fill the tank before we add the stabilizer to reduce the amount of exposed metal inside the tank (it won’t rust, if submerged in properly stabilized fuel).
Tip: After you dump the stabilizer in your tank, make sure to run the engine for a few more minutes (or better yet, drive the vehicle around your neighborhood). This ensures that the fuel is sufficiently mixed with the stabilizer and is pulled up into the rest of your fuel system.
* If you plan to store the vehicle for a longer duration, then draining the fuel system becomes an increasingly good idea.
***
6. Charge the Battery & Connect a Trickle Charger
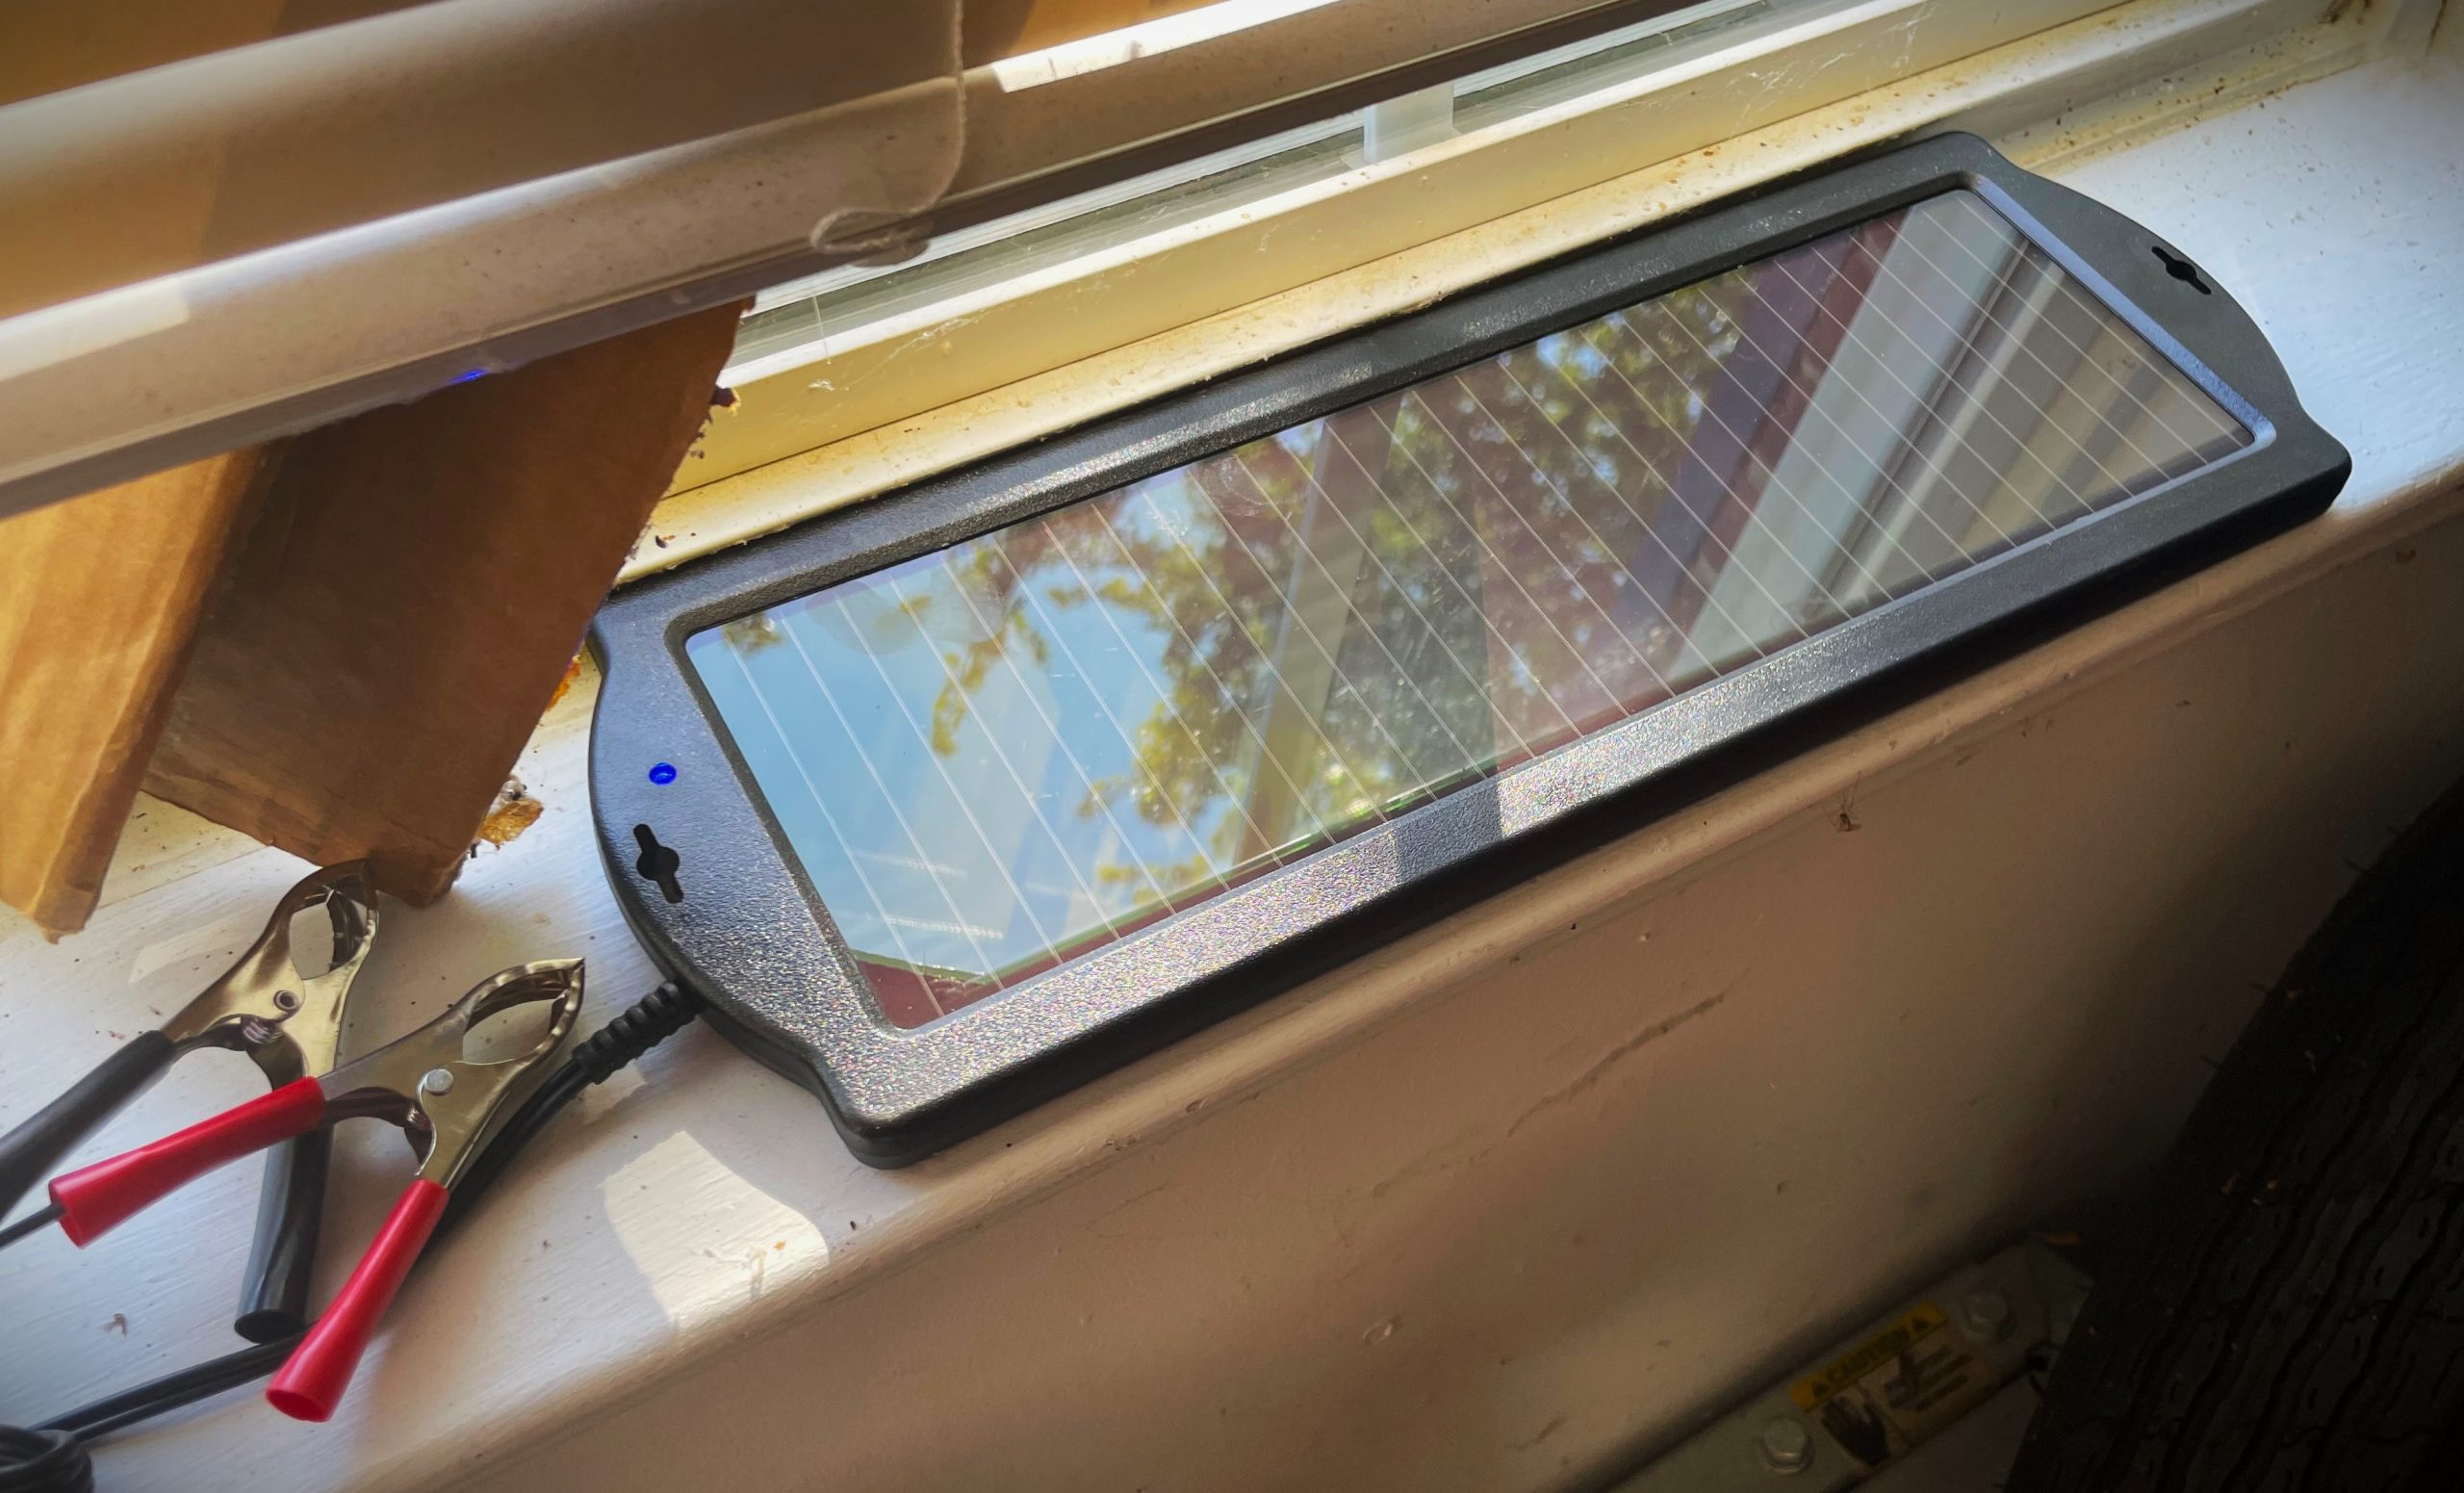
A healthy battery will gradually discharge over time—and that’s true even if it’s been disconnected from the vehicle’s electrical system**. Worse yet, if a battery stays discharged for long enough, it could be irreparably damaged. That’s why a trickle charger is cheap, easy insurance.
In contrast to a traditional battery charger, a trickle charger simply feeds your battery a constant low-current diet of amps, so that it stays topped-off and happy.
But before you connect your trickle charger, make sure the battery is fully charged—either by driving the vehicle around or by connecting it to an ordinary battery charger.
** We typically don’t recommend disconnecting a battery from the vehicle. If its electrical system is in good working order, the overall effect would be negligible. More importantly, leaving the power disconnected for a long duration could potentially cause issues if you’ve got a modern stereo, security system, or more importantly, an aftermarket EFI setup with an ECU.
Fighting a phantom electrical drain in your vintage ride? Read this.
***
7. Cover It
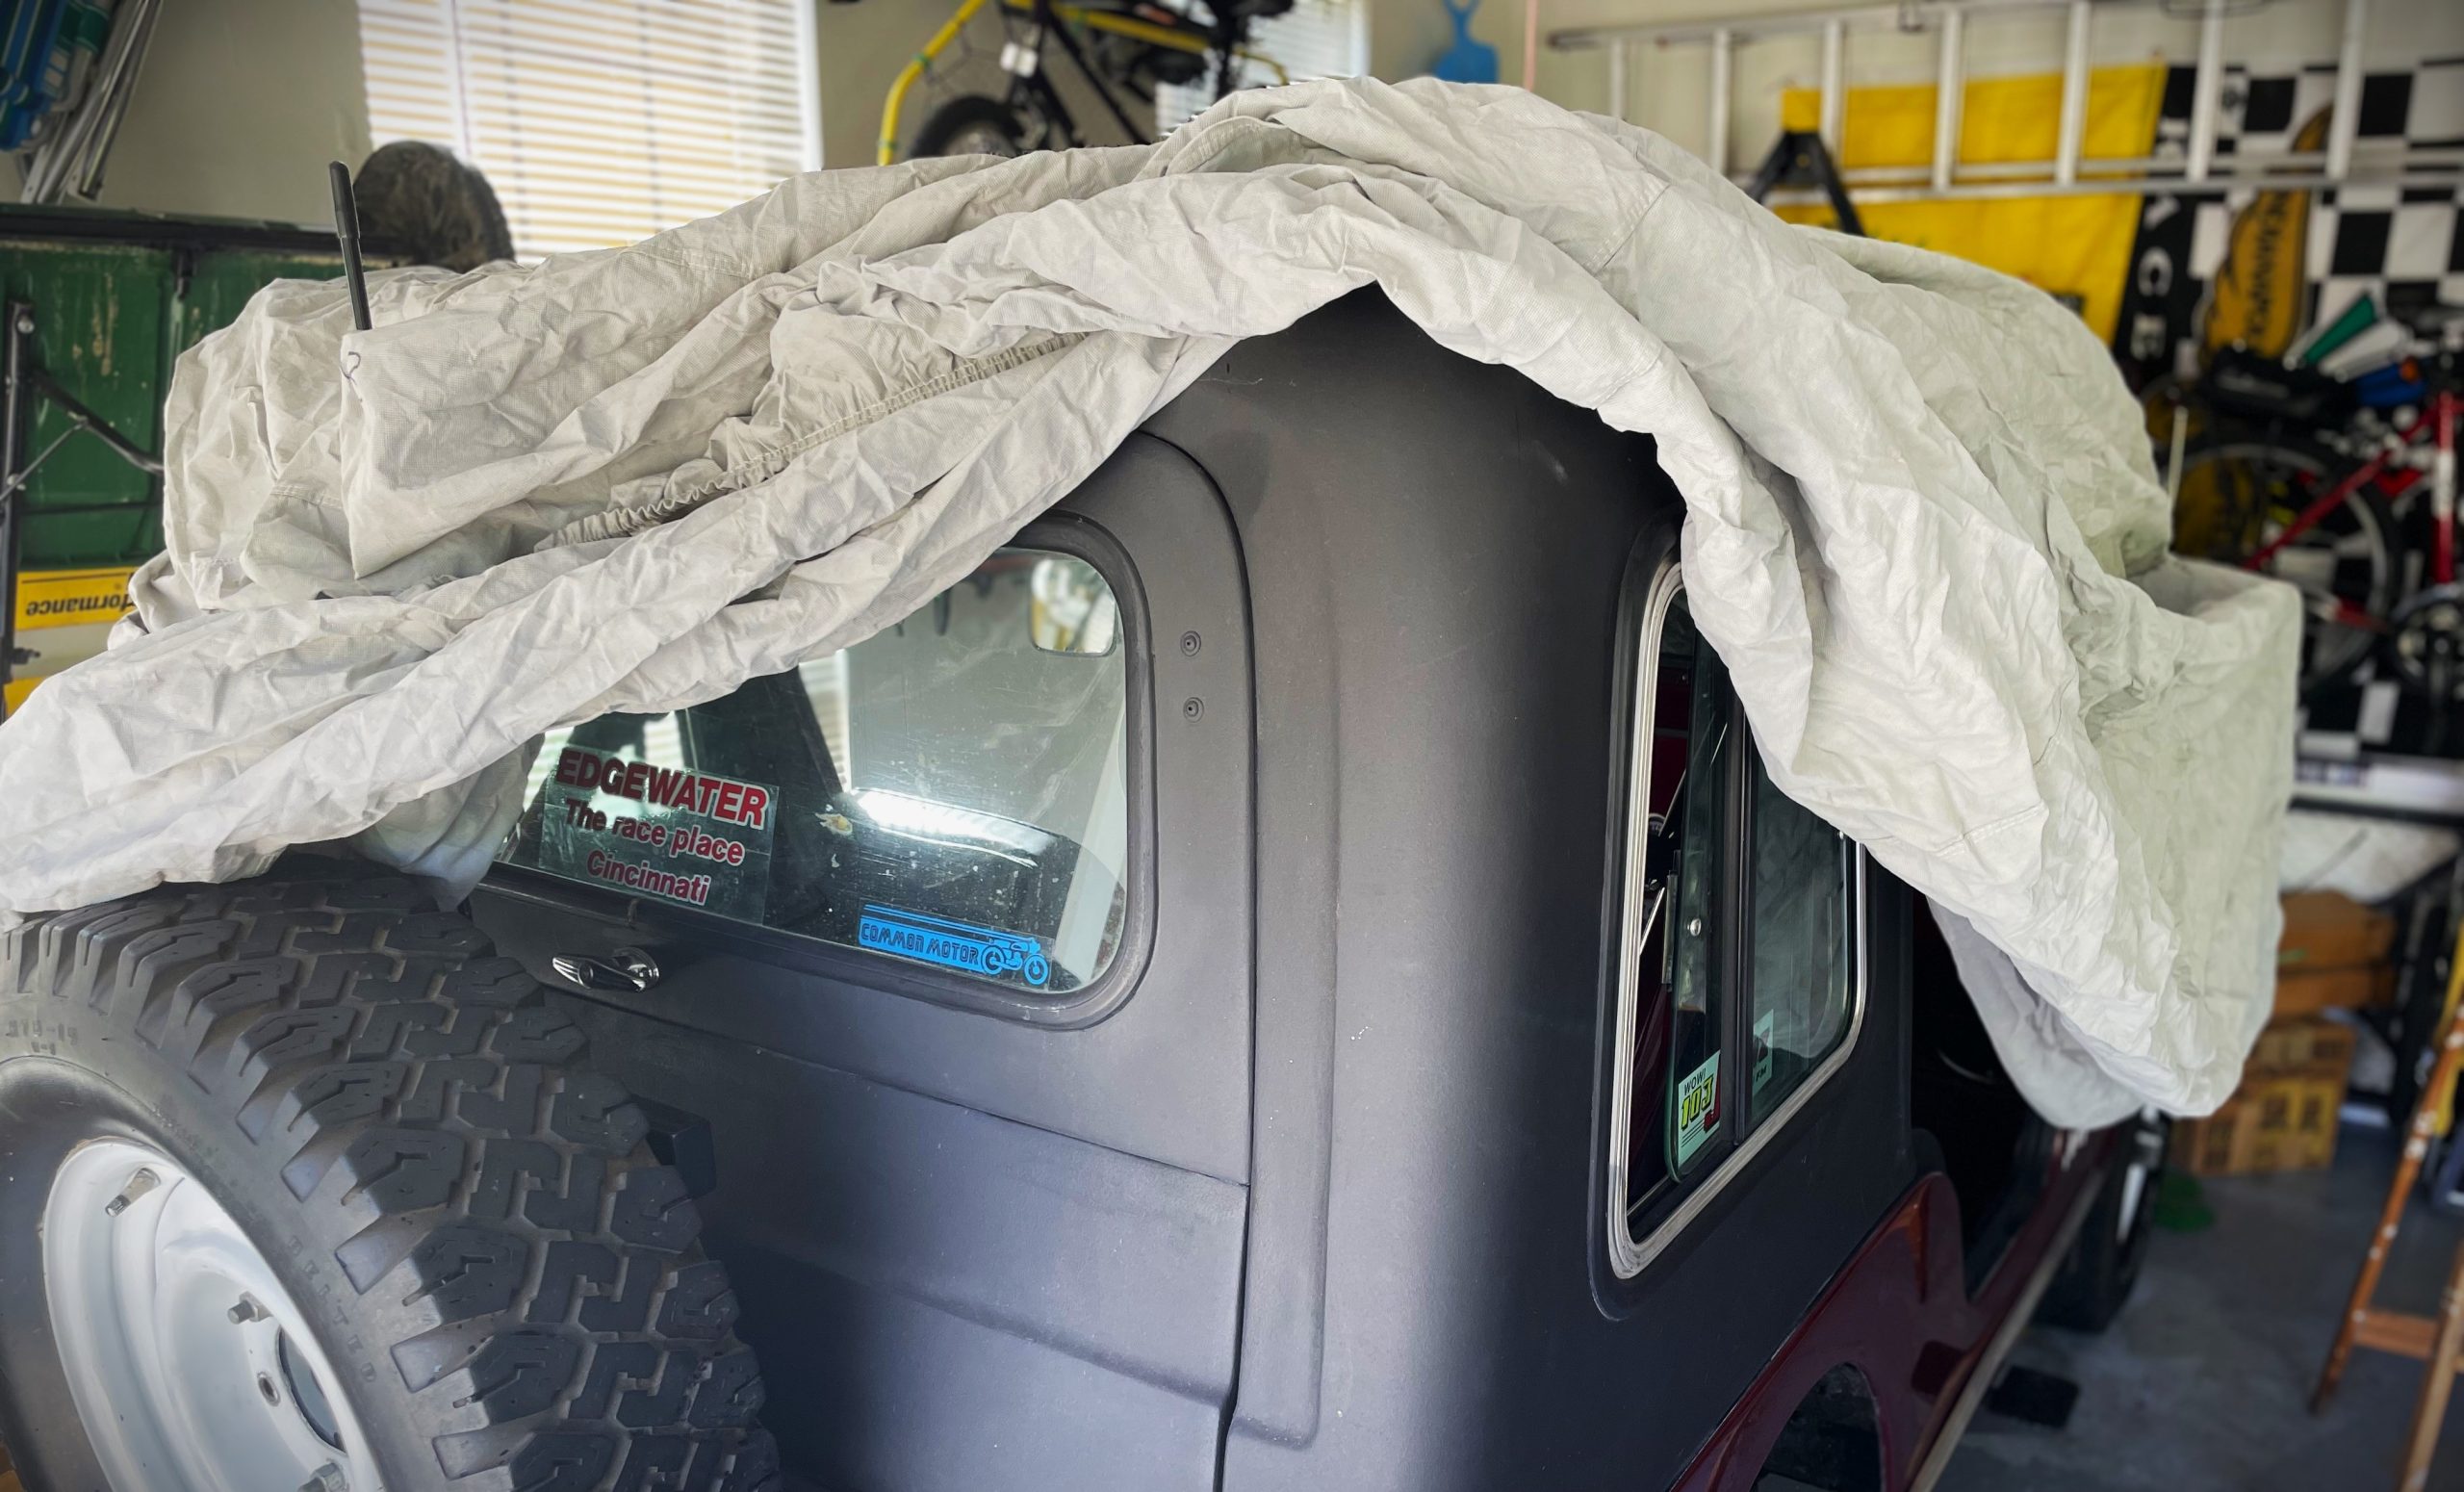
This last one has a lot to do with where you’re storing your vehicle. If you have the luxury of inside storage, than a cloth dust cover might be all you need. But if you’re storing it outside, say in a car port or even in a barn, you’ll likely need something more robust to guard against the elements.
Don’t be tempted to buy a few box store tarps either, as you’ll want something breathable, elsewise the material will trap moisture in your vehicle—essentially creating a rain forest-like biosphere in your classic car or truck where rust, mold, and mildew can thrive. In other words, you want a purpose-made quality vehicle cover.
But! Before you cover your car or truck, follow these three principles:
- Wash the Vehicle First. If you did your job in point two, this is a non-issue. But again, you don’t want to pull a nice, clean car cover over a gritty, dirty surface, elsewise there’s a good chance you’ll scratch the paint.
- Don’t Cover It Hot. If it’s been running, let the vehicle (engine, exhaust, etc.) cool down before you toss on the cover—same deal if its baking in the sun all day. Wait until the body is cool, as you don’t want to risk the cover being damaged (or worse yet, bonding to your finish).
- Clean the Cover Occasionally. Make sure the cover itself is free of any gunk or grit too with a regular wash schedule. But be careful! You could damage your cover by cleaning it incorrectly. There’s a good tutorial here.
***
Bonus Tip: Don’t Start the Engine Until Spring!
Another raging debate on the internet is the need to regularly start the motor (say, every week or two) to keep the fuel system primed and oil up on the valvetrain and in the bearings.
We definitely say you shouldn’t do that. Just follow the steps outlined above…and leave the vehicle alone until you’re ready to start driving it again for the next season. OnAllCylinders contributor Jeff Smith offers a good explanation why here: Should I Start My Vehicle’s Engine Periodically During Winter Storage?
***
Again, this wasn’t a definitive list, and depending on your vehicle and where you’re storing it, there may be other factors to consider here too. But at the very least, these key bits of mechanical and cosmetic maintenance are a great step towards ensuring your classic car or truck is ready to go in the spring for another season of warm-weather cruising.
See ya then.
***
You may enjoy our other vehicle seasonal storage/winterization articles too:
Comments