Wheel alignments are often thought of as a job for professionals with fancy laser-guided equipment. Or in other words, something you can’t do at home.
But nothing could be further from the truth.
In fact, plenty of enthusiasts use DIY wheel alignment equipment on a regular basis. For example, folks who set up their street cars for autocross (gymkhana or “pro solo”) events frequently revise the wheel alignment setup for the task in hand. Sometimes the wheel alignment is tweaked on-site to make the car work better. And in many cases, the alignment settings are such that you’d never use them on the street, but they’re perfect for beating up cones.
Folks who drag race their street driven cars can also make use of quick changes in the wheel alignment department. Drag cars like a lot of caster. They don’t like any negative camber. They like a tiny amount of toe in. And many drag race alignments are done with the front end raised up to mimic actual conditions. Some of those changes make the car more difficult to live with on the street (case-in-point is parallel parking a manual steering car with a ton of caster).
That’s why GM cars of yesteryear had very little caster—it made low speed maneuvers easier for Edith and Archie when they were driving their manual steering econobox.
Circle track racers are in the same boat. They vary the steering setup based upon the track, conditions, tires, and so on. Sometimes those alignment specs are changed right at the track.
If you’re wondering, it’s really not that difficult to setup a car at the track or in your home garage. Once you get the hang of it, you can actually perform a setup or setup change in minutes (not hours). You just need the appropriate tools (home brewed or otherwise).
As it turns out, Summit Racing has a wide range of wheel alignment equipment. We’ll get into some of that hardware in our list below, and in particular, we’ll feature some tools and insight from QuickTrick Alignment.
The tips below are a mix from the writer along with the folks from QuickTrick. They’ll definitely help when it comes to easing the pain of alignment.
***
12 Home-Brewed DIY Wheel Alignment Tips
***
1. Figure Out Ride Height First

Before you perform a wheel alignment, ensure the ride height is set and the chassis is setup. For more details on this process, check out my earlier article here: Establishing a Baseline Street Car Chassis Setup for Quarter Mile Drag Racing.
Any time ride height is changed, it has an effect upon wheel alignment.
***
2. Tire Pressure

Always double check tire pressure before you begin. Make sure it’s the same side to side. More or less PSI in a tire can actually influence the wheel alignment setup.
***
3. Getting Settled

QuickTrick points out you should settle the suspension system prior to taking and changing measurements and dimensions. What you need to do is bounce the car on the suspension a wee bit before beginning the alignment.
***
4. Drag Race Ride Height

We alluded to this above, but it’s common to setup a drag car with the front end raised about 1 to 1.5 inches. This is easily accomplished by placing a floor jack under the chassis and lifting it up. We simply check the distance between the top of the front wheel wells and the ground when at rest, and then measure it when it’s raised on the floor jack. This simulates the way your car runs down the dragstrip.
***
5. Homemade Turn Plates

Turn plates make wheel alignments a whole bunch easier. No secret. But they can be cost prohibitive, especially if they’ll only see occasional use in a home garage. QuickTrick Alignment suggests you try a couple of vinyl floor tiles with either oil or table salt (yes, table salt) between them.

***
6. Steering Straight

Start the alignment process with the steering wheel centered. Place a piece of tape on the top center of your steering wheel. That will give you a quick visual to see where you’re at when making steering adjustments.
***
7. Follow the Correct Wheel Alignment Process
Set caster and camber first. Then set toe. Always check the toe when making camber or caster adjustments. Changing caster and camber will usually change toe settings.
***
8. Importance of Roll When Setting Toe

When dealing with toe measurements, it is important to check your measurements several times during the adjustment process (see above tip). It’s also very good practice to roll the car backward and then forward approximately 10 feet prior to setting the toe. This loads the front tires and provides more accurate measurements.
QuickTrick Alignment advises that toe is far more sensitive than camber or caster. Its experts also note that when setting up a car, begin with small, adjustments and keep things as balanced as possible to find the right spot between aggressive turn-in and stable braking and acceleration.
***
9. Level Playing Field

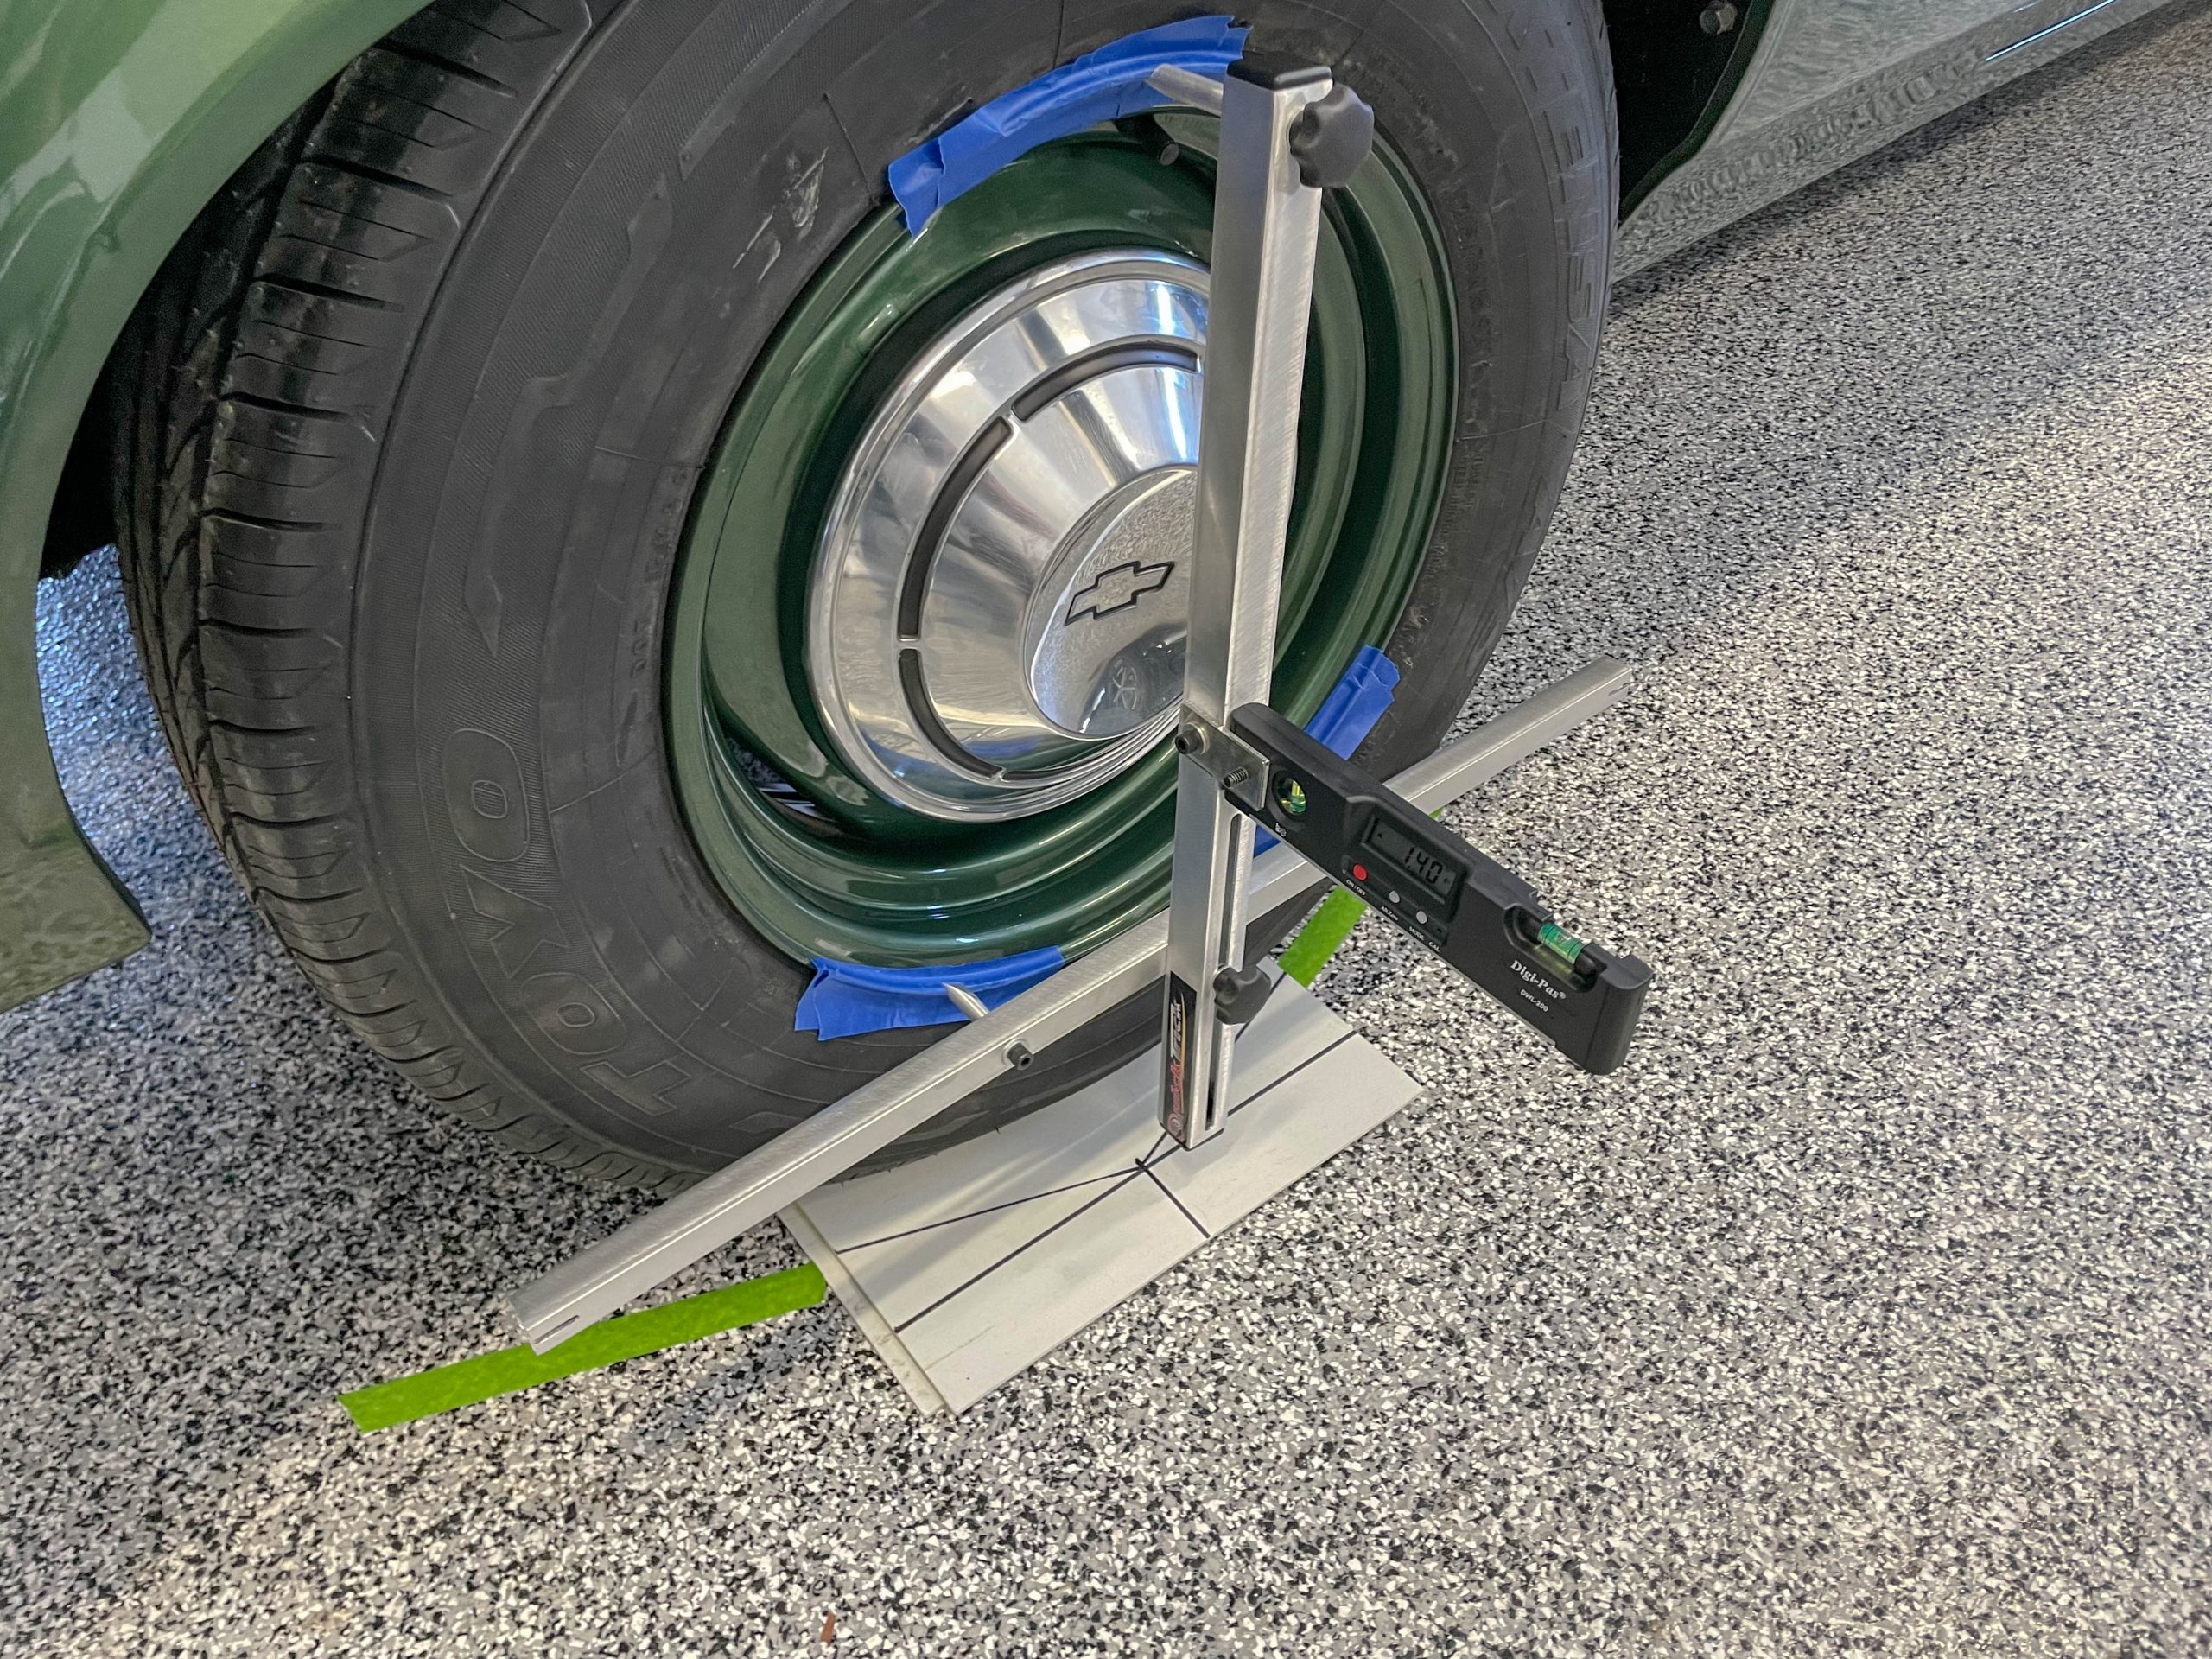
Do alignments have to be performed on a perfectly level surface? Not if you use something like the QuickTrick Alignment system. Its QuickTrick Gauge features a calibration button to zero that will level and compensate for any unlevel surface. (With the exception of grass or muddy surfaces).
This is important for garage floors with drains—usually the concrete slopes toward the drain.
***
10. Tape Protection

Several home alignment systems are indexed off the wheel flange and use metal pins for mounting. In order to prevent marring the wheels, simply use green or blue painter’s tape on the wheels to protect them from pins.
***
11. You Can’t Align Worn-Out Parts

Don’t bother trying to align worn parts. Replace them first and then perform the alignment. This includes both worn out suspension parts and worn out tires. You can’t fix broken.
***
12. Shim Stock
It’s obvious that shims are regularly used to set both caster and camber. Exceptions include cars that use eccentrics for adjustment along with some aftermarket upper A-arms that use caster slugs (Detroit Speed comes to mind). Elsewhere alignment shims are used for the setup.
When selecting shims, stainless examples are preferred. Keep in mind shims are readily available in 1/32, 1/16, and 1/8 inch thicknesses. Clearly, it’s better to use as few shims as possible. For example: Instead of using two 1/16 inch shims stacked together, substitute with an 1/8 inch shim. Summit Racing offers all sorts of different alignment shims.
***
Bonus! The Effects of Wheel Alignment
For more on the effects of wheel alignment, check this article out: Alignment 101 – QuickTrickApedia

Comments