Whether it’s gas, diesel, or electric, Summit Racing’s going to find a way to hot rod every vehicle it gets its hands on.
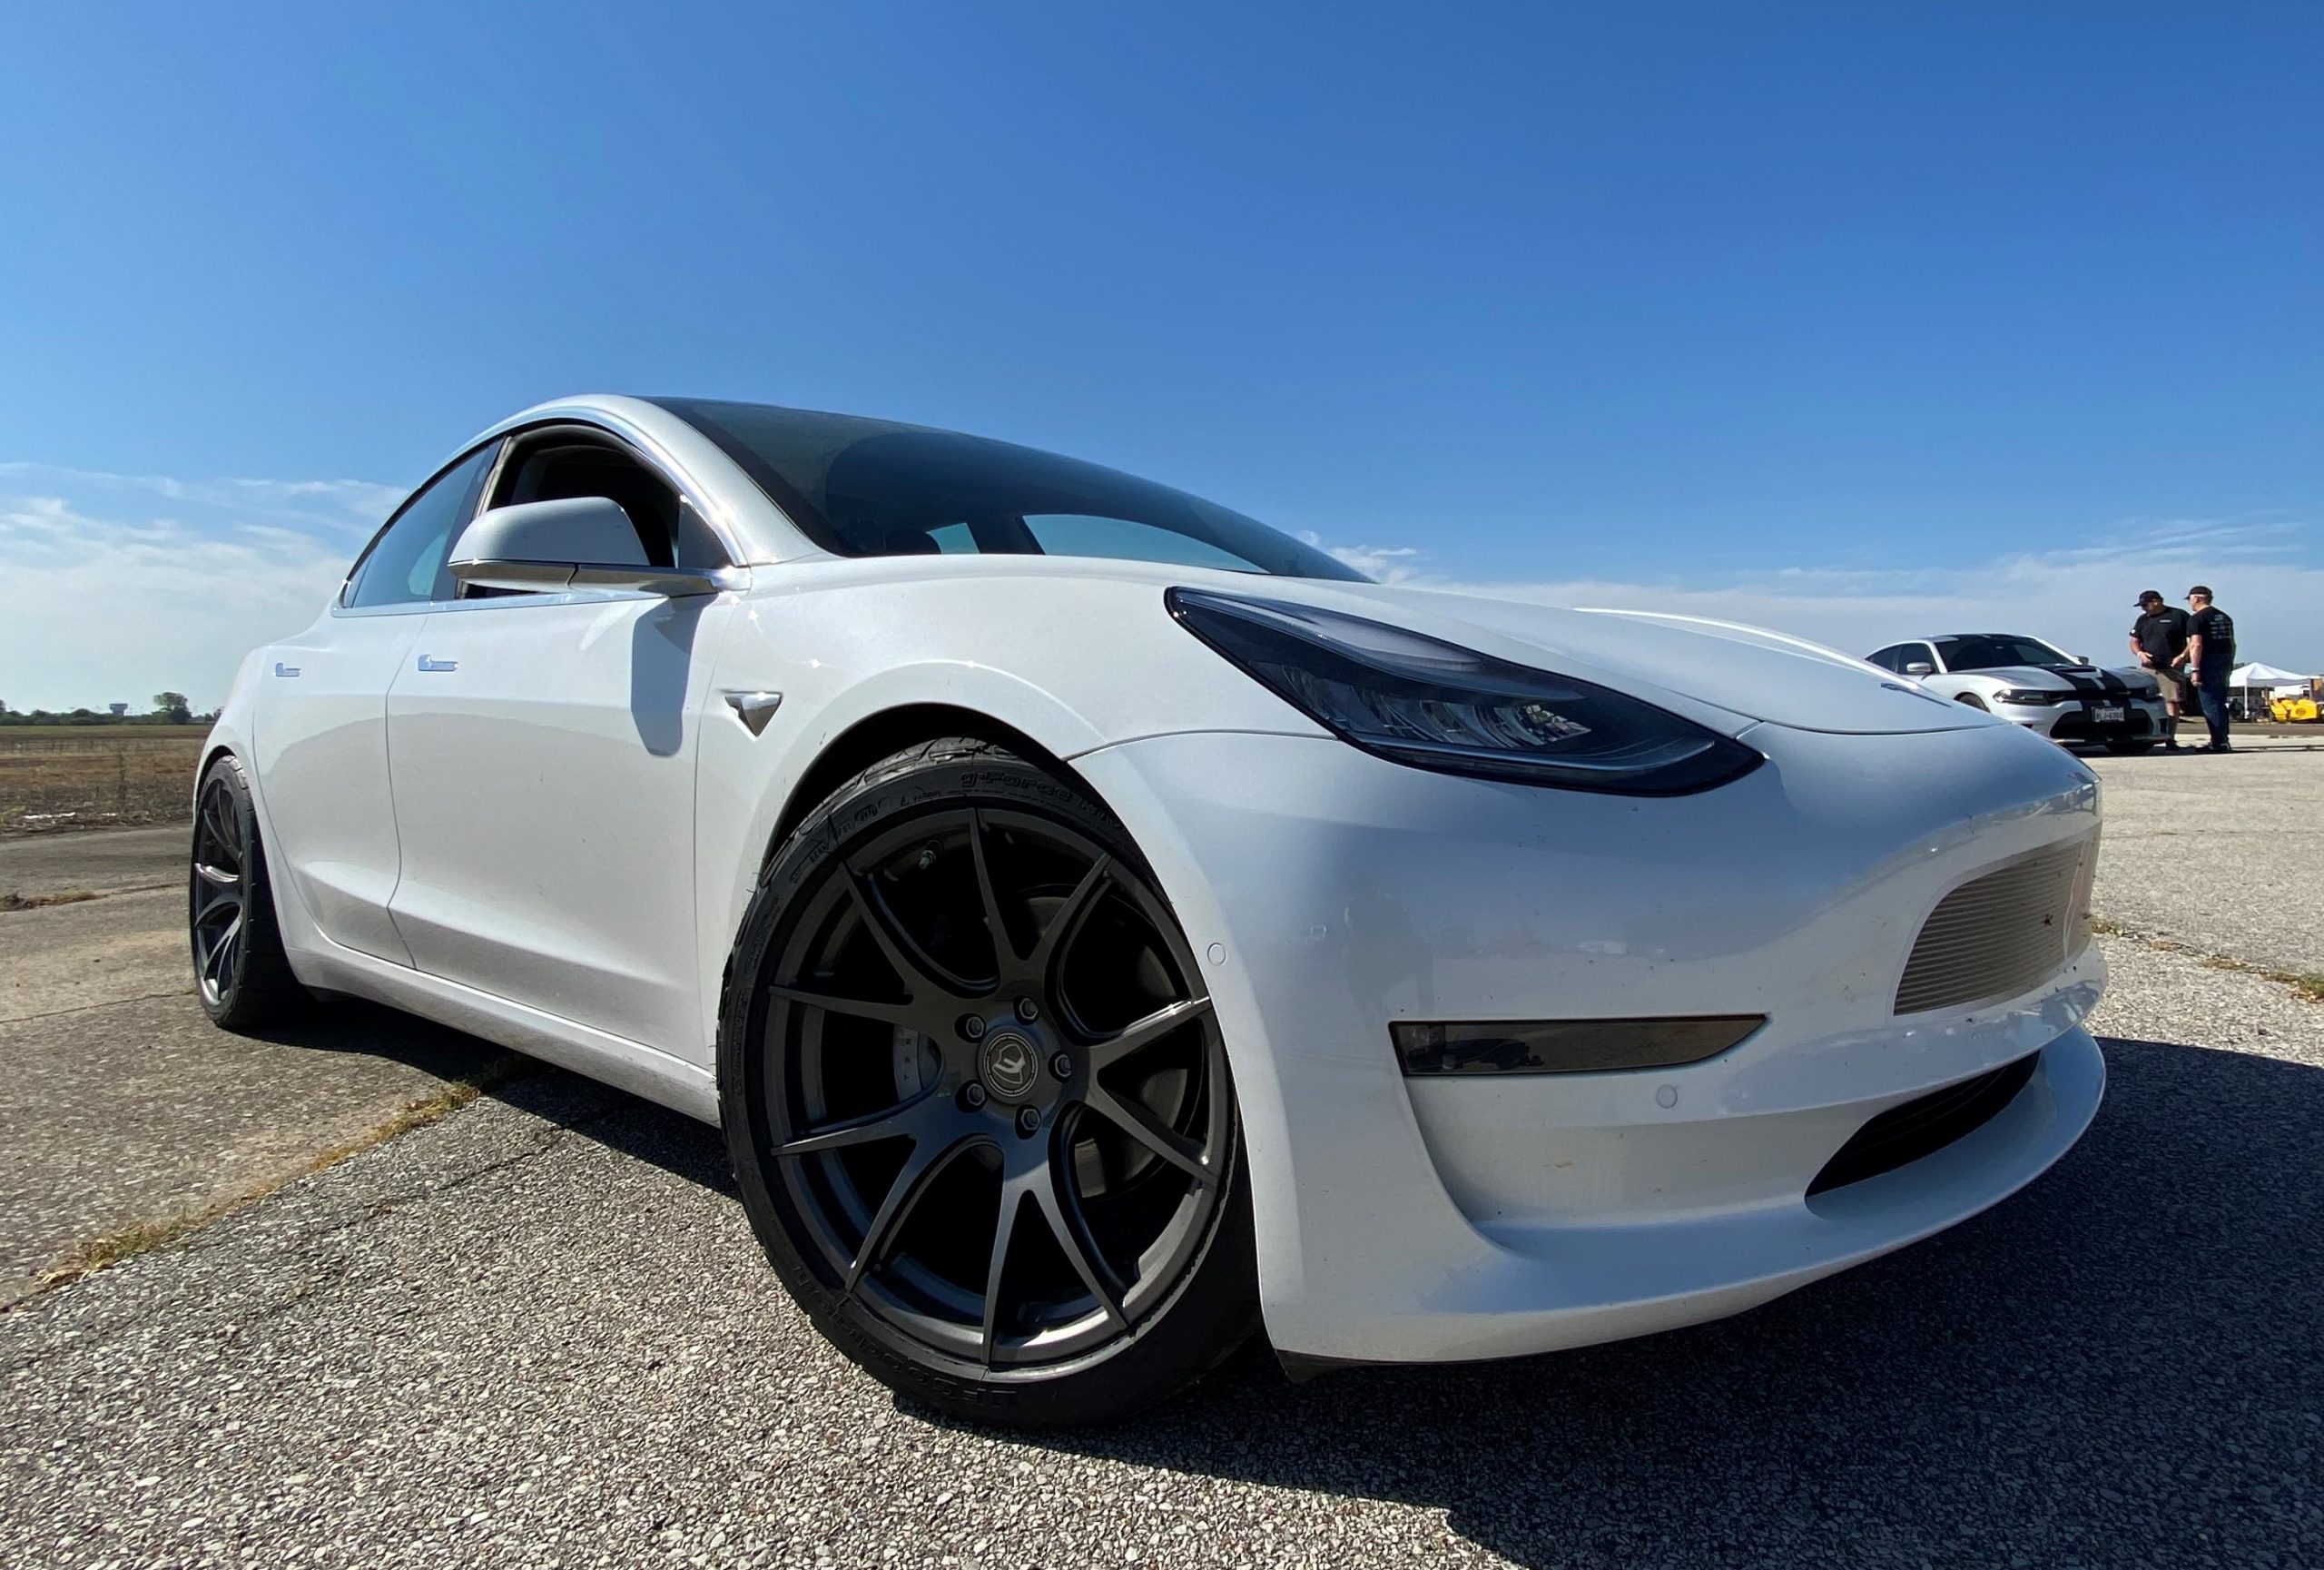
So when Summit Racing introduced us to White Lightning a while back, we knew the performance modifications to its Tesla Model 3 would start soon.
You can get all the updates on Summit Racing’s Tesla Model 3 White Lightning here.
And here we are. The Tesla is getting some welcome suspension upgrades. Let’s turn it over to Summit Racing’s Brian Nutter for a walkthrough.
***
Our first Autocross experience gave us a great baseline. The car was stock so it ran in Super Street and hurt some feelings. We were roughly 32nd out of 104 cars and pretty decent in PAX as well. The issue with PAX is the Super Street Class is also filled with C8 Vettes, Porsche GT3s, and other top-tier sports cars. So, it’s not exactly the best fit for a four door sedan.
The recently-announced SCCA EVX class will make things interesting and our local Akron Sports Car Club will be incorporating this class soon but, for now, any mods bumped us directly into A Street Prepared.
What to Upgrade on the Tesla First?
Figuring out the upgrade path for the typical Summit Racing customer is not always easy. Luckily there are quite a few parts that can increase the sportiness of a car without degrading the streetability of the car.
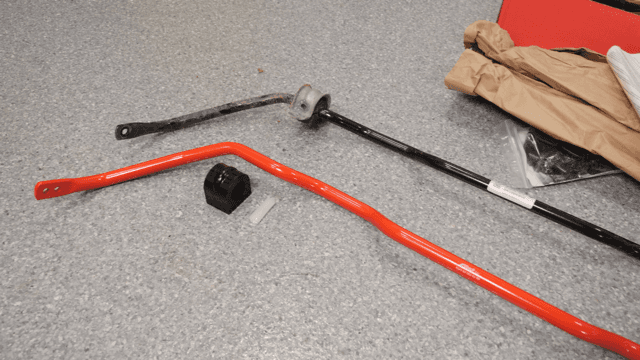
The Eibach Pro Kit has a long-standing reputation for excellent quality and strikes a good balance between budget, appearance, and handling. With just 6,000 miles on the clock of our Tesla Model 3, our dampers are in pretty good shape. And we feel Tesla did a pretty good job with the damping curves for their factory spring rate and ride frequency target. So, we turned our attention to the Eibach springs and sway bars for the Tesla Model 3.
Benefits of Eibach Springs
- Maintain plenty of shock travel
- Lower center of gravity for less lean
- Less wheel gap for a better aesthetic look
- Lower car for better aerodynamics (can increase range, acceleration, and top speed)
- Firm, but not harsh, ride quality
- Spring rates are set so they don’t overpower factory damping curves (so no bounce)
Benefits of Eibach Sway Bars
- Reduced lean
- Adjustable front and rear to dial-in desired rotation
- Polyurethane bushings won’t wear or squeak
As expected, the manufacturing quality was great. Frankly, for the price, it’s an excellent value. Eibach knows their target customer and nailed it with this one. (Eibach’s Million Mile Warranty is a nice touch too.)
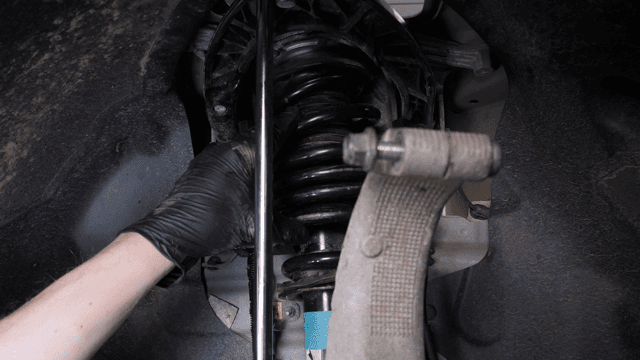
Installing the Tesla Model 3 Suspension Upgrades
So, can you do the job yourself? Sort of. We have a vehicle lift, but the work can be done on the garage floor with jack and stands—with one exception we’ll get into in a sec.
The rear suspension goes in easily. No biggie there, because there are no struts to contend with. The front has a few areas that you will want to prepare for. The good news is disassembly is easy!
First, with the sway bar disconnected and removed and the suspension in full droop there is no danger of springs flying out or anything when you disconnect the spindle from the upper control arm.

Merely loosening this bolt is not enough. It needs to be completely removed. The ball-joint has a groove cut into it and is captured by it and will not slip by without it removed. A simple pickle fork or air-hammer does the rest. Then you lower the strut. We did not have to remove the brake caliper to get the required clearance for getting the strut assembly in and out.
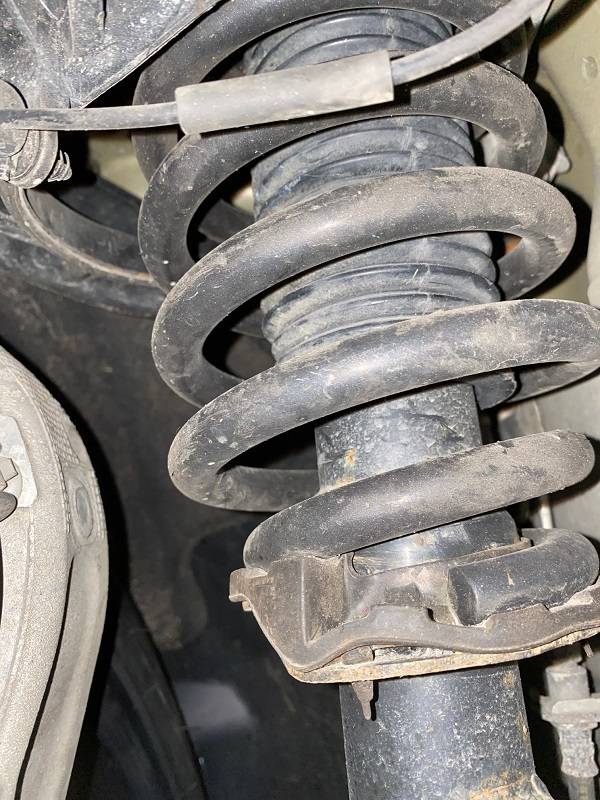
We tried a manual spring compressor tool and it’s a headache. The bump-rubbers and boot inside the Tesla strut create an interference issue. Plan on working with your local shop to swap the springs with a wall-mounted compressor.
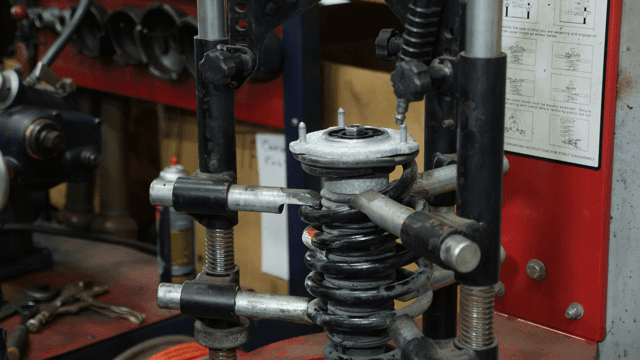
Removing the strut’s top hat is pretty straight forward BUT there are a couple ways to do it.
The first (and what most shops do) is take an impact to it and buzz the nut off and on. The downside to that is it spins the shaft and this can wear the seals. It’s a bit more work, but a deep socket can be cut so that it slips over the nut and allows access to the Allen head in the top of the shaft to keep it from rotating. A handle welded to the socket or even a big pipe wrench does the rest.
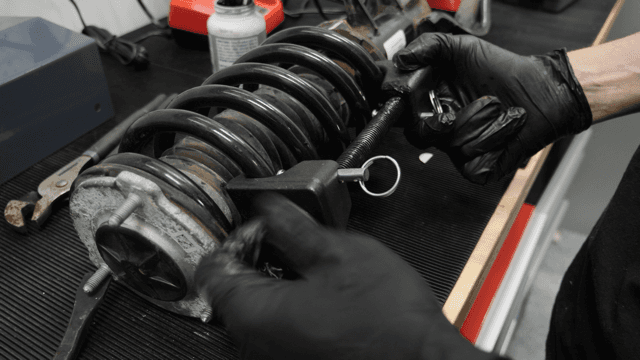
Spring orientation on the front strut is CRITICAL!
Getting the springs installed right side up is easy because you can match the factory orientation. Eibach is kind enough to print their labels so they are always facing up when the springs are installed correctly.
But here’s where it get’s tough: If you do not have the top-hat clocked exactly as it was when the strut was removed, it will not go back up into place. The bottom of the strut has a fork that goes over the lower control arm and there is no way to spin the hat once spring pressure is applied.
You can try to mark the top hat before pulling things apart, but there is still a good chance you will be a few degrees off when you assemble.
So what do you do?
- Bolt the top hat in the strut tower like normal and the lower fork will be off.
- Take a set of conventional spring compressors (like these) and take load off the spring.
- Rotate the fork at the the bottom of the strut so it will fit over the bushing in the lower control arm.
- This may take couple attempts—but when it’s right, you can remove the spring compressor. It’s not easy to remove once everything is clocked so be aware of the placement.
Here are a few other things to consider:
Tesla Model 3 Suspension Upgrades: The Result
All done. The suspension ride height looks great and we’re off to the alignment rack.
We’ll post some details on that soon, along with thoughts on the ride and handling changes.
Video: White Lightning Modification Plans
Here’s a quick video where we discuss some of our plans for further upgrades and modifications. Check it out below:
Comments