Editor’s Note: Perhaps the only things Travis Jones loves more than his 1986 Monte Carlo SS are autocross courses and a good challenge. That’s why Travis is on a mission to transform his Monte Carlo from an underpowered, ill-handling daily driver to an Autocross hero. A self-described “GM guy through-and-through,” Travis is a regular on the site OppositeLock, has documented his project on his Instagram page (@sslow6.0), and will give us a first-person account of his build here as a guest writer.
Travis has owned the Monte Carlo since high school. Although he’s thought about selling it from time-to-time, Travis has held on to it for sentimental reasons, even though the car has often sat idle. After his girlfriend inspired him to try Autocross for the first time, Travis started to look at the Monte in a whole different way.
“I became obsessed with taking a 1980s boat and making it handle,” Travis said.
We’ll let him pick up the story following the LS swap from part three of the series:
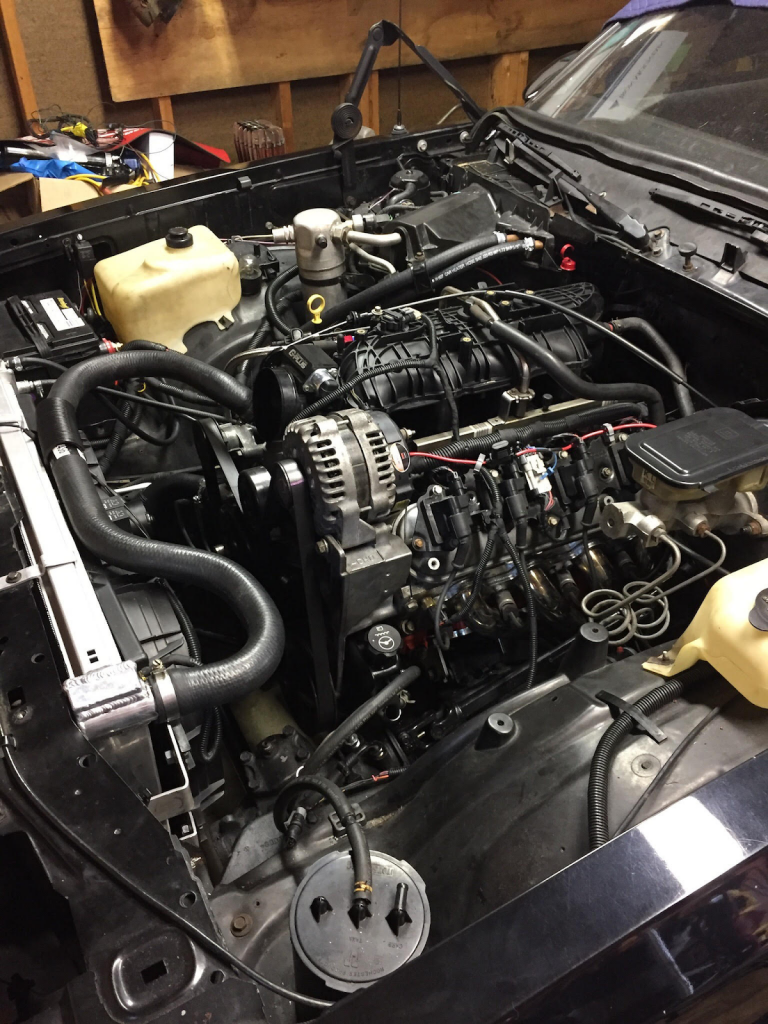
If you’ve been following the series so far, you’ve seen that I completely rebuilt the suspension under the car, blew up my old 350, swapped in a 6.0L LQ4 V8 (with support from my awesome wife), and put in a new fuel system. I also wired up a Microsquirt controller to handled the ECU functions — we’ll cover that in a future article.
Still, I had a few things to wrap up on the swap.
I must warn you: What you’re about to see is a project that has run way over budget and past its deadline.
Basically, the goal was to get the car back to a running and driving condition to make the last few Autocross events of the season.
The final tasks to complete the swap were fairly simple.
First, I needed to make a throttle cable bracket as the Trailblazer SS I liberated this intake from was drive-by-wire. The factory truck bracket didn’t fit. I also needed to make a bracket for the 200-4R’s throttle valve cable and find a way to attach it to the throttle body. I needed some sort of air intake and air filter to keep from sucking up random leaves, dirt, Mazdas, and small pets. Other items on the agenda included heater hoses, a transmission cooler, and header installation.
Once this was done, we’d hit the track and the dyno.
First up: heater hoses. I researched how to make the heater hose system work, since a heater is definitely necessary in Michigan. The factory style heater control valve won’t work with an LS. It just stops flow when there is no vacuum source. The LS water pump also requires that there is a heater circuit, even if it just a piece of hose looped over.
I searched through about 15 pages of heater control valves until I found this guy:

This is the heater control valve from a 1995-2000 Full Size Chevy truck (ADO-15-5533). Rather than just stop the flow, it uses a valve to recirculate the hot coolant. It uses a vacuum line, like the factory unit, and works perfectly when LS swapping a G-body. To install, you just cut the heater hoses in the same place, force the hose over the barbs, and use hose clamps to hold the hose on.
For the throttle bracket, my solution was fairly simple, if a little crude. I took a piece of flat steel, cut the throttle cable attachment point from the old truck intake, and welded it together. Not the best look in town, but hey it gets the job done.
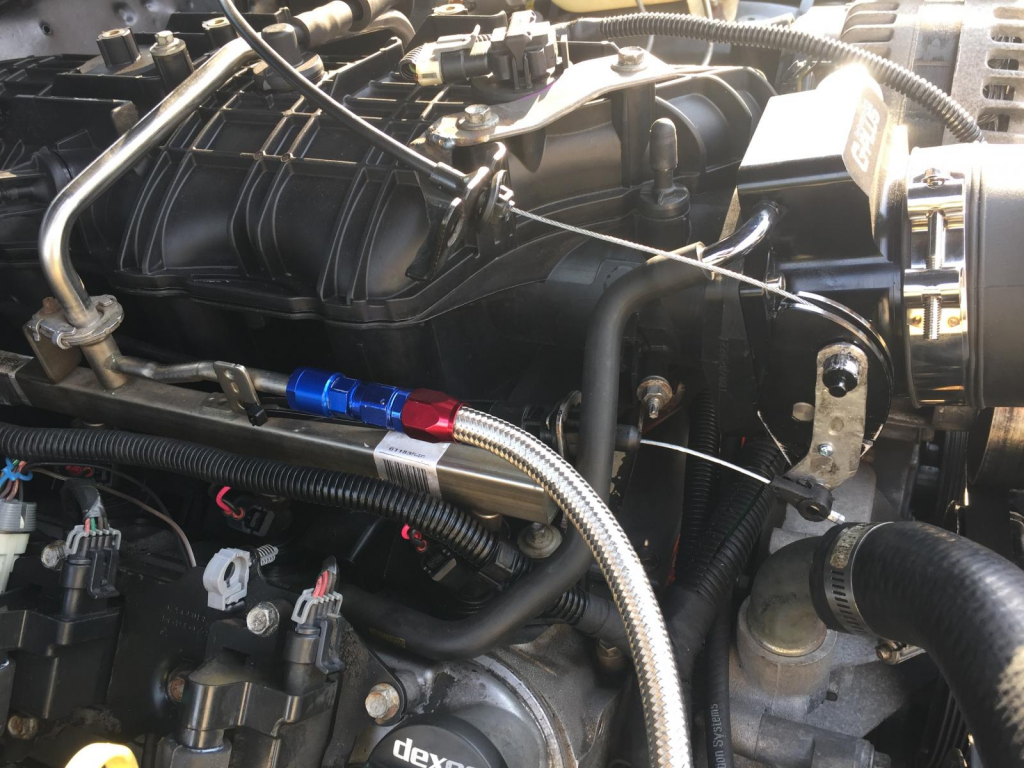
For the 200-4R throttle cable bracket, I cut and contorted the stock bracket into something that would fit on a small stud on the side of intake. For the throttle body side of the equation, I used the cruise control stud and some small machine screws to hold on a small bracket that I made to attach the TV cable. It certainly isn’t pretty, but it’s functional.
QUICK TIP: If you have TV cable controlled transmission like a 200-4R or a 700-R4, make sure your TV cable is correctly adjusted or you will burn your transmission up quickly. I used a longer TV cable from a 1982-92 F-body with TPI fuel injection to reach the throttle body. (PIO-CA-1970).
For the transmission cooler, I used an old bar and plate cooler that a friend had given me (very similar to TCI-824104), along with some trick Hayden fittings that go right from the radiator cooler lines to the external cooler (HDA-393).
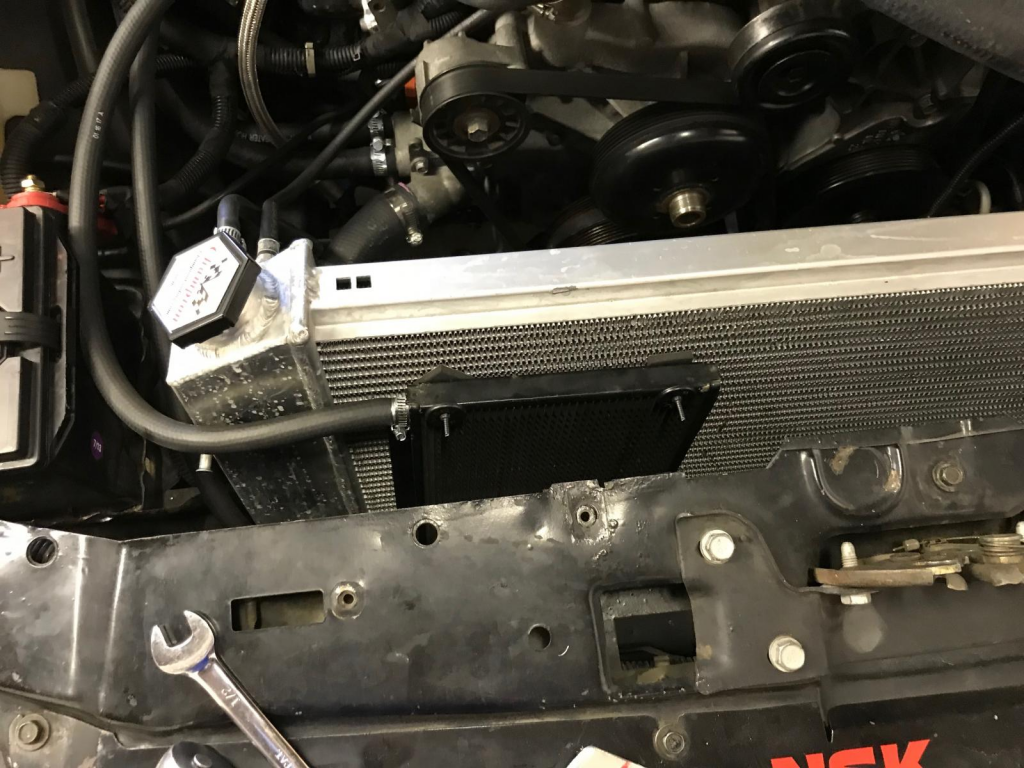
The long suffering 200-4R had been rebuilt in 2005 with a TCI Master Race Rebuild Kit (TCI-389000) by Whitfield Transmission in Detroit. It had a stock torque converter which is only a 1,800-2,000 rpm stall converter. I never got around to making the lock-up torque converter work. I figured it deserved a cooler with the influx of GM LS power.
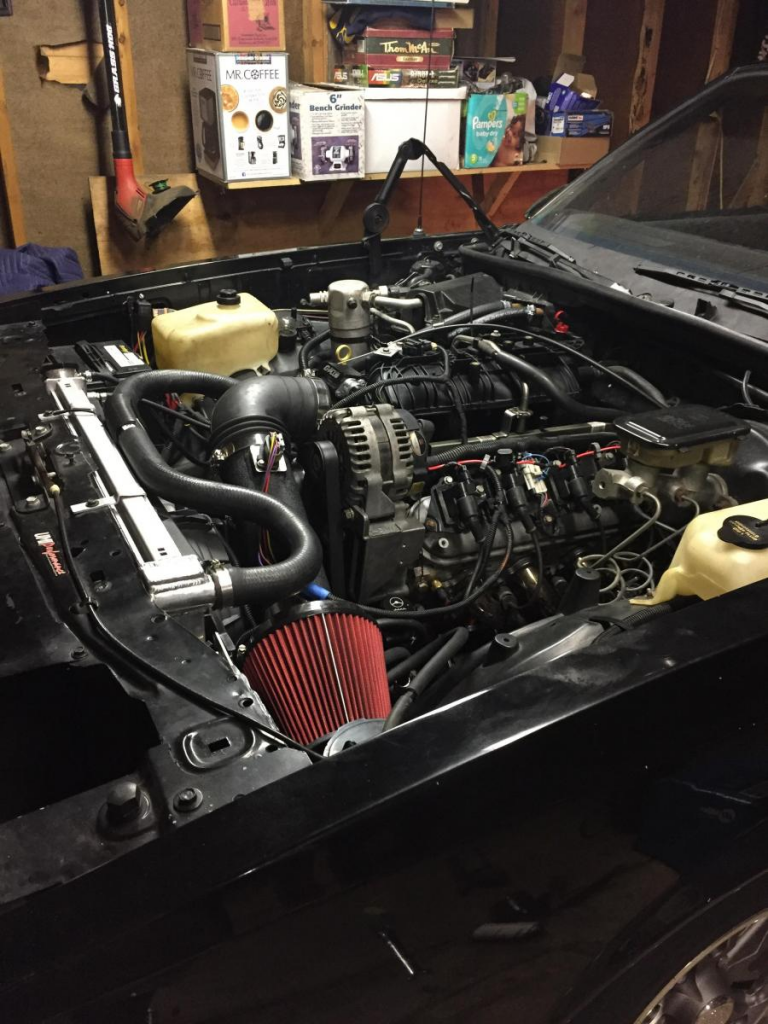
With that sorted out, it was on to the intake setup. When using a factory 3-bolt truck intake or an LS1 intake, it is common to use a 1999-04 Chevy truck cold air style intake and relocate the battery to the trunk. However, with my TBSS intake I had to get a little more creative. I procured a very cheap 2010-2015 Camaro intake, but something like Spectre’s 2010-2015 Camaro cold air intake (SPE-9908) would also work well.
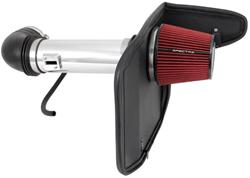
Below you can see my intake installed. Eventually I’ll do something a little different to make sure that it’s sucking in cold air, but this works fine for now.
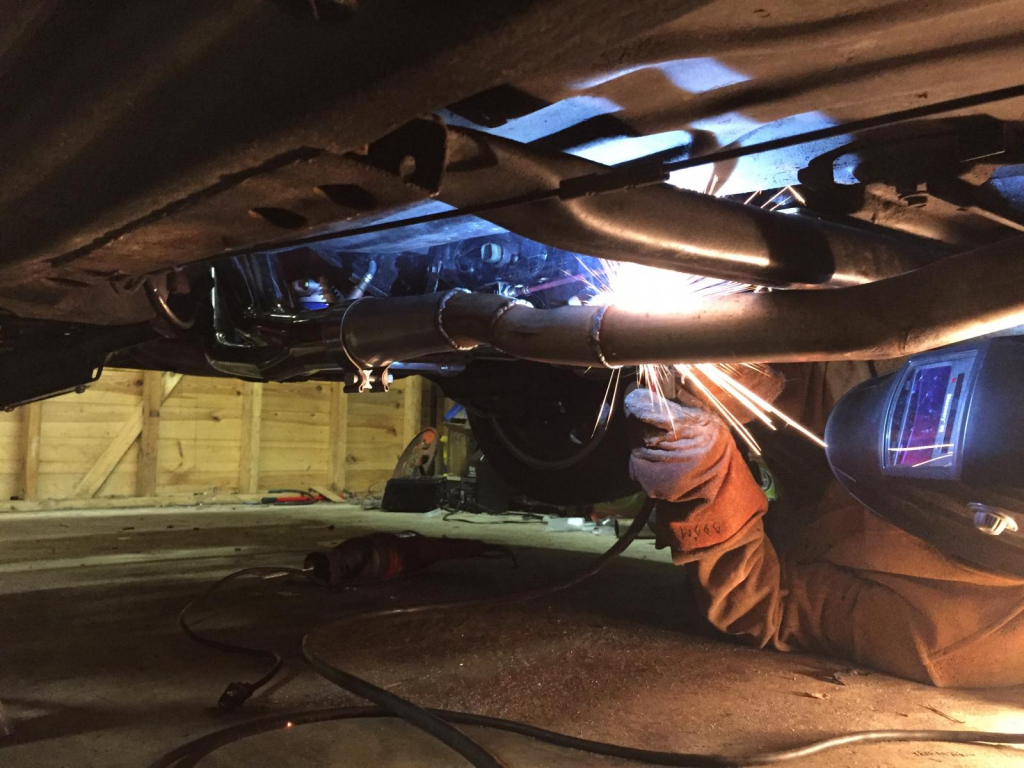
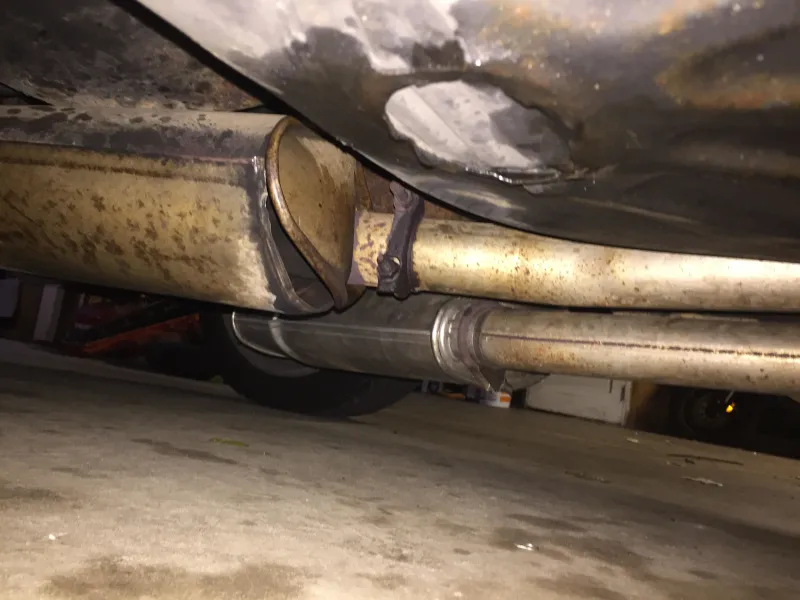
With the intake side sorted out, I turned my attention to the exhaust. At this point my budget was absolutely tapped out, so I called my friend DeWayne (@loganmotorsports) to help me cobble something together. Using nothing but a MIG welder, a sawzall, and scraps of aluminized exhaust pipe from the upstream part of the exhaust that connected to the old shorty headers, we were able to mate the 3-inch to 2.5-inch collector reducers to my 2.25-inch exhaust.
With the exhaust wrapped up, it was time to fire up the engine and see what it would do.
I used the VE Analyze Live function of the Tuner Studio software to automatically dial in the part throttle tune while I cruised the car around my neighborhood and on the highway.
I did have one mishap during tuning, which caused the engine to backfire so violently that it cartoon-exploded one of my mufflers. However, I was able to mat the throttle on a few on-ramps while logging my air-fuel ratio to feel comfortable with the safety of the tune.
From there, why not take it to the drag strip?
Previously, the best quarter-mile time the car had ever turned in was 14.6 @ 97 miles-per-hour. I took to the start line and cut a 13.27 @ 106.92 mph on my first pass. The absolute best part of the day was when I was lined up against a brand new Dodge Hellcat. He obliterated his tires off the line and couldn’t catch me on the big end!
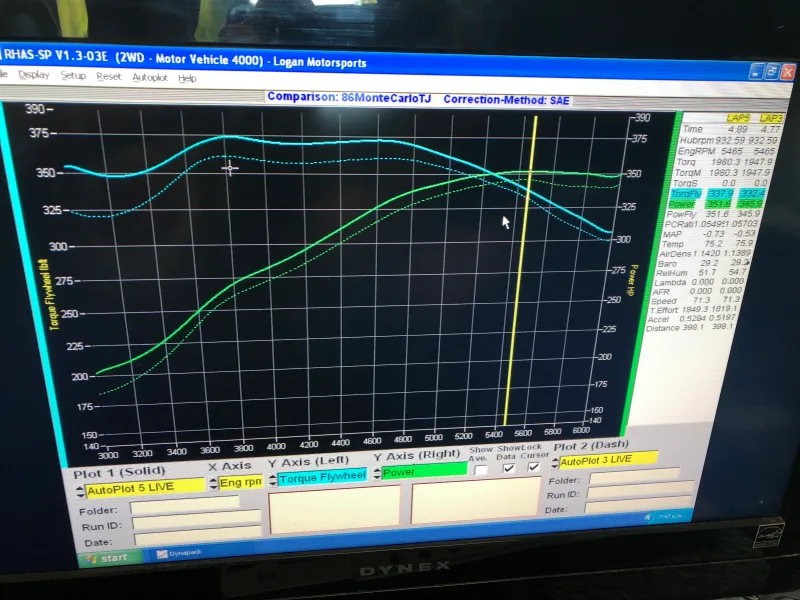
The week after my Hellcat conquest, my friend DeWayne offered to let me use his Dynapack dyno at his home garage. A Dynapack is a load cell hydraulic dyno and can register power a little lower than an inertial dyno like a Dynojet. The nice thing is that the Dynapack adjusts for conditions and offers a J1349 SAE horsepower rating. It can also do steady state loading for throttle tip in and part-throttle tuning. And, unlike a roller dyno which requires you to strap the car down, the Dynapack bolts right to the rear axle hubs.
We bolted my car to the dyno and let it rip.
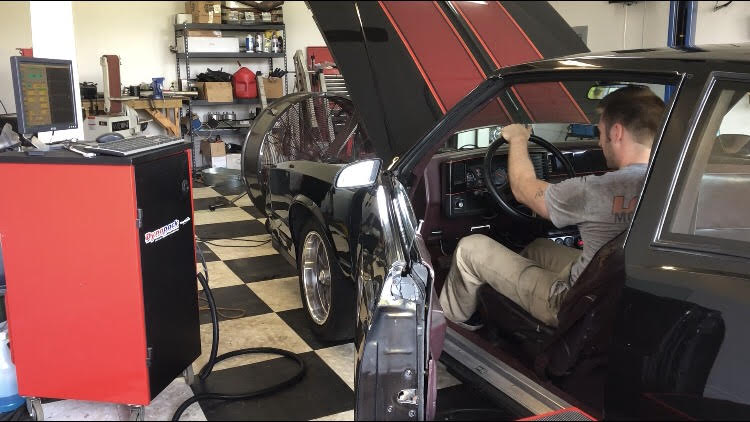
The results? 352 horsepower at 5,450 rpm and 375 ft.-lbs. at 3,800 rpm. The test was done with the water at 185 degrees and with an SAE J1349 correction factor. If we were to factor in a 15-percent drivetrain loss, that’s about 405 hp at the crank.
Not too shabby for a junkyard LS motor with a tiny LS3 cam.
Thanks for this article. It was really informative and useful. Great work keep going. Thank you.
good information, Im currently running an LQ9 in my 79 trans am but went the carburated rout, it also has a 700r4. I’ve had this combo for 4 years and its been great. now Im leaning to go fuel injection and use a TBBS intake like you but would like more info on the TV set up you have. You make it look easy can you post or send me more pictures of the TV bracket set up you have?