Editor’s Note: Perhaps the only things Travis Jones loves more than his 1986 Monte Carlo SS are autocross courses and a good challenge. That’s why Travis is on a mission to transform his Monte Carlo from an underpowered, ill-handling daily driver to an Autocross hero. A self-described “GM guy through-and-through,” Travis is a regular on the site OppositeLock, has documented his project on his Instagram page (@sslow6.0), and will give us a first-person account of his build here as a guest writer.
Travis has owned the Monte Carlo since high school. Although he’s thought about selling it from time-to-time, Travis has held on to it for sentimental reasons, even though the car has often sat idle. After his girlfriend inspired him to try Autocross for the first time, Travis started to look at the Monte in a whole different way.
“I became obsessed with taking a 1980s boat and making it handle,” Travis said.
We’ll let him pick up the story from here:
(Image/Travis Jones)
My dad always said that racing will make a car present its weakest link.
If you’ve been following this build, you’d know that I first built my 1986 Monte Carlo SS with my dad in the summer of 2004. We pulled out the 305 that I had blown up in a matter of months, fixed the body, put a nice paint job on it and dropped in a mildly built 355.
The motor was 10.5-1 compression with Keith Black Claimer pistons, Stock 624 casting heads, a Lunati Voodoo camshaft (LUN-10120703) (227/233 @ .050, .489/.504 lift; 110LSA) Edelbrock EPS intake (EDL-2701) and an Edelbrock Performer carb. A fine combination for a 17-year-old kid.
I daily drove the car and drag raced it a few times with some somewhat disappointing low-14 second time slips from Lapeer International Dragway.
Around the autocross course, I had issues with the Edelbrock carb and its side-hung float bowls. I switched that out for a 750 vacuum secondary Holley and it did much better in the corners. I was making some adjustments to the vacuum secondary springs, and I took the car for a quick blast on the highway to check a WOT kickdown bog that I was fighting.
The car stumbled on power and as I slowed down for an exit ramp, I knew something was wrong. I limped the car home and ran a compression test. No compression on cylinders 3 and 5 so it definitely needed a head gasket. Apparently, the engine was the weakest link.
At that time, I was putting as much money as I could into savings for my upcoming wedding.
I had proposed to my girlfriend a year earlier at an autocross event. With a little chicanery I had managed to convince the organizers to move her into the F-street “ladies” class where she was the only entry so she would get a trophy by default. She was surprised when she was called up for the trophy. She picked up the trophy and turned around.
I dropped to a knee to pop the question. She said yes.
So the plan was: put a head gasket on the motor and get it running, as cheap as possible.
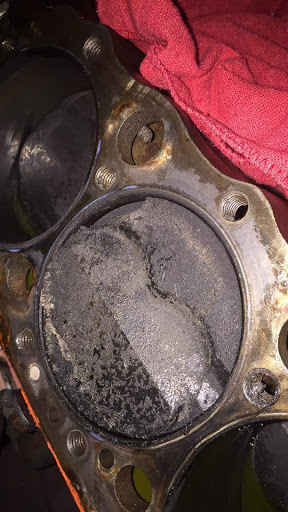
I pulled the intake, carb, and cylinder head. It looked like this.
(Image/Travis Jones)
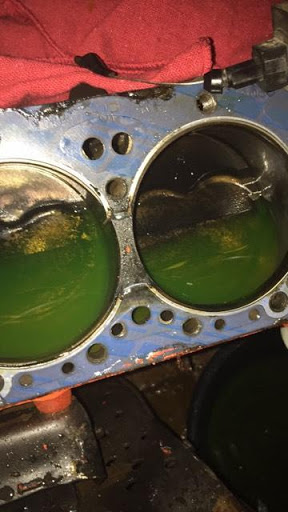
The cylinder head condition was even worse.
(Image/Travis Jones)
The area between the cylinders was pretty warped.
So I went on Craigslist looking for some 76cc chamber heads. Vortec heads would have been the perfect upgrade except that the domed pistons would have put me at 12.5:1+ compression, which is hard to make work with pump gas.
I was lucky to find some 882 heads locally. My friend Dewayne (@loganmotorsports)—we’ll see more of him and his shop later—offered to work the ports over for a case of beer and pizza.
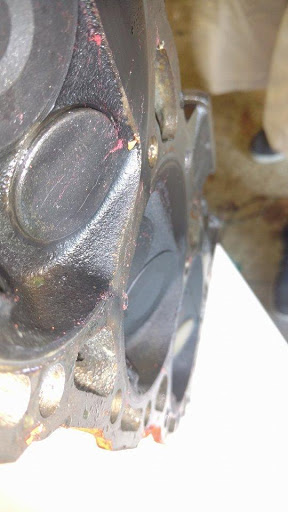
He spent all day hogging out the ports and smoothing bowls. After we cleaned everything, we pulled the other head. What we found was very bad.
Both 4 and 6 had broken ring lands.
Strangely enough, they both tested okay in the compression test.
(Image/Travis Jones)
The damaged surface you can see in the photo is from bits of aluminum being smacked around the inside of the combustion chamber.
I needed a new short block.
And seeing that every extra penny I had was being put into the wedding, a rebuild wouldn’t be happening this season.
That took the wind out of my sails.
My hopes of getting the car back together to make the last few events of the season were quashed. I put things like the headers, the ported heads, intake, and carb into the trunk, and cleaned up the garage.
I put a moving blanket down on the deck lid and set a box on it. I thought “this is how project cars turn into storage units.” My heart sunk.
The 355 had survived 12 years of abuse, but now the car was going to sit for a while.
My then-fiancee could tell that I was unhappy. She asked what it would take to get it going again.
I had no intention of putting another Gen. I SBC into the car, I said, adding that if I did anything, I’d put an LS engine in it.
“So LS swap it,” she said. “Take a loan from the wedding fund and get the car running again.”
Which reaffirmed that she was the one for me.
The LS Swap Project
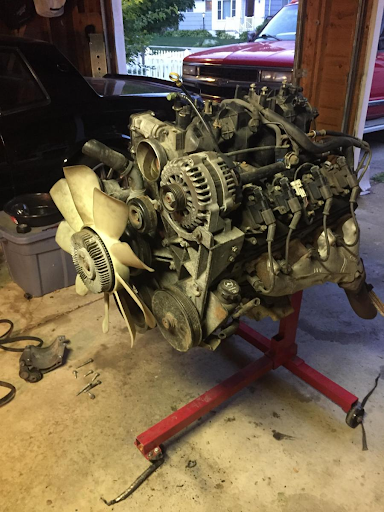
I found a nearly complete 125,000-mile LQ4 on Craiglist for $700. The engine was from a 2004 Yukon Denali that had been rear-ended. I picked it up the next day.
The motor was in pretty good shape, but the yard that had pulled it had cut the harness.
(Image/Travis Jones)
With the goal of swapping an LS into my car, I needed to do it in a cost-effective, yet quick way.
Thankfully there are a multitude of swap parts readily available for these cars. I reached out to my friends for advice.
My friend Jon, a GM powertrain engineer (@mtrcityjonn) had a turbocharged LS-swapped 1985 SVO Mustang and had followed the “Sloppy Mechanics” guide to running it on a Microsquirt ECU.
He suggested that I do the same to save money on the ECU.
My friend Harrison, the brake engineer at FCA who helped with my brake kit, had one laying around from an abandoned college motorcycle project. He was nice enough to give it to me. So the engine and ECU were picked out, but how was I going to get it into the car, wired up and running?
I researched a variety of parts and came up with a plan.
I chose the Hooker LS swap engine mounts (HOK-12623063) and the Holley LS swap oil pan (HLY-302-2) I really liked the Holley stainless steel headers, but they were out of my budget.
Instead, I used a set of stainless headers from Speed Engineering.
I had previously upgraded my radiator with an aluminum 3 core which was supposedly good for 700 horsepower with electric fans.
I remembered reading a write up on MonteCarloSS.com about the ’97-02 Dodge Intrepid electric fans fitting nicely into G-bodies as a stock-looking electric fan option, so I purchased them and knew I’d figure out a way to mount them.
The fuel system would also need to be addressed because I ran a normal SBC mechanical fuel pump on the old motor.
I chose to buy a Spectra gas tank from a 4.3L TBI Monte Carlo of the same year (SGT-GM306C), a Buick Grand National pump hanger and sending unit (SGT-FG156A), an Aeromotive 340 LPH pump (AEI-11569), and a DeatschWerks fuel pump relay kit (DWK-FPHWK).
You can drop the GN hanger/sending unit and pump into a carbureted tank, however there is no baffling inside the tank to ensure that the pump won’t starve around corners.
Re-using the stock tank might work for a weekend cruiser, but for an autocross car that sees some G’s in the corners, fuel starvation is a thing that needs to be mitigated.
I ran a Corvette-style filter/regulator (WIX-33737) back by the tank and utilized the factory 3/8 feed line.
For the intake, I had originally planned on running the standard 78mm throttle body and truck intake, but I read a fantastic article in Hot Rod magazine showing off the TrailBlazer SS and its Gen IV 5.3L truck intake. It made great torque and pulled to 7000 rpm.
I found one on Craigslist complete with injectors and fuel rail for $150.
It came with an electronic throttle body, so I sourced a cheap mechanical 92mm on eBay.
At the time, Holley didn’t offer their 4-bolt 92mm Sniper throttle body (SNE-860004-1) or I would have spent a couple of extra bucks for one.
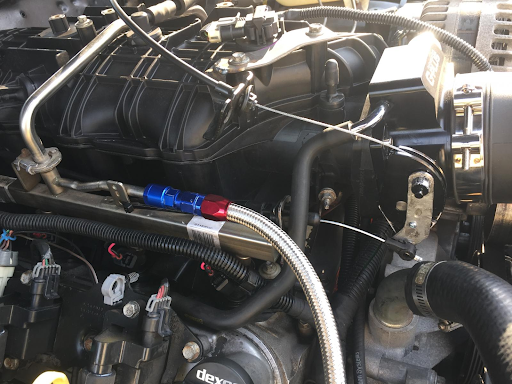
Since I planned to run a “dead-head” returnless fuel system, I was able to reuse the factory fuel rails simply by turning them 180 degrees on the intake, which put the fuel feed on the passenger side of the car. The last major thing I’d have to address was how to mate the LS to my 200-4r 4-speed automatic transmission.
Summit makes a flex plate spacer kit (SUM-704000). What isn’t available is a throttle valve cable adapter bracket for a TBSS style intake manifold. I managed to fabri-cobble the factory carburetor throttle and TV cable bracket into something that worked.
(Image/Travis Jones)
…
Those are the parts I needed to get the motor installed. I’ve attached a complete list of parts that I purchased below.
The LQ4 engine made a good 325 horses from the factory. I wanted a little more, but I was on a budget.
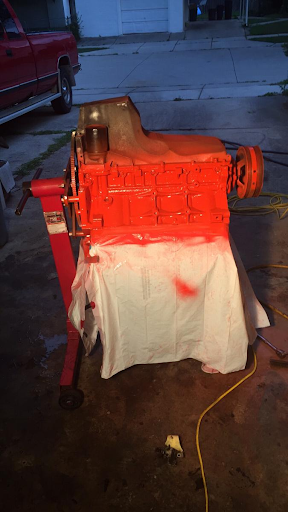
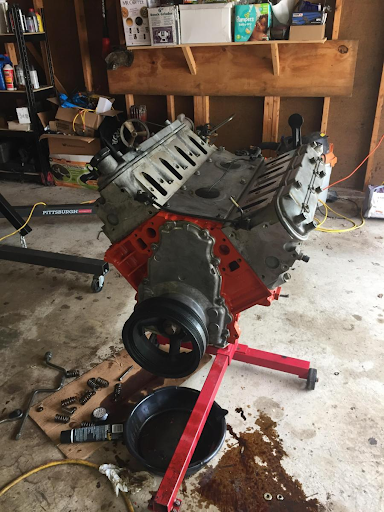
My buddy Jon helped me out again. He had a factory LS3 1-bolt cam, springs, and the corresponding cam gear laying around, all of which he sold to me for beer money. I degreased and repainted the block, removed the old oil pan, modified the F-body windage tray, installed the pickup tube for the Holley swap pan, and installed the new Holley pan.
This:
(Image/Travis Jones)
Then, this:

(Image/Travis Jones)
Jon brought over his spring compressor, and harmonic balancer installer/remover, and we pulled out the factory cam and replaced it with something with a little more sauce.
NOTE: The only reason this cam works in this configuration is because the Microsquirt operates on batch fire fuel injection, and doesn’t require cam sensor input to determine injector timing. To my knowledge, no one makes a 1x reluctor single-bolt cam gear, so unless you have a Gen IV motor, you can’t use this cam with a factory-style ECU or an aftermarket ECU that requires a 1x cam signal.
We changed the springs to the LS3 blue springs to avoid valve float at high rpm. The stock truck springs just can’t keep up.
The last thing we did was install the flywheel spacer and flywheel to ensure that everything lined up correctly with my older-style transmission.
(Image/Travis Jones)
With the motor together, we had to pull out the old one.
My friend and amateur rally driver Santiago (@escuderiaboricua) came over with his engine crane. With only a short block left to remove, which meant only the bellhousing bolts, torque converter bolts and engine mount bolts had to be removed, so we got it out in no time.
Since it had been 12 years since the motor had been out, I power washed the frame and hit it with some flat black spray paint to keep up appearances. It’s amazing the visual impact a $4 can of spray paint can have.
Before:
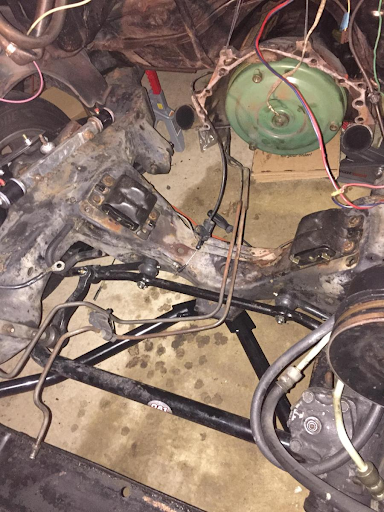
(Image/Travis Jones)
After:
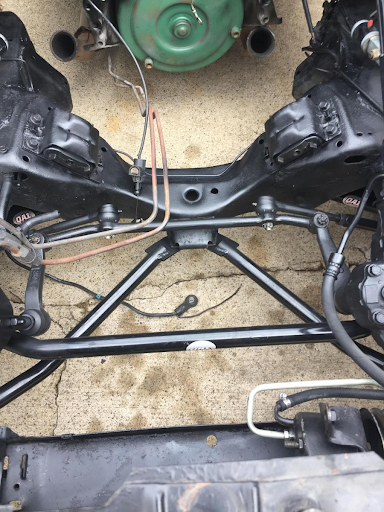
(Image/Travis Jones)
One other thing that had to be done for clearance was to cut the last boss on the passenger side valve cover if you have a full AC box instead of just a heater box in the car. It doesn’t affect the way that the coil bracket attaches.
Then, we removed the factory lower clamshell mounts and installed new Energy Suspension mounts (ENS-3-1130G) per the Hooker instructions.
We hit a snag when we went to install the Hooker mounts. The wrong bolts had been included in the package. Apparently, Hooker had changed the design to use standard hex head bolts, but had sent me a mount kit which required tapered head bolts.
A call to the Holley tech line got me the correct parts in just over a week.
Once the parts arrived, we installed the brackets and, after wrestling with it for a bit, got the engine to sit in place.
Installation Tip: Don’t torque down the engine mount bolts on the frame. Leave them a little loose so that the engine can find its “home.” Torque them down tight from there.
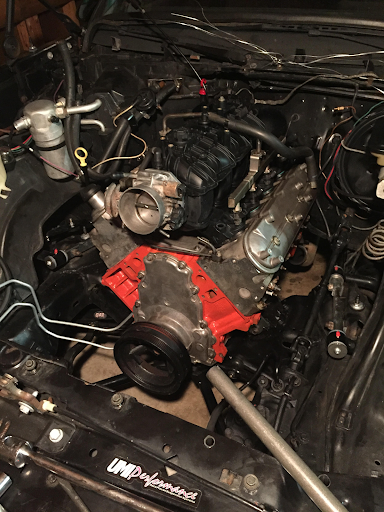
(Image/Travis Jones)
Somewhere along the way, I lost one of the engine bellhousing dowels.
It never crossed my mind to check. Definitely check yours before putting the motor in the car.
I dropped the transmission to install it. One interesting quirk in installing a 200-4R to an LS is that, depending on the transmission bellhousing casting, you may have interference with the rear cover bolts and the upper portion of engine.
(Image/Travis Jones)
I used a rat-tail file to clearance enough material away from the affected area.
My friend Harrison helped me install the headers.
I had to bash and dimple the headers to install them. They aren’t a perfect fit the way the Hooker headers would have been. You get what you pay for.
We installed the bellhousing bolts and reattached the torque converter bolts. With the engine in, headers installed, and transmission bolted up, next came the accessories, radiator and fans.
When I undertake a big car project, I like to have my dad working with me.
When we first started working on the Monte my junior year of high school, my father and I didn’t have the best relationship. Building the car together forged a bond and respect for each other that I don’t think we would have found any other way.
Life Tip: If you’re a father, build a car with your kid, if you’re a kid reading this, ask your dad to help you build a car.
My dad drove down to my garage and we tasked ourselves with the fuel system, as well as the radiator and fans.
Harrison and I had dropped the fuel tank the day before. I had also built up the new tank with the sending unit and fuel pump.
We needed to attach high-pressure fuel hose to the sending unit from the output, to the filter regulator. And then we had to run it from the return on the filter regulator back to the sending unit return, and go from the filter regulator to the 3/8 steel feed line.
One thing that isn’t apparent after you drop the tank, is that due to a heat shield, it looks like the fuel system is all one steel line from the tank up to the fuel line in the engine bay.
It isn’t.
Behind the heat shield, you’ll find some rubber hose. This isn’t high-pressure hose and must be replaced.
This can also be where you attach the output from the filter regulator, to avoid having fuel hose loop back under the gas tank.
I used high-pressure rubber hose to save a few bucks, but Tanks Inc. makes a great kit that includes almost everything you need (TNK-LSLINEKIT45).
I installed the front accessories. For a stock G-body, I believe the truck accessories are the best. They clear the hood, and the power steering is a direct fit with factory hoses.
That, and my frugal mind knows that the water pump, power steering pump, and alternator are included with the engine from most auto recyclers.
For the radiator fans, my dad made simple aluminum brackets that would attach to the core support. (I’ll probably weld some bungs to the radiator tanks for a cleaner look later.)
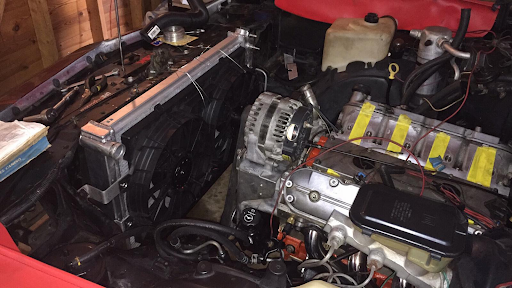
(Image/Travis Jones)
Once the radiator was in, I used the hoses from a 2001 Chevy Silverado to connect my standard-style radiator. I had to trim the upper and lower hoses a bit, but it fit and was routed away from the belts and fans.
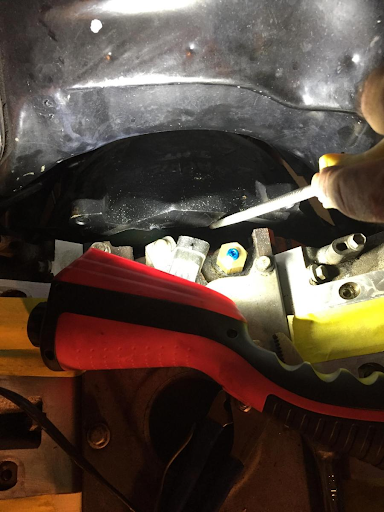
It was now time for what many people consider the most daunting part of the LS swap—wiring.
We’ll talk about that next time.
Love it. I’m hearing the old Johnny Cash tune “One Piece at a time” I think it’s really cool that your wife to be is so supportive of you passion. Also the many friends willing to help with parts, and labor. I was restoring my ’65 Mustang, and swapping in a 302 and a five speed manual when my wife and I were planning our wedding. Lots of blood sweat and beers. The fact that she didn’t leave me proved she’s the one. Years latter my oldest son helped me get my old Chevrolet Pickup back on the road. My youngest son asked if it will be his when I’m gone.
I didn’t read the whole article yet, but I was looking and I too want to run a 200 4R and need a detent cable! I also have a TBSS throttle cable and a drive by cable throttle cable on it. Any chance of elaborating on the “fabri-cobble the factory carburetor throttle and TV cable bracket into something that worked”! This sounds like my kind of fix! Which TV Cable did you use, a tpi camaro/transam? This is all going in a 72 El Camino! P.S. I had an 85 MCSS with a 350 TPI but that was back in the day before everyone started throwing rocks the the TPI stuff! Anyhow good luck with your build.
Mark