Editor’s Note: Perhaps the only things Travis Jones loves more than his 1986 Monte Carlo SS are autocross courses and a good challenge. That’s why Travis is on a mission to transform his Monte Carlo from an underpowered, ill-handling daily driver to an Autocross hero. A self-described “GM guy through-and-through,” Travis is a regular on the site OppositeLock, has documented his project on his Instagram page (@sslow6.0), and will give us a first-person account of his build here as a guest writer.
Travis has owned the Monte Carlo since high school. Although he’s thought about selling it from time-to-time, Travis has held on to it for sentimental reasons, even though the car has often sat idle. After his girlfriend inspired him to try Autocross for the first time, Travis started to look at the Monte in a whole different way.
“I became obsessed with taking a 1980s boat and making it handle,” Travis said.
We’ll let him pick up the story from here:
I was hooked after the first run.
I had a newfound passion for SCCA Solo Autocross, a desire to be competitive, and I had my old 1986 Monte Carlo which I’d owned since age 15.
While others might have opted to upgrade to something better suited for autocross, this is where the story of my Monte Carlo really begins.
Sure, I thought about selling the car, but I built it with my dad and had too much time, emotion, and memories invested in it to watch some else drive it away forever. But seeing that the car felt sluggish, and handled poorly (my then daily driver—a 2015 Taurus SHO—was much more fun to drive), it needed a lot of attention to again be a fun street car, a competitive autocross car, and enjoyable to drive.
It was exactly that challenge which inspired me to prove that a boxy, sluggish 1986 Monte Carlo could become a formidable autocross weapon.
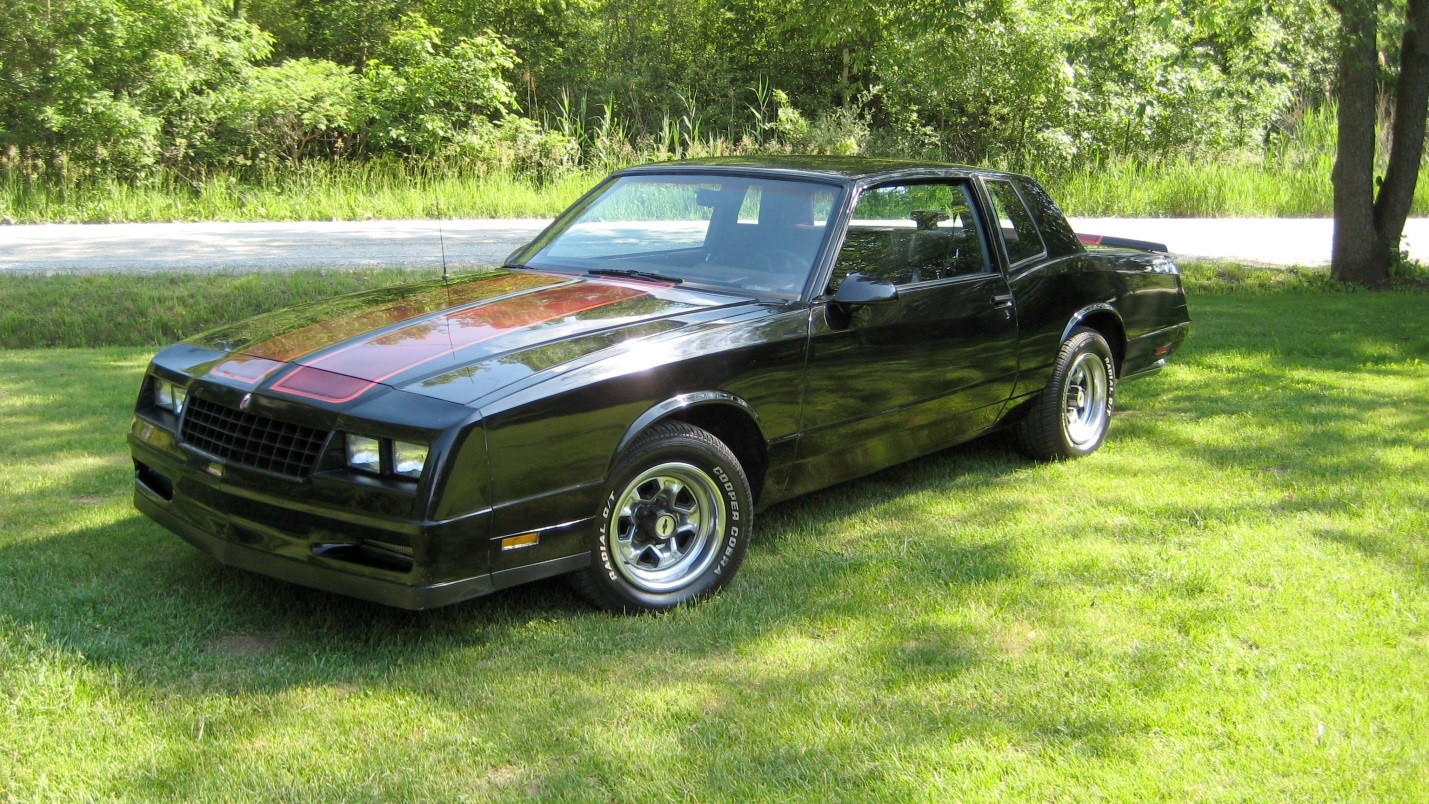
My Monte Carlo was the first car I owned. I paid $1,300 for it.
Within a month, I had spun the rods out of the block on the factory 305. In the summer of 2004, my dad and I put a rebuilt 350 in it and did the body work and paint. While it looked good and made the right noises, I knew there were multiple things that needed to be addressed in the suspension immediately after my first autocross event. The car pitched and swayed, and the steering was loose and imprecise.
It was fun, but it sure wasn’t fast.
The first chassis parts that I ordered for the car were new sway bar end links (MOG-K700538) and sway bar bushings (MOG-K6455). Knowing that my Monte Carlo SS came equipped with a large front sway bar as part of the F41 suspension package, I figured that the 30-year-old factory end links were worn out and this could be a quick, cheap and easy upgrade. I was partially right. The sway bushings and end links were installed without any fuss, and I was sure that this would make a huge change in the character of the car around the course at the next event.
It didn’t.
After the Autocross season ended, I proceeded to spend the winter running through countless different scenarios, researching different parts and suspension kits, and bouncing ideas off of my car friends. I am very thankful that I still have these friends after asking them 1000 questions, explaining 500 different scenarios, and seeking their input. To undertake a big automotive project, you need to have two things: a plan and some friends to help you in the shop from time to time. (Also a friend with their own dyno helps too but we’ll get to that later.)
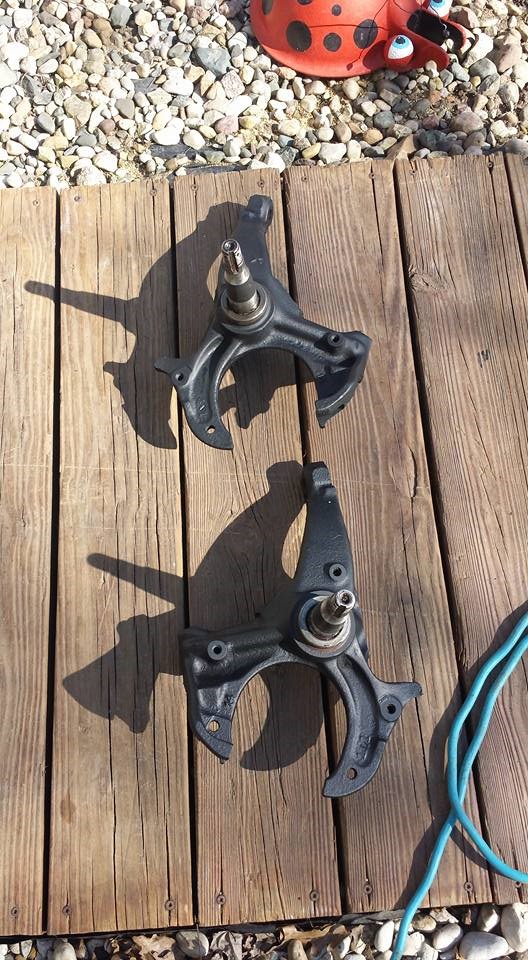
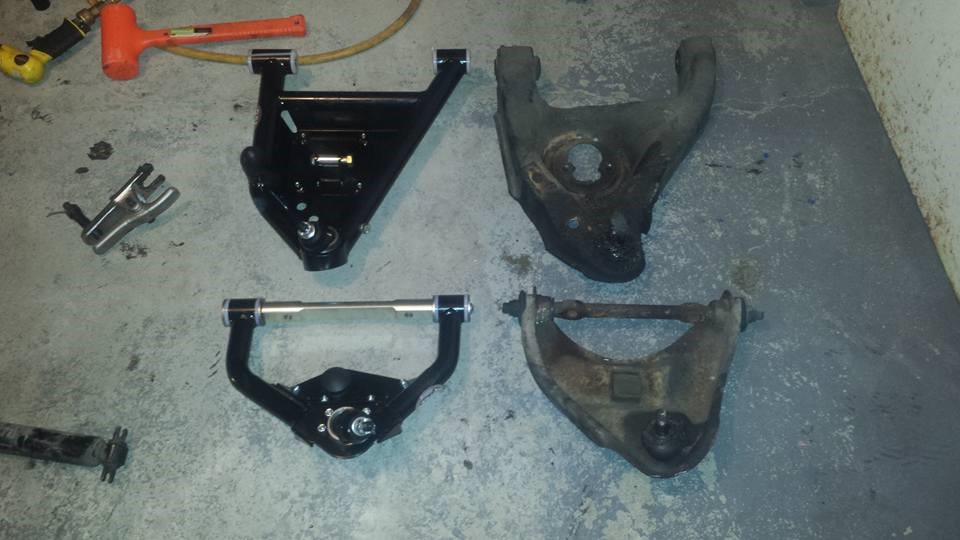
I decided on three different things to address in the suspension: body roll, ride height, and steering feel.
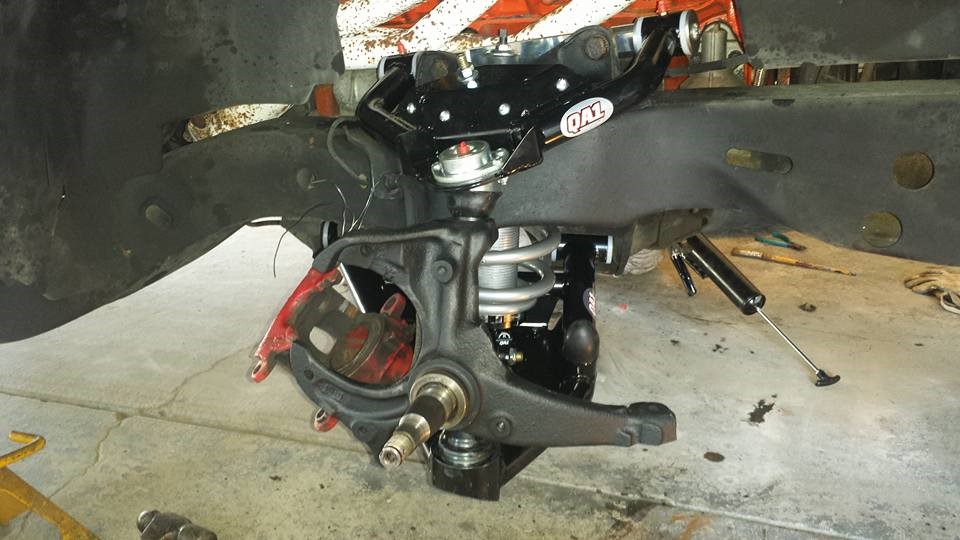
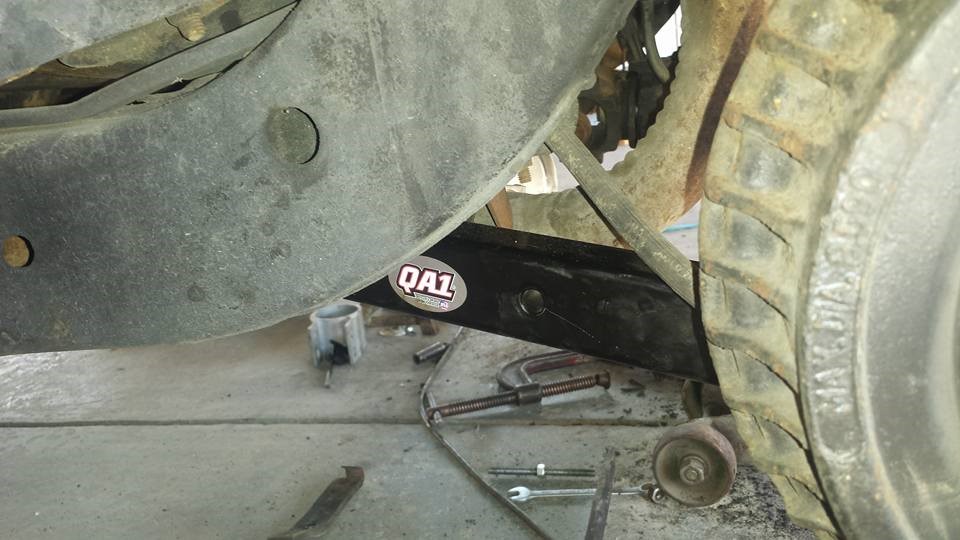
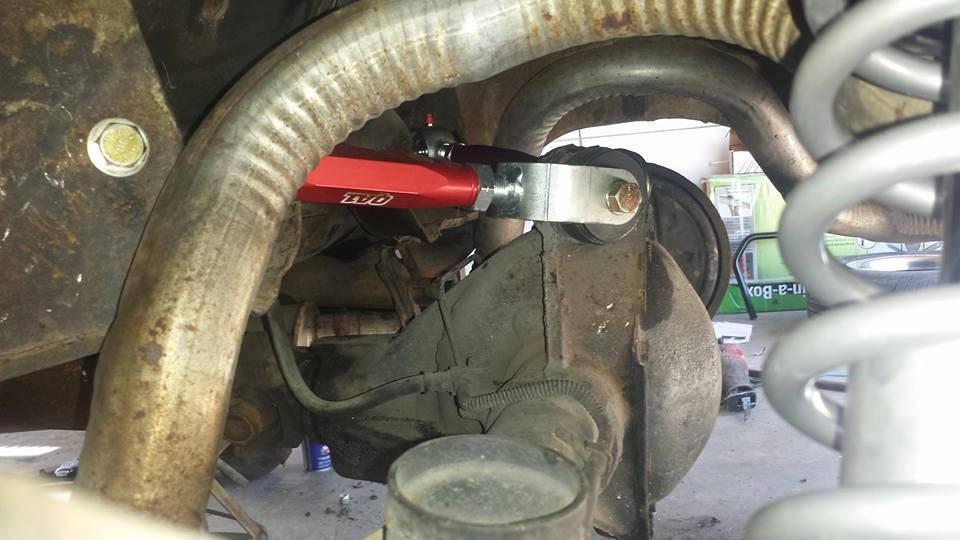
After much deliberation decided on the QA1 Level 3 Handling Suspension Kit (QA1-HK03-GMG1) with 550 in./lb. springs, new steering parts and the UMI Performance Adjustable Strut Tower Brace (UPI-3055-B). I also purchased a Cardone Industries remanufactured steering box for an FE2 Equipped Trans-AM (AAZ-27-6550) for better steering feel.
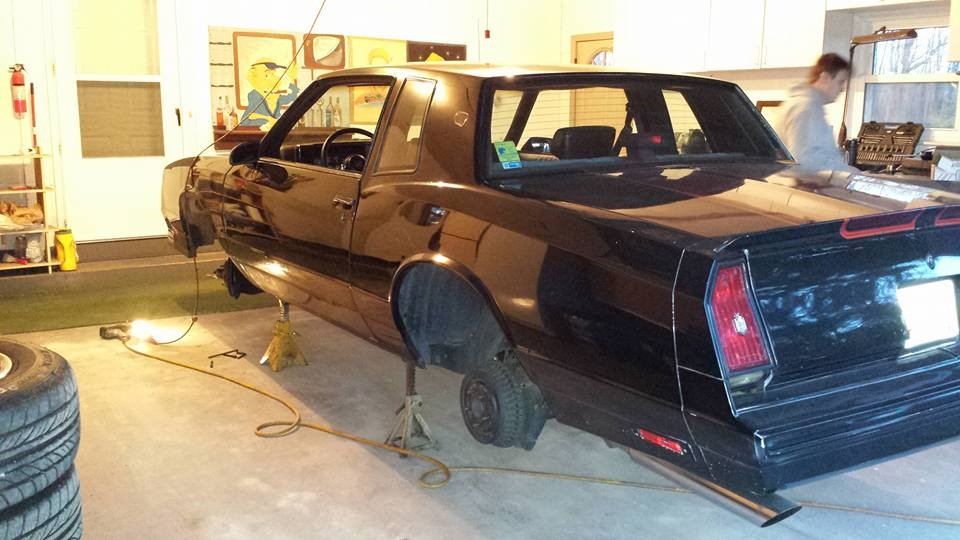
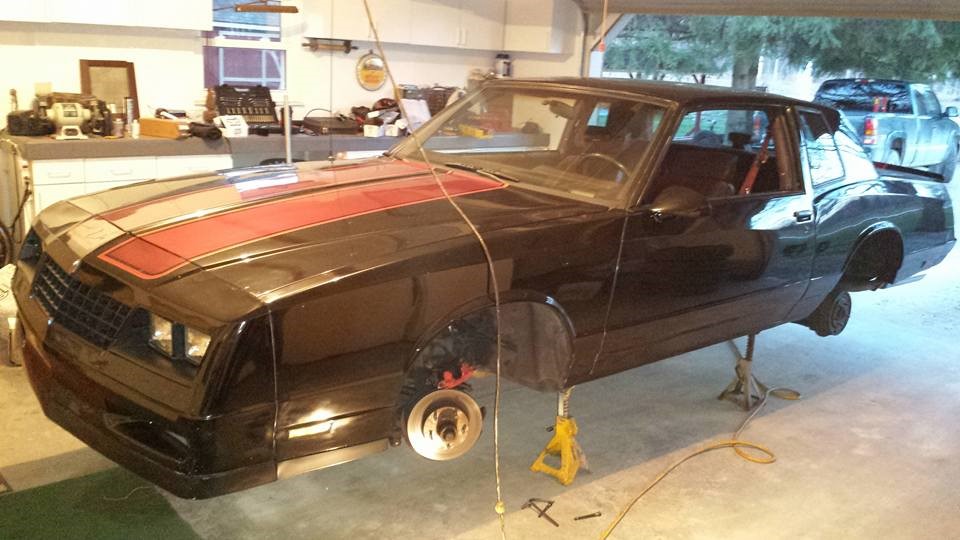
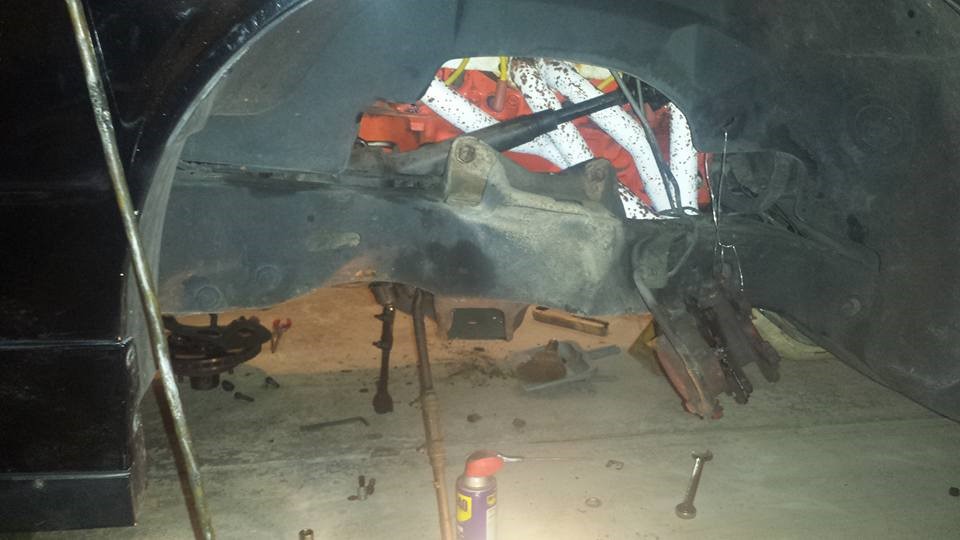
After all of the parts came in, I called my dad and laid out my challenge. I’d load all the parts into the trunk, drive to his house on Thursday, and I’d go racing with the new suspension on Sunday—a 56-hour suspension upgrade!
Follow along to see how our 56-hour suspension overhaul came together below:

…
Once we put the tires back on and got the car back on the ground, we started it up. The power steering, which we forgot to re-fill completely, groaned, complained, and then died.
We assumed the Cardone reman box was bad. Time was of the essence so I muscled the car quickly to the alignment shop where the toe, caster, and camber were dialed in where QA1 recommended for “aggressive” handling characteristics. However, none of this would matter if I didn’t have power steering.
When we got the car back from the alignment shop, it was already past 5 p.m., and we knew we would have to get the steering fixed. The first thing we did was put the factory steering box back on. No luck—the power steering was still dead. After trying to test the pump, I made the decision to just go get another one before the parts stores closed. We got the new pump, and with some improvisation got the old pulley off. Then, we installed it onto the new pump. We filled the reservoir with power steering fluid, started the car, and crossed our fingers.
It made the beautiful hydraulic groaning noise as it replaced air in the box with fluid. I had power steering once again.
Finally, at 11 p.m. on Saturday (nine hours before I had to race), the car was done—or at least as done as it was going to get.
I didn’t even have time to wash it before I raced the next day. Even if I had the time, I was too exhausted.
Like the article..i have a 84.ss Monte and it needs all the similar things you covered..thanls.rj
This is only part 1. I suggest you wait until the series wraps up the suspension topic until you buy parts.
My uncle has the same car and he’s looking to sell it 8686 Monte Carlo SS all original original ghost SS’s special edition make an offer
The only special edition SS from the factory was the Aerocoupe, they only made 200 of them. It might be a dealer special edition, but it would need lots of documentation to prove what it is.
Not original any more ?? Lost value now .
These cars aren’t worth anything. Not to mention the g-bodies are terribly slow from the factory. Even the famed Grand National is slower than an F-150 now.
Not that value matters because I never plan to sell it.