Editor’s Note:Kevin Tetz, creator of the Paintucation video series, is a seasoned automotive painting pro, and today he’s sharing some 101 tips on how to paint an engine bay for best results.
…
The first place people look at on a car is at the hood—typically a front three-quarter view—getting a feel for the car.
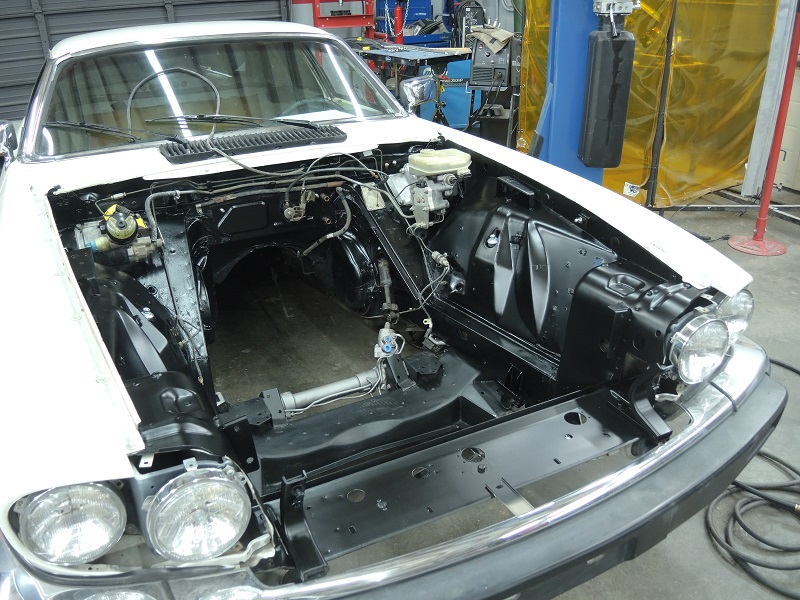
The second most popular view is UNDER the hood to check out the engine. Whether you’re restoring a car, refurbishing it, or a mixture of both as we’re doing on our 1990 Jaguar XJS project (XJ-LS), it really matters how the engine compartment looks.
Granted, it’s hard to keep the oily bits clean with a daily driver, but starting with a strong and great looking foundation is the key to not only a stunning under-hood impression, but to easy maintenance as well.
We decided to go with Summit Racing’s Hot Rod Flat Satin Black topcoat over a bed of black DTM Epoxy Primer for our engine compartment. Even if we weren’t changing the color on this car, spiffing up the engine bay with a satin black finish looks great, and the fact that its catalyzed urethane makes it chemical-resistant and very strong!
Check out the step-by-step methods we used to paint the engine bay of this Jaguar before we swap in an LS engine to replace the out-of-commission 5.3L V12 that it originally housed.
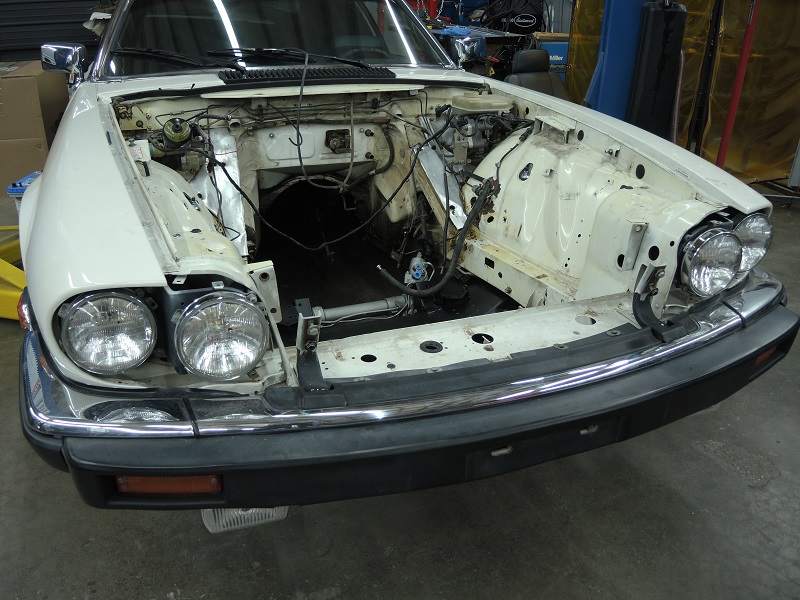
The Jag’s 5.3 V12 was toast, so LS power is replacing it. With the engine out it’s the perfect time to prep the firewall and aprons for new paint. (Image/Kevin Tetz)
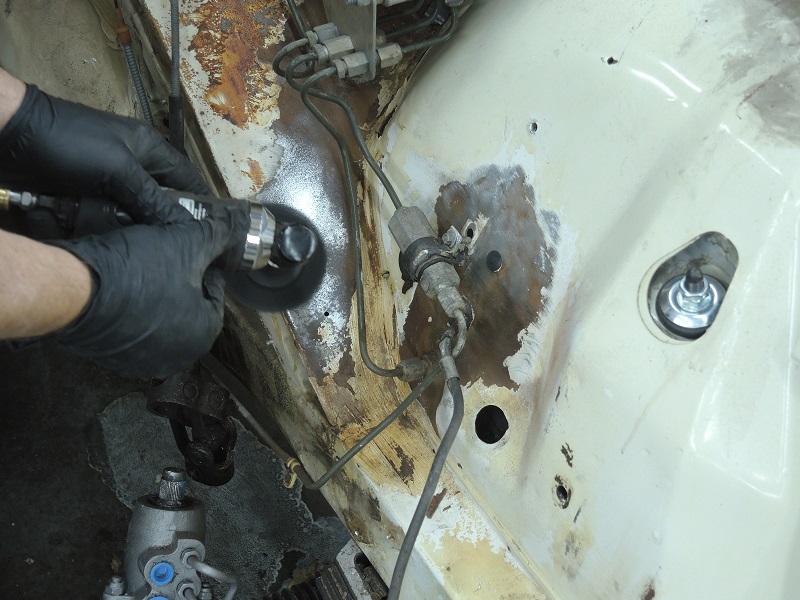
Time and brake fluid have taken their toll on the factory paint, so a fiber wheel and wire brush gets rid of the scaly rust. (Image/Kevin Tetz)
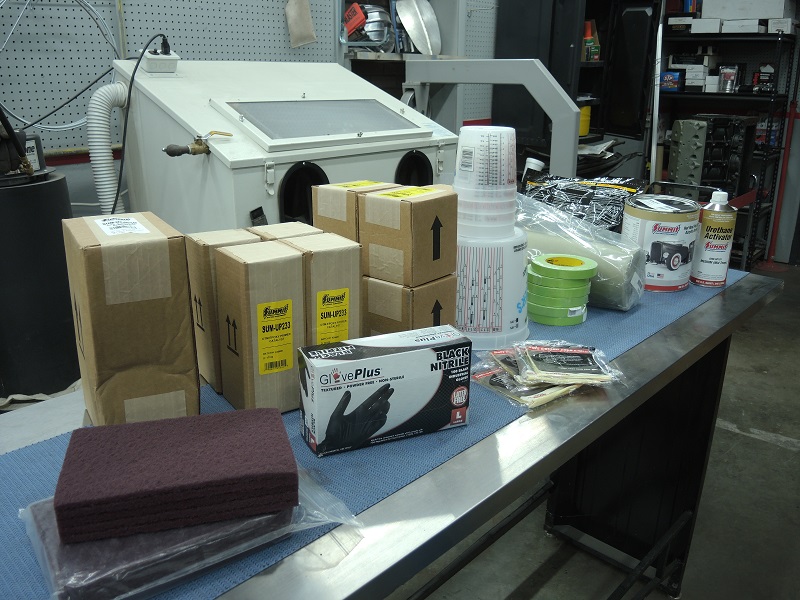
We’ll be using Summit Racing-branded epoxy primer and paint on different areas of the car, so we got a gallon of each as well as all the masking, prep and safety supplies we’ll need. (Image/Kevin Tetz)
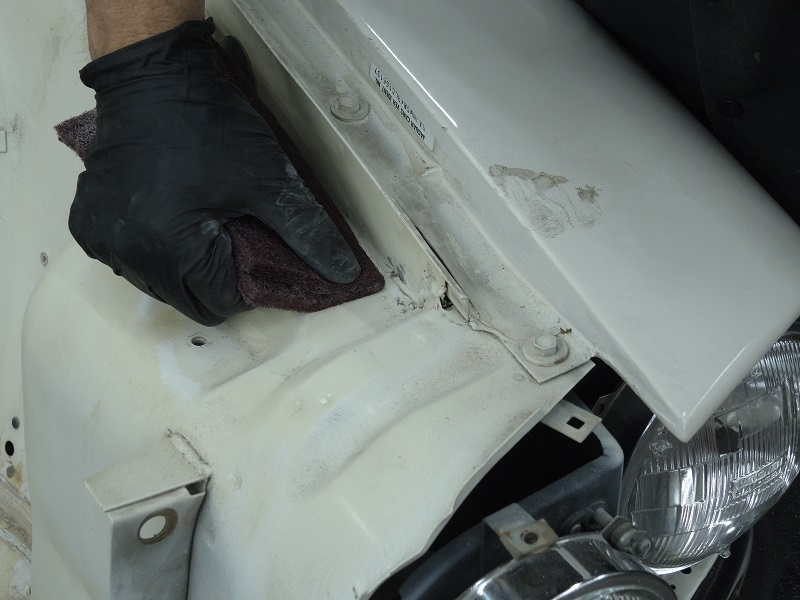
The original paint gets prepped for epoxy using red scuffing pads (SUM-ABHPMAROON). (Image/Kevin Tetz)
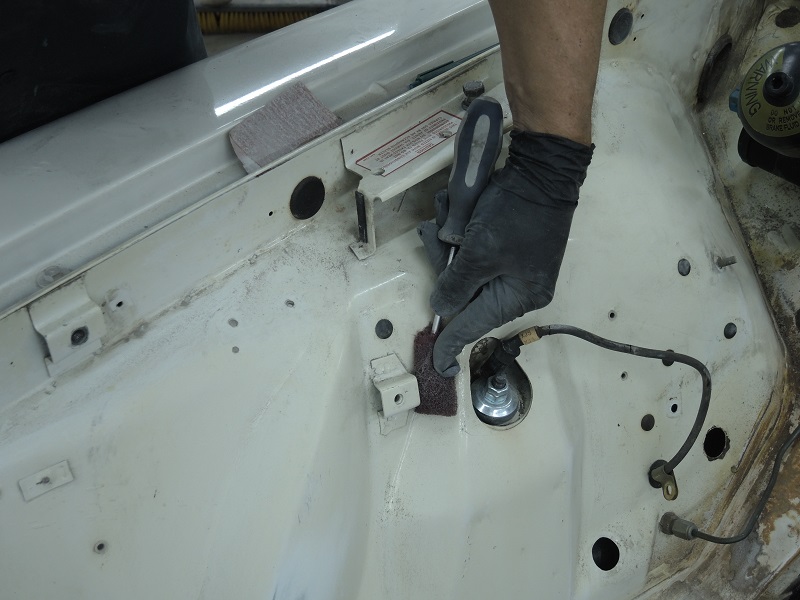
The great thing about scuffing pads is that they conform to different surfaces easily. We’re wrapping the pad around a screwdriver to reach into tight areas so our paintjob doesn’t flake later on. (Image/Kevin Tetz)
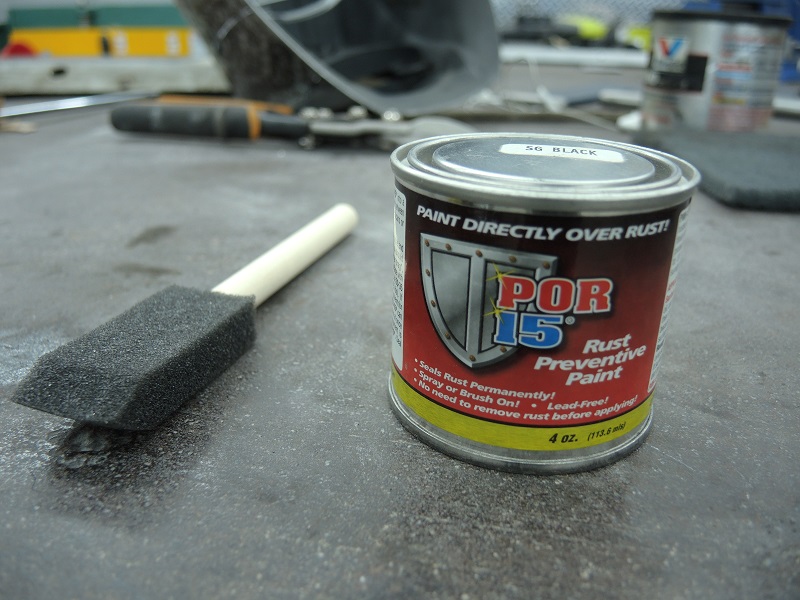
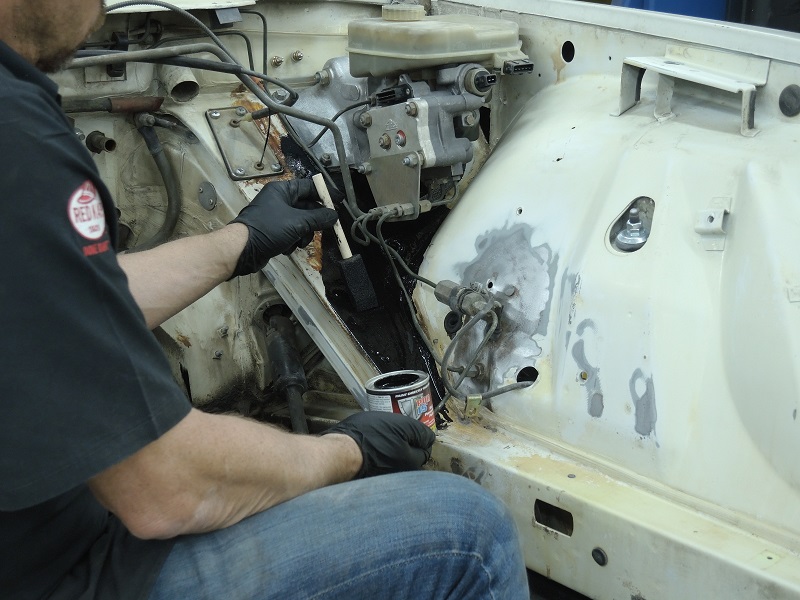
Since we’re dealing with a little scaly rust still in the pits of the metal, POR-15 (POI-45008) is a perfect coating to form a barrier between any rust that’s left over and our new coating. (Image/Kevin Tetz)
One coat of POR-15 is enough, and is applied with a disposable brush. Make sure you protect yourself while using this product—it’s impossible to remove from your skin! (Image/Kevin Tetz)
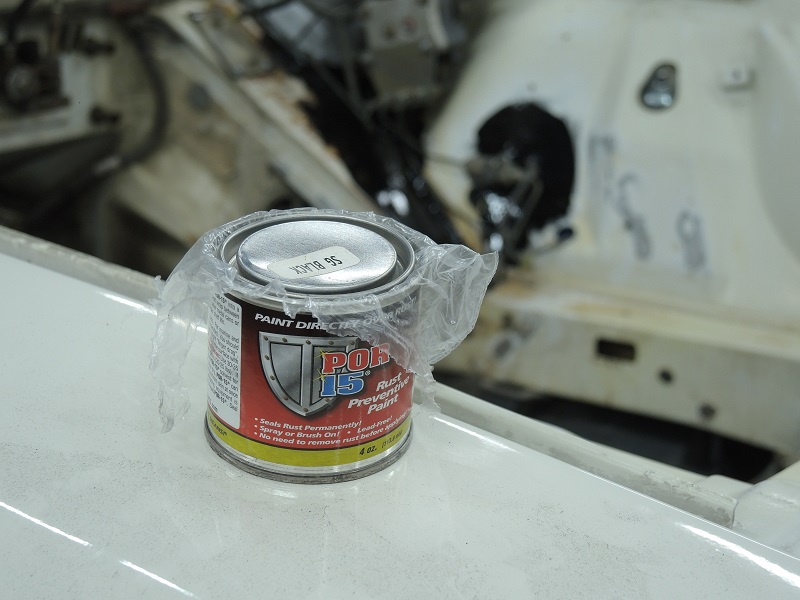
Here’s a tip—use plastic when replacing the lid on the POR-15 can. This makes it easy to remove the lid next time you use it. (Image/Kevin Tetz)
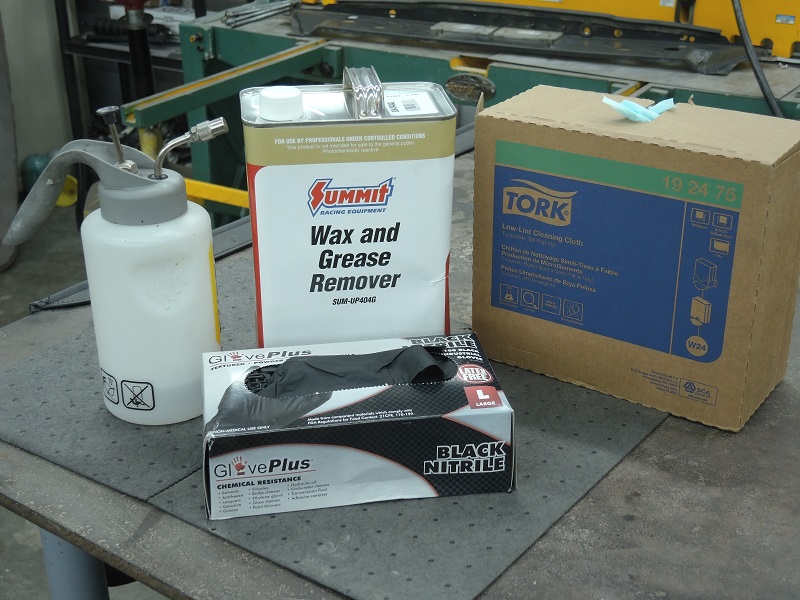
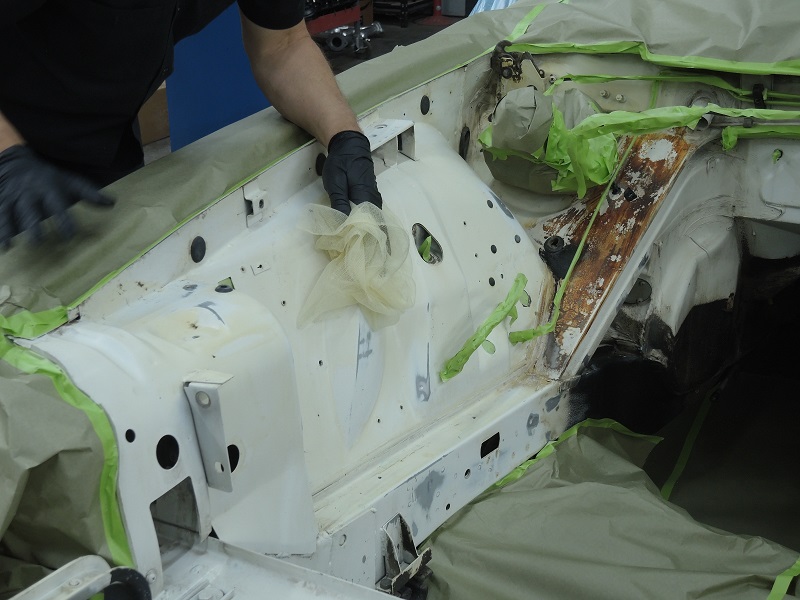
We’ll pre-clean our surfaces with Summit Racing wax and remover (SUM-UP404G), Tork low-lint wipe towels (TOK-192475-1), and Nitrile gloves (GPN-B46100) to protect our skin. The pump sprayer mists the cleaner onto the surface and is wiped off in one direction with the towels. (Image/Kevin Tetz)
With the wax and grease remover wiped down, we’ll use compressed air at about 60 psi to blow any dust and debris out of crevices and cracks. (Image/Kevin Tetz)
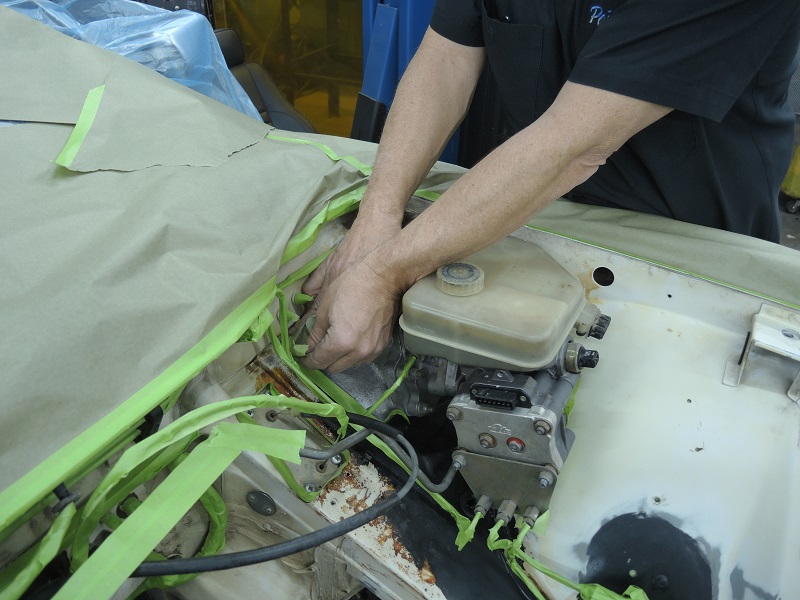
Masking what we didn’t remove (ABS system and brake lines) is tedious but makes for a clean looking job. You’ll need several rolls of ¾-inch masking tape for this job. (Image/Kevin Tetz)
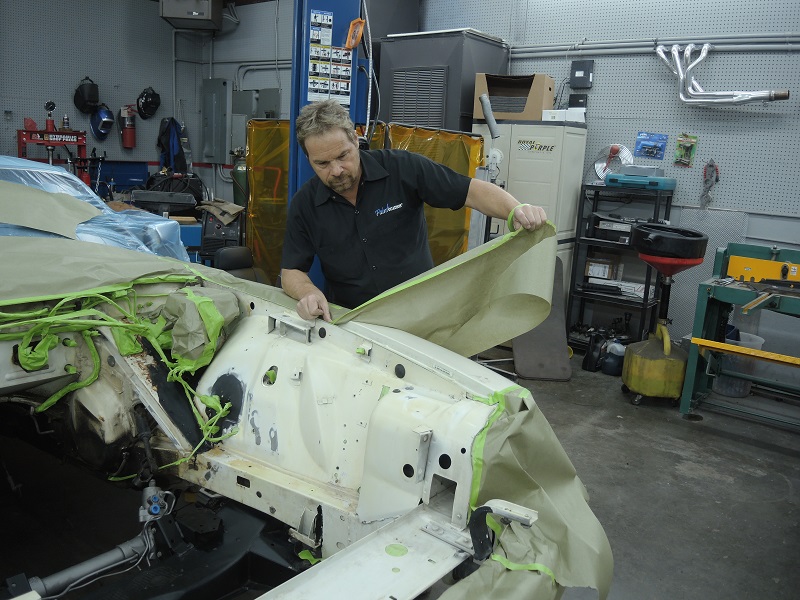
We used a roll of 18-inch masking paper (FSX-18) for the sheet metal and surrounding areas. Don’t use newsprint with urethane and epoxy coatings. Modern paint coatings will bleed through the newsprint. (Image/Kevin Tetz)
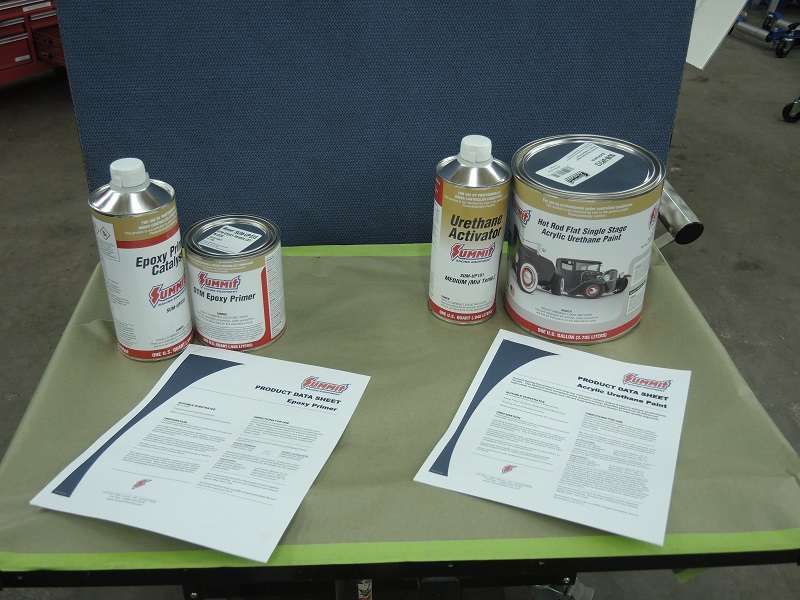
This is our two-part paint system—epoxy primer for the ground coat and Hot Rod Black Satin urethane paint as the top coat. Every Summit Racing paint product has a TDS sheet that can be printed from the Summit Racing website. These sheets contain everything you need to know about using these products including mix ratios, spray gun selection, preparation guides, drying times, and important safety information. (Image/Kevin Tetz)
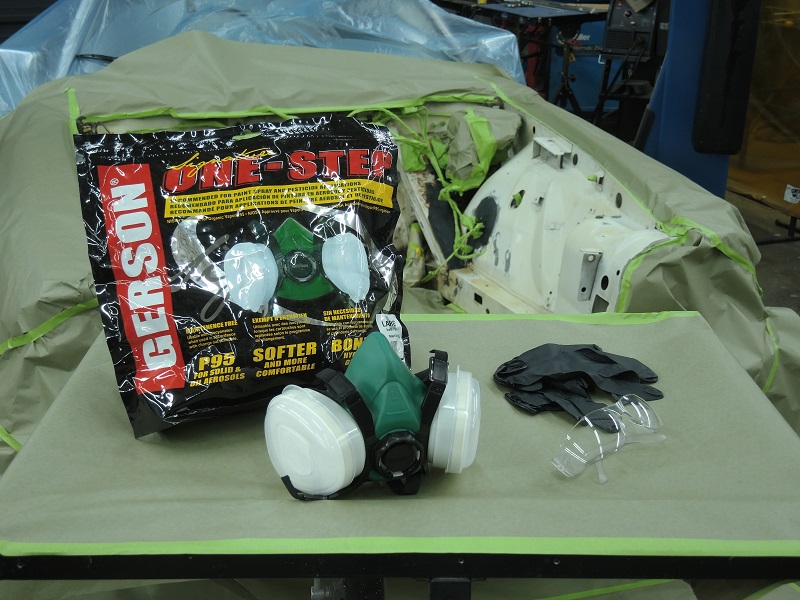
When we spray we use a well-ventilated shop, a new active charcoal respirator (LMG-08311P), gloves, and safety glasses. Safety is no joke—make sure you’re protected. (Image/Kevin Tetz)
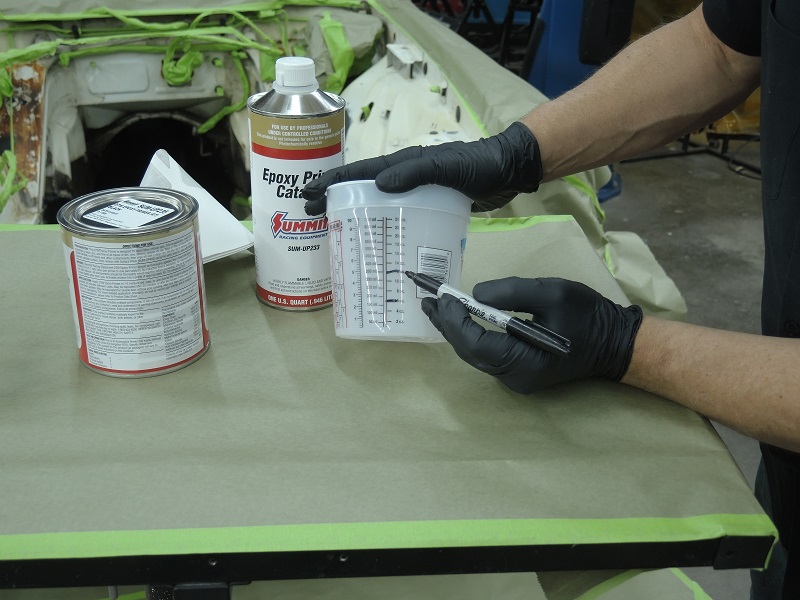
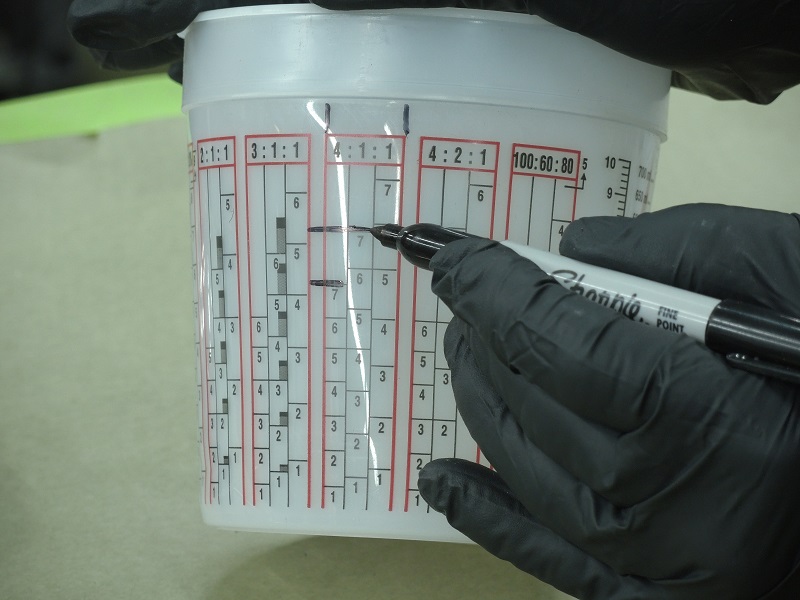
Mixing cups give you options and take away the guesswork when mixing paint. Find your correct ratio on the side of the cup and follow it left-to-right for a perfect mix. Your ratio is clearly labeled in the TDS sheet. (Image/Kevin Tetz)
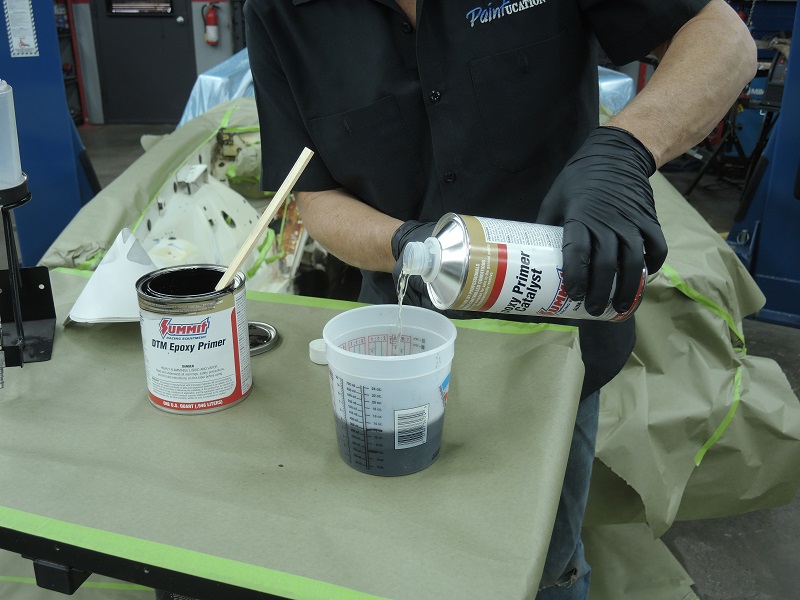
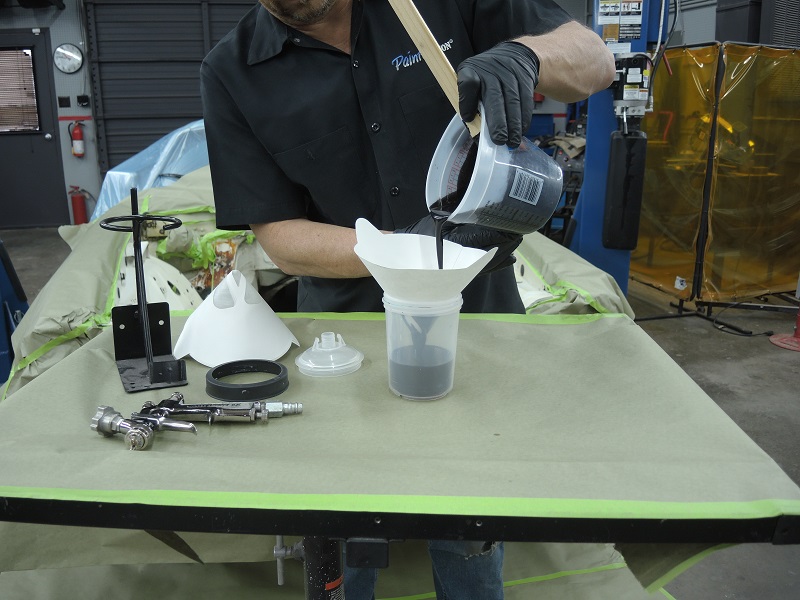
The epoxy primer uses a 1:1 mix ratio—equal parts of each component. If your mix ratio is not on the side of the mixing cup, you can do simple math and use the markings to make your ratio. Stir or shake your primer before blending. (Image/Kevin Tetz)
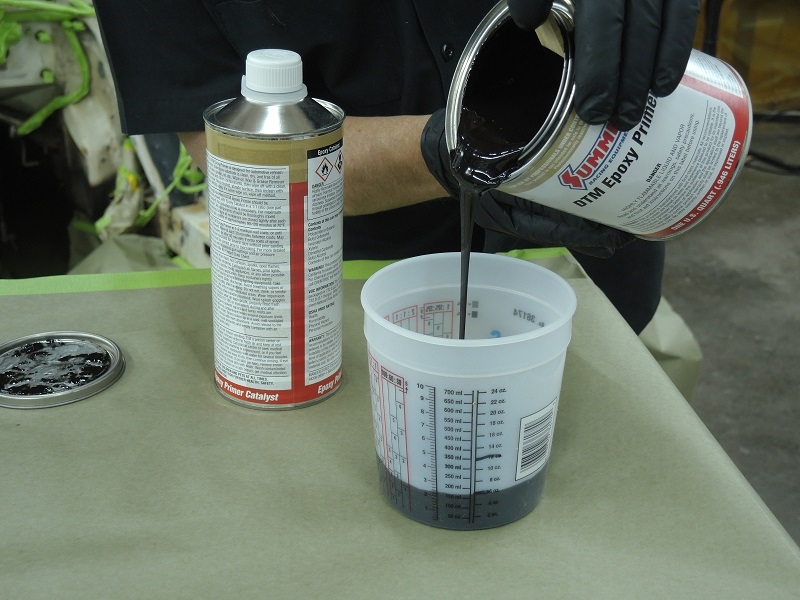
I always mix paint products wearing gloves and glasses on as well. We’re adding the equal part of catalyst last. (Image/Kevin Tetz)
With both components added, thoroughly blend them together. (Image/Kevin Tetz)
Strain the mixed primer into the PPS cup (or your spray gun cup if you’re not using the mixing cup) to make sure you’ve filtered out any debris. (Image/Kevin Tetz)
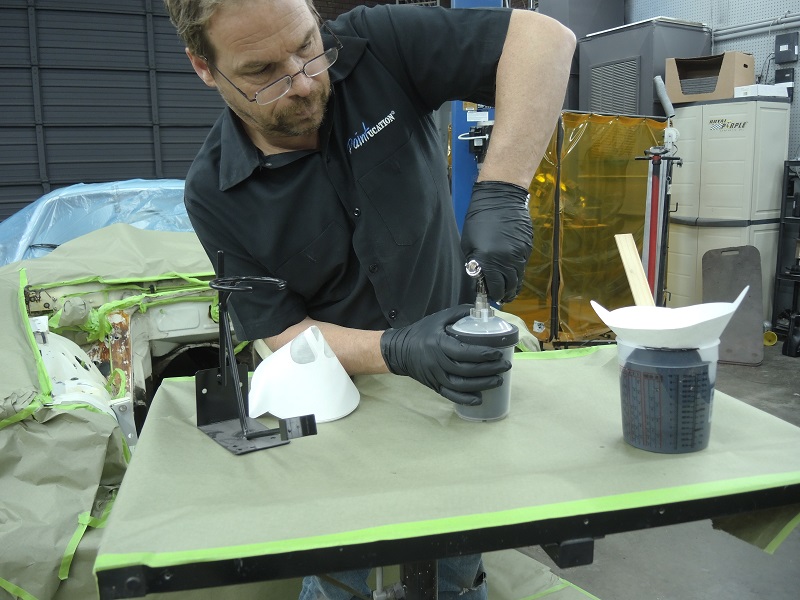
PPS uses a twist-lock top to lock it to the gun. Make sure it’s snapped in. (Image/Kevin Tetz)
Run a small amount of material through the gun before you spray! This make sure the fluid chamber of the gun is purged and ready. (Image/Kevin Tetz)
A tack cloth (LMG-020003G) is used to do a final surface cleaning before spraying primer or paint. (Image/Kevin Tetz)
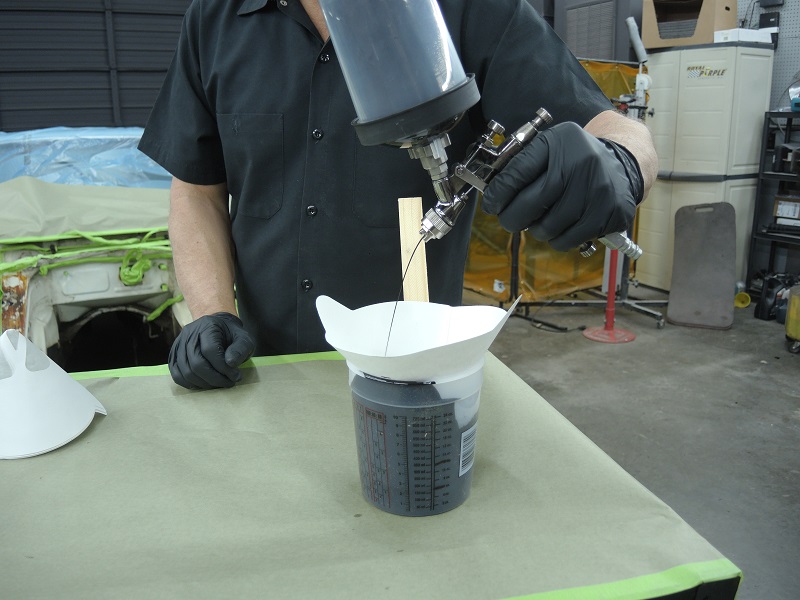
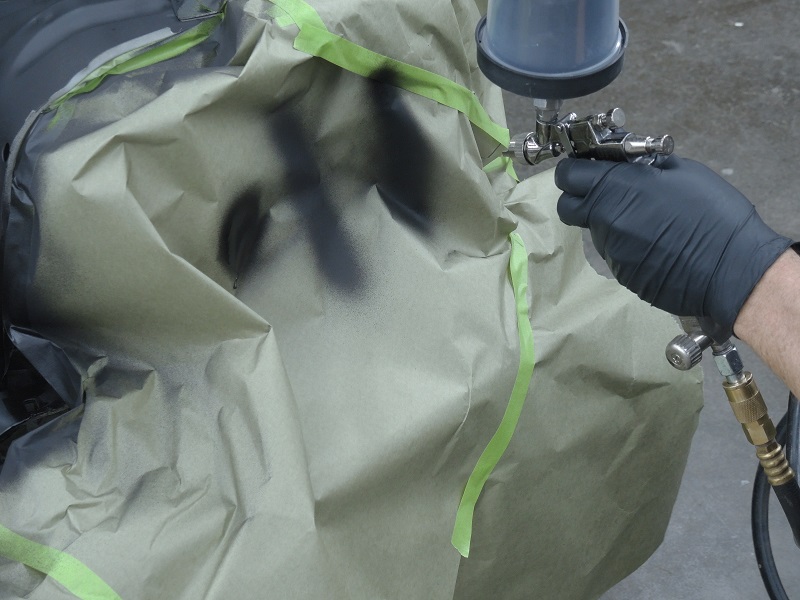
Test your spray pattern on the masking paper. You should see an elliptical (football) shape for your pattern. We’re using an Iwata LPH400 gun with a 1.4 fluid tip for both primer and paint. (Image/Kevin Tetz)
A single wet coat of epoxy is applied using a 50% overlap on each pass, approximately 6 inches from the surface. Overlapping your pattern on each pass gives you an even layer of material without runs or drips. (Image/Kevin Tetz)
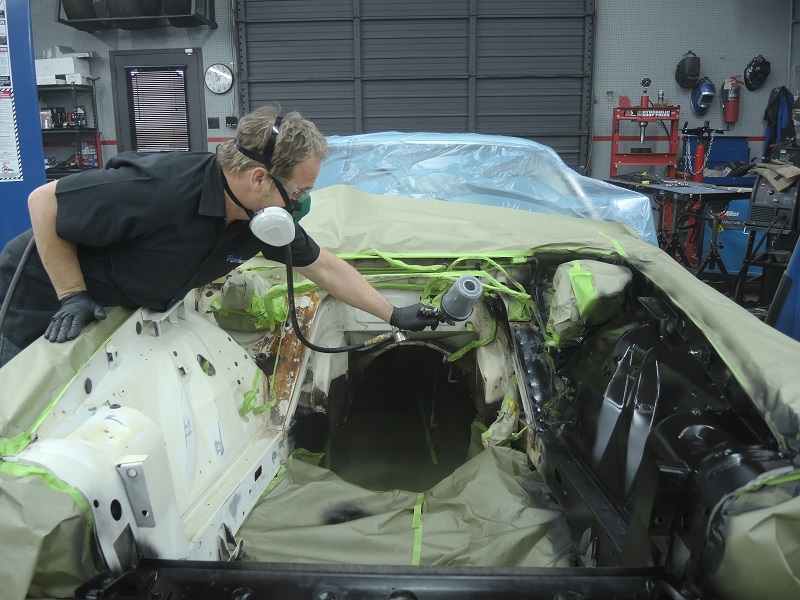
The masking paper on the fenders allows us to lean over for access while spraying. This engine bay is a challenge to spray with all the different shapes and angles. (Image/Kevin Tetz)
The primer’s TDS sheet calls for waiting at least 30 minutes before you can paint over it, but it gives you a 48 hour window where you don’t have to sand it to paint it. This is important with an uneven area like ours that took a long time to properly sand! Epoxy saves you time and allows you to wait overnight to paint if you have to, without doing any more surface prep. (Image/Kevin Tetz)
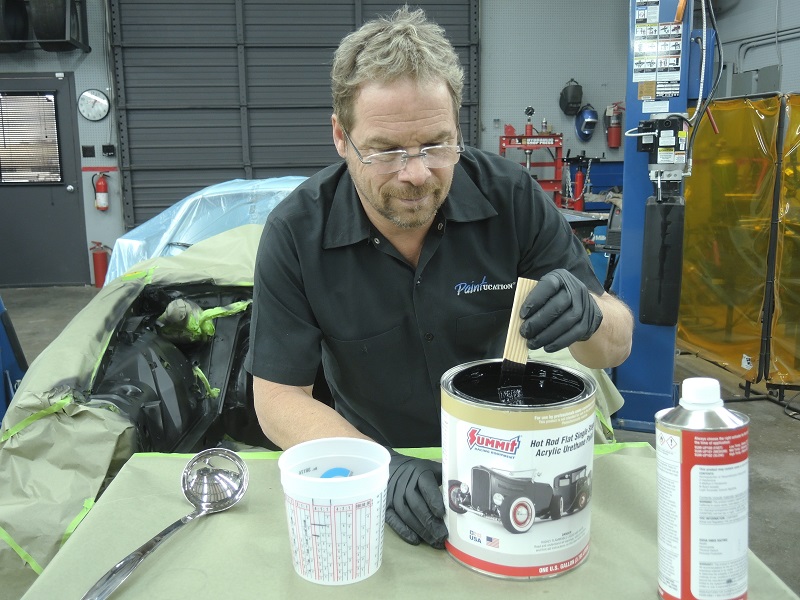
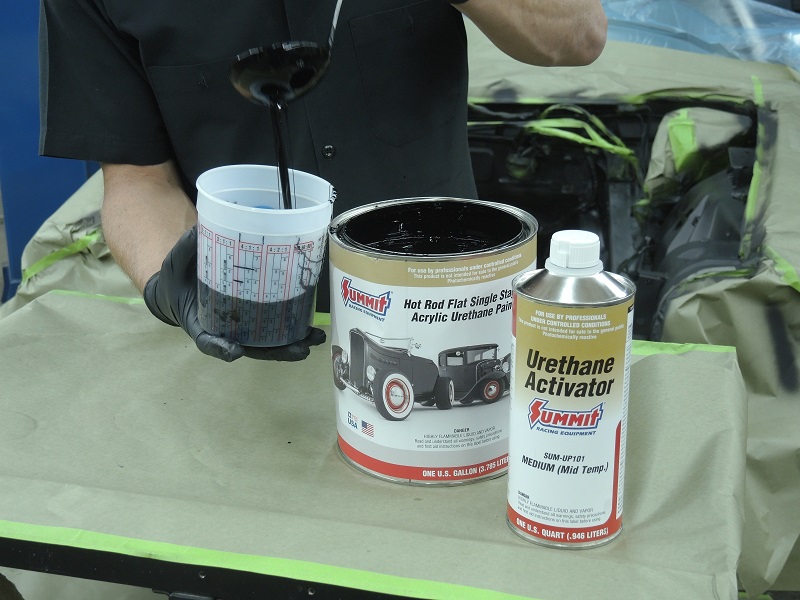
We let our epoxy sit for an hour before topcoating. We cleaned our paint gun with lacquer thinner and started mixing the Hot Rod Flat Satin Black paint. These products tend to settle, so make sure the paint is completely stirred with nothing settled at the bottom of the can. (Image/Kevin Tetz)
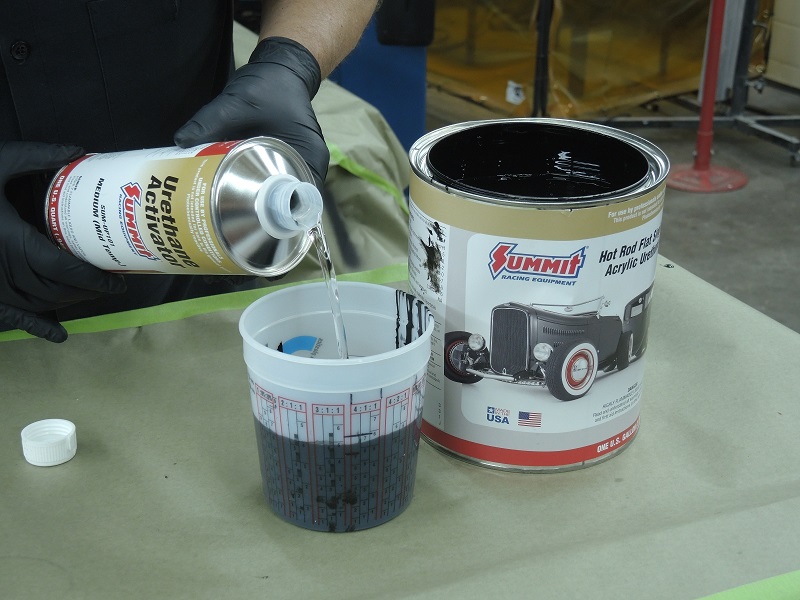
The paint has a 4:1 mix-ratio—4 parts paint to 1 part catalyst. This ratio is clearly marked on the side of the mixing cup and makes it easy for you to get a perfect mix. Four parts is marked on the far left column, then you move to the next column for the 1 part of catalyst. (Image/Kevin Tetz)
A kitchen ladle is an easy way to keep your bench clean while mixing out of a full gallon of paint. (Image/Kevin Tetz)
We’re using medium temperature reducer since we’re around 73 degrees in our shop. Summit Racing offers a range of catalyst temperatures to suit whatever your conditions are. (Image/Kevin Tetz)
Testing the gun pattern on the paper again tells us we’re ready to paint. (Image/Kevin Tetz)
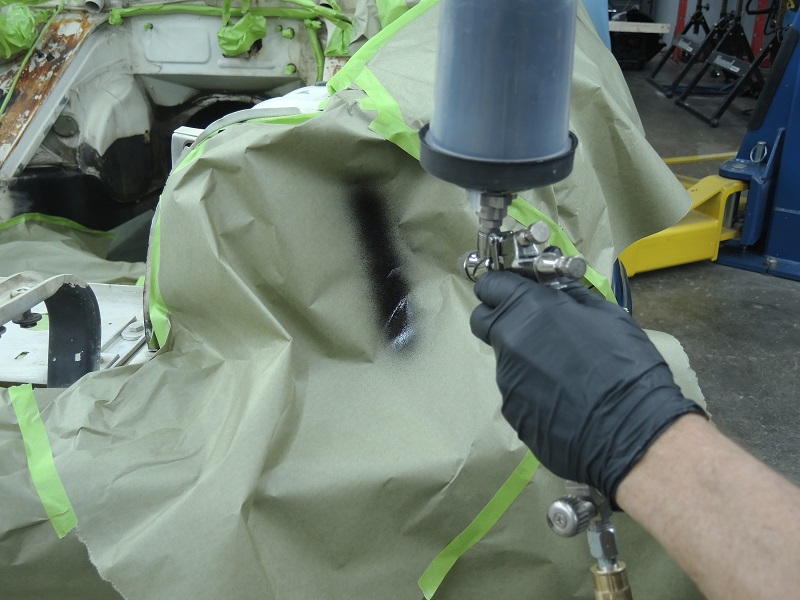
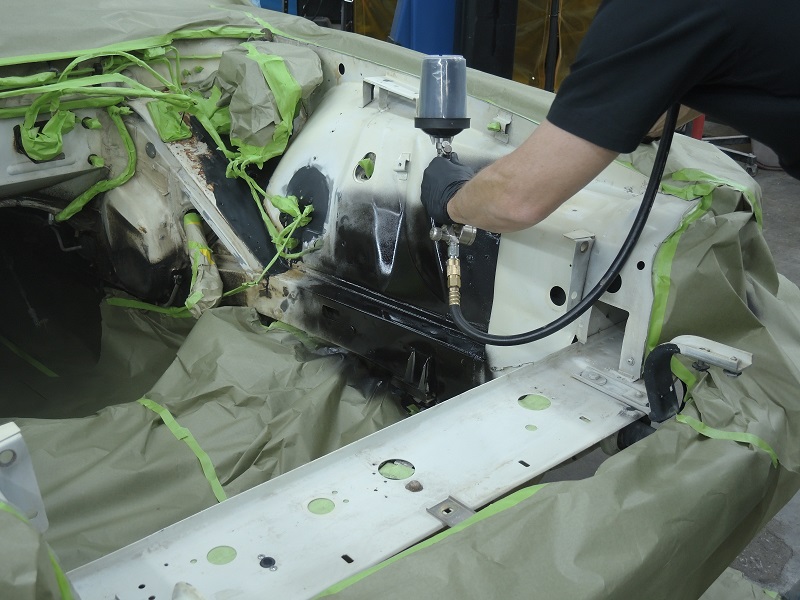
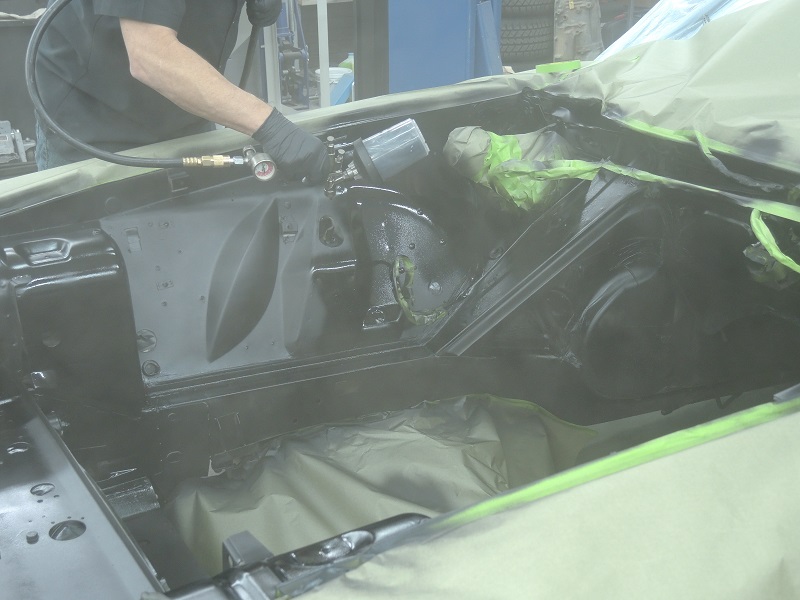
I found it was easiest to start on the firewall and work my way to each apron, alternating from side to side to get even coverage without dry spray. (Image/Kevin Tetz)
Here’s why it’s important to have good ventilation as well as good safety equipment. Overspray needs to be cleared out of the shop quickly so the solvents don’t dive back into the coating. Our garage doors were open halfway to create airflow. (Image/Kevin Tetz)
We shot two wet coats over the engine bay with 15 minutes of drying time between coats. The Hot Rod Satin Black needs at least 30 minutes before it evens out and takes on its final appearance, so don’t worry if it appears to dry inconsistently at first. (Image/Kevin Tetz)
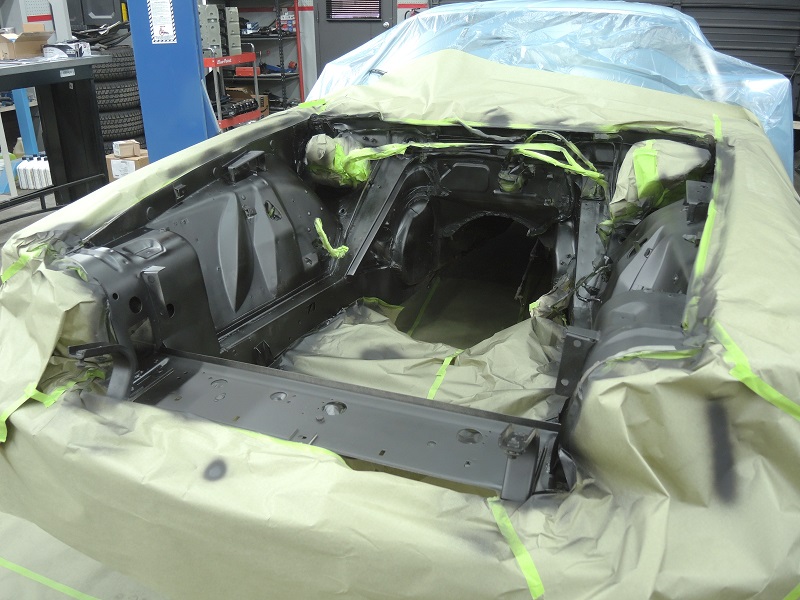
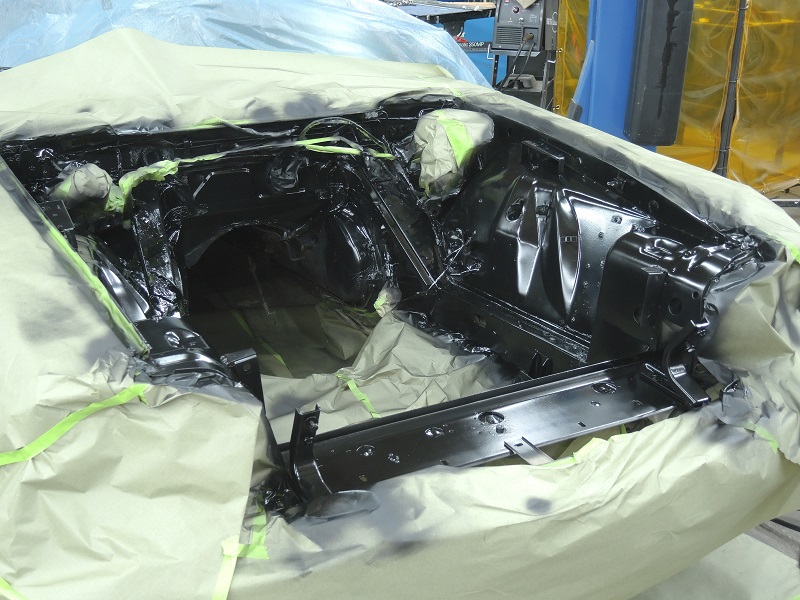
We let everything dry overnight and then carefully unmasked the project. What we’re got now is a beautiful satin-black finish that will be compatible with whatever color we choose for the outside of this project. The coating should last a lifetime and be easy to maintain. (Image/Kevin Tetz)
Where is your well ventilated area? No fans in sight and doors closed? And 18 inches of paper will keep the black specs off the fenders , maybe, but the roof is gonna look like a leopard., so is your floor , not to mention your tool box and all your equipment. I get results that look as nice as yours , granted , they won`t last a ‘lifetime’ but it will outlast the bow-tie your putting in da ‘jigwaar’. I think it would have looked much nicer the OEM color. Plus all the money you are spending non prep and materials you could have EASILY did it, and clean up after it grenades don`t take any more time. For satin black simply oven cleaner the crud out of it a couple times , blow dry really close to blast away any loose stuff , scottsbrite it and either rattle can rustoleum or oil based with cheap hardener . cost is less than 10% of what you spent. It will last a good 5 years and I pressure wash it every 6 months or so. In my hillbilly eyes , this was way overboard, but I only been doing this for 50 years and not wasting my customers money.
There is clearly plastic on the entire rest of the car….You are criticizing someone on their methods, which you can’t even accurately observe, then go on to say you would paint it with canned rustoleum?
I agree with Billy, for someone that cant even see the plastic wrapped on the car and you say you have been painting for 50 years you sir need to retire with the Sh*t you are talking. Rattle can really? and talking about a LS go home and retire son. If I am not mistaking he has a big fan with a filter sock on it for those small areas, Yes I have his dvd set you might want to watch and learn something you old a** hack.
Nice job. I am glad to see someone else using the Summit line of auto paint. I used the same DTM Epoxy on my Falcon as a foundation sealer prior to body work, it was fairly inexpensive and looked awesome! I liked it so much I am thinking about shooting my 96 Dodge Cummins the same and just rolling with it. If it gets scratched up screw it. Scuff and recoat. Thanks for the info. I’m trying to make use of winter in a 1 bay garage and do my engine compartment while I wait for warmer days ahead. I did the underside of my hood with POR 15 and it looks sweet. Thinking about just doing the whole engine compartment in that by itself since it is good with the heat spec, durable, and levels nicely. Plus UV breakdown shouldn’t be an issue under the hood.
Personally I like the underhood black satin look….I’m fixing up a 90 Civic hatch with my son and I’ll show him how to prep and paint the compartment….Thanks for the tips.


Where is your well ventilated area? No fans in sight and doors closed? And 18 inches of paper will keep the black specs off the fenders , maybe, but the roof is gonna look like a leopard., so is your floor , not to mention your tool box and all your equipment. I get results that look as nice as yours , granted , they won`t last a ‘lifetime’ but it will outlast the bow-tie your putting in da ‘jigwaar’. I think it would have looked much nicer the OEM color. Plus all the money you are spending non prep and materials you could have EASILY did it, and clean up after it grenades don`t take any more time. For satin black simply oven cleaner the crud out of it a couple times , blow dry really close to blast away any loose stuff , scottsbrite it and either rattle can rustoleum or oil based with cheap hardener . cost is less than 10% of what you spent. It will last a good 5 years and I pressure wash it every 6 months or so. In my hillbilly eyes , this was way overboard, but I only been doing this for 50 years and not wasting my customers money.
There is clearly plastic on the entire rest of the car….You are criticizing someone on their methods, which you can’t even accurately observe, then go on to say you would paint it with canned rustoleum?
I agree with Billy, for someone that cant even see the plastic wrapped on the car and you say you have been painting for 50 years you sir need to retire with the Sh*t you are talking. Rattle can really? and talking about a LS go home and retire son. If I am not mistaking he has a big fan with a filter sock on it for those small areas, Yes I have his dvd set you might want to watch and learn something you old a** hack.
Nice write up! Thanks!
Nice job. I am glad to see someone else using the Summit line of auto paint. I used the same DTM Epoxy on my Falcon as a foundation sealer prior to body work, it was fairly inexpensive and looked awesome! I liked it so much I am thinking about shooting my 96 Dodge Cummins the same and just rolling with it. If it gets scratched up screw it. Scuff and recoat. Thanks for the info. I’m trying to make use of winter in a 1 bay garage and do my engine compartment while I wait for warmer days ahead. I did the underside of my hood with POR 15 and it looks sweet. Thinking about just doing the whole engine compartment in that by itself since it is good with the heat spec, durable, and levels nicely. Plus UV breakdown shouldn’t be an issue under the hood.
Personally I like the underhood black satin look….I’m fixing up a 90 Civic hatch with my son and I’ll show him how to prep and paint the compartment….Thanks for the tips.