The whole idea behind a head and neck restraint system is to limit the forward movement of the head beyond the point where damage to the connection between the neck and the spine might occur in a massive negative g situation like hitting a retaining wall. The head and neck area are the most vulnerable to damage. (Image/Jeff Smith)
“There are only three sports: bullfighting, motor racing, and mountaineering; all the rest are merely games.”
– Ernest Hemingway
…
You have to appreciate the boldness of the drivers from the earliest days of motor racing.
Much of the drama surrounding auto racing back then stemmed from one simple fact: driving a race car was nothing short of life-threatening.
Today, it can be said that it has never been safer to sit behind the wheel of a race car.
One of the biggest advancements in driver safety came for the development and evolution of head-and-neck restraint systems.
Several companies offer them. We thought it would be a good idea to dive a little deeper into how to mount these systems properly to deliver maximum performance and protection.
How Head-and-Neck Restraint Systems Work

The NecksGen device is extremely light at only 1.3 pounds for the medium version. The belt channels will accommodate either two- or three-inch-wide belts, and the tether system can be attached and detached from the helmet easily. (Image/Jeff Smith)
The system is designed to control the movement of the driver’s head, especially the base of the neck during sudden negative accelerations or hard stops like those that occur in crashes.
The collar rests on the driver’s shoulders and is retained by the shoulder harness. A tether arrangement ties the helmet to the device which limits severe forward head movement.
In a severe negative-g situation, a driver’s body is held tightly in the seat with the five-point harness system but the head and neck are left vulnerable unless properly restrained. In a crash, the head can be pulled forward violently, which can cause what doctors refer to as a basilar skull fracture.
An Intro to Impact Racing’s NecksGen REV Head-and-Neck Restraint Systems
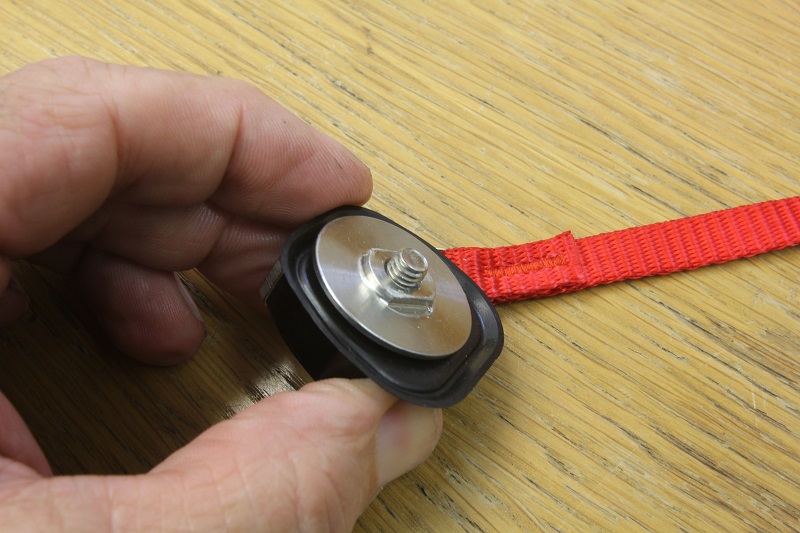
The NecksGen REV system comes with the anchors that have this stainless nut/washer assembly on the back side. This washer is only used when the helmet is not already fitted with the locating female M6 terminals. (Image/Jeff Smith)
While some racers complain about limited movement while using these systems, the Impact Racing NecksGen REV head-and-neck restraint system offers exceptional freedom of movement.
Because each driver’s physical makeup is different, there are some measurements that need to be performed to ensure that the system will work properly to keep each individual driver safe in a crash.
First, we measured the driver’s neck diameter to establish the properly sized NecksGen system to order.
The most common size is medium—as it was for our driver— but the device is also offered in small and large sizes as well.
Once our NecksGen arrived, it required only a few simple steps to put it into action.
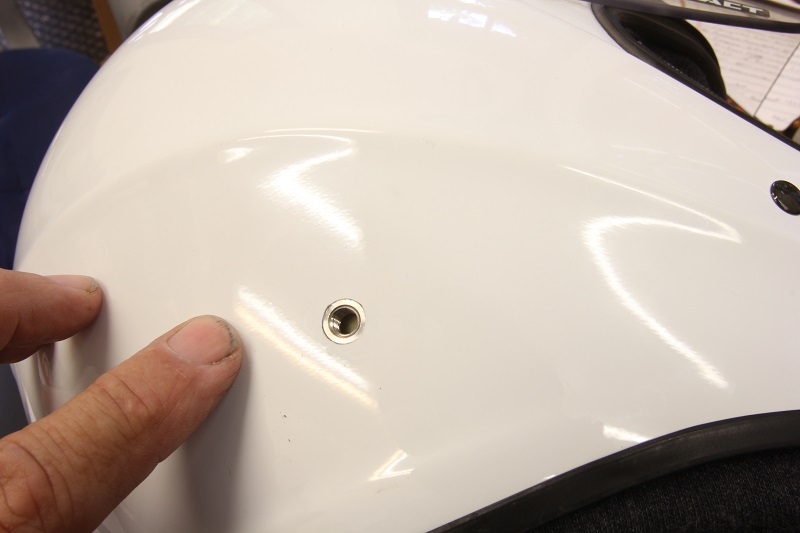
We had previously bought a Snell SA2015-rated Impact Racing helmet that includes the mounting anchor for a head-and-neck restraint system. This is part of any helmet built to satisfy Snell 2010 and later requirements. Prior to the SA2015 standard, the M6 terminals were optional per the Snell standard.
We will be matching this Impact REV system to an existing Snell 2015 Impact Racing 1320 style helmet that comes with the mounting lugs permanently installed in the helmet which makes installing the REV post anchor clips as easy as bolting them on. (Image/Jeff Smith)
Helmets certified to the previous standard that include the integrated M6 terminal were SAH2010 (the H meaning the helmet was certified with the insert). With the SA2015 standard, the M6 terminals were a requirement so there is no SAH identification. It is simply an SA2015 helmet and the integrated anchors are required to be certified to that Snell standard for attaching the hardware in place.
If not, drilling your helmet to fit the hardware is a simple procedure. Instructions for doing this are included with the system. Note: Make sure you can access the inside of the helmet liner before you drill.
Installing the quick-release mechanism on our Impact helmet was easy, and the kit supplied the Allen wrench we needed.
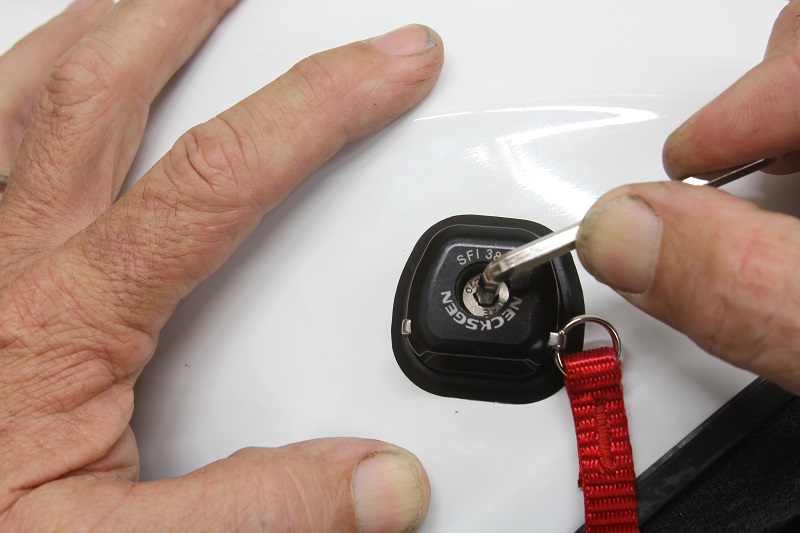
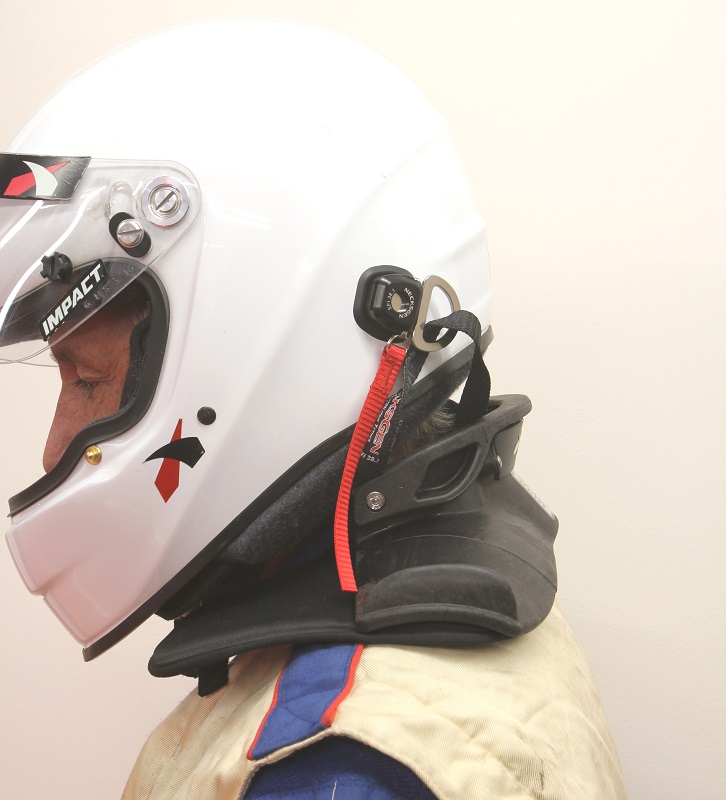
To install the anchor, simply bolt it to the helmet at a rearward-facing 45-degree angle. This will place the horizontal slots for the male clips facing rearward and the red release handles facing forward. (Image/Jeff Smith)
With that in place, the next step is for the driver to sit in the car with the NecksGen brace in place and connected to the helmet.
The driver should position him- or herself in the seat with the straps over the top of the NecksGen device. Next they should gently push the device back against the seat back or headrest—it is not intended to be tight up against the driver’s neck. This should be the most comfortable location to wear the device.
Finally, it’s helpful to have a second person pull all the excess tether material to one side and measure the total length of the excess length by folding it into a loop and then measuring that distance. The ideal length will generate a one-inch pinch or fold length. This would represent two inches of total slack in the tether. This is not an exact specification, so if you have 1¼ inches, for example, that spec will probably be fine.
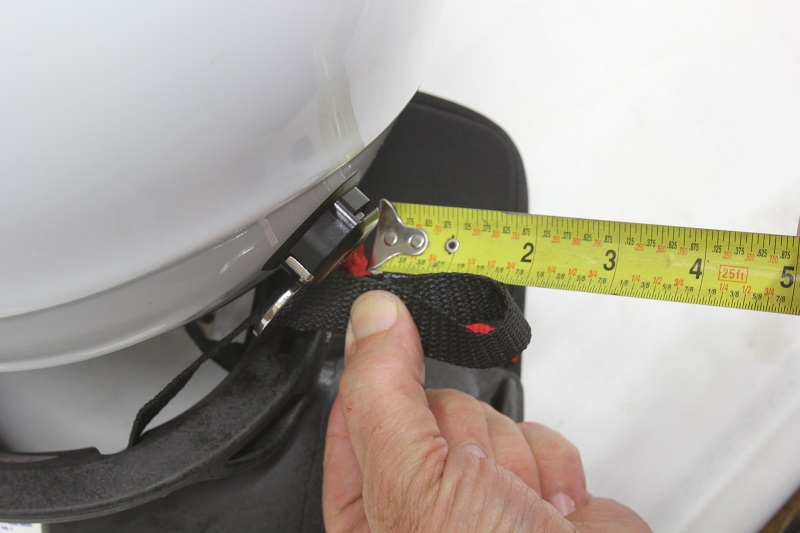
We’ve simulated the position of the helmet to the REV restraint to show how to measure the tether free length. Pull all the slack out of the tether and create a loop. Measure the length of the loop—if it is roughly 1 to 1½-inches long then the length is correct. If the loop is longer—two inches in this case, this will require a shorter tether that can be obtained from Impact. (Image/Jeff Smith)
In our case, the tether measurement came out quite a bit longer which required sending a request to NecksGen for a shorter tether. A medium device comes with a 23-inch-long tether. They are available in one-inch increments.
With your loop measurement, the technicians at NecksGen can determine quickly the tether length you need. So, as an example, if the loop measures two inches instead of the recommended one inch, a tether that is two inches shorter would bring the tether length into spec.
All of this might sound complicated but it really is very simple.
We spent about 20 minutes working on this, and another 20 minutes practicing an exit procedure from a Late Model stock car through the driver’s window. The NecksGen device really doesn’t impede movement and we discovered that the driver using this device could exit the car easily in the same amount of time as he did with no safety restraint system in place.
We won’t race without this now.
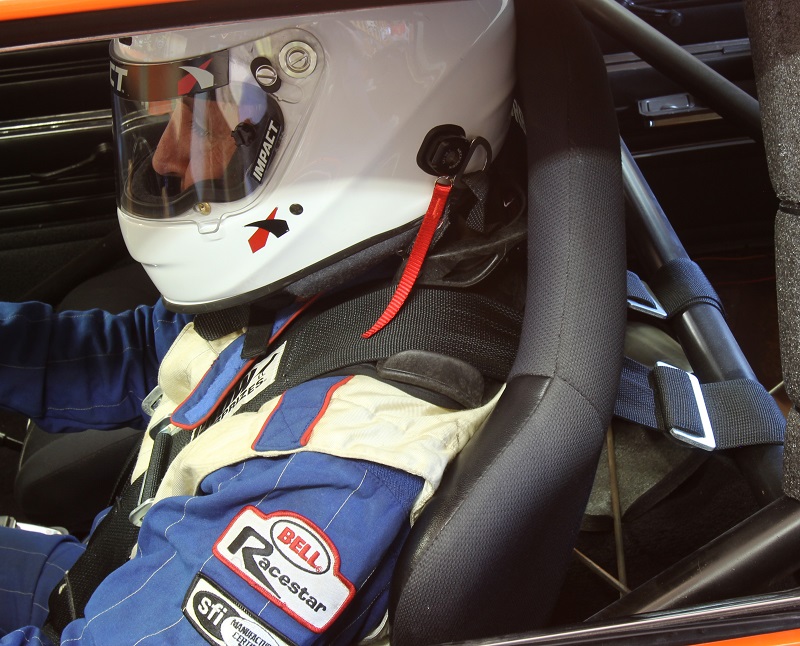
Here is the NecksGen system fully in place. Note that the red tethers can be used to instantly release the NecksGen restraint from the helmet. (Image/Jeff Smith)
Comments