You have to start somewhere if you want to learn something. That goes for pretty much anything in life, and starting out tackling small jobs can provide helpful experience and instill confidence as you proceed to larger jobs. Performing basic port matching of induction components is a good way to introduce yourself to the world of porting. It also gives you an excuse to buy a few new tools and it will save you a bit of money when performing the work yourself.
As we always hope is the case, but rarely is, different components don’t always work with other components when it comes to using aftermarket parts on your vehicle. There are a number of reasons for this, including a wide range of manufacturing tolerances by the OEMs, different tolerances between aftermarket companies, changes that occur over time in the casts used to make the parts, and more. Thankfully, the differences aren’t usually too difficult to overcome.
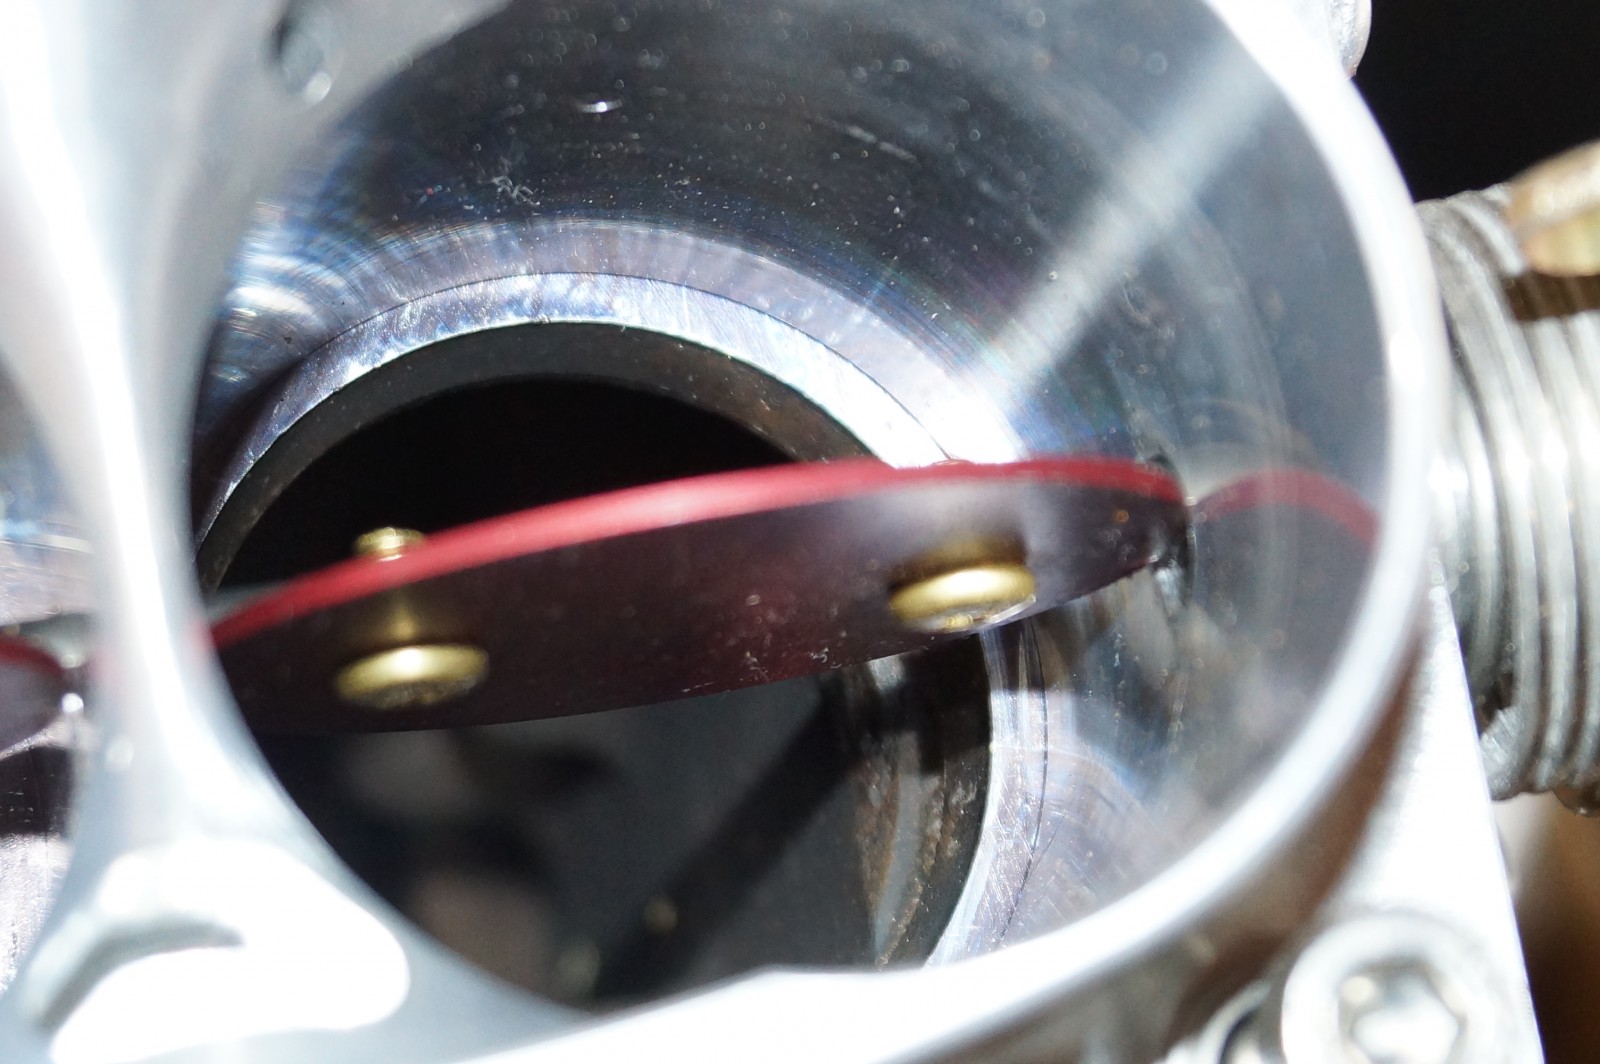
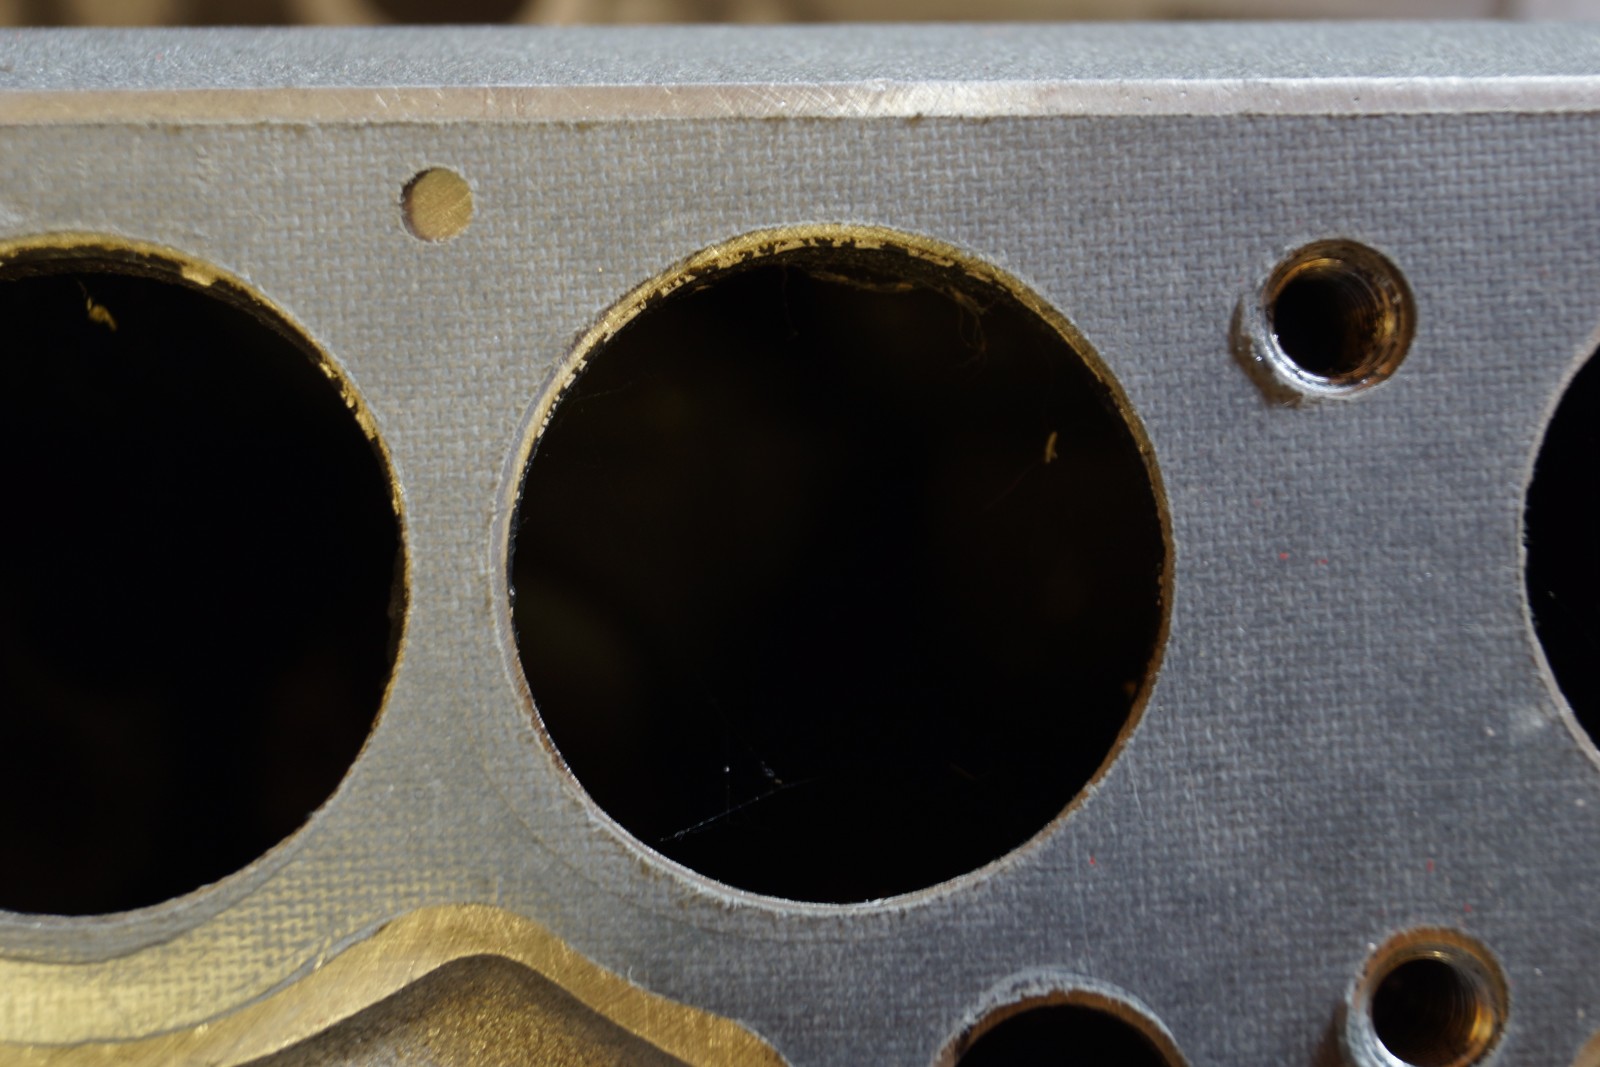
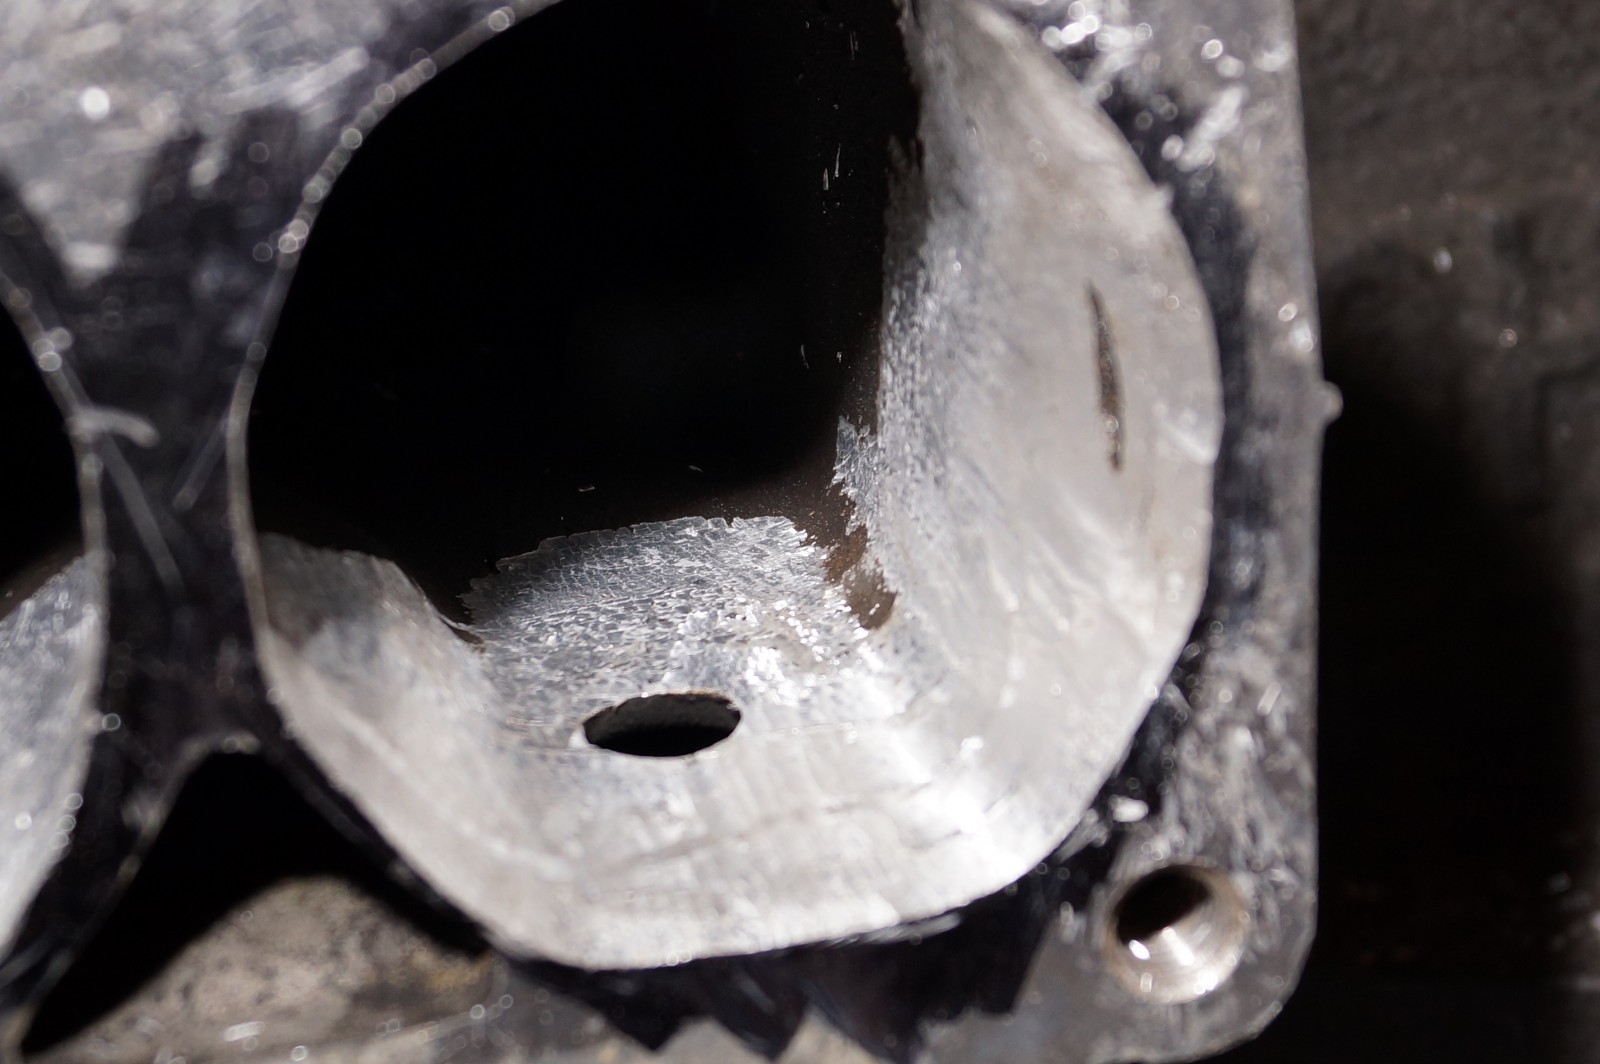
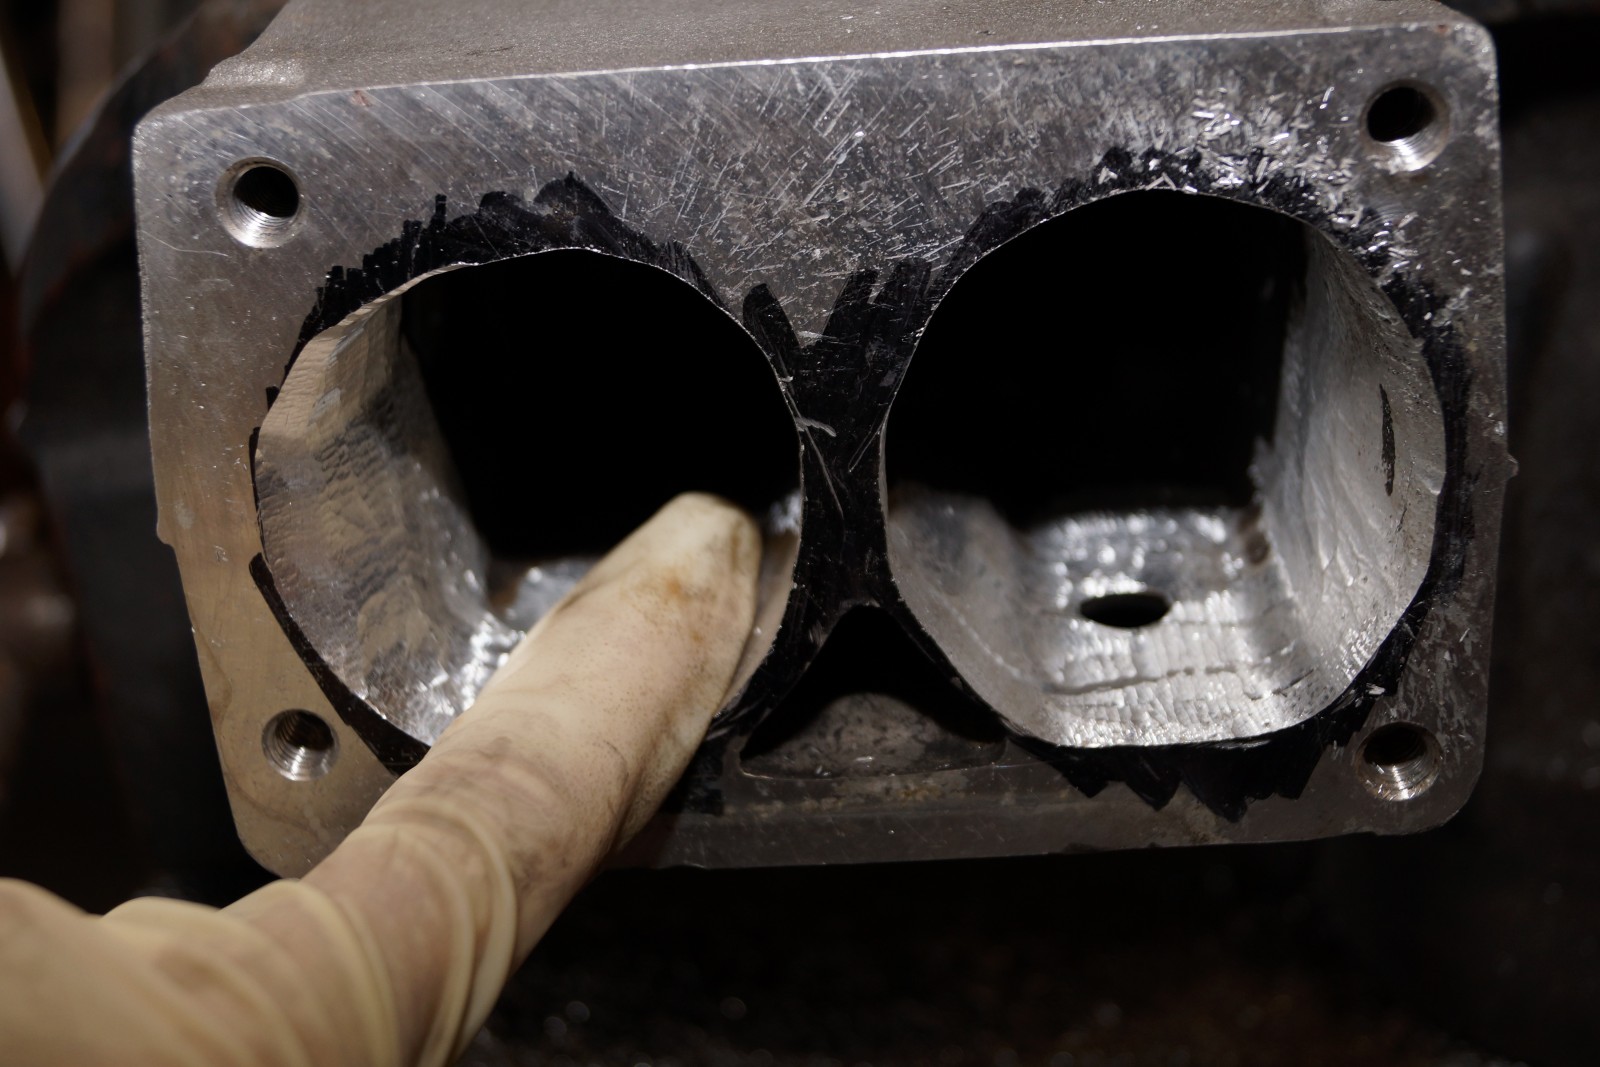
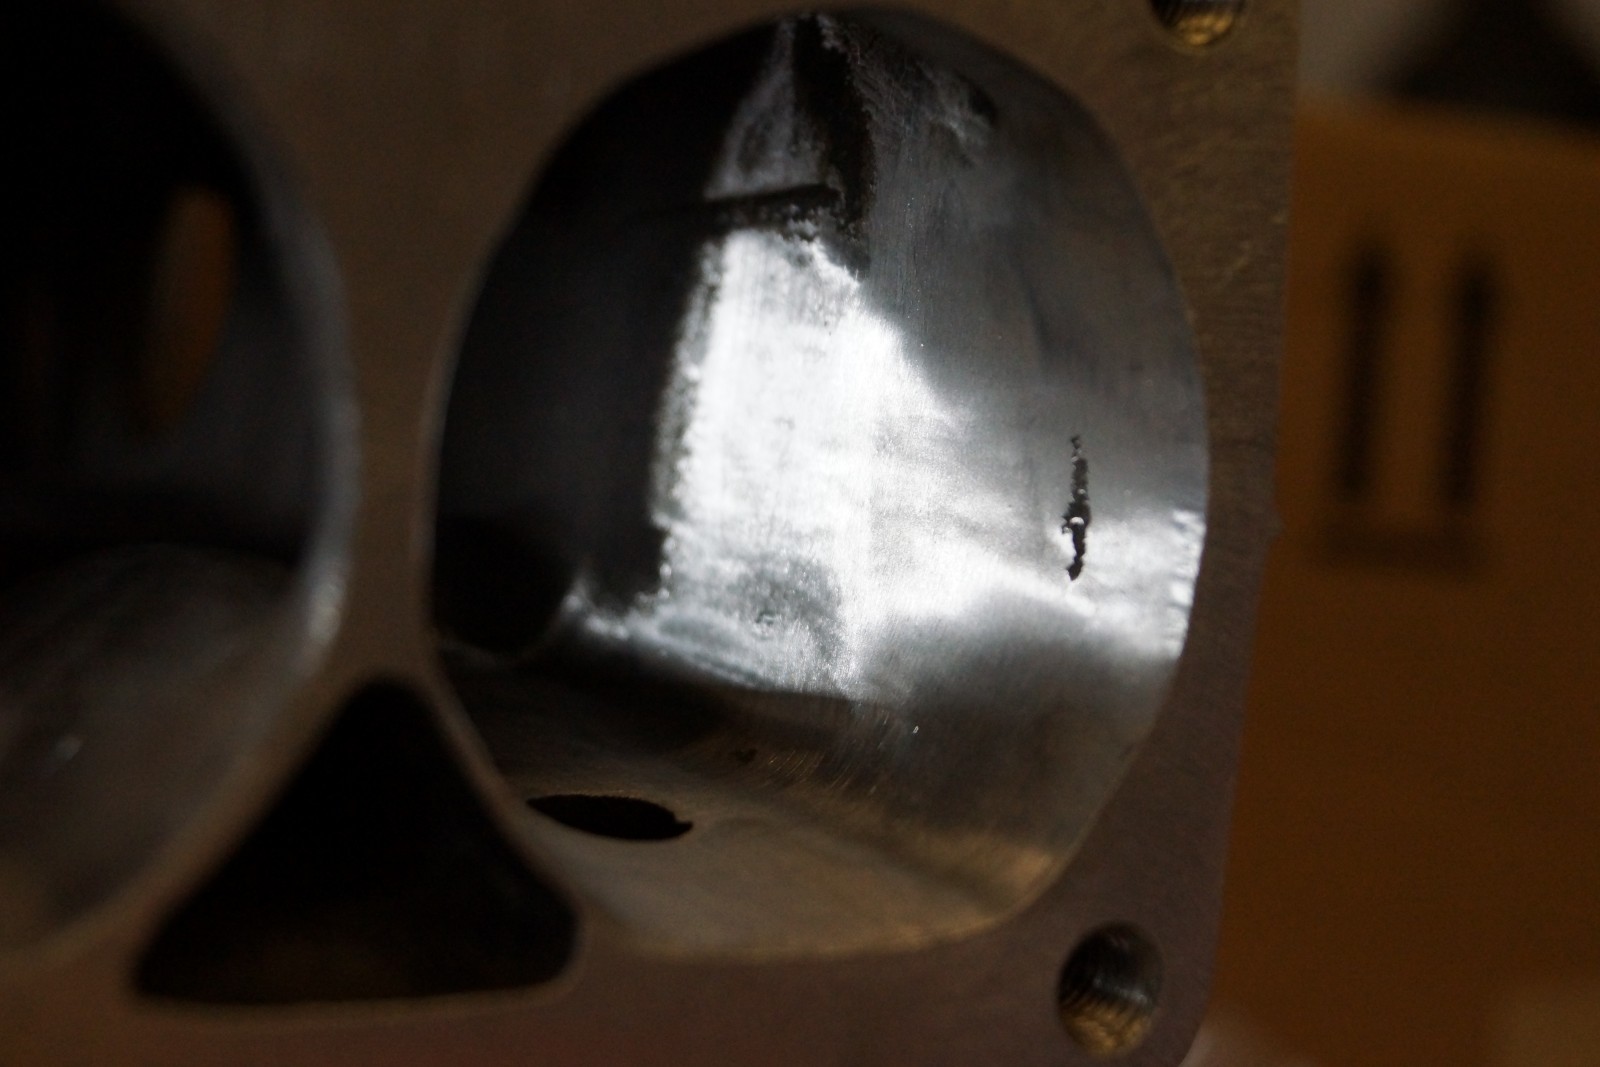
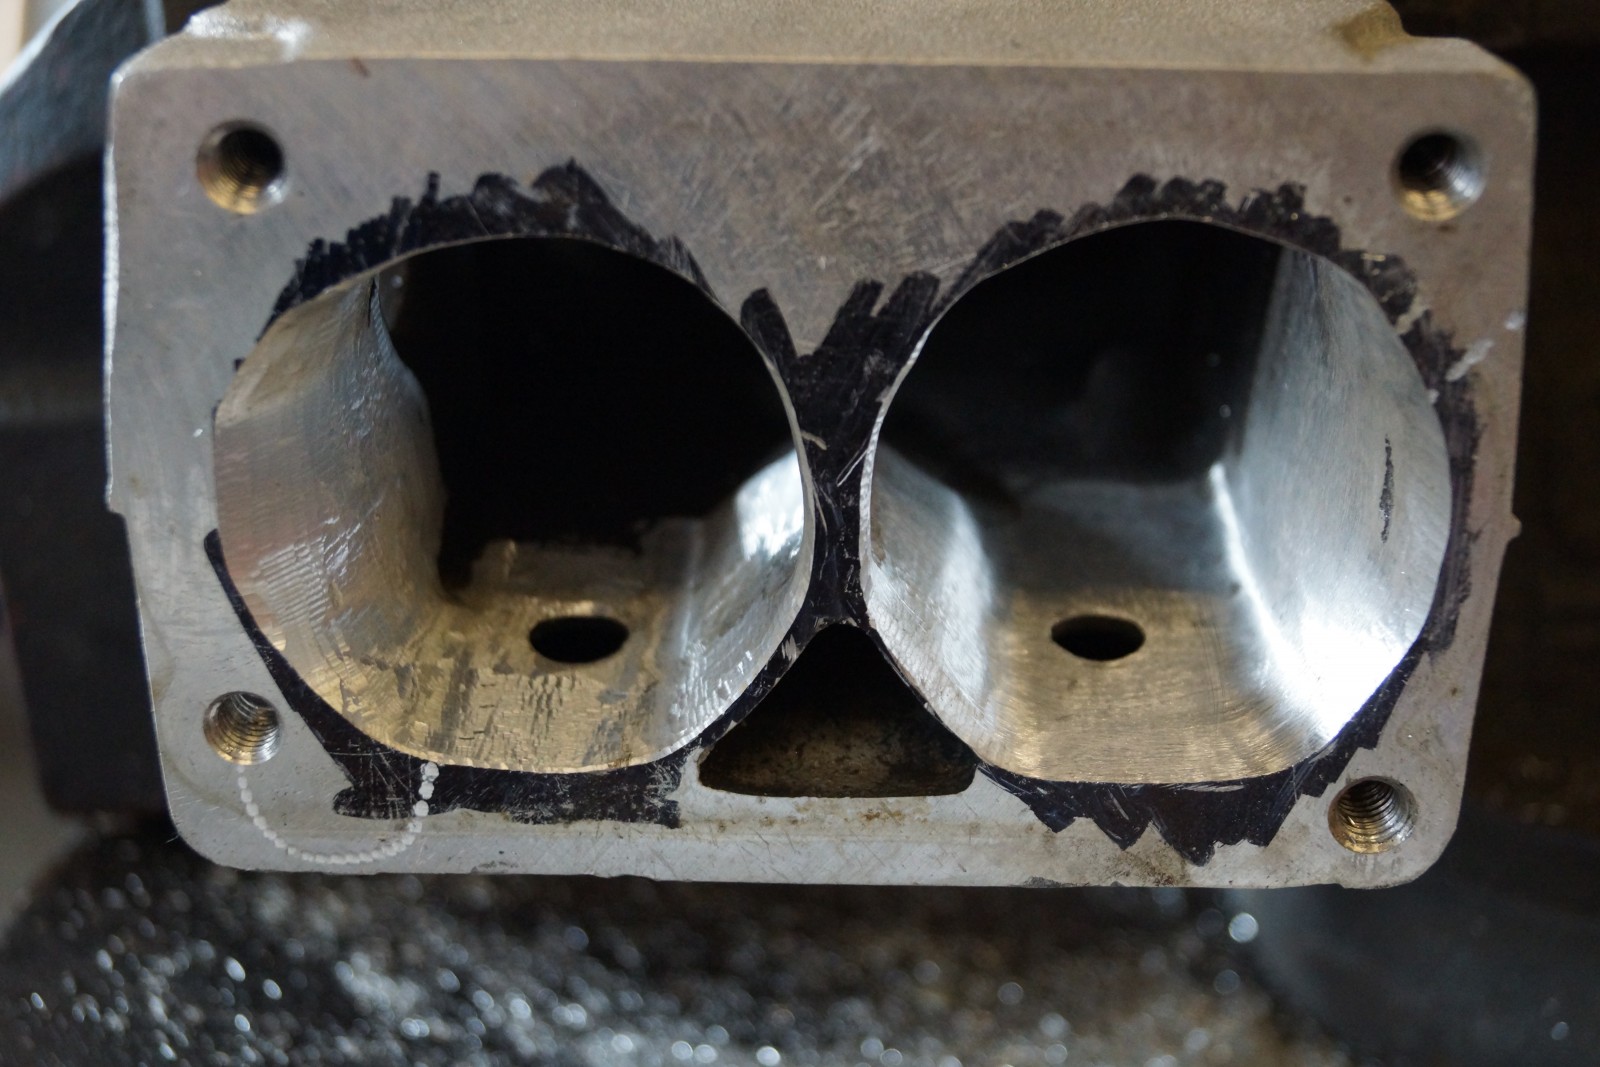
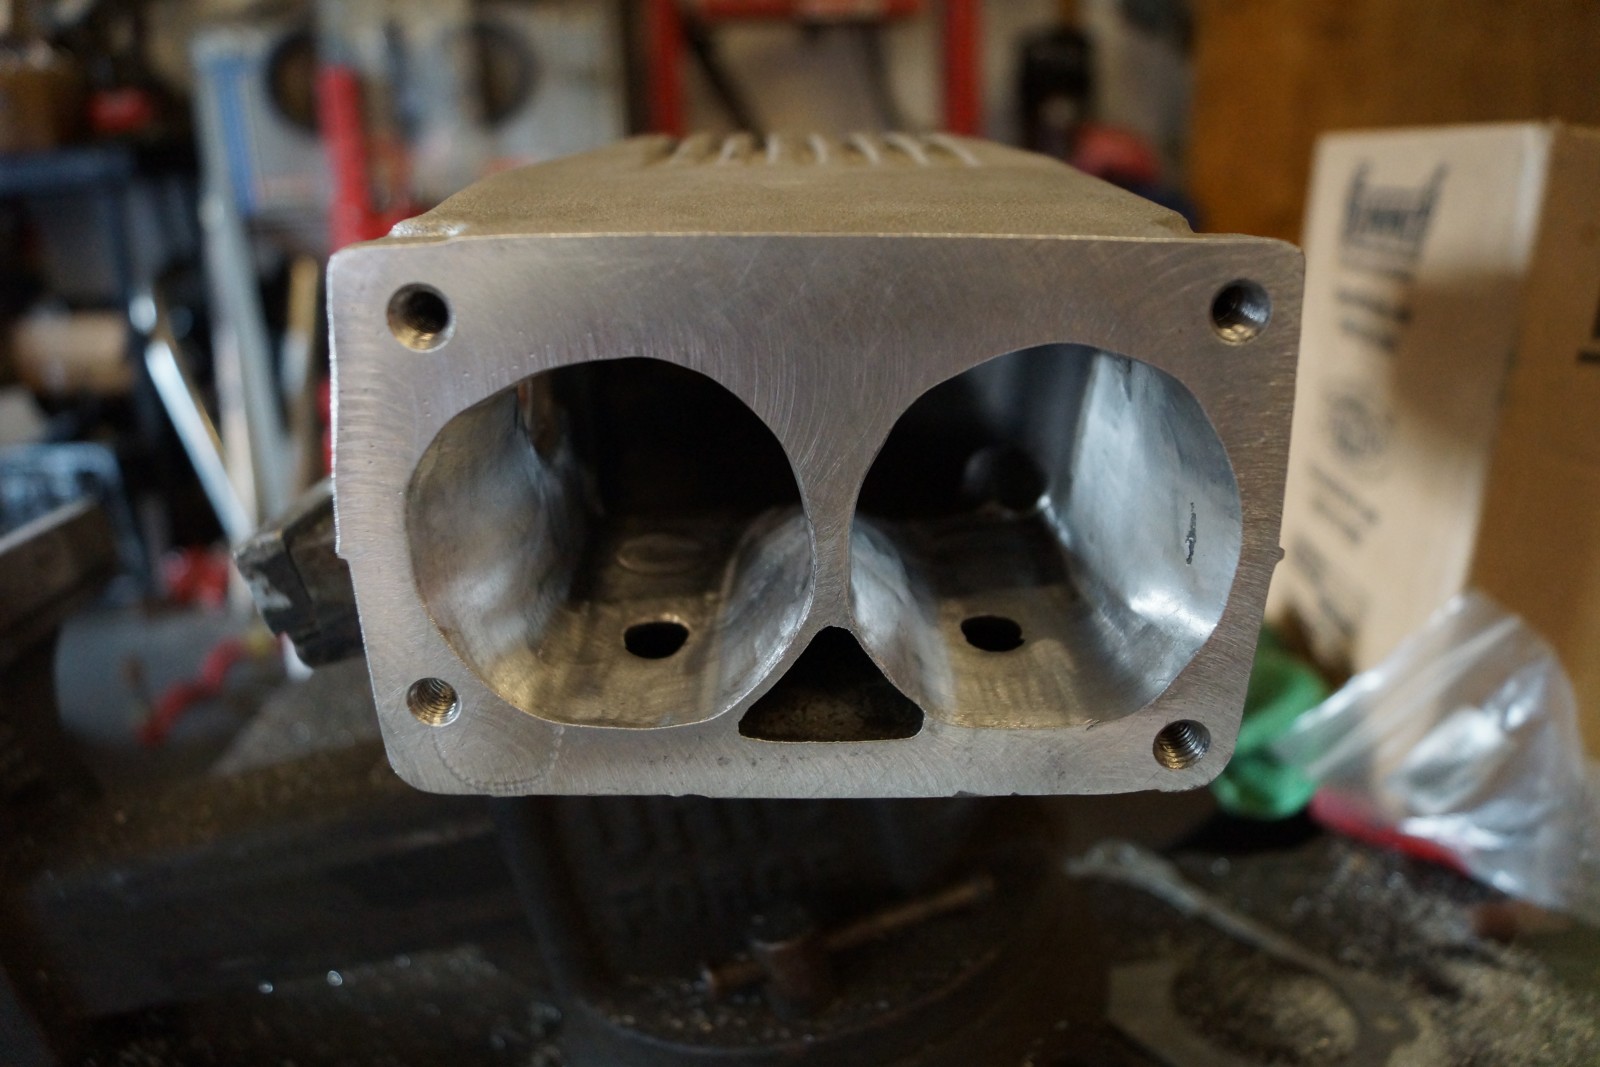
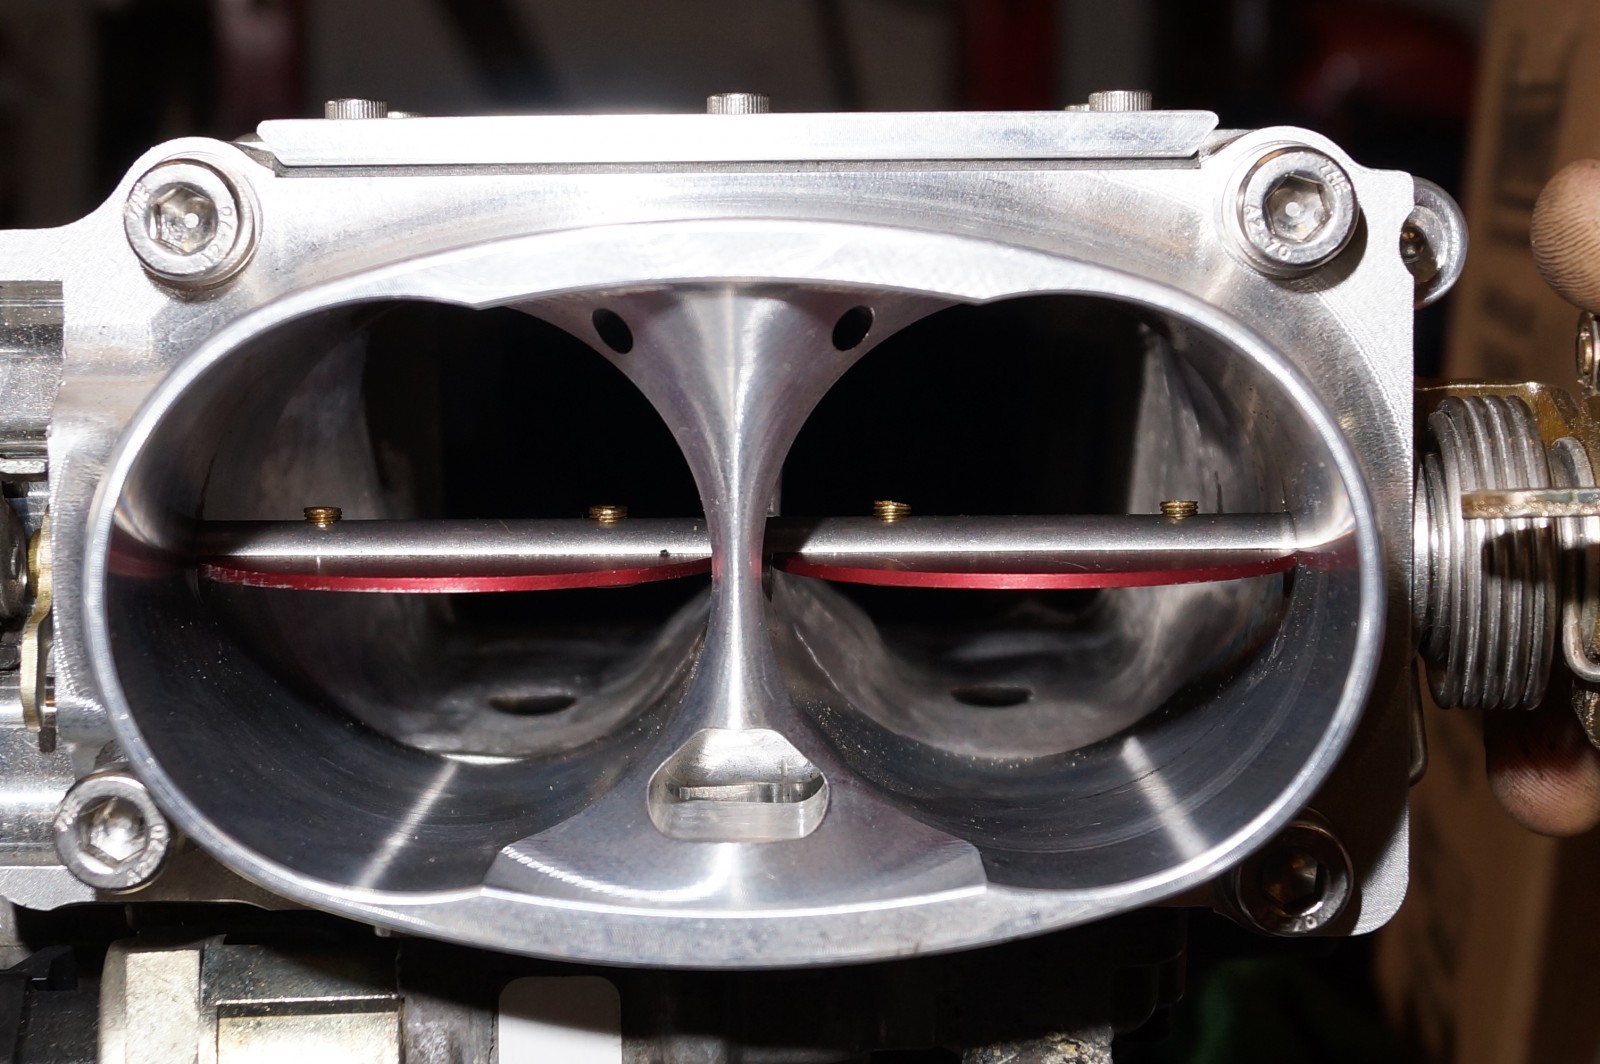
If you’ve ever torn an engine down, you’ve likely seen casting differences between the OE induction parts (cylinder heads and intake manifolds) on a stock engine. Since we’re all about improving performance, we want to optimize any combination of parts and this can be accomplished by making sure that the port sizes on two adjoining components, like cylinder heads and intake manifolds, are the same size so as not to reduce or disrupt airflow through the port. You may also find that the physical ports do line up, but maybe the gasket between them does not. You can modify that to optimize flow as well.
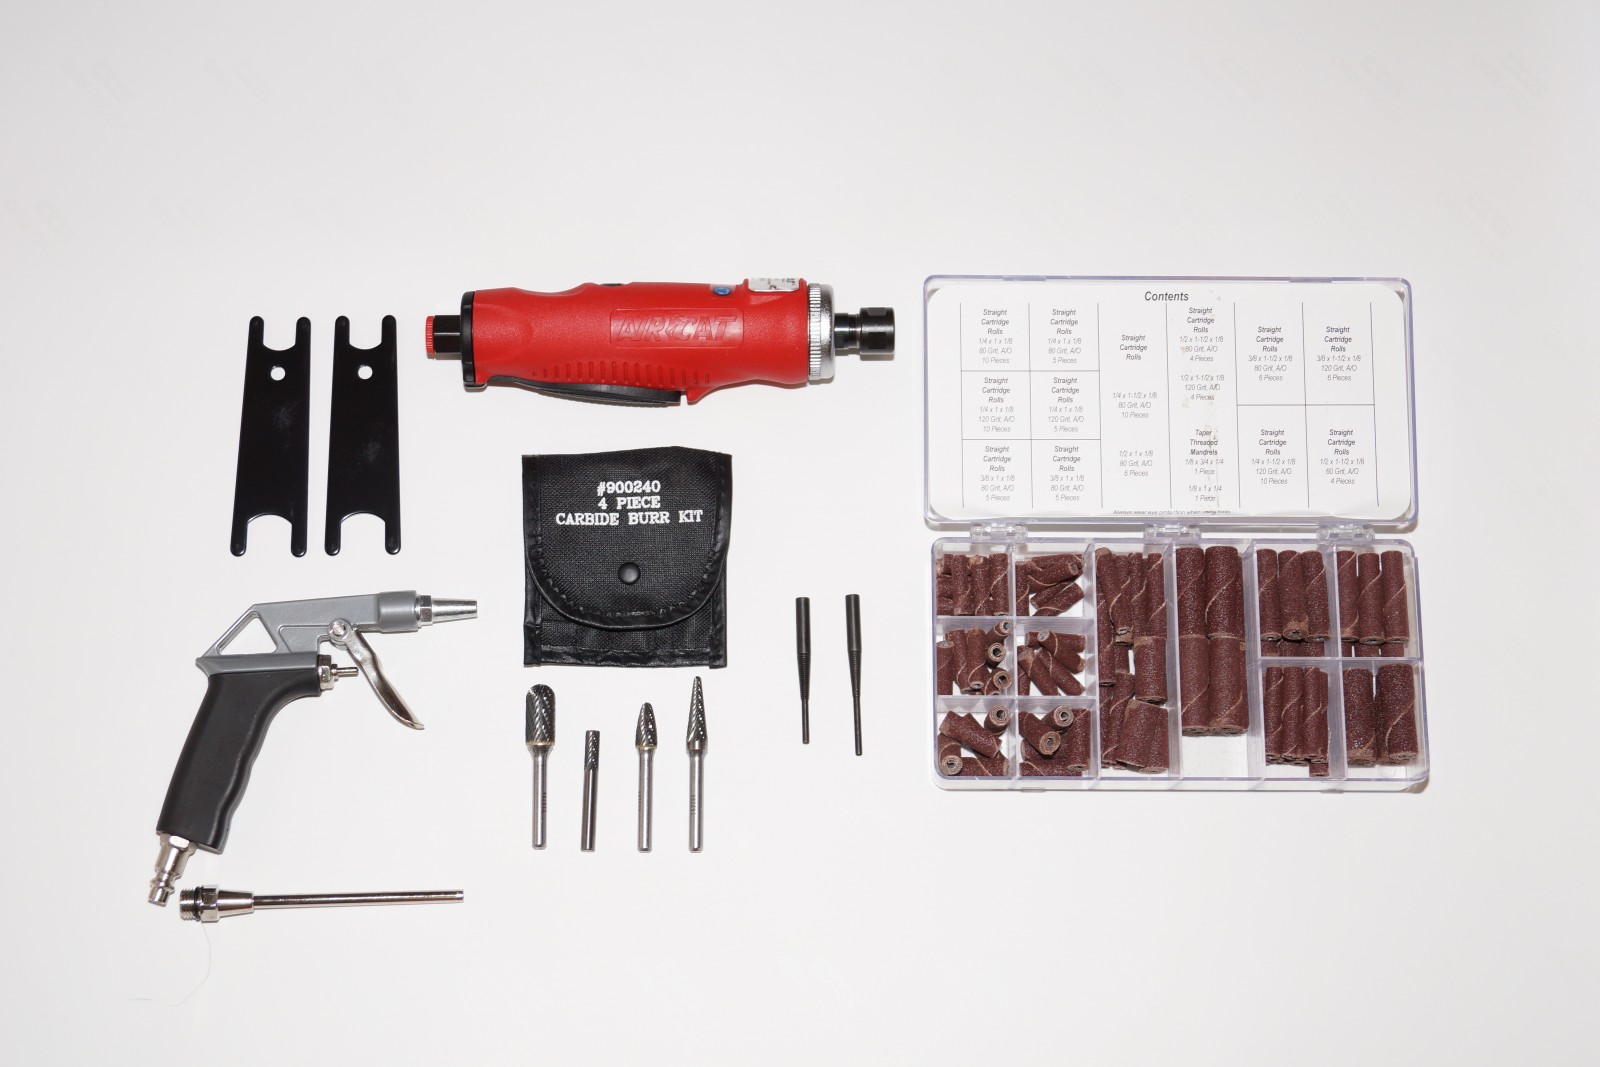
If you do find differences in port size, or obstructions that you would like to remove, the tools needed to remedy these situations are not expensive. We picked up a simple, yet comfortable, straight die grinder from Summit Racing Equipment for a little over $68—you’ll find a myriad of uses for a die grinder in your home garage so it’s money well spent. To do the cutting, we ordered a four-piece carbide cutting kit for $65, as well as a stick of grinding wax for $10 and a cartridge roll porting kit for $40. One other thing you’ll want if you don’t already have it is a quality air blow gun with a long barrel on it ($9.25). Depending on what you are working on, you may need the added reach the long barrel provides, and the more focused blast of air will make it easier to get all of the metal shavings out. So we’re in for under $200 on our porting supplies, and you’d likely be spending much more than that to pay someone to do the work for you.
Sounds good to us.
There isn’t a whole lot to getting a pair of ports to match up, really. You can start with the gasket as a guide, but more often than not, you’ll find that one of the castings is a bit larger, so start with the largest port and match everything to that. Port matching isn’t the same as porting a cylinder head or an intake manifold runner, which is a job that shouldn’t be taken lightly. That sort of porting requires additional research with regard to the available material in the castings you are working with, as well as an understanding of airflow and fluid dynamics. Changing the physical design of an intake runner can have both good and bad implications on performance. That is beyond the scope of this article, though, as we just want to clean the edges up and make sure that the parts are all fitting nicely together without creating any unnecessary turbulence or restrictions to the airflow.
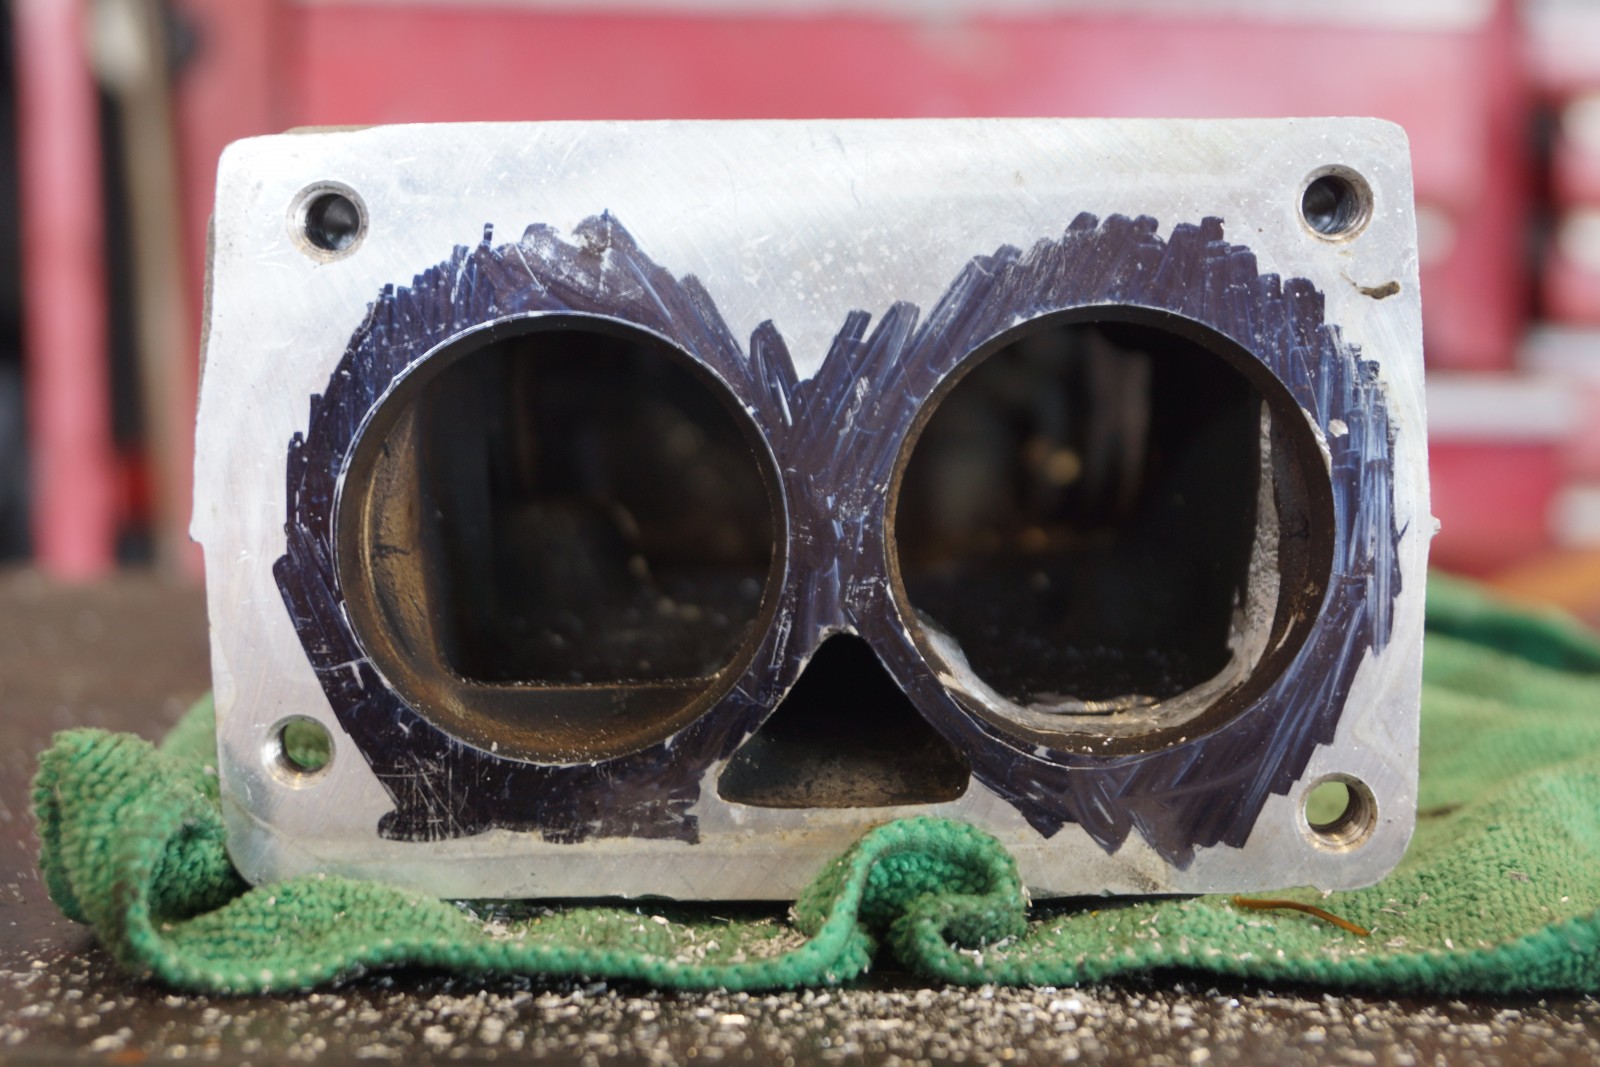
That said, we’ve been in the process of assembling an updated, Tuned Port Injection-based engine for a third-generation F-body. The first step to optimizing a TPI setup, even a stock one, is to clean up the inside of the upper plenum. Tuned Port Injection systems are well known for creating great torque thanks to their long-runner design, but this comes at the cost of upper rpm horsepower—most TPI engines are all done by 4,800 rpm or so. While there are larger aftermarket runners and lower intake manifolds available, no one makes a larger upper plenum and that becomes the biggest restriction. Optimizing it is thus essential for the application. In the photos below, you’ll see how we opened up the upper plenum to match the larger openings of the aftermarket throttle body we are using, as well as the larger intake manifold runners.
Here are a couple of tips before you get started with your port-matching adventure. First, the metal that comes off is going to go everywhere, so wear some sort of leather footwear unless you are sure that the metal filings will not reach your feet. Said filings are a royal pain in the behind if you’re trying to extract them from porous and intricately designed sneakers. Second, long sleeves are a good idea, though the air blower gun does a good job at removing the metal filings from your arms. It goes without saying that eye protection is a must—you only have one set of eyes so take care of them! When it comes to performing the work itself, always be mindful of the thickness of the material you are working with, and be sure to use Tap-Ease or some other bit wax to keep your equipment clean.
Happy porting!


[…] Smith: Port matching the interface between the intake manifold and the intake port opening on the cylinder head is one […]
[…] Port-matching the intake and exhaust ports is the minimum. (Here is a recent article we did on port-matching basics.) A good three-angle valve job and cleaning up the exhaust ports will help […]