I finally collected all the parts to assemble my small-block Chevy 350 but when I torqued the head bolts, one of the holes stripped. I’ve heard there’s a way to fix this with a thread insert kit, but I’ve never done it before. Do I have to take the engine to a machine shop to get this done, or can I do it myself? I’m kinda stuck until I get this repaired. Luckily, the engine is out of the car if I have to take it to the machine shop.
M.K.
Jeff Smith: The good news is that you can repair this problem yourself with just a few simple hand tools and a ½-inch drill motor. There are several kits on the market for thread repair, but I’ve used the Heli-Coil kits in the past with good results. In the case of the small-block Chevy, the head bolt is 7/16-inch with 14 threads per inch. So this will require the Heli-Coil kit PN5521-7. The kit comes with the unique tap, insert tool, and six thread inserts. You will also need a 29/64-inch drill bit to open the hole up for the required tap. The most important point of this operation is to make sure the hole you drill is perpendicular to the deck. To ensure that the bolt hole is in fact perpendicular to the deck, you will need a drill guide.
 You can purchase dedicated drill guides designed for 3/8-inch drill motors, but these tools are mainly designed for woodworking and the reviews I’ve seen are critical of the quality. A better idea is to make your own. There are a bunch of different ideas for creating one. The simplest is an aluminum or steel block about two inches thick and roughly six or seven inches long. The block must be perfectly flat on the cylinder block face. Next, you could use transfer punches and a cylinder head as a guide to drill three holes. The first two are used to position head bolt holes that will locate the drill guide on the engine block. The third hole is the most important one. It needs to be larger – enough to accommodate a length of hardened steel drill guide material. This bushing will be the same inside diameter as the outside diameter of the drill bit–29/64 or 0.4531-inch. The guide will then be pressed into the block to securely locate it. That might be a job for a local machine shop. Once that’s done, you can use this block to center the drill bit over the head bolt hole. You can double-check your work by threading a head bolt into the block from your fabricated drill guide. If the bolt won’t screw in, then the position is off. You don’t need a depth limiter for enlarging the stripped hole since all production small-block Chevy head bolt holes open into the water jacket. If you were doing this on an engine with blind head bolt holes, you would definitely want to indicate drill depth with a mark on the drill bit. With the block accurately in place, you can use it to guide your drill bit through the engine block. I know this sounds like a lot of work, but it’s important that drilling the Heli-Coil hole is as perfect as possible. It’s a bunch of work to ensure that the 20 seconds it takes to drill the hole that it’s as accurate as possible. Our machinist friend Don Barrington said that you need to be careful with head bolt holes nearest the cylinder as they have a tendency to crack right into the cylinder wall while you are drilling. When that happens, you have a much larger problem! Just be careful and don’t say we didn’t warn you.
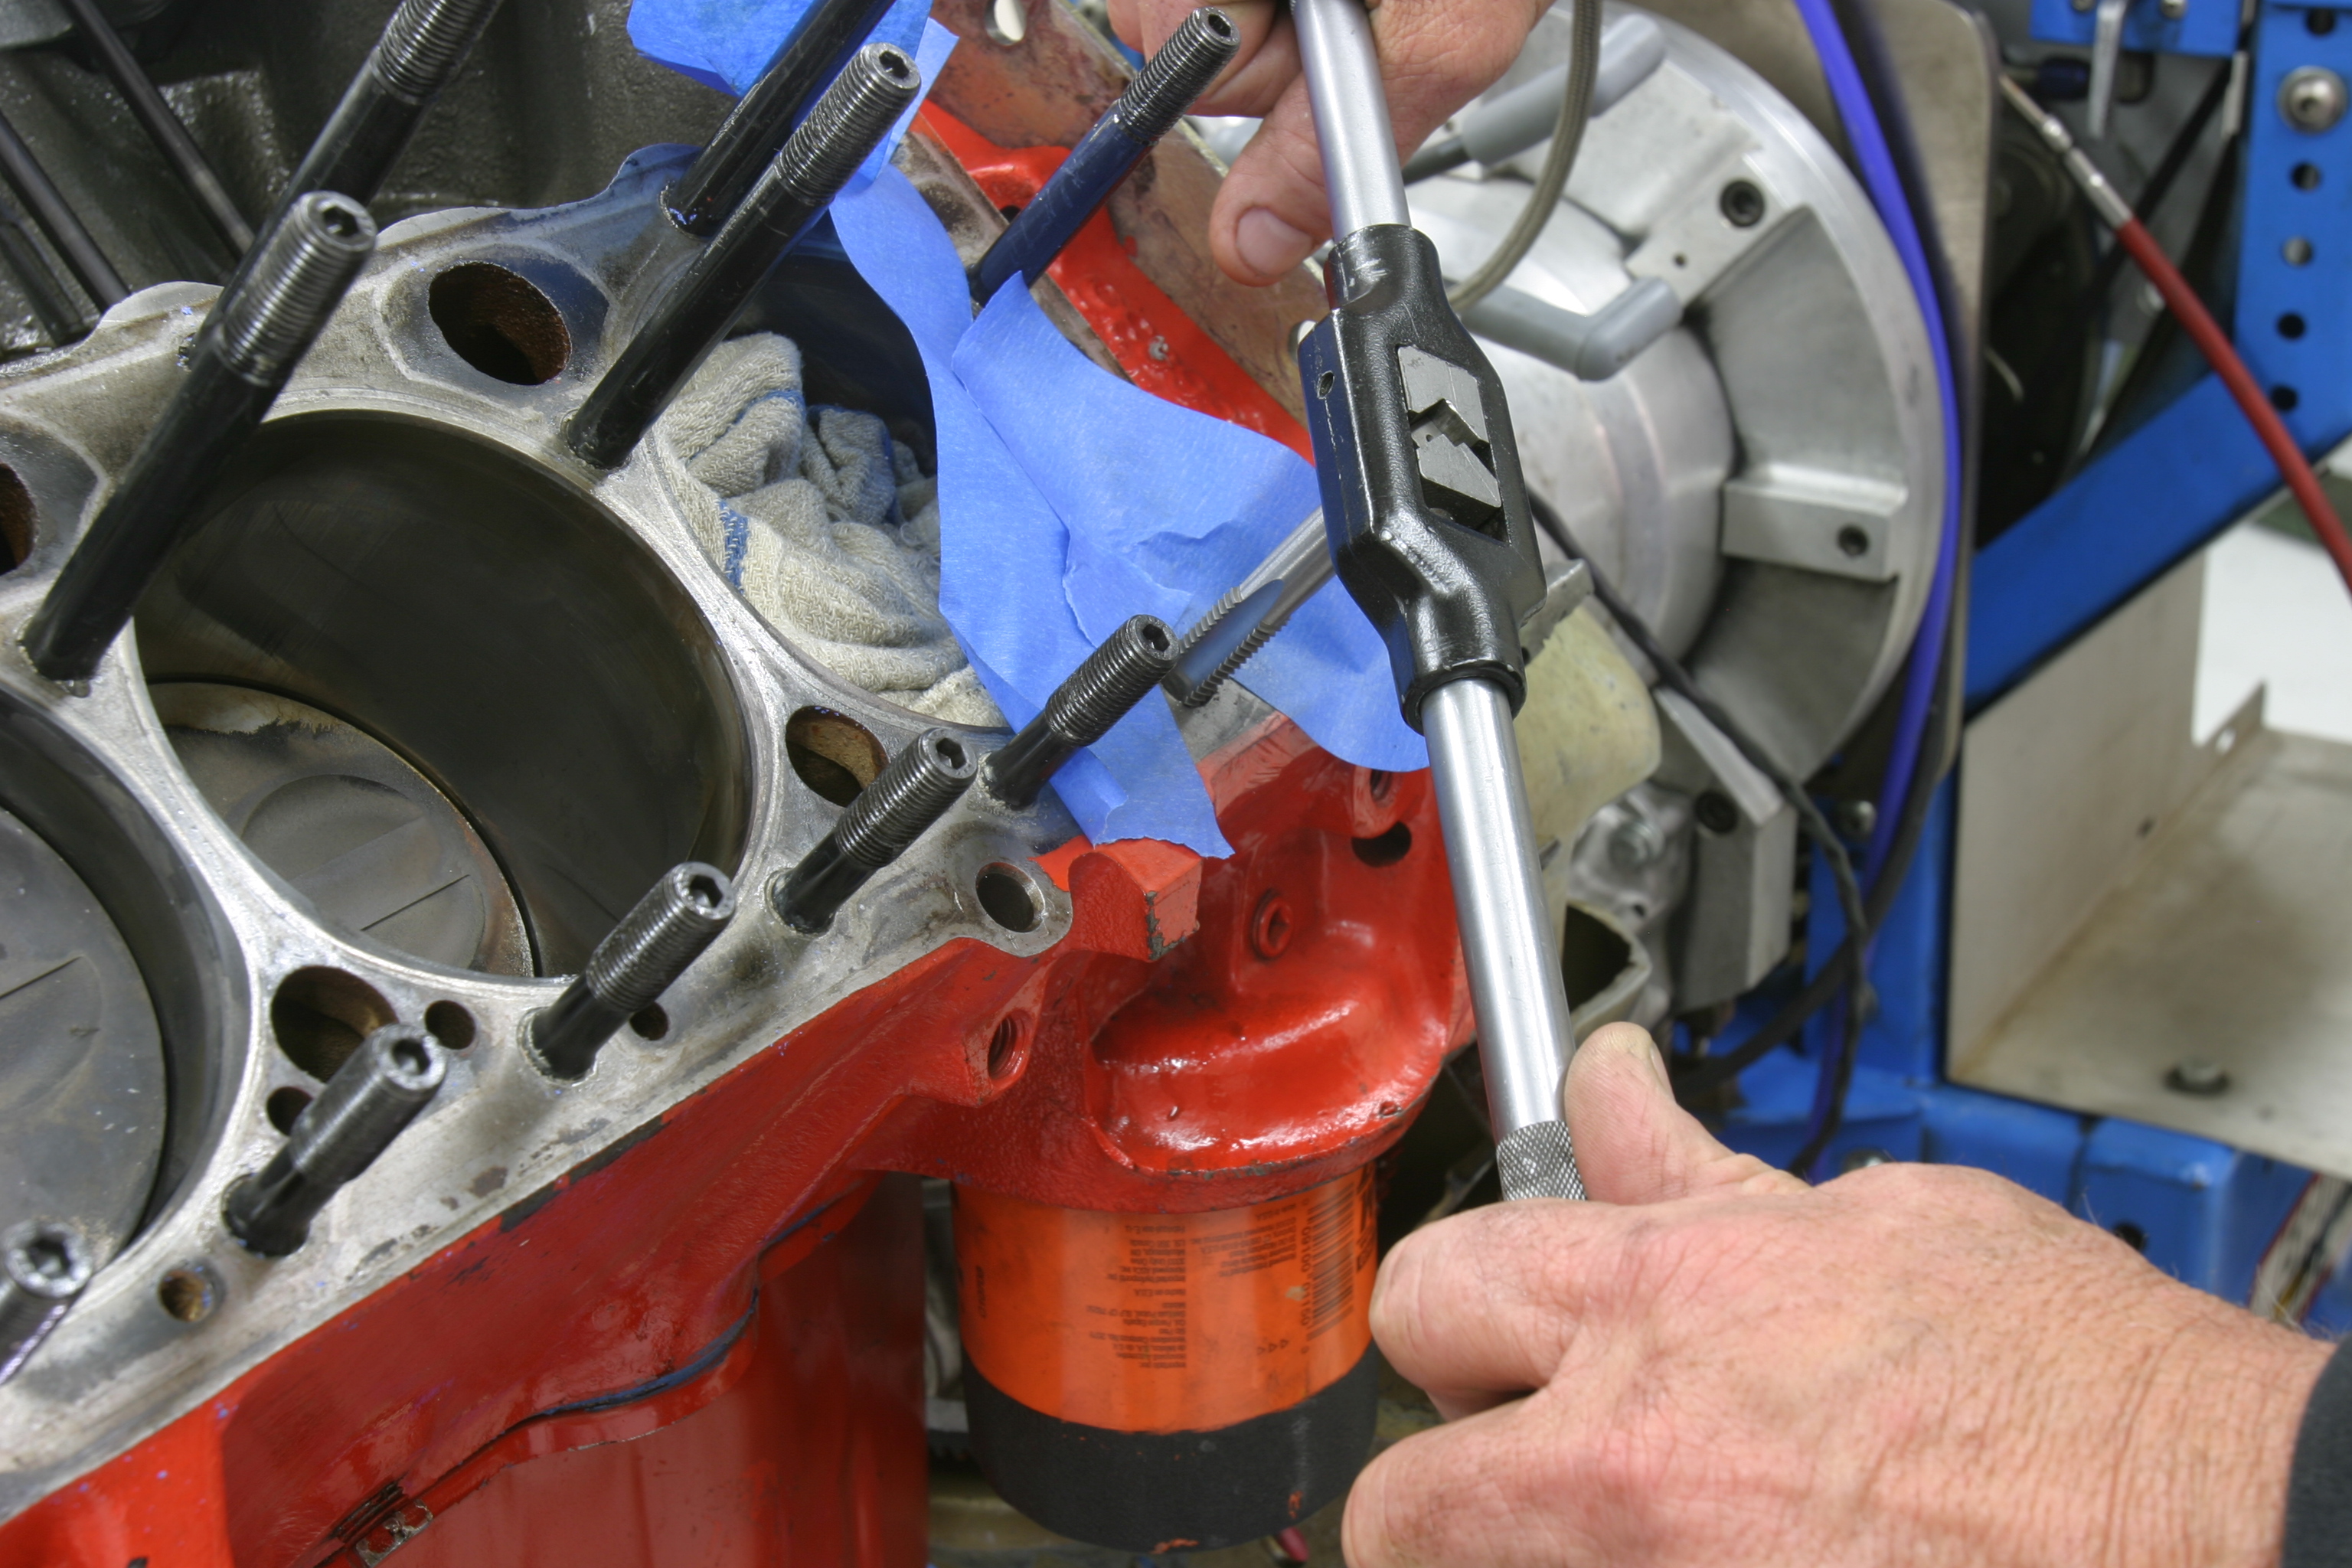
Next step is to tap your newly-drilled hole with the supplied Heli-Coil tap. This will also require the tap to be perpendicular to the block. I would suggest using the drill guide to help start the threads. Once the tap has started, you can back it out, remove the drill guide, and then finish cutting the threads. Finally, follow the instructions for installing the thread insert. It may require a second insert stacked on top of the first. You will also have to break off the tang at the bottom of the insert to allow the head bolt to fully engage. Once the offending head bolt hole has been repaired, you should clean the other holes. But don’t use a normal tap. Normal thread taps remove block material that will only increase the chances of pulling threads in other holes. ARP makes a thread cleaning tap that is designed to sweep the threads but not remove metal. For your 7/16 x 14 head bolts, the cleaning tap is PN 911-0004. This is expensive, but considering the alternative of installing several more Heli-Coil inserts into your block, the cost doesn’t seem so bad.
I would also warn against using stock head bolts and I certainly avoid no-name “high performance” Grade 8 head bolts. Many years ago, the guys at ARP showed me what’s wrong with these generic high performance fasteners. I chose a hole in a SBC block and threaded a stock head bolt in about four or five turns into the block. The bolt wiggled a little bit, which meant there was quite a bit of clearance between the bolt and the female block threads. Then I tried a generic performance bolt and the “wobble” clearance was shocking. The bolt moved so much it seemed like the threads were undersized–which they are. The thread overlap in these bolts is marginal, which can and most often contributes to pulling threads out of the block. The final bolt I tried was an ARP bolt. It actually required slightly more effort to thread it into the block in the exact same hole. This revealed the increased thread engagement with the ARP bolt compared to the other two bolts. That’s why now I only assemble an engine with ARP head bolts. In your case, assuming stock head bolt lengths, the ARP kit is 134-3601. I clean the block with the ARP thread-cleaning tap, coat the threads with thread sealer (for any bolt holes that extend into the water jacket) and use ARP’s Ultra-Torque underneath the bolt head flange and on both sides of the washer. All ARP head bolt washers come with a relief on one side that is designed to match the radius on the underside of the ARP bolt head. Make sure the washer radius is installed correctly.
This may seem like a lot of effort for just bolting on a set of heads, but it all will lead to a properly assembled engine where you won’t have any head gasket problems because the load is even across the entire face of the cylinder head. If you take care of the details, the details will take care of you.
Great article! Some were reminders and many were new information to this old guy:)
As a machinist for 40 years in a job shop making spare parts for the navy and Northrop Grumman and also doing prototype parts if you never used a helicoil kit be very careful to drill the hole perpendicular to the surface, another word plumb!. Keep drill bit speed slow using plenty of oil. Jobs like this don’t get rushed so take your time and do it right! Good luck my friend!!!
I have a 3.1liter chev Malibu 2001 bolt hole to the #1 rocker is stripped out what can I do
8.31.15. You should pick up a TimeSert thread kit. There are two different bolt threads for this engine, 10mm & 8mm bolt threads! The ThreadDoctor has kits. P/N 1015 core or P/N 1812 core. If the cars worth keeping, then change the head gaskets, & the lower intake manifold gaskets, the Fel-Pro PermaDry type. Use the Lisle 48300 tool “before the rocker arm bolts are loosened”! I did this on a 1999 Chevy Lumina 3.1L V6, with 81k miles. Also clean the EGR passage in the L.I.M.
9.7.15. I ment to say,clean out the Upper Intake Plenum, not Lower Intake Manifold.
Jeff. I have a 1998 3.0 litre mercruiser motor in my boat. I am having issues with a head gasket. In the process of torquing the head bolts one was stripped (not sure if that was the issue with the gasket???). I have purchased a heli coil to repair but this being a water jacket the actual tang is to deep to fit. Can I cut 2 of the coils? Have you seen this issue.I need to get to 95 lbs and am very concerned. Any suggestions? Thank you for your article.
Not clear from your question, but you may “stack” helicoills to get more depth and shorten helicoils if too long for hole.
Stacking is done by installing the first coil (including trimming the tang) and then installing the second.
The little Dremel cut-off disc works well for trimming with square end to coil.
Jeff: Thanks for the article. Just pulled out the threads in one of the short bolt holes in a 350 block and the Part Numbers really helped. Going to go with studs because a few more may be a little suspect and now am nervous. Just wanted to say thanks.
Mike in Olsburg, KS
When I did this I greased the drill bit and that collected all the
metal shavings and stopped them falling into the motor.
Can you oversize the hple
i tried everything
I strongly suggest, just give it up and save time and money and family
i tried everything
I strongly suggest, just give it up and save time and money and family, people don’t care they tell you do this do that knowing it’s not going to work and it can be very very bad for you, you will end up discovering that people is nothing but another animal
you know this guy is a real people. him speak from heart and experience.
I helicore a 3 cyl gas ford tractor block but the head bolt won’t go down any further. It’s about 1 inch above the head. Scared to go any further because of cracking the block. What can I do
Take the bolt backout and look in with a borescope to see why it stops before you go any further. This may give you a dirrection to proceed.
It could be simple or time to quit the repair. Helicoil sometimes confuse the situation by the tab breaking off too soon. Only option at this time is to try to drill out the coil and hope you still have threads to bolt, torque it down with out going even bigger.