marking a ring and pinion gear set to check for proper mesh
Jeep XJ Cherokee in scrapyard
g2 performance ring and pinion gear install set
inside the axle housing of a dana 35
cutting a lubrication groove in a dana 35 center housing
using a honing block on a ring gear back
drilling a hole for an air line fitting in an axle housing
drilling and tapping a hole in an axle housing for an air line fitting
inside view of a rear jeep xj cherokee axle housing and differential
an axle differential painted with marking dope
marking a pinion yoke to check for proper mesh
arb air locker line fitting in an axle housing
inserting a roller bearing into an axle housing
seating an axle bearing in a tube
a wrapped end of an axle housing tube
inspecting a rear differential gear set
inserting axle into axle housing tube

Big Blue, our bone-stock 1989 Jeep Cherokee, doesn’t look like much now. But when the upgrades are done, it will be a very capable off-roader. First up are deeper gears, new axle shafts, and locking differentials for the Dana 30 front axle and Dana 35 rear axle. We used ARB Air Locker differentials. Except for the air lines, the installation process is similar if you are using another type of positraction or locking differential.

We are using G2’s differential installation kits too. They include all of the necessary gaskets, seals, and bearings to do the job. The photos outline the procedure for installing gears, locker, and axles for the Dana 35 rear axle; the installation procedure for the Dana 30 front axle is much the same.

The first task is to clean up the axle housing inside and outside.

The Dana 35 center section has no return passages for the gear oil, which lubricates the axles and bearings. Cutting a slight groove in the location shown on both sides of the center section will allow gear oil to flow back in from the axle tubes.

The Rock Lizard guys always hone down any burrs, rough spots, etc., on each ring gear set they install. That eliminates one potential source of wear and the dreaded gear howl.

A 7/16 inch hole (squared to the housing) must be drilled in the Dana 35’s housing for ARB’s air line bulkhead port. Rock Lizard usually does this in two or three steps in bit sizes.

The hole must be tapped with a quarter inch NPT pipe tap. The bulkhead fitting is tapered, so you’ll want to leave a thread or two blank at the bottom of the hole so the fitting seals tightly.

The ARB air locker and G2 ring gear are assembled and installed in the axle housing to check pinion gear backlash. The copper tube is the air line for the locker.

Marking dope was applied to the pinion gear. When the differential/ring gear assembly is rotated, the marking dope clearly highlights the “lightning” marks on the differential’s surface. That means the crown of the pinion gear will have to be ground down slightly until the marks are no longer visible.

The pen indicates where material has to be removed from the crown. Rock Lizard removed approximately an eighth inch of material.

Here is the ARB locker’s air line and bulkhead fitting in the hole drilled earlier. Three or four wraps of plumber’s tape seal the fitting to the housing. Make sure the O-ring is in place in the bulkhead body. The O-ring seals the compression nut to the bulkhead body.

On to the axle shafts. The axle end bearing is tapped into place first. A bearing tool is used to seat the bearing.

After seating the axle end bearing, seat the axle seal. Use plenty of assembly lube to hold the axle seal’s spring, which holds the rubber seal against the axle, in place while tapping the seal into the axle tube.

If you’re not going to insert the axles immediately, use clear shipping tape or kitchen plastic wrap to completely seal the axle housing from dirt and debris.

The Dana 35 axle uses C-clips to retain the axles. To install the axles, remove the cross shaft retaining pin from the differential housing, then remove the cross shaft.

Insert both G2 axles into the housing and gently tap them in as far they will go. Use needle-nosed pliers to insert the C-clips. Reinstall the cross shafts, bolt on the differential cover, and fill the differential housing with the gear lube recommended for your differential.

Produced from 1984 through 2001, the Jeep XJ Cherokee was a capable vehicle right from the factory. It came equipped with the 4.0L in-line EFI six-cylinder engine, a four-speed automatic transmission, a Dana 30 front and Dana 35 rear axles—and loads of off-roading potential.

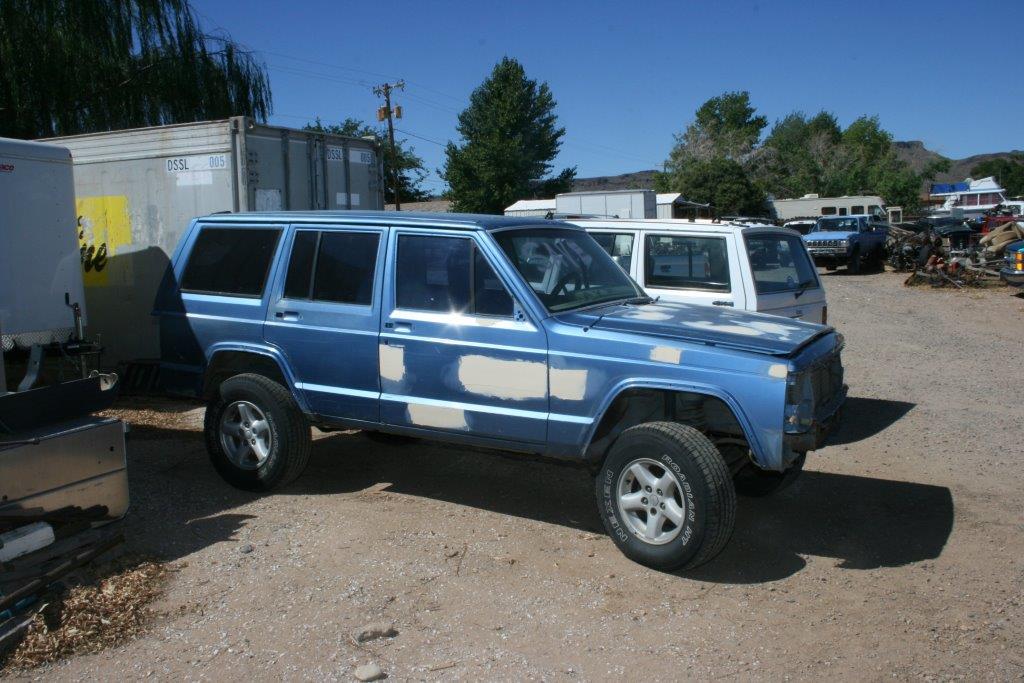
Using a 1989 Jeep XJ Cherokee, which we affectionately called “Big Blue,” we’ll show you how to unlock our XJ’s potential using select aftermarket upgrades. In this multi-part series, our goal is to build a four wheeler that can run most any off-road event, ease over any trail this side of the Hammers, and comfortably prerun any off-road race.

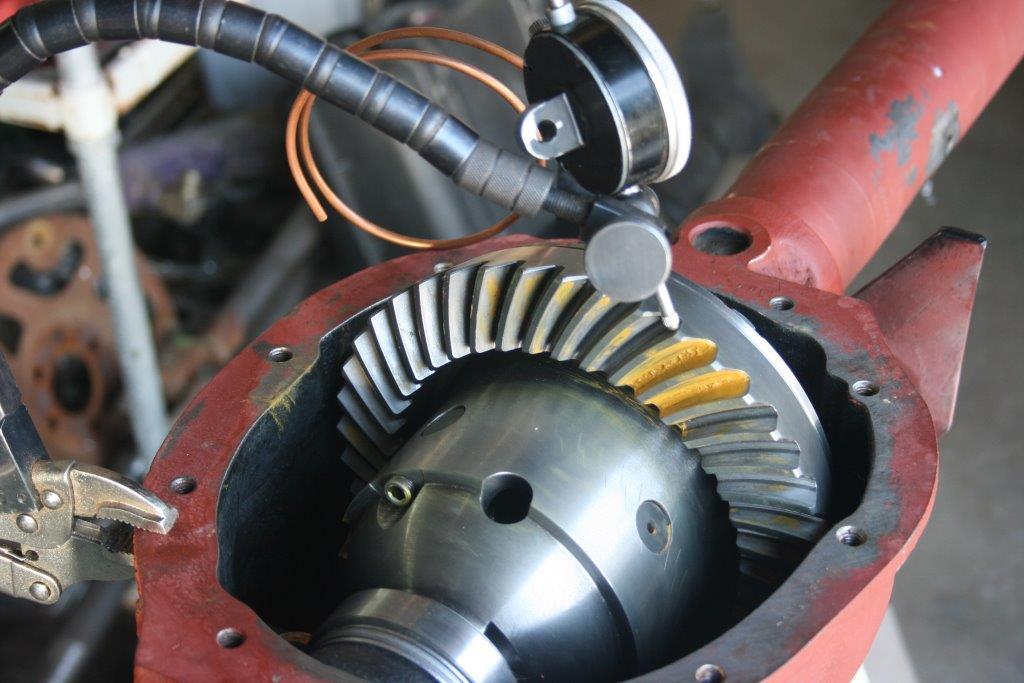
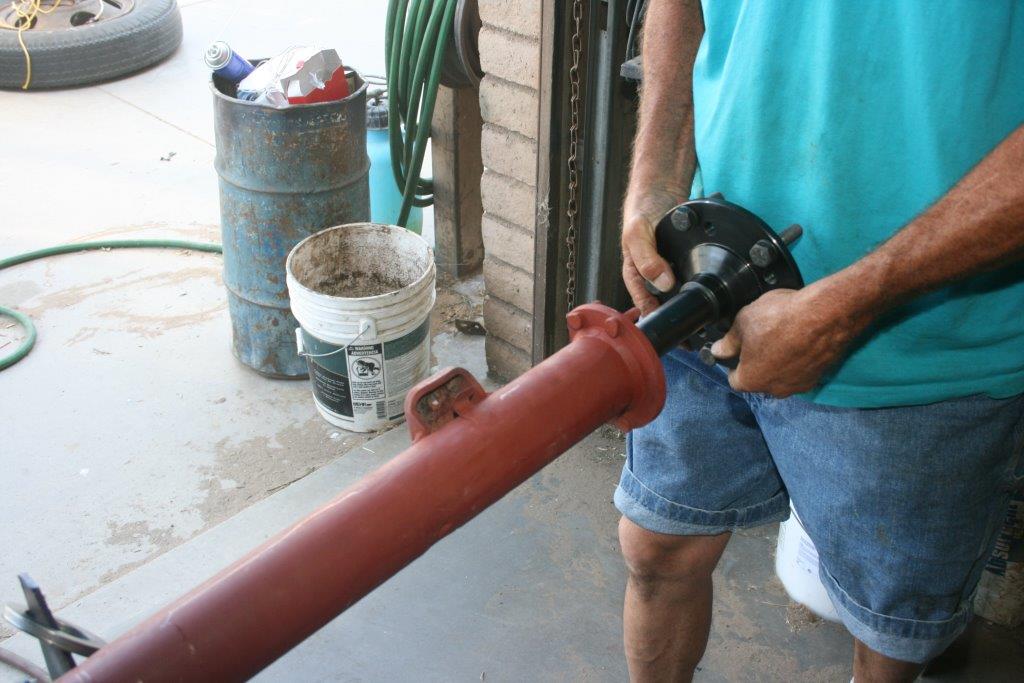
In this first installment of Big Blue XJ Cherokee, we focus our attention on the axles.

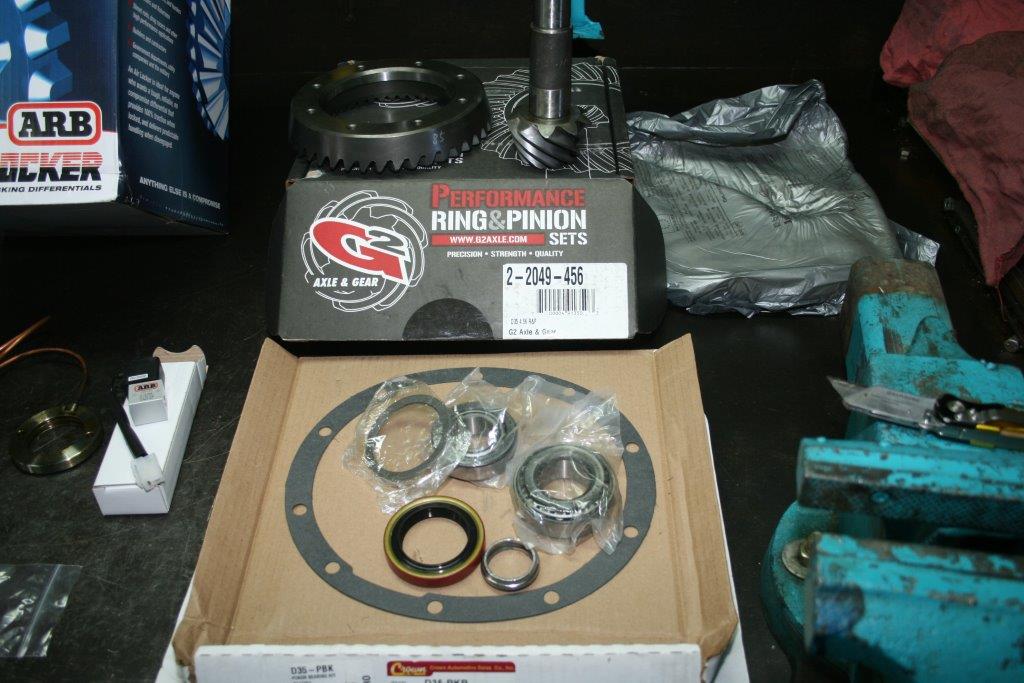
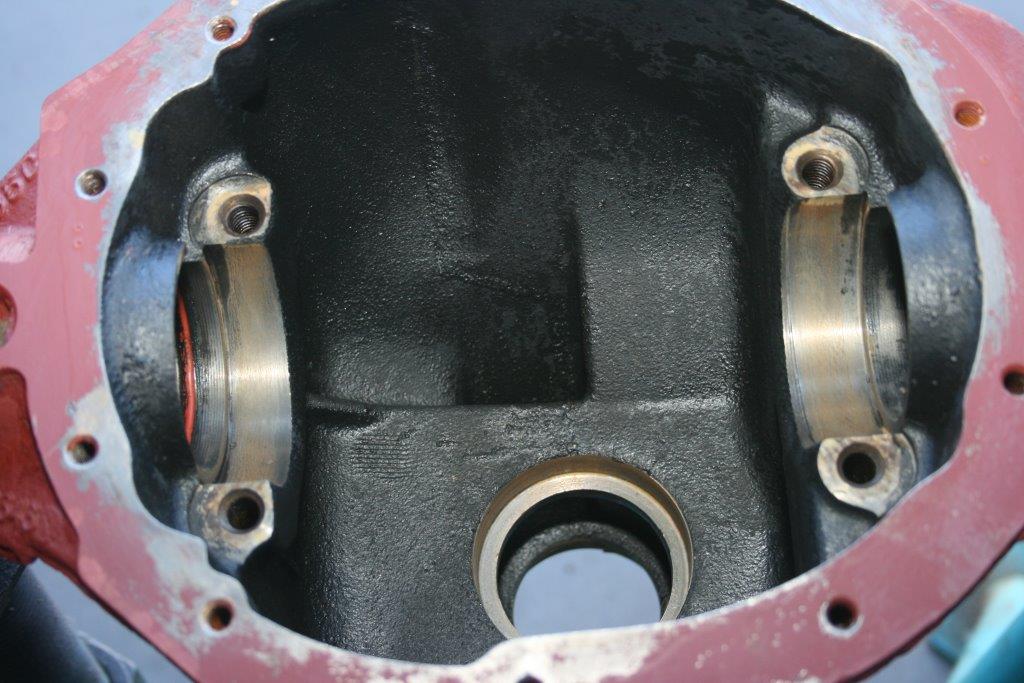
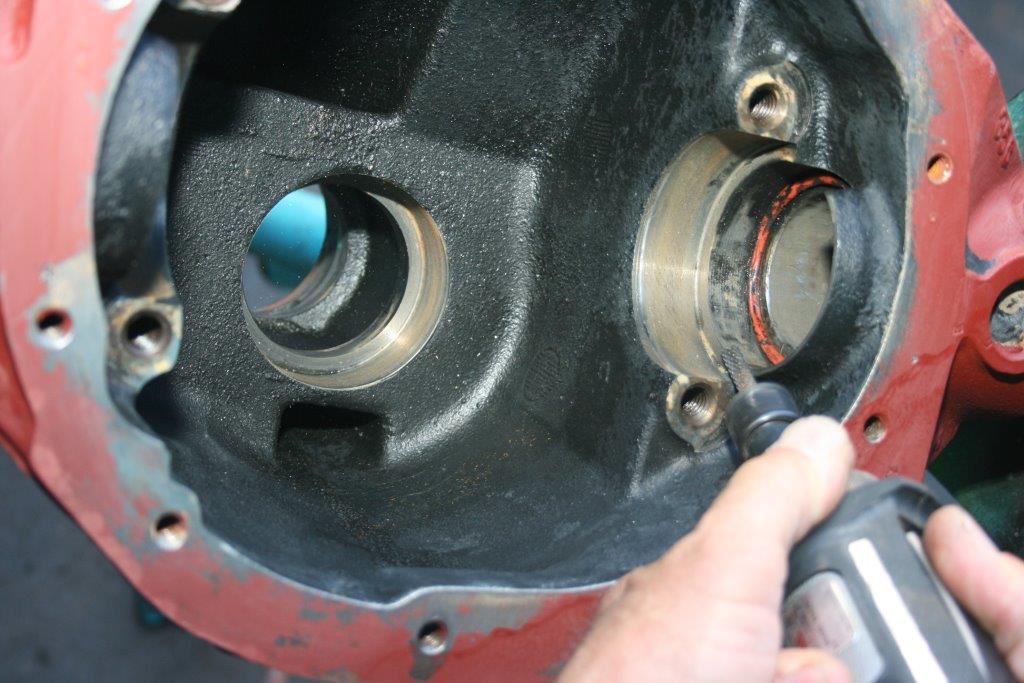
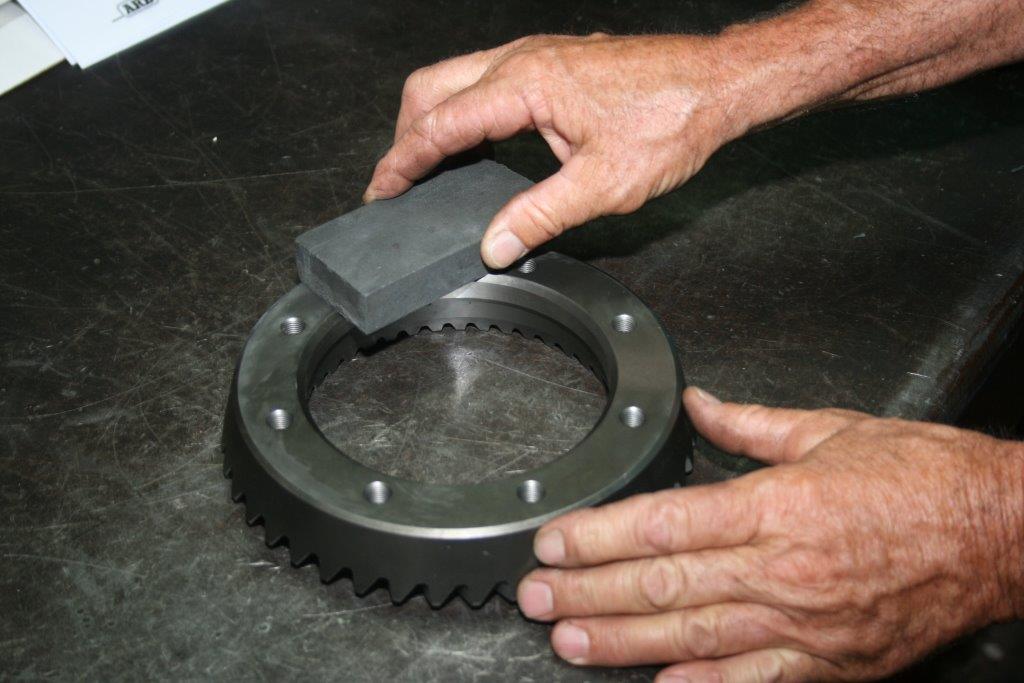
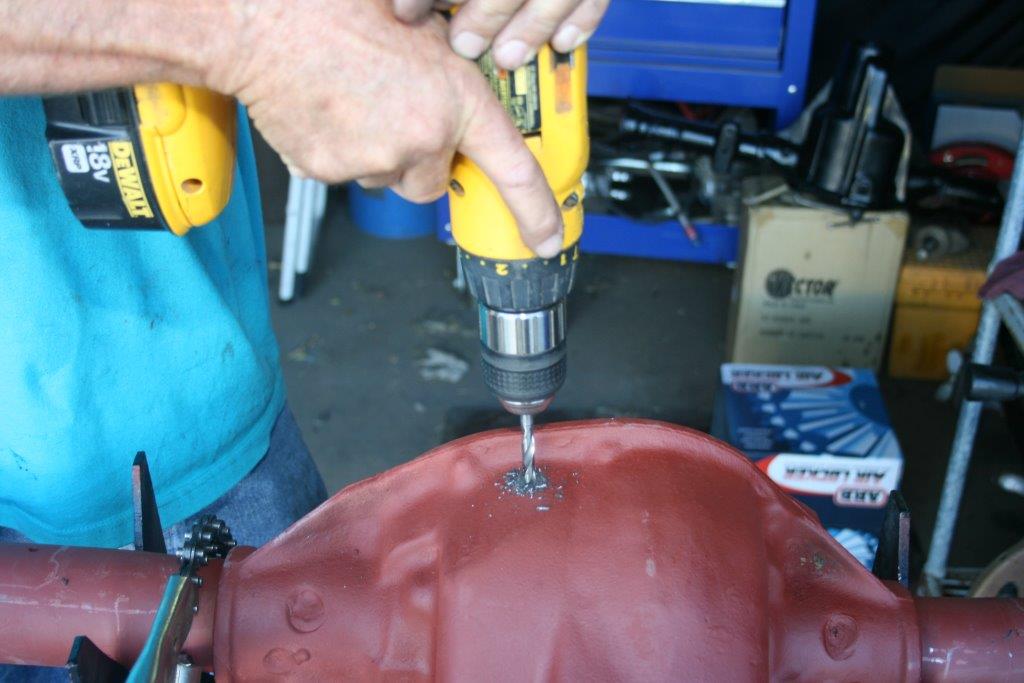
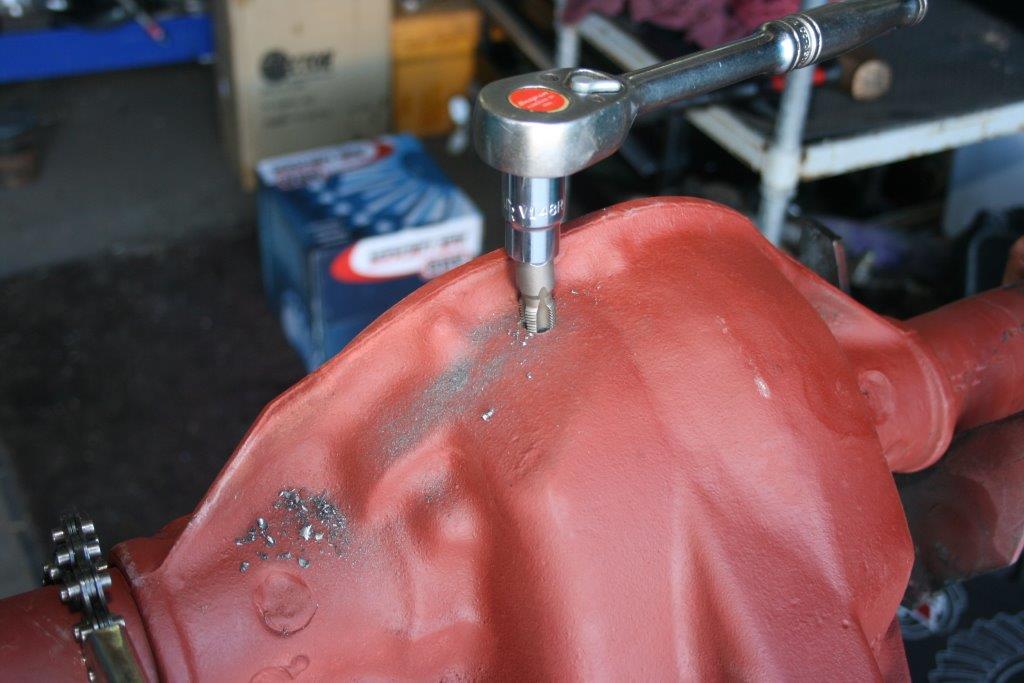
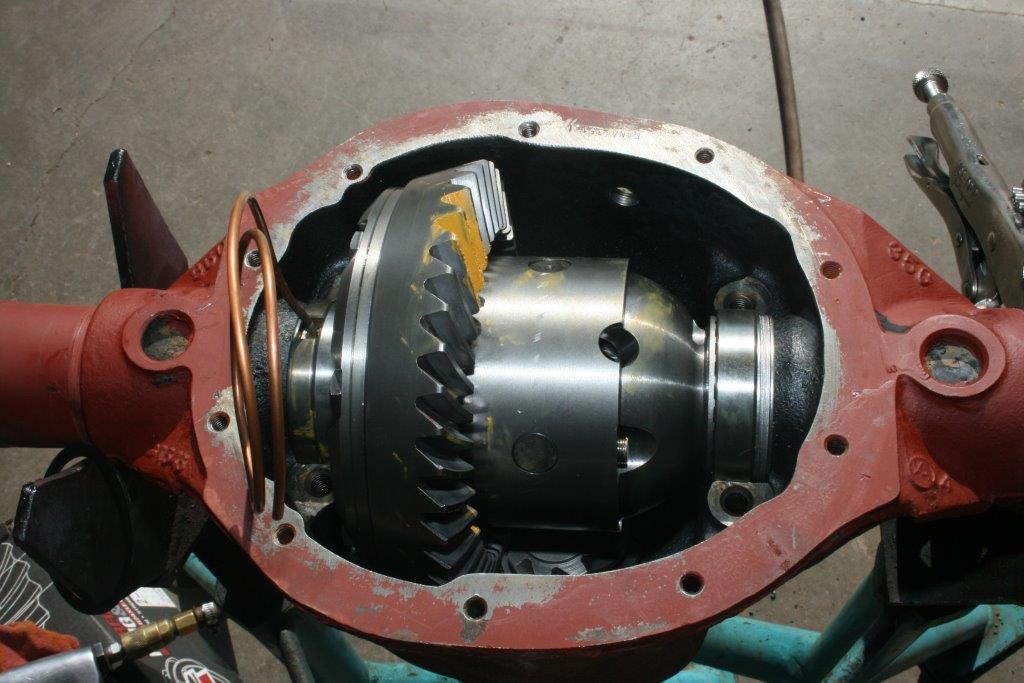
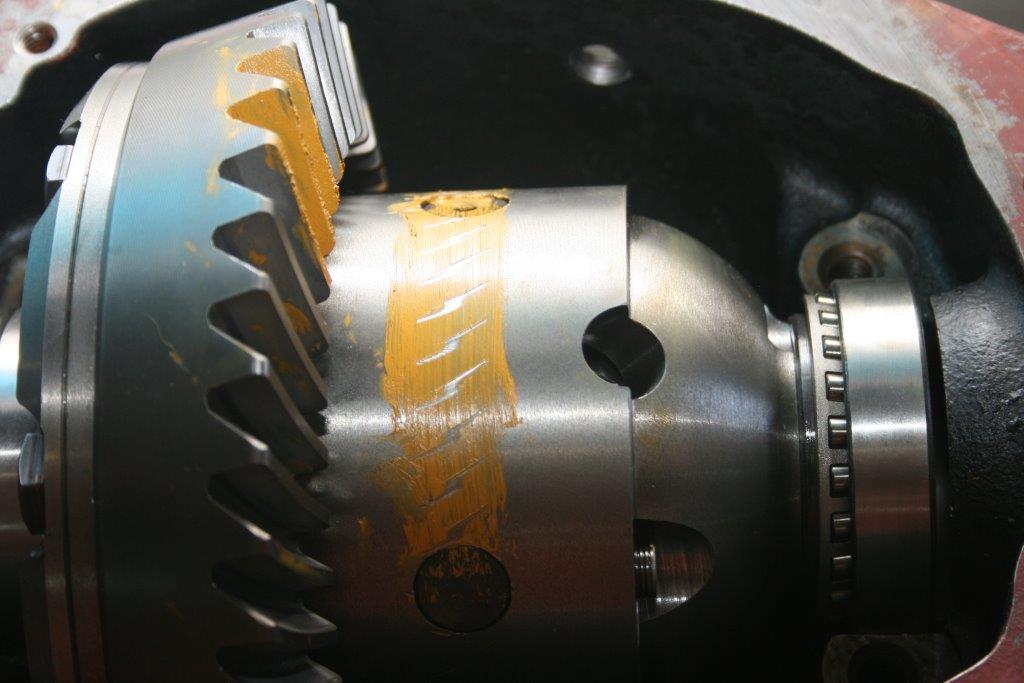
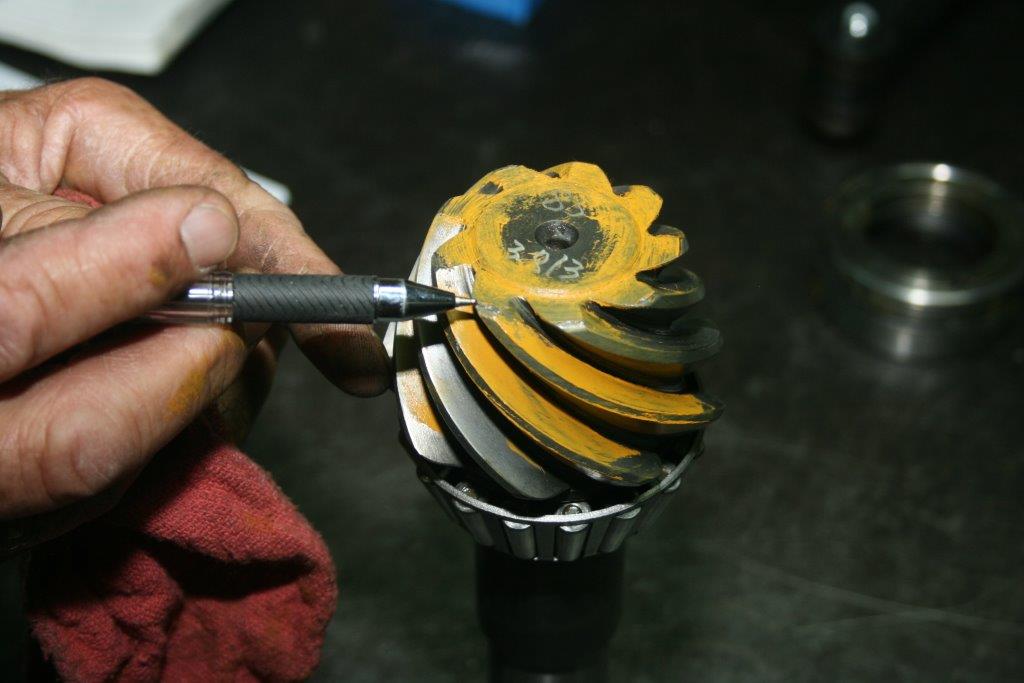
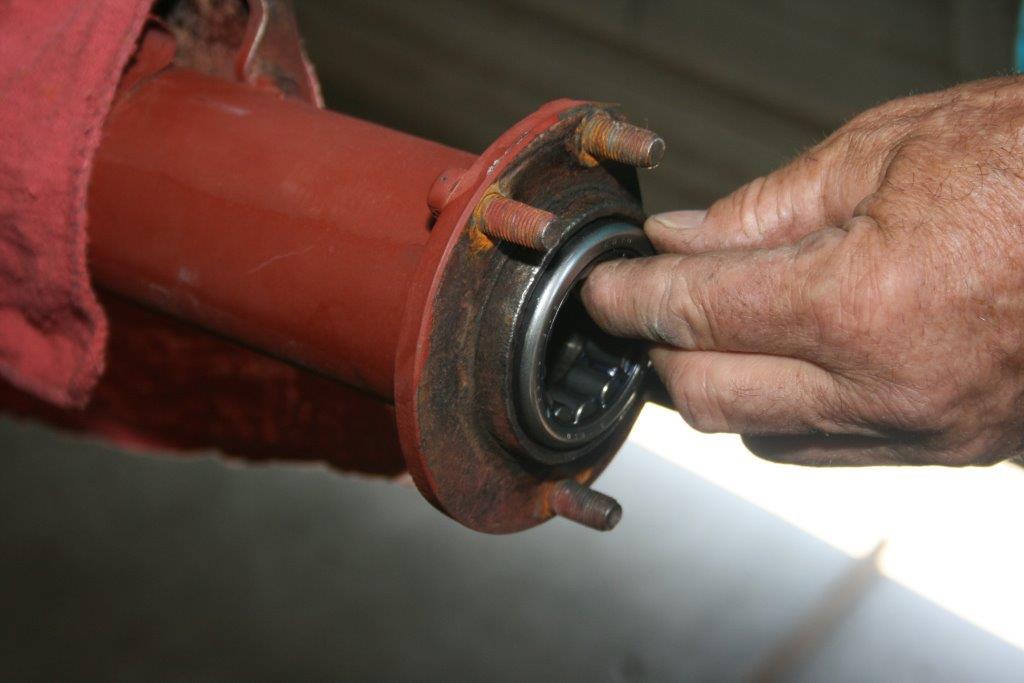
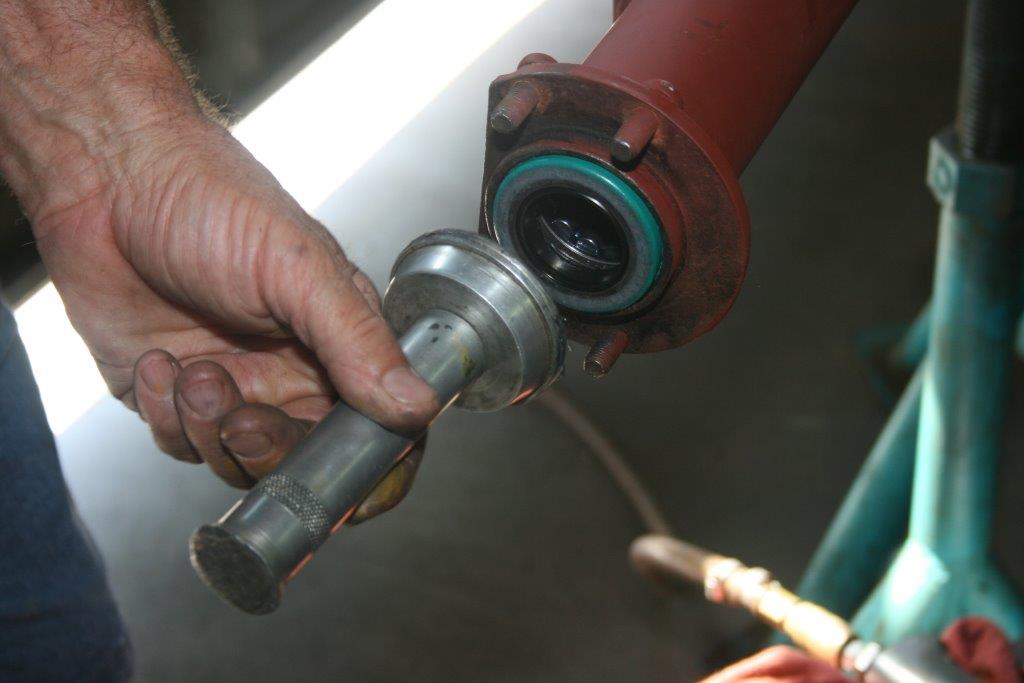
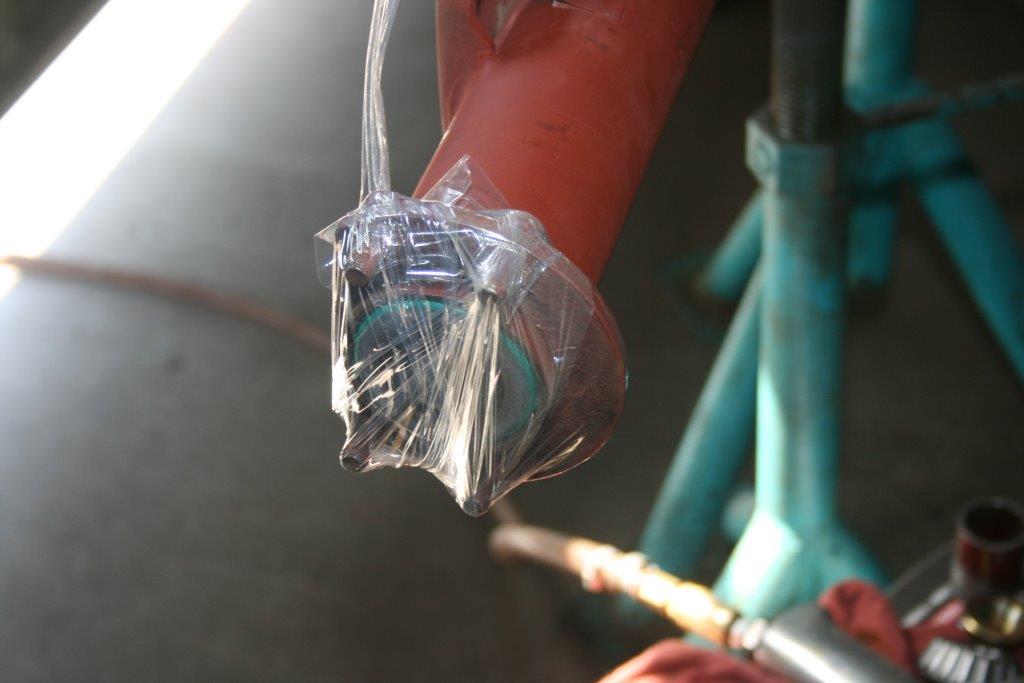
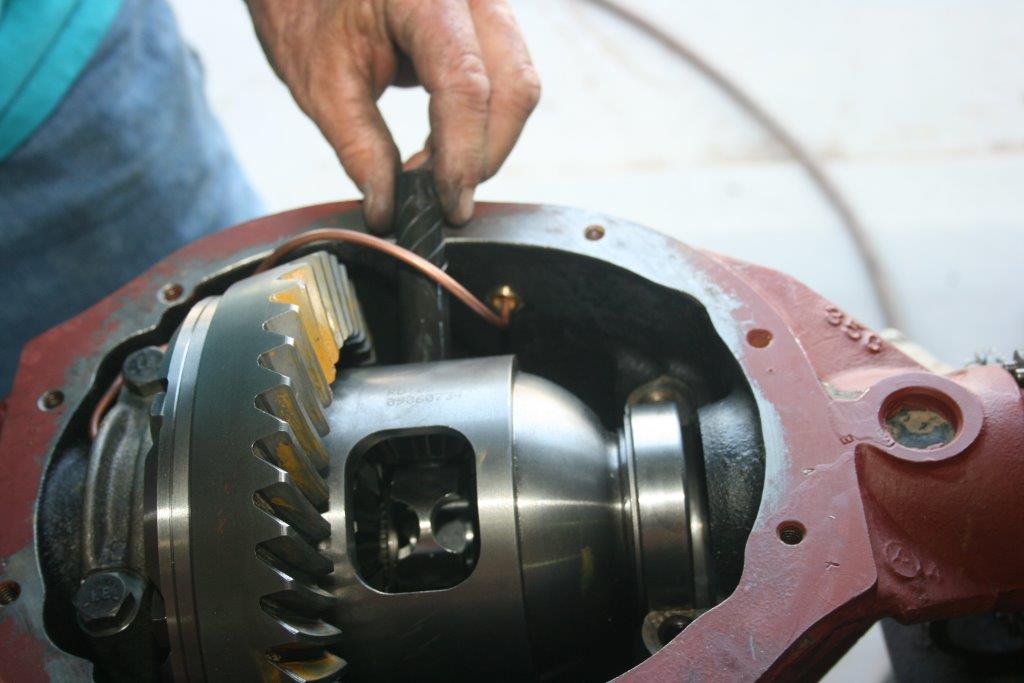
The Dana 30 and Model 35 axles were completely rebuilt with new axle shafts and 4.56:1 ratio ring and pinion gears from G2 Axle and Gear. A set of ARB air locker differentials was installed as well. Building a differential from the bare axle tubes and center section up is the work of an expert, so we entrusted the job to the techs at Rock Lizard 4×4 in Kingman, AZ.

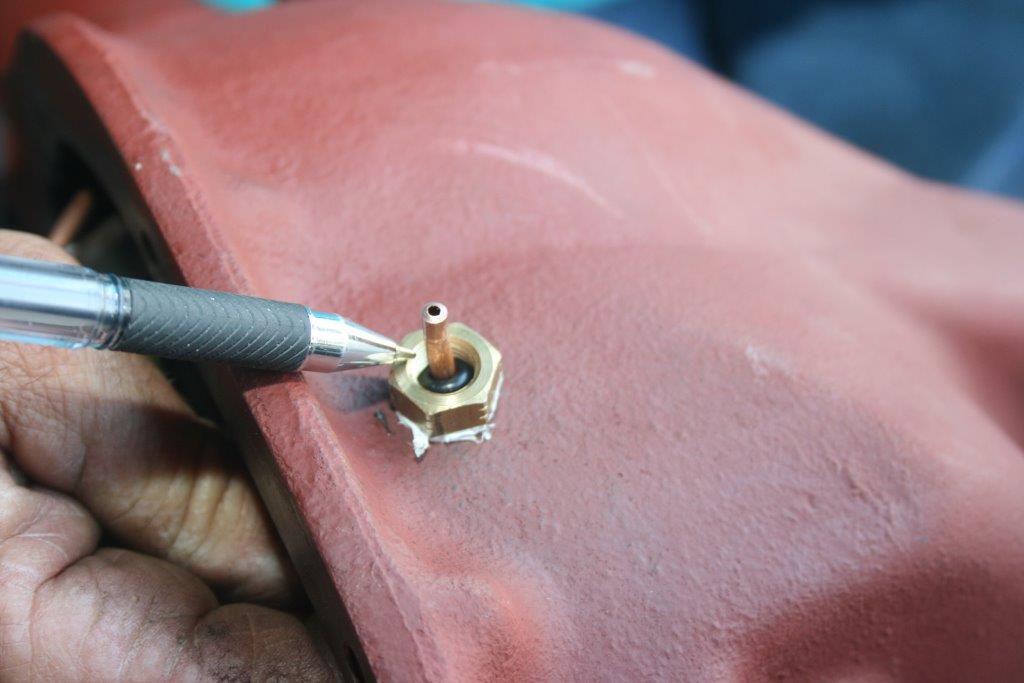
We decided to use a Viair air system to supply the ARB lockers. It includes an onboard air pump, air lines (with glad-hand connectors on each bumper), and a metal air bottle holding a reservoir of high-pressure air. The reservoir will also allow us to quickly refill our tires and power air tools on the trail.

Scroll through the slide show above to see how our axle upgrades came together.

Author: Jim Brightly

A former editor of Truckin’ and Trailer Life magazines, and tech editor of Four Wheeler, Petersen’s 4-Wheel & Off-Road, and Family Motor Coaching magazines, Jim Brightly is now a semi-retired photojournalist living, writing, and wheeling in northern Arizona. He’s been building and wheeling Jeeps for more than fifty years.