
(Editor’s note: Al built this cage when he worked for exhaust manufacturer Stainless Works)
My automotive pride and joy is a 1967 RS/SS Camaro. I have owned my car for several years and have autocrossed and drag raced it, but have not had the opportunity to run it at one of the local Ohio tracks such as Nelson Ledges, Mid Ohio, or BeaveRun. I began to do research about what it would take to get the Camaro in shape for this type of racing.
After asking about safety requirements, I found out the car would not pass tech at any of those tracks. They require three point belts at a minimum, and my car only had the standard 1967-issue lap belts. I figured that this was a good opportunity to upgrade to a five-point harness and a roll bar.
As I do with most projects, I made a list of requirements:
• Maximum vehicle stiffness
• Location for mounting shoulder belts for five point harness
• Additional safety protection
• Ability to get in and out of the front and rear seat with minimal effort
• Ability to remove the rear cross bar of the main hoop for complete use of the back seat
• Visually hidden from the outside
• Maximum interior room
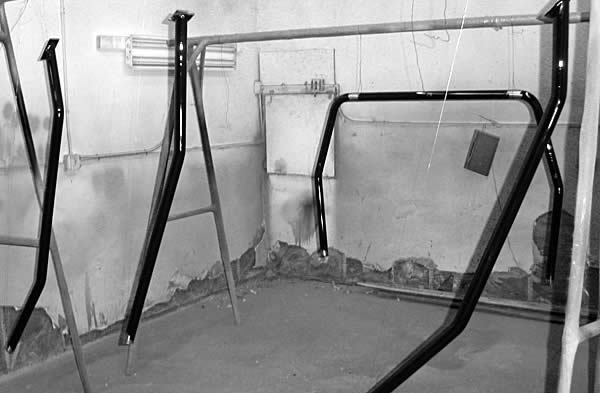
I decided to install a six-point roll bar, but with laid down front bars that would run almost parallel the front floor pan, rear bars that would tuck up tight to the rear window, and a removable cross bar.
You will note that I did not list meeting drag race sanctioning body tech rules as a requirement. In order to pass NHRA or IHRA tech, the sidebar has to pass from the main hoop to the floor at an angle that makes getting in and out of the car akin to climbing a jungle gym. Since I run the Camaro on treaded DOT tires, it would be hard to go 11s, especially with a 3:00 rear axle gearset. Most tracks I have been to will really not hassle you as long as the bar construction is sound and the car does not go 10s or faster.
Detroit Speed and Engineering supplied the main hoop, and I fabricated the front and rear bars. I used 1 ¾-inch, .134-inch wall DOM mild steel tubing. The 1 3/4 inch tubing is required by most sanctioning bodies for a roll bar (full roll cages can use 1 5/8 inch material), with wall thickness no less than .120 inch. When tubing is bent, even with a mandrel bender, the outside wall thickness of the bend will get thinner and the inside of the bend will get thicker due to the displacement of the material. That’s why most roll bar manufacturers start with .134 inch wall tubing.
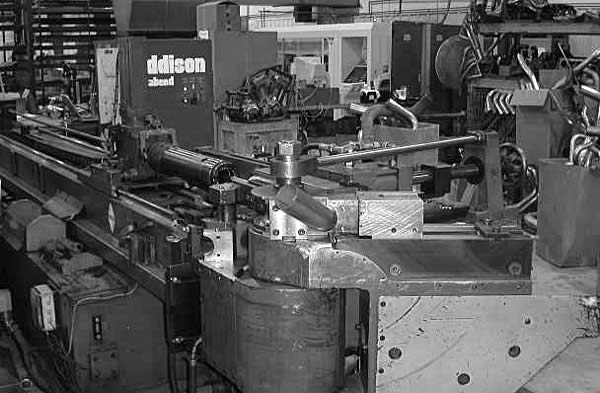
I mocked up my front and rear bars using cut and welded scrap. This allowed me to check clearances and make any changes before bending the actual tubes. Once I had all the tubes mocked up, I used our shop’s ROMER coordinate measuring machine to digitize the samples. The ROMER will digitize a sample tube and generate a centerline, which can be loaded into the CNC mandrel bender.
Once the tubing samples are loaded into the bender, the machine will tell you how long a piece of material to cut. Once the piece is cut and cleaned, you load it into the bender and press one button—the machine will index the pipe, then make all bends and rotations exactly as you programmed it. Most people don’t have access to this type of machinery, but a good performance exhaust shop with a mandrel bender could bend the tubing for your roll bar.
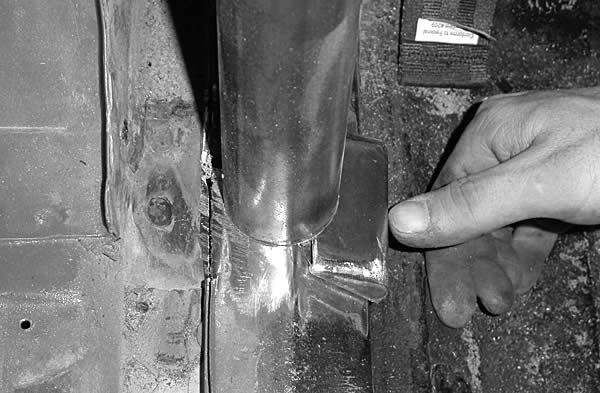
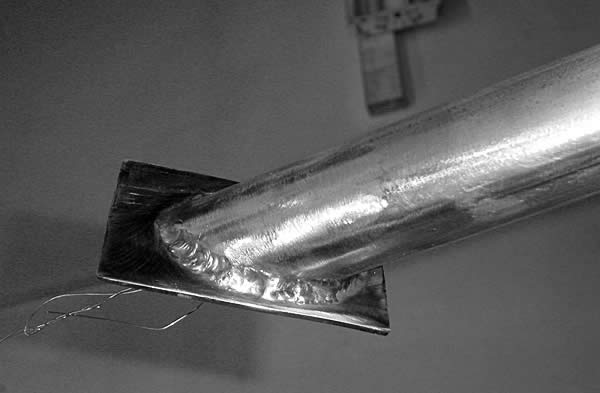
On 1967-69 Camaros, the edge of the floorpan meets the inner rocker panel exactly where I wanted to mount the main hoop. Rather than cutting the hoop to meet the floor pan, I made a pair of small triangle-shaped boxes from .125 thick steel plate, welded them to the floor pan, then welded the main hoop to the boxes. This arrangement spreads the load from the main hoop to a larger area on the floor, and makes it easier to level the main hoop in the car as I will be cutting a flat surface rather than a compound angle.
The hardest part of the entire job was making the a removable main hoop cross bar. I have seen a lot of cars with bars that use two shear plates and a clevis pin, or another arrangement similar to those used on removable door bars. I chose not to go this route because they almost always rattle—and I HATE rattles inside the car!
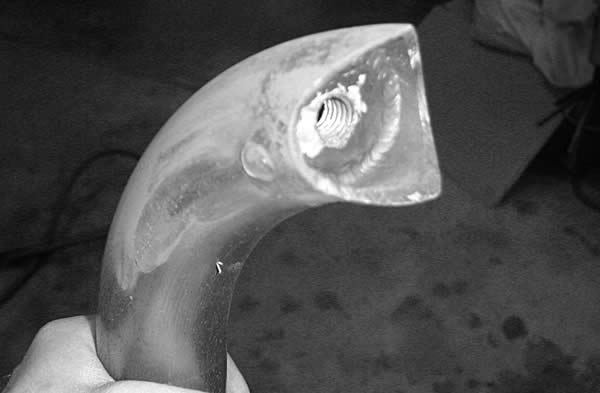
I decided to bolt the cross bar to the main hoop. I welded a tube into each side of the main hoop; two ½-inch bolts will pass through these tubes into two laser-cut, 1/2 inch thick rings which I drilled, tapped, and welded into the cross bar. To keep the cross bar from scratching the main hoop when removing and reinstalling it, I cut two oval plates from 18 gauge stainless steel sheetmetal, rolled them to match the contour of the main hoop, and bonded them with adhesive to the rear of the hoop. I left the plates unpainted so they won’t chip or flake.
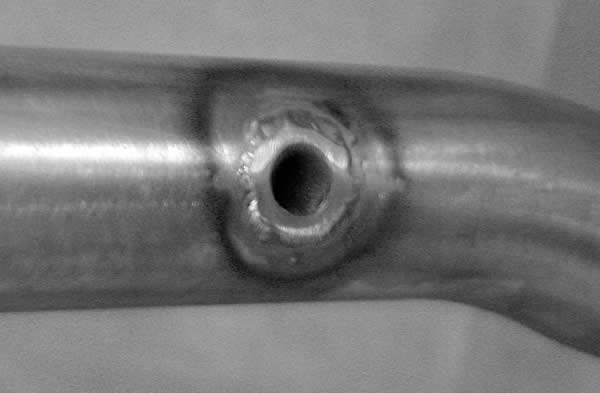
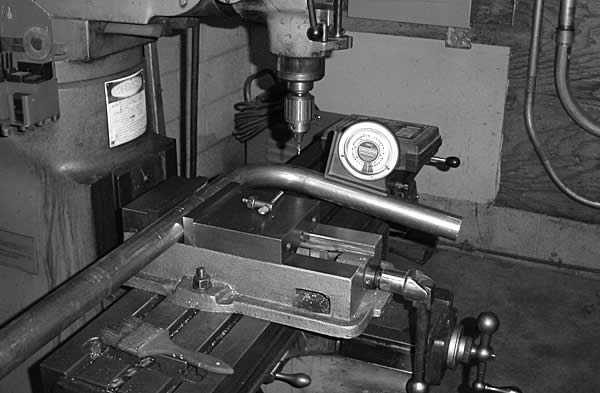
To cut the fishmouth on the cross bar tubing, I had to match the side angle of the roll bar (looking at the bar from the front to the rear of the car) and the 11-degree layback of the main hoop (done to match the rake of the quarter window weatherstrip). I used a magnetic angle finder to set the appropriate angle in both directions, and cut both ends with a 1 ¾-inch hole saw on a Bridgeport mill. I destroyed two hole saws in the process, but the tubes fit together nice and tight.
I cut, fit, and fishmouthed all of the tubing before painting. This allowed me to paint the bars before putting them in the car. I used POR-15 black paint on the bar and the mounting points in the car, painting to within six inches of the joints to be welded. This stuff is tough, dries to a nice glossy finish, and can be touched up with a brush.
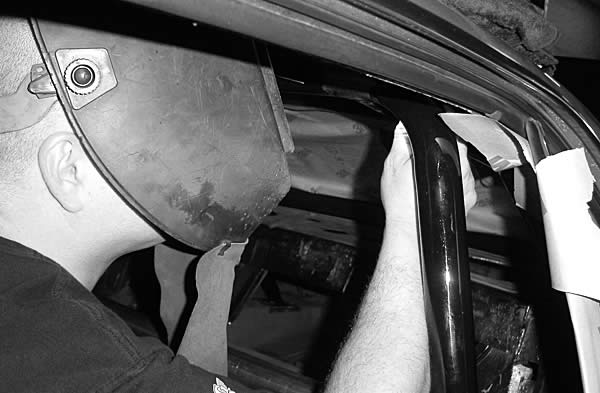
Once everything was painted, I asked my good friend Ed Turner to weld the cage in for me. A certified TIG welder, Ed taught me a few tricks, like using a small mirror on the top of the roll bar to weld in an area that can’t be seen. Ed also uses 308 stainless filler rod. He explained that the stainless rod is much purer than mild steel rod, which minimizes pitting and bubbles in the weld.
When welding inside a car, make sure to cover everything that cannot be removed, including the inside window glass—it is very easy to ruin the glass with burn marks. 3M makes a great self-adhesive sheet to protect the glass from grinding and welding sparks.
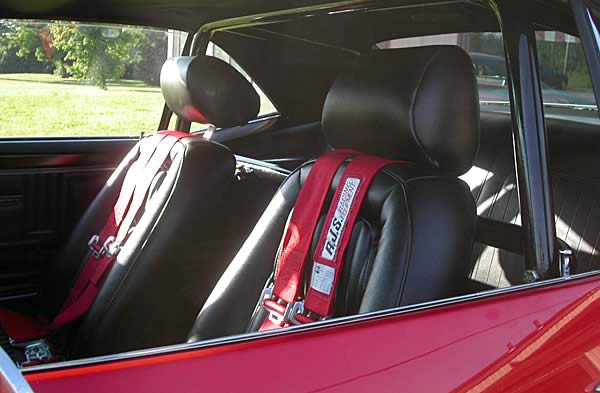
Once the roll bar was welded in, I painted all the welded areas and installed the headliner, seats, and carpeting. I purchased a new headliner and carpeting from Year One, and proper RJS five-point harnesses from Summit Racing.
I met all of my requirements for this project. It is easy to get in and out of the car, I now have a place to mount the five point harnesses, the bar blends in with the interior when looking at it from the outside, and the car is noticeably stiffer. Buying a kit may have been easier, but by making the roll bar myself I was able to get exactly what I wanted—and isn’t that what building a hot rod is all about?


[…] pull it "into" the main tube. : http://actoncobra.com/images/020514%…20(Medium).jpg Or this: How to Fab and Install a Roll Bar – OnAllCylinders The hard part in either case is making sure the brackets/hardware are strong enough. most bolt-in […]