Welcome back to our Little Red Corvette series, an in-depth look at the problems encountered and the fixes made on my 1971 C3 Vette. In Part 1, I explained how the car was pretty much undrivable off the transporter. I completely went through everything from the body mounts to the rear suspension. Most of the changes were simply enhancements in the driveability, performance and particularly for this car, safety departments. Since I’m not building an NCRS Flight Judged Corvette I’m free to modify as I see fit.
In Part 2, we’ll zoom in on the front end of the car. Everything was drop-dead beautiful appearance-wise, but just like the rear suspension it wasn’t exactly pretty from a mechanical perspective. Here’s what I found along with the fixes and modifications I made.
Story Overview
- Always inspect suspension components even on a completely restored car
- There are different-rate front coil springs for small block- and big block-equipped C3 Corvettes
- Other good upgrades for C3 Corvettes include a larger front sway bar and Bilstein shocks
Springs
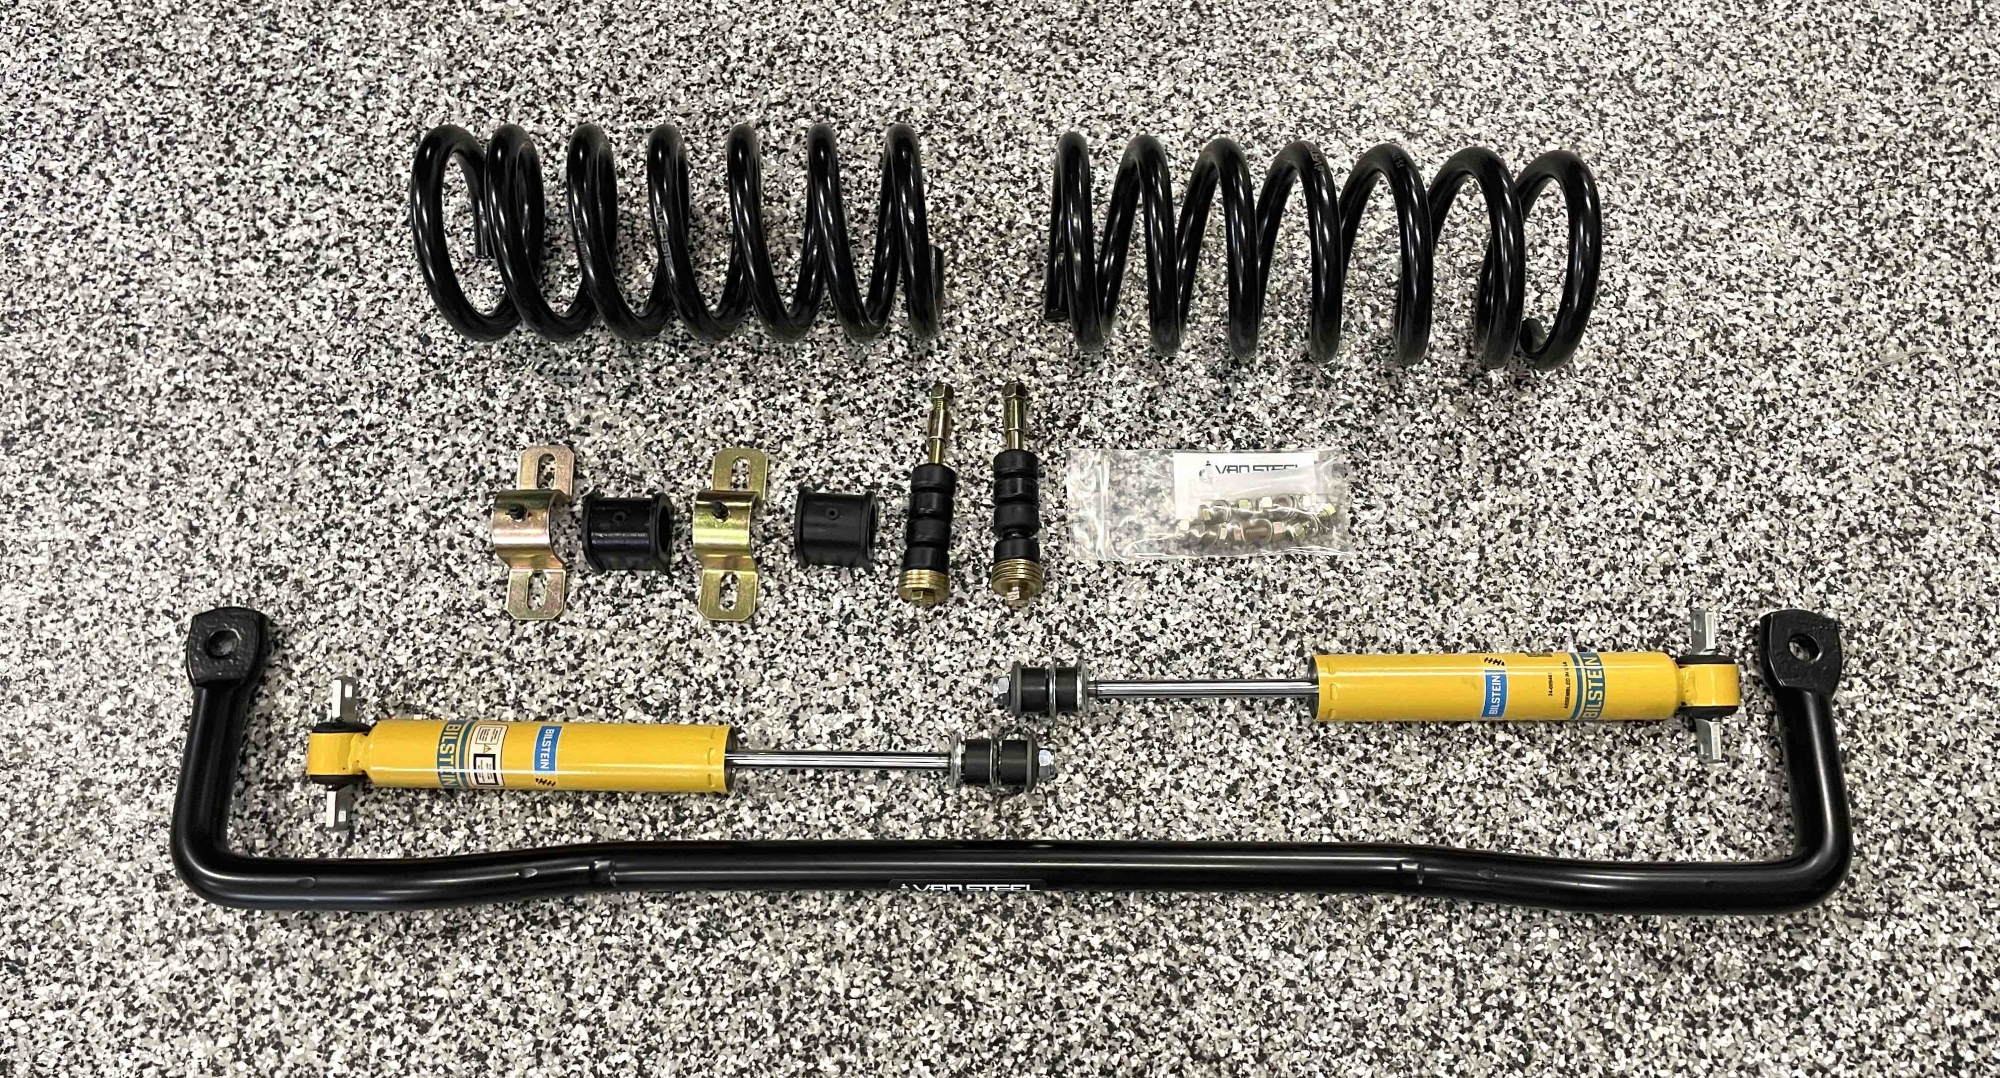
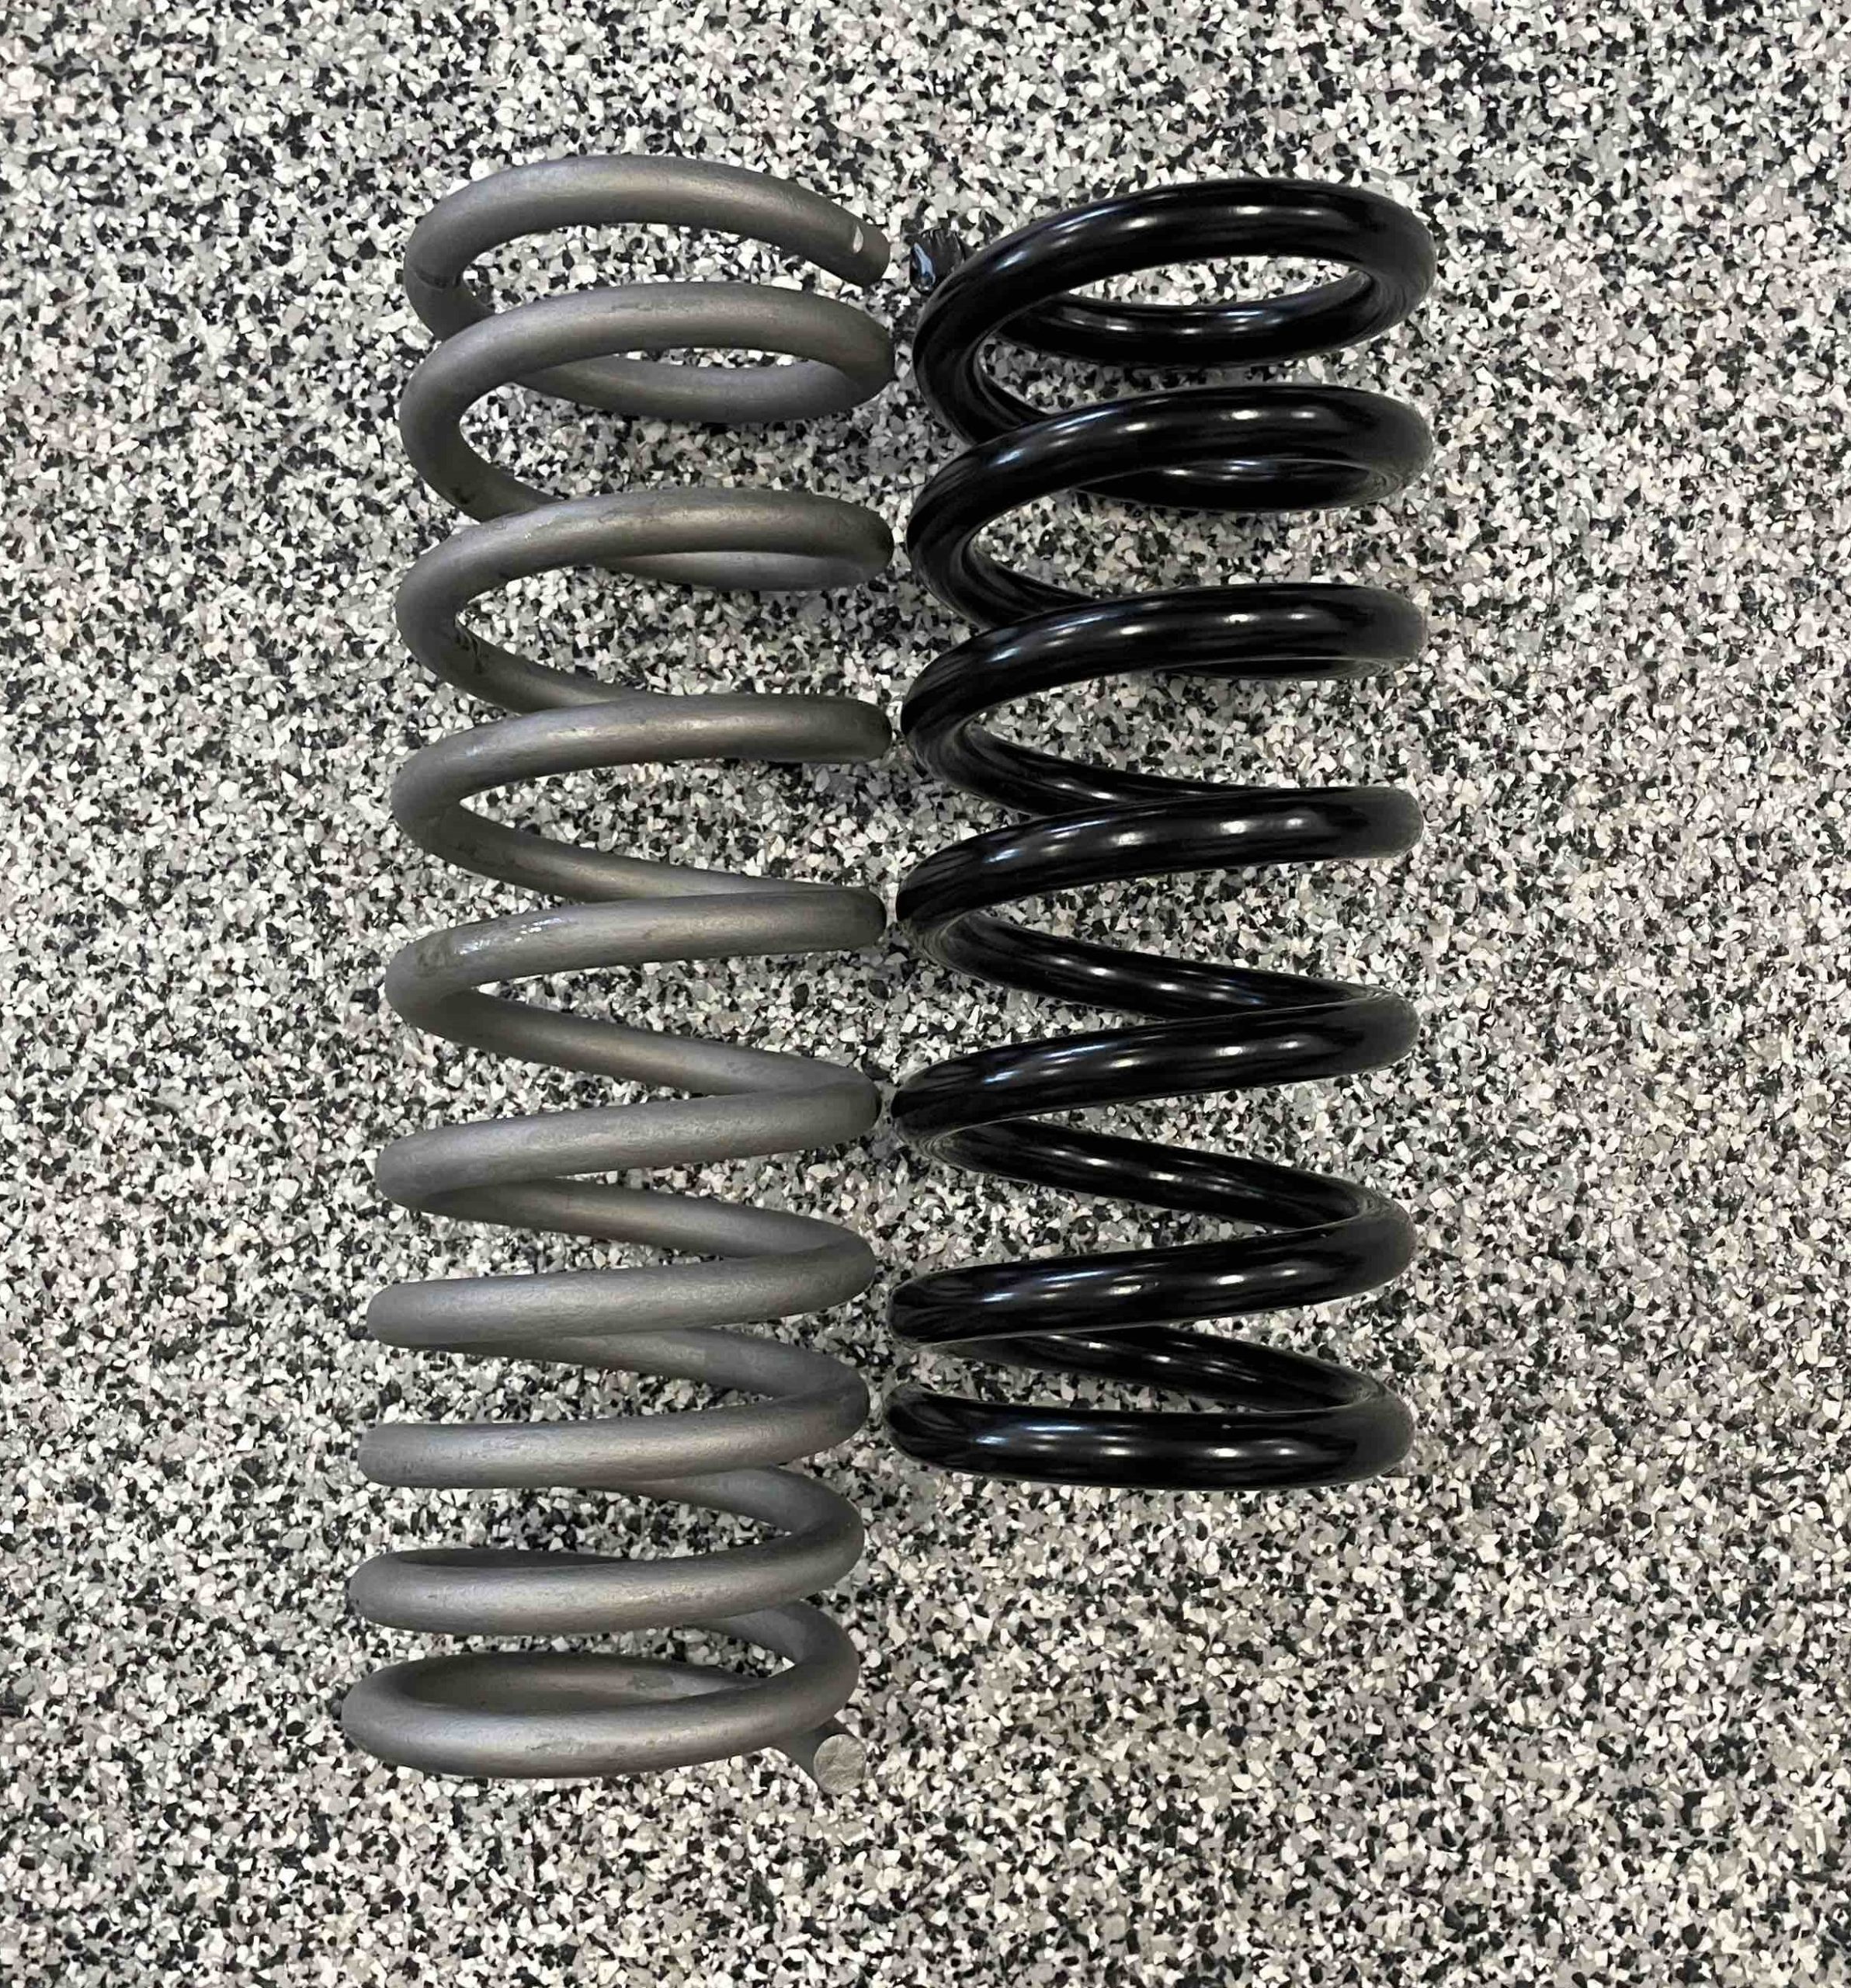
Since I plan to install a big block Chevy, I wanted to change the front springs to the 550-inch pound versions designed for big block Corvettes. They’re the perfect match for the 360-inch pound composite Van Steel spring I installed out back.
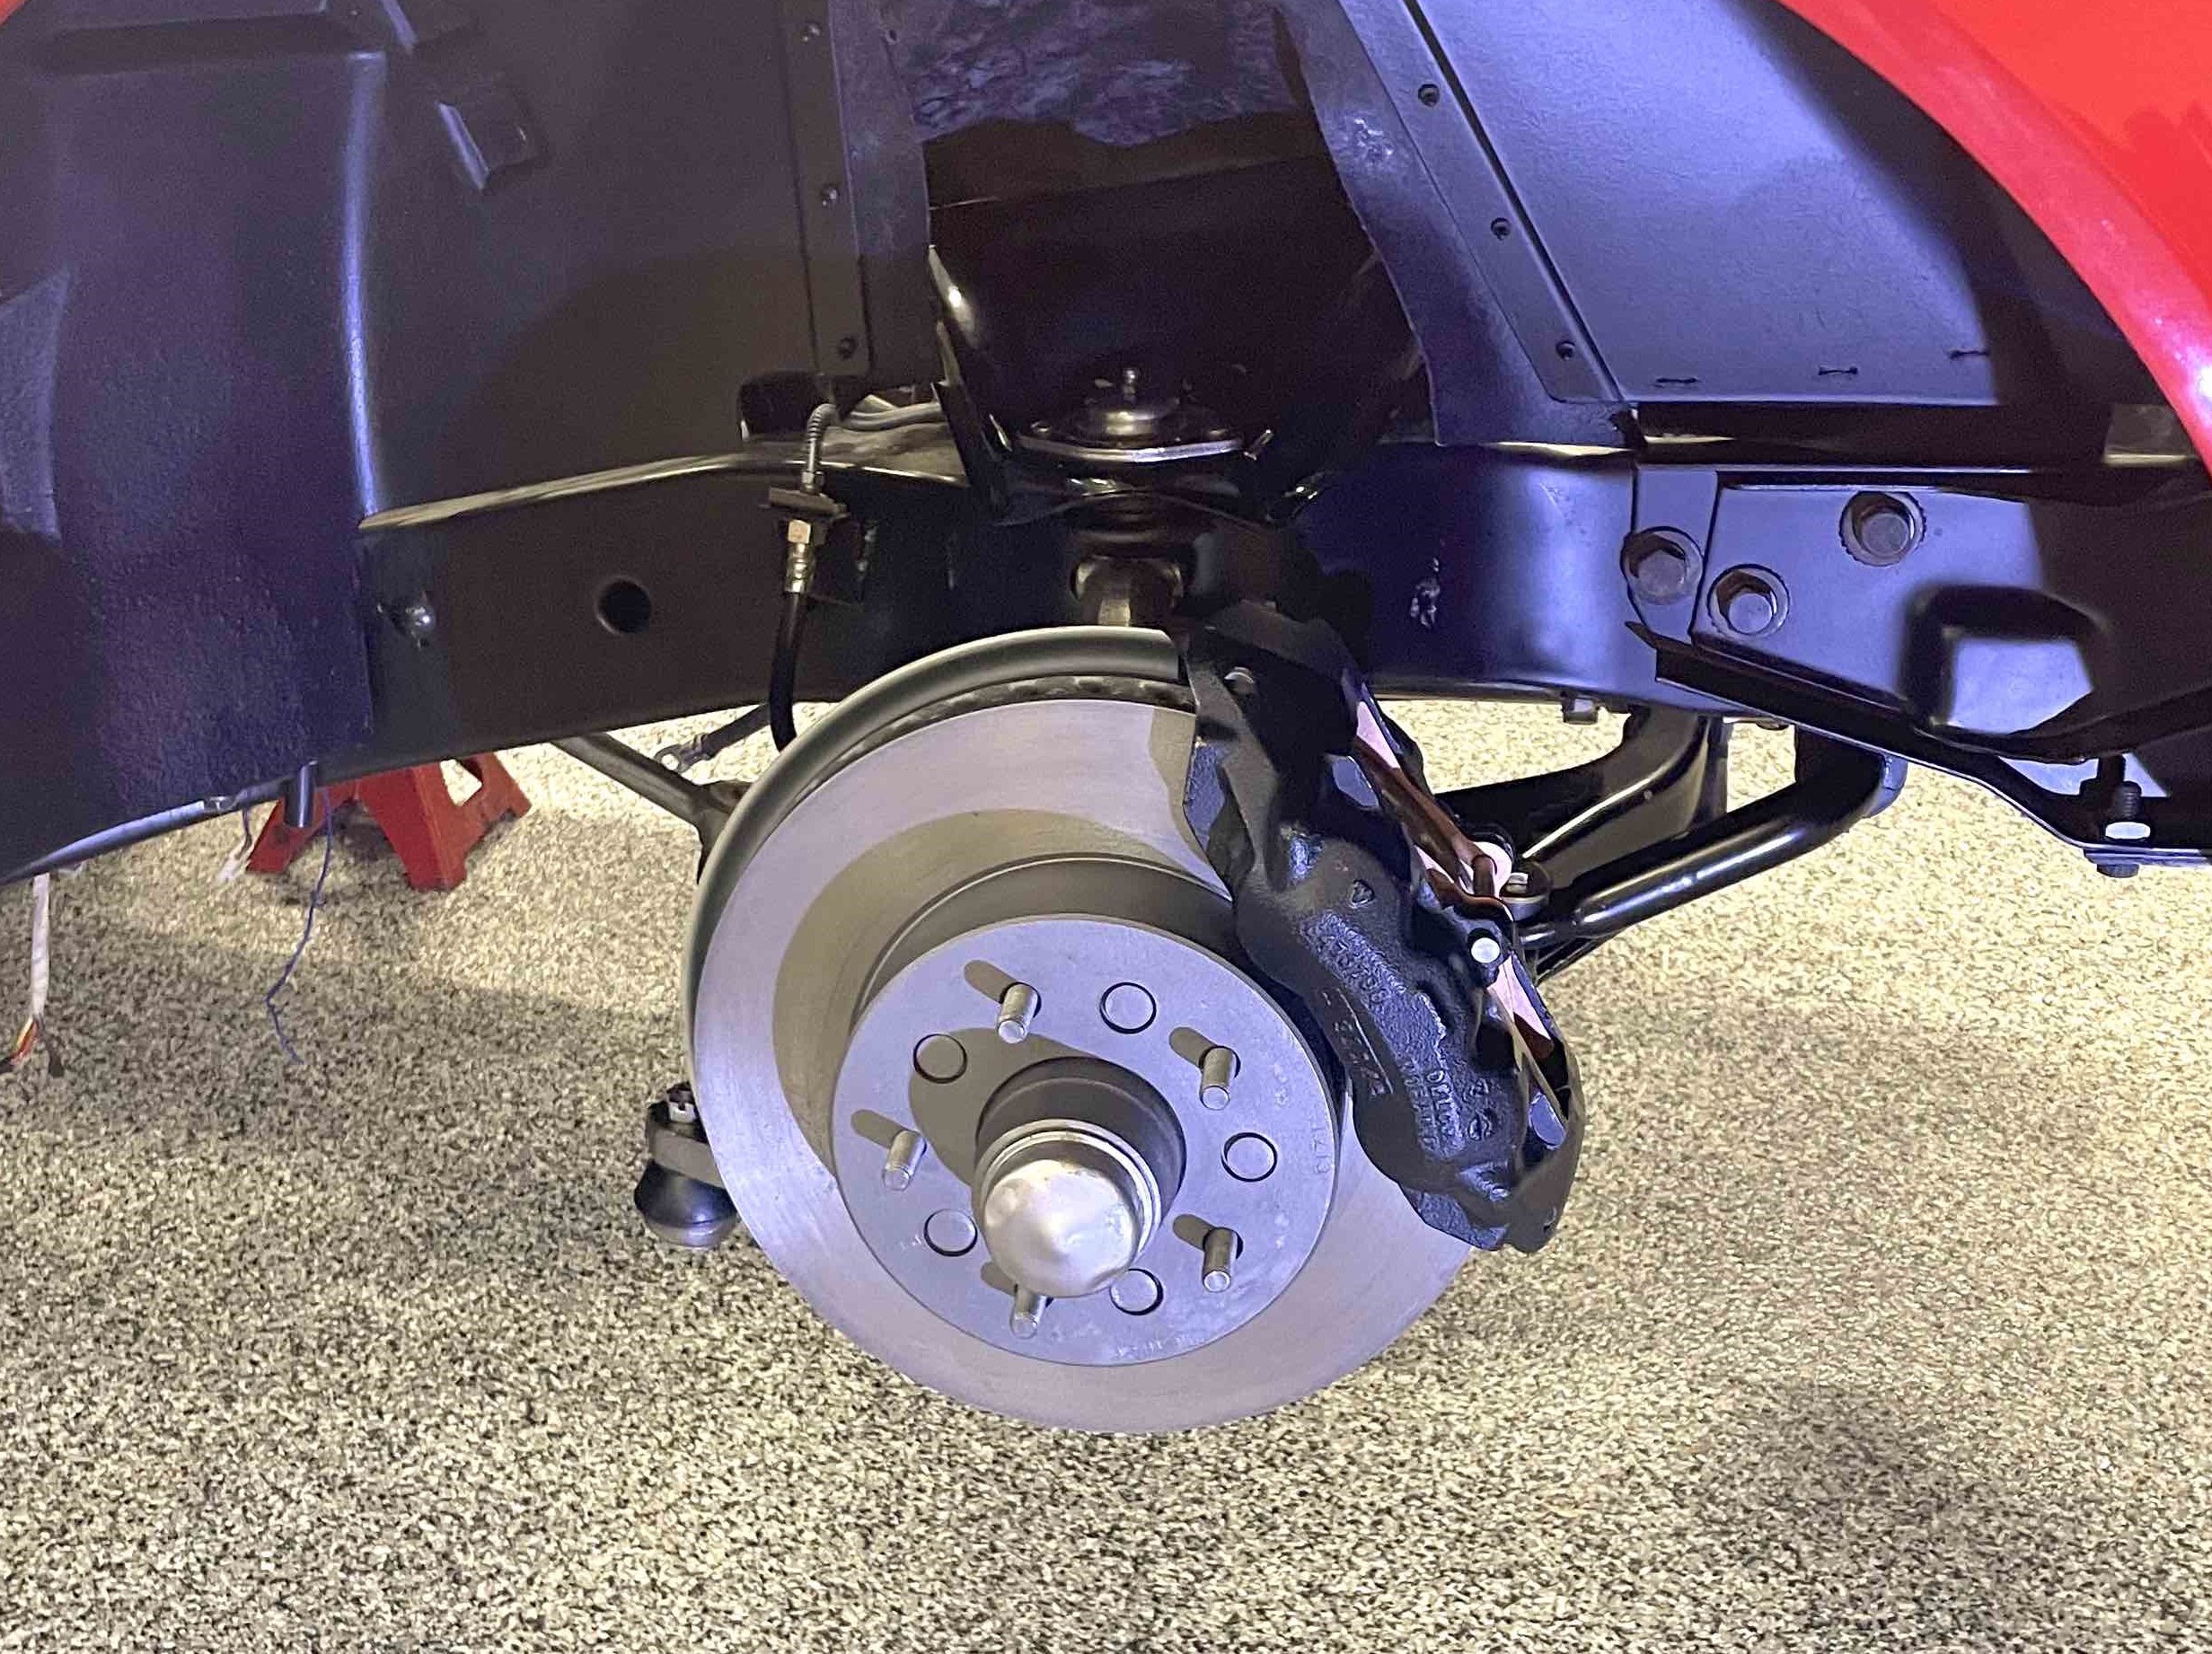
In order to swap springs, the tie rod ends had to come out and the brake calipers removed from their brackets and moved out of the way so they don’t cause excess stress on the brake lines. I set the calipers on an axle stand.
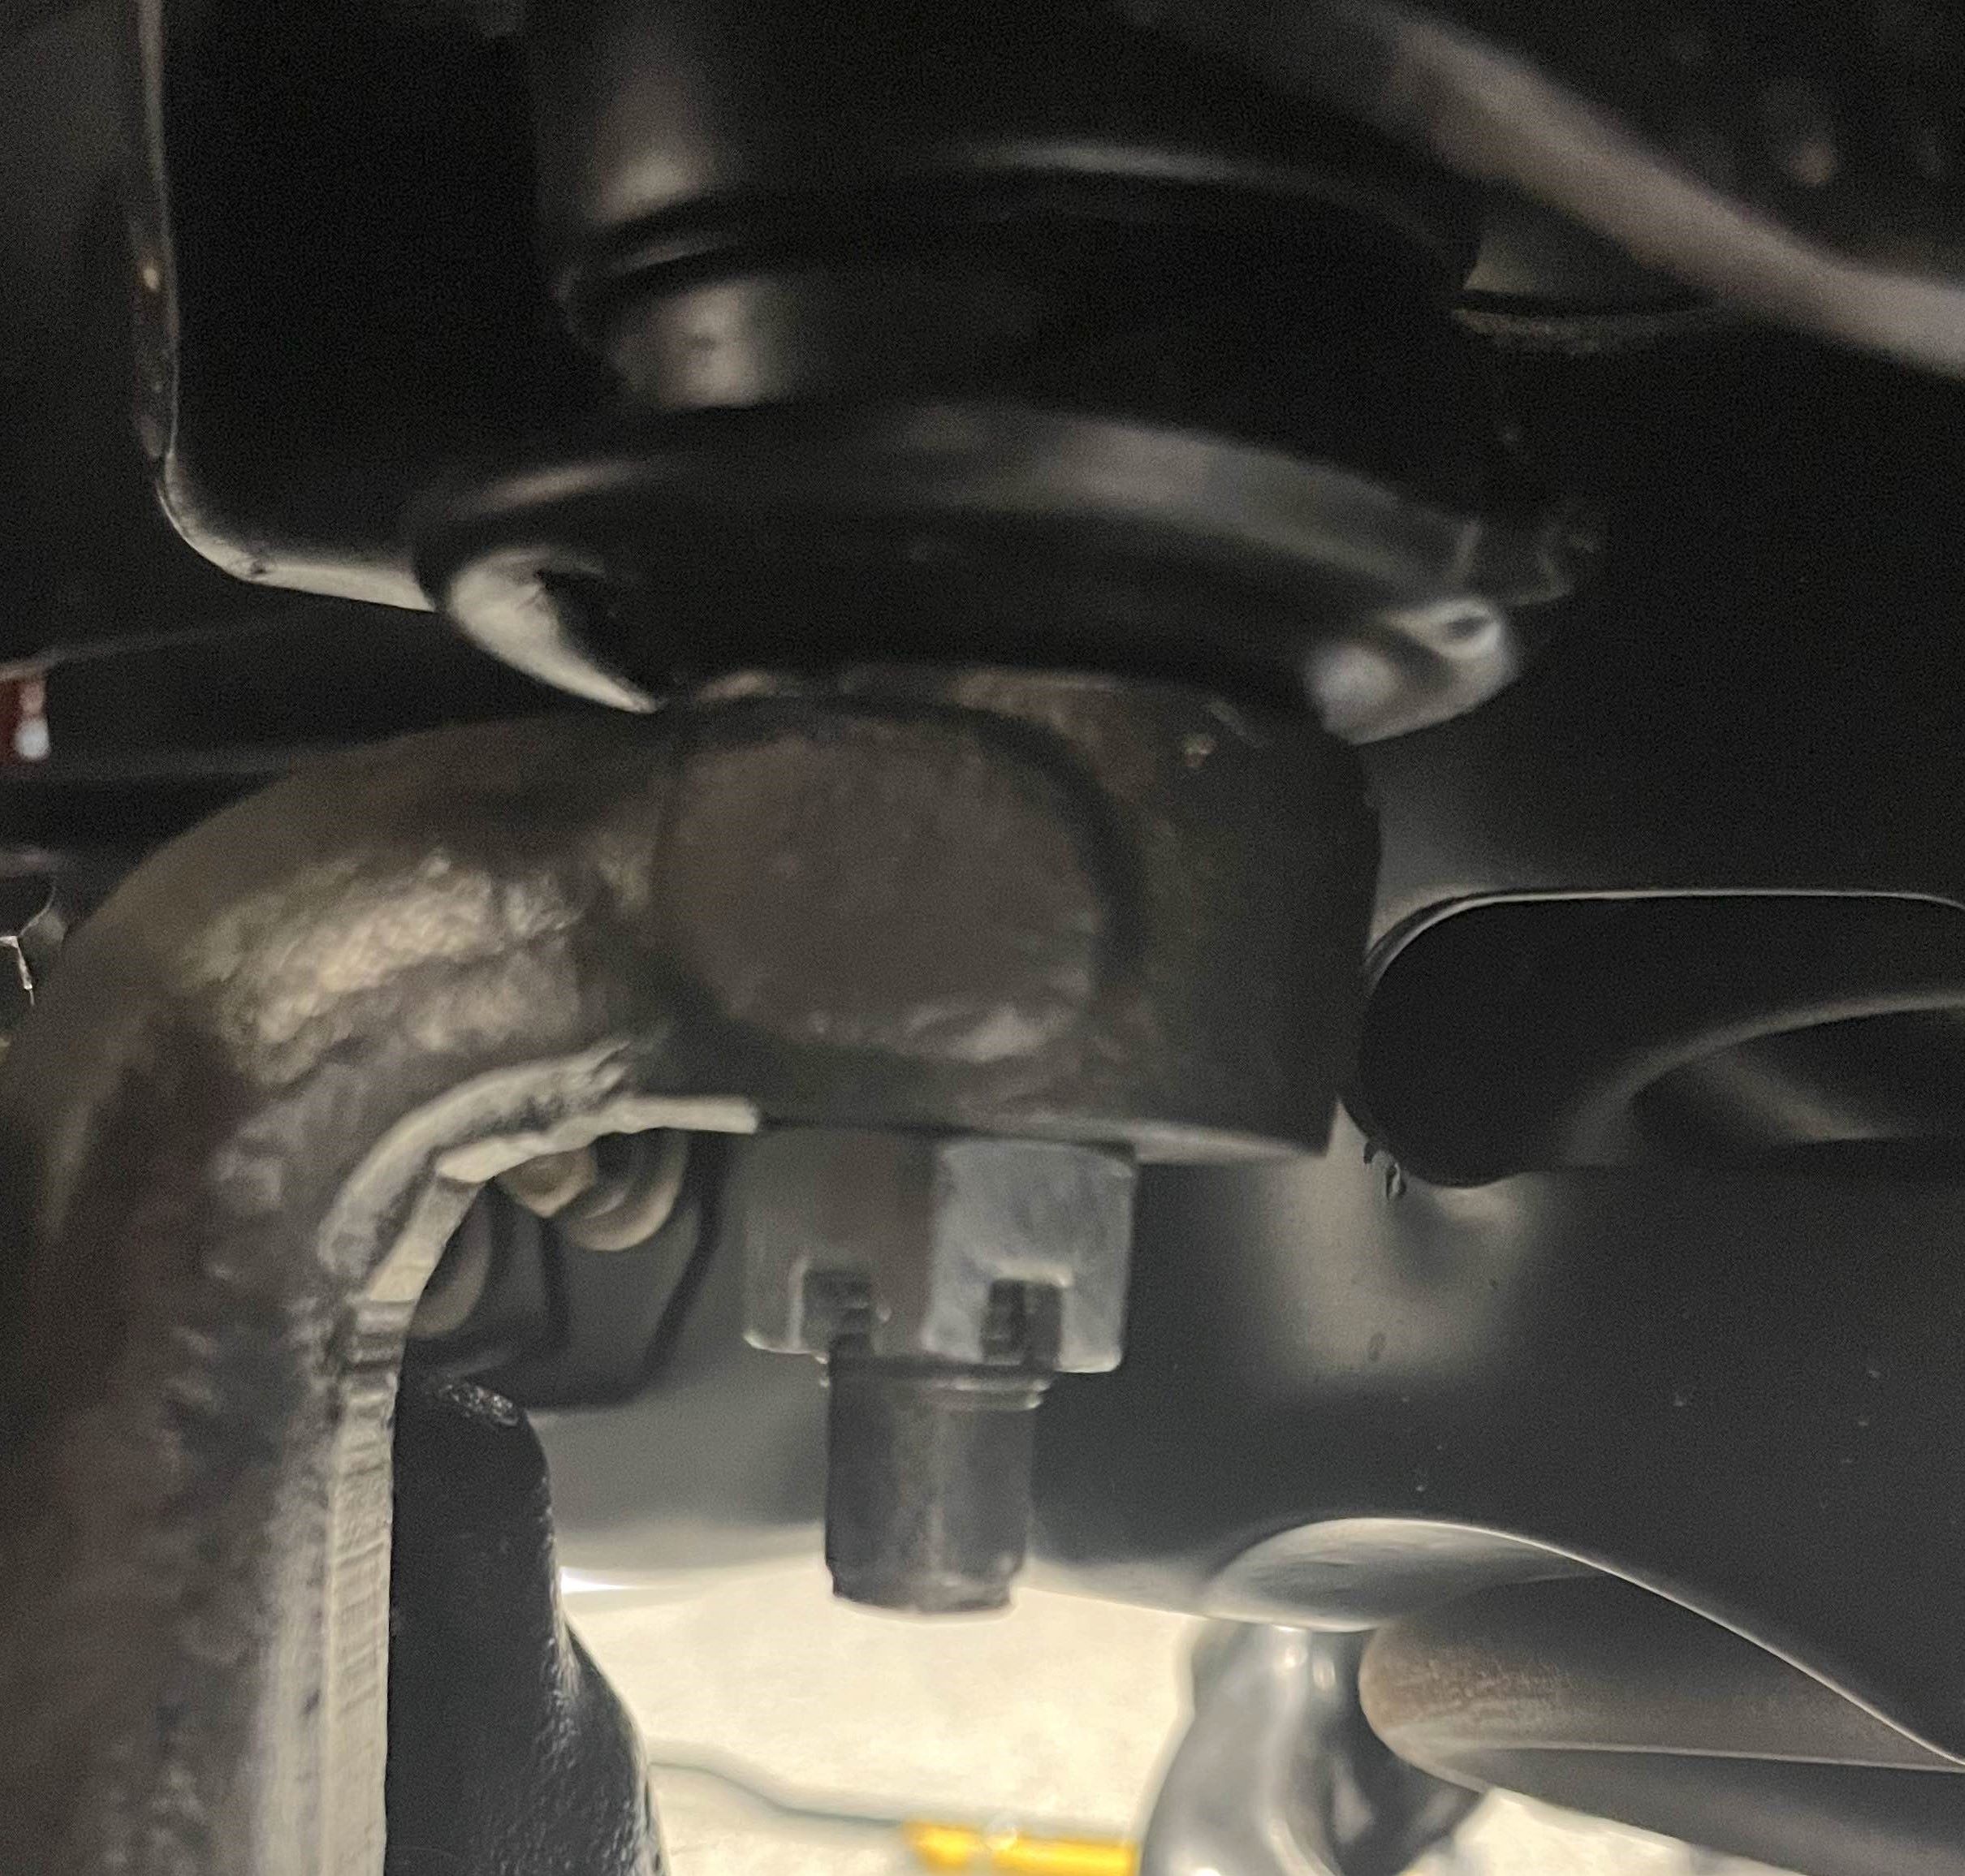
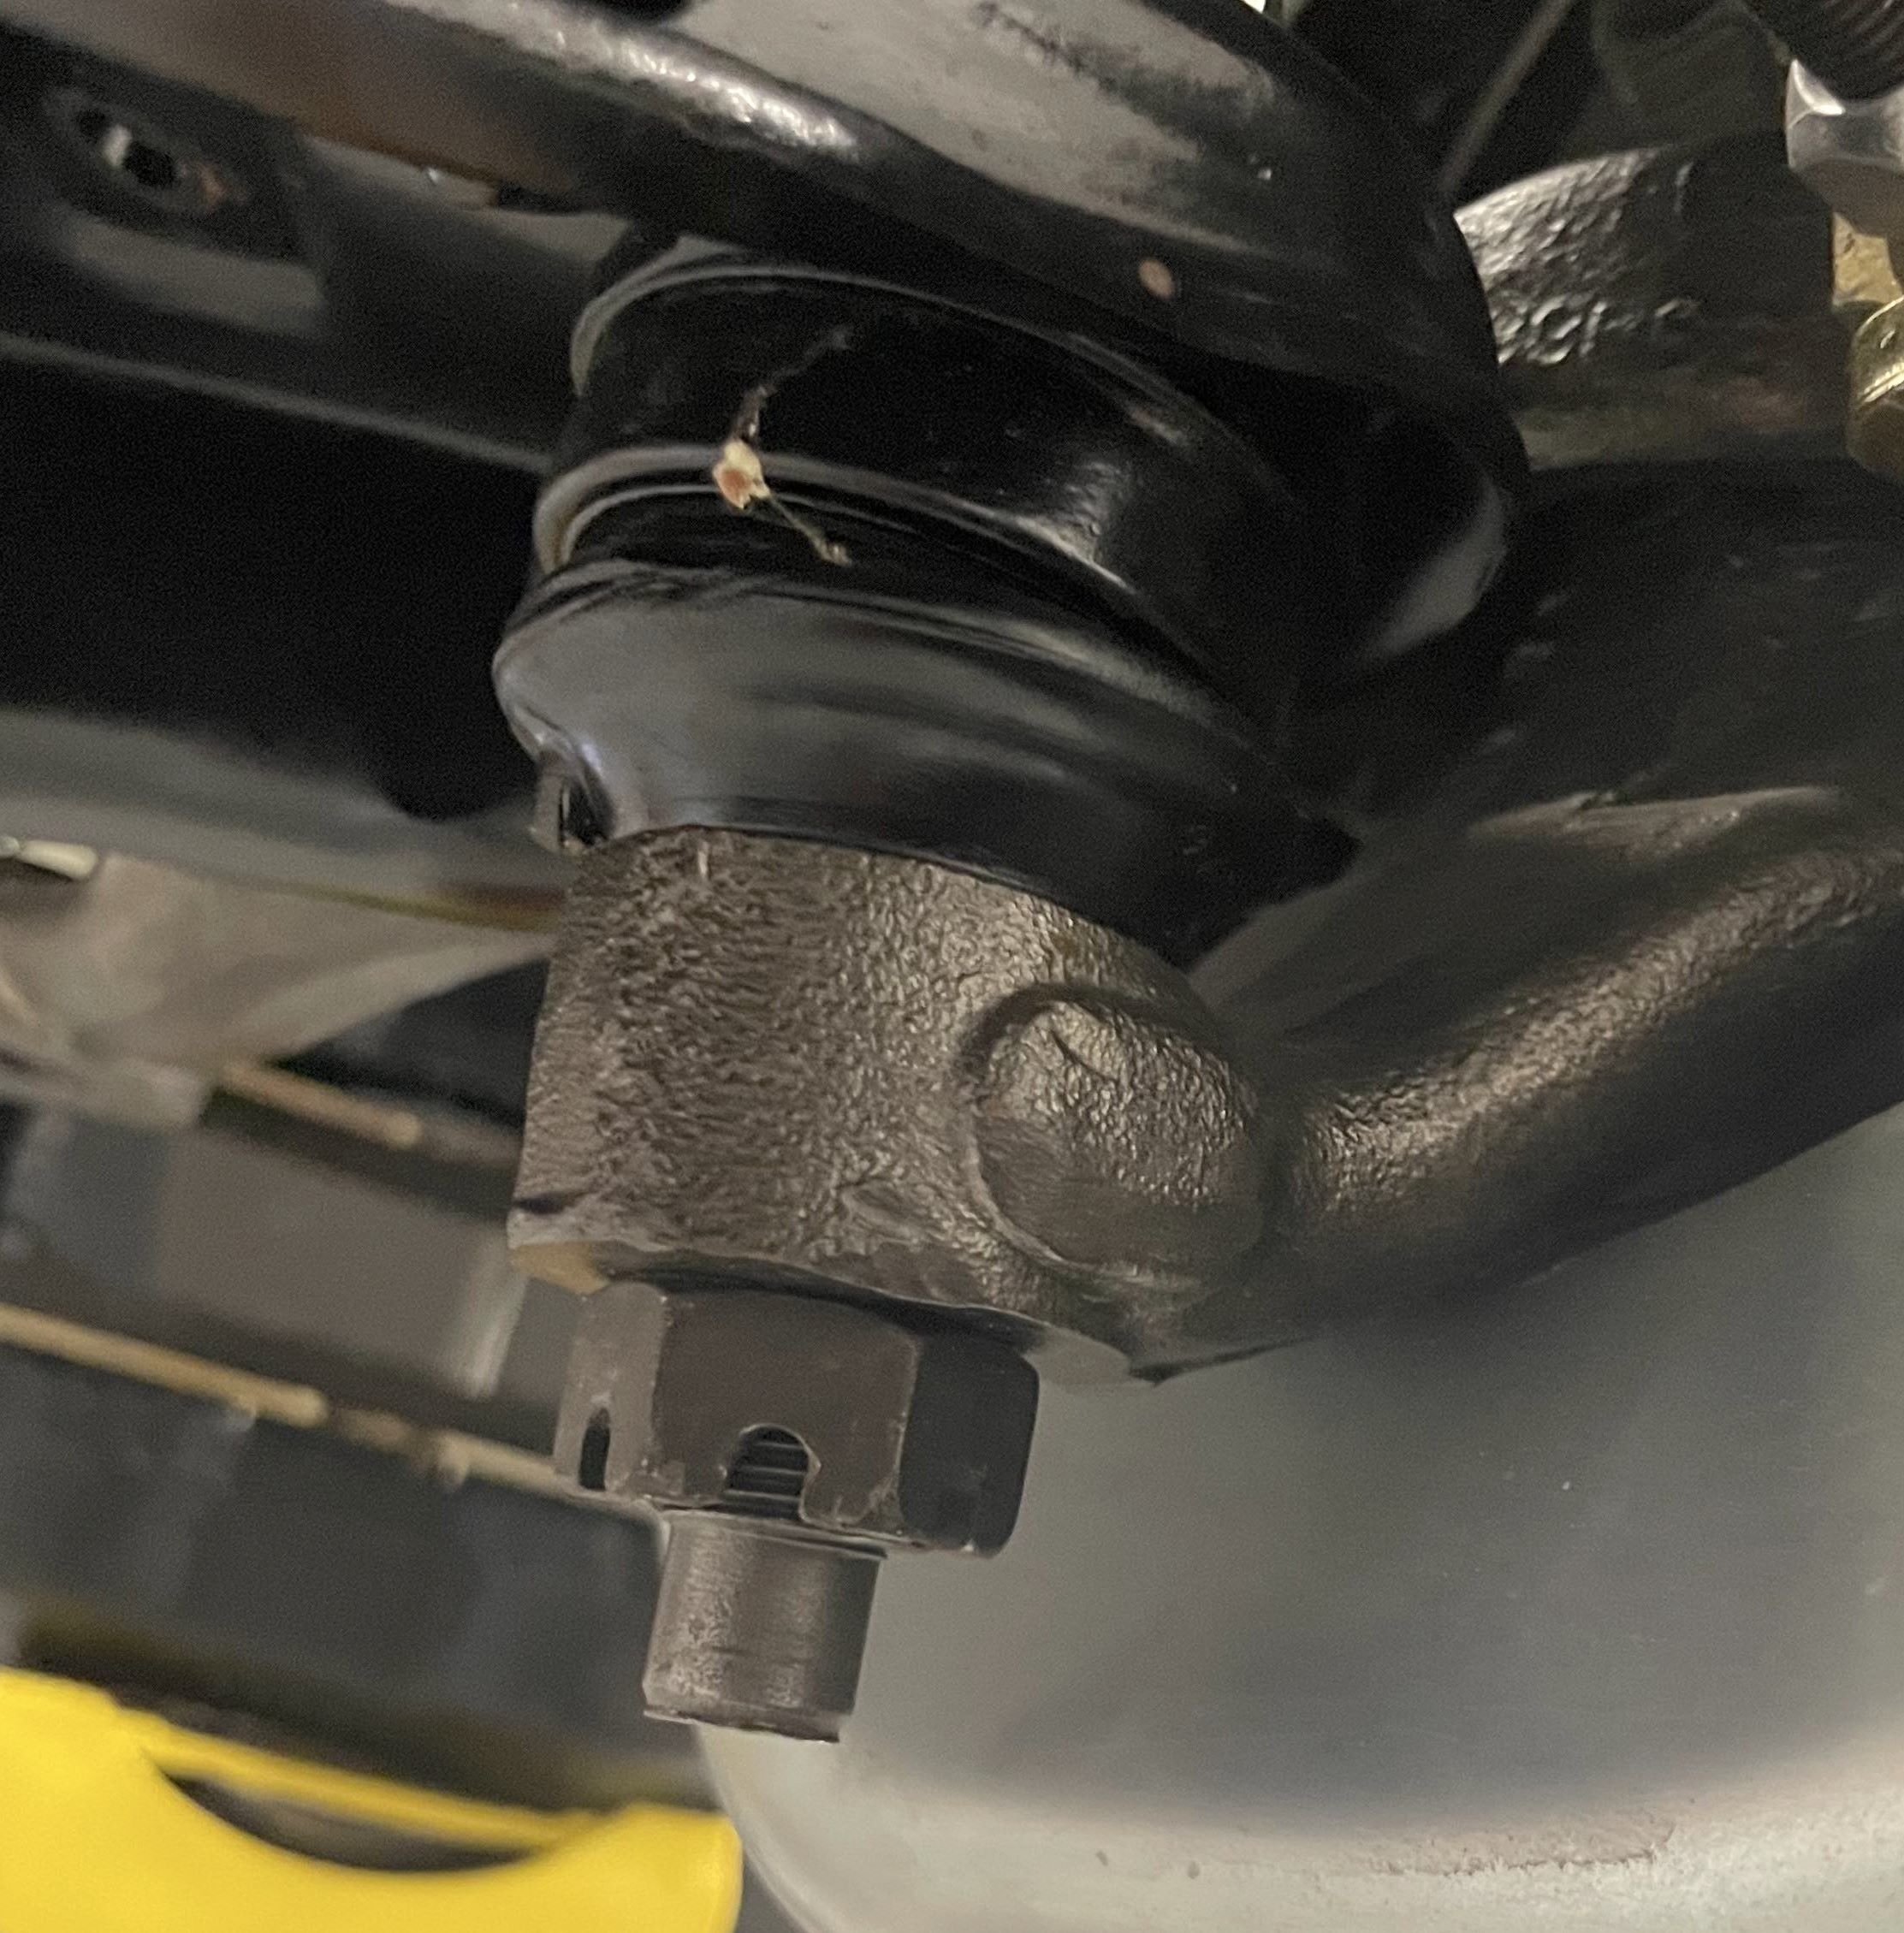
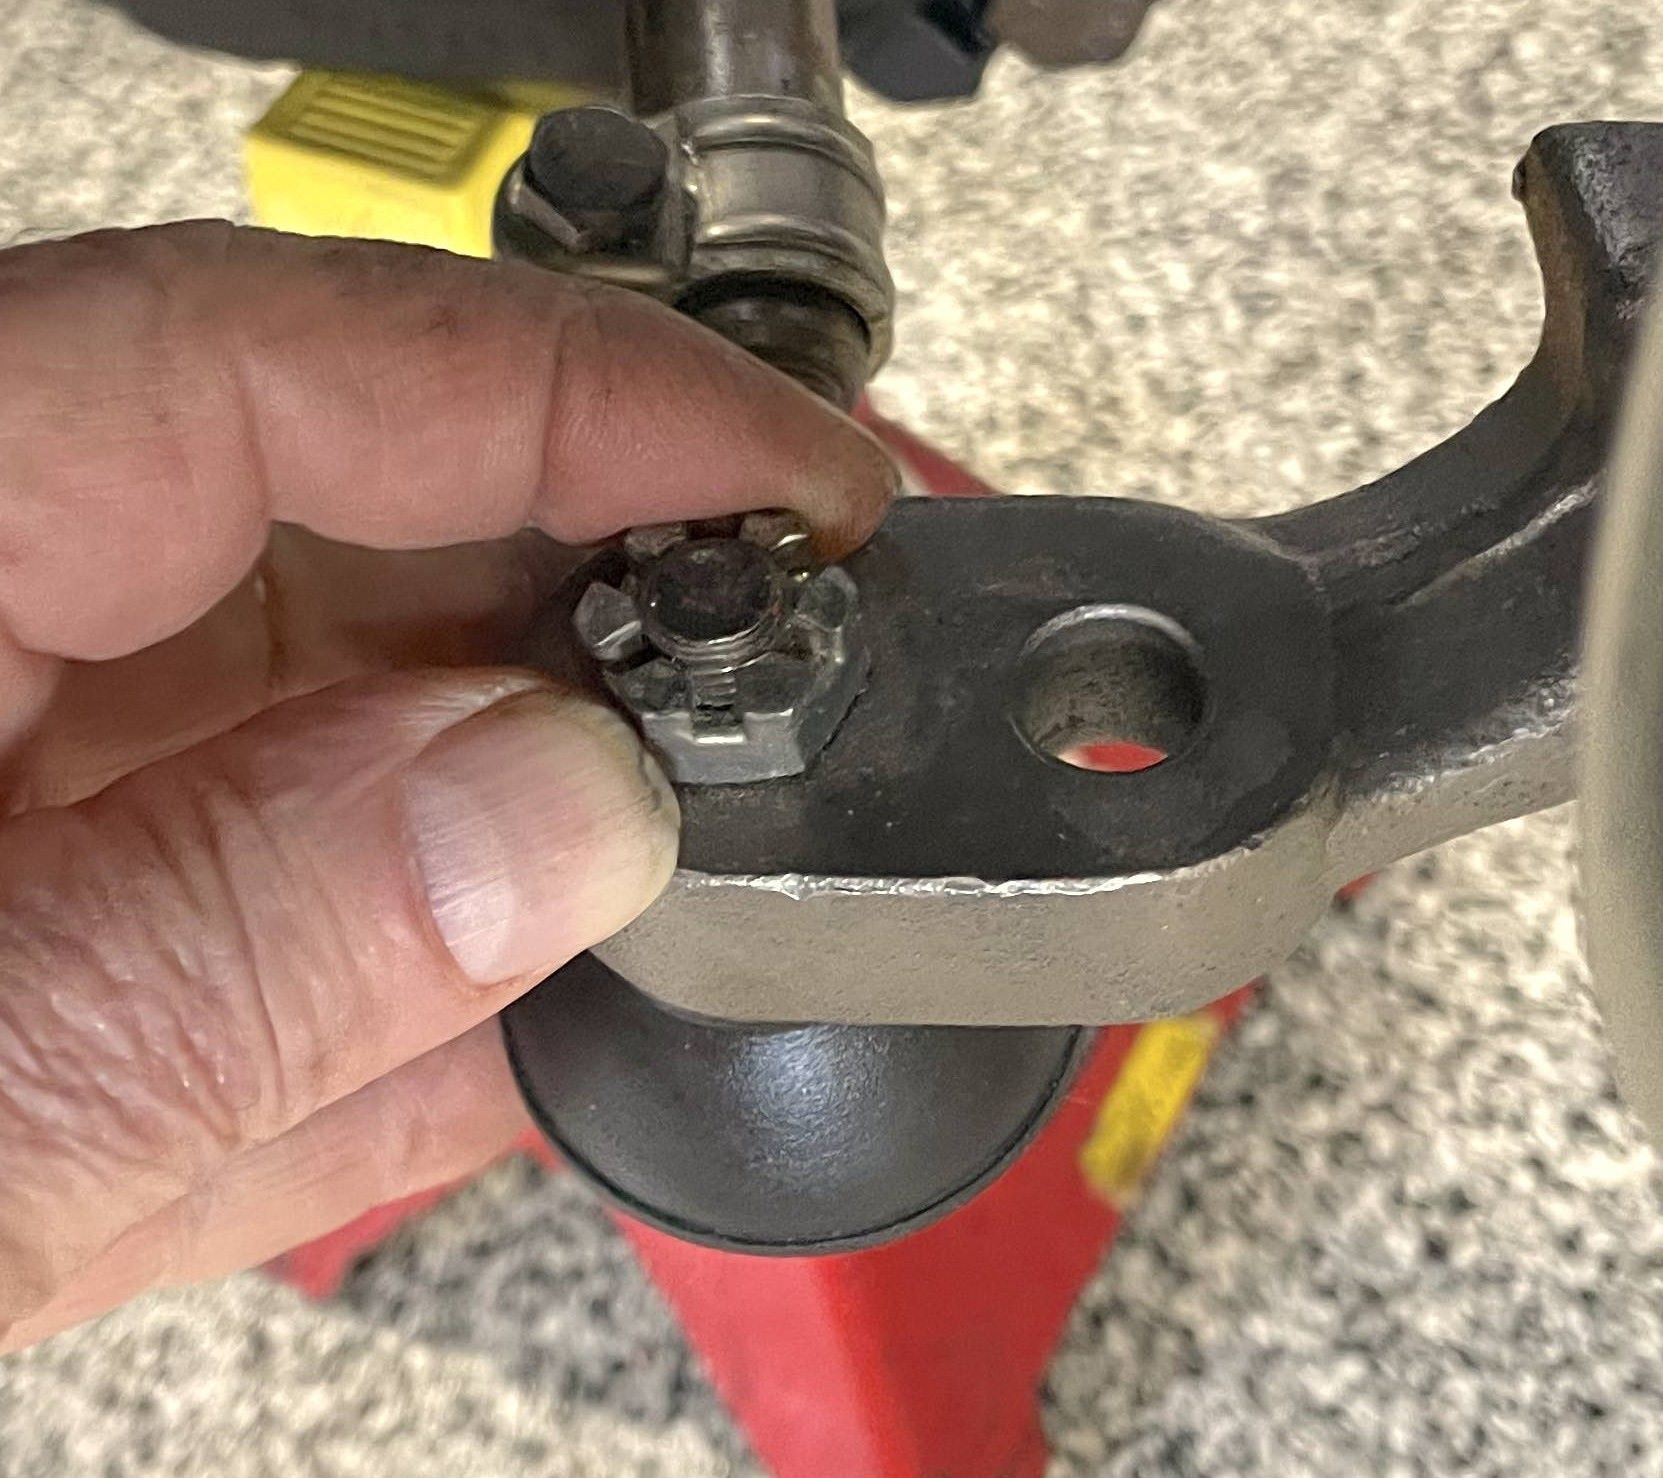
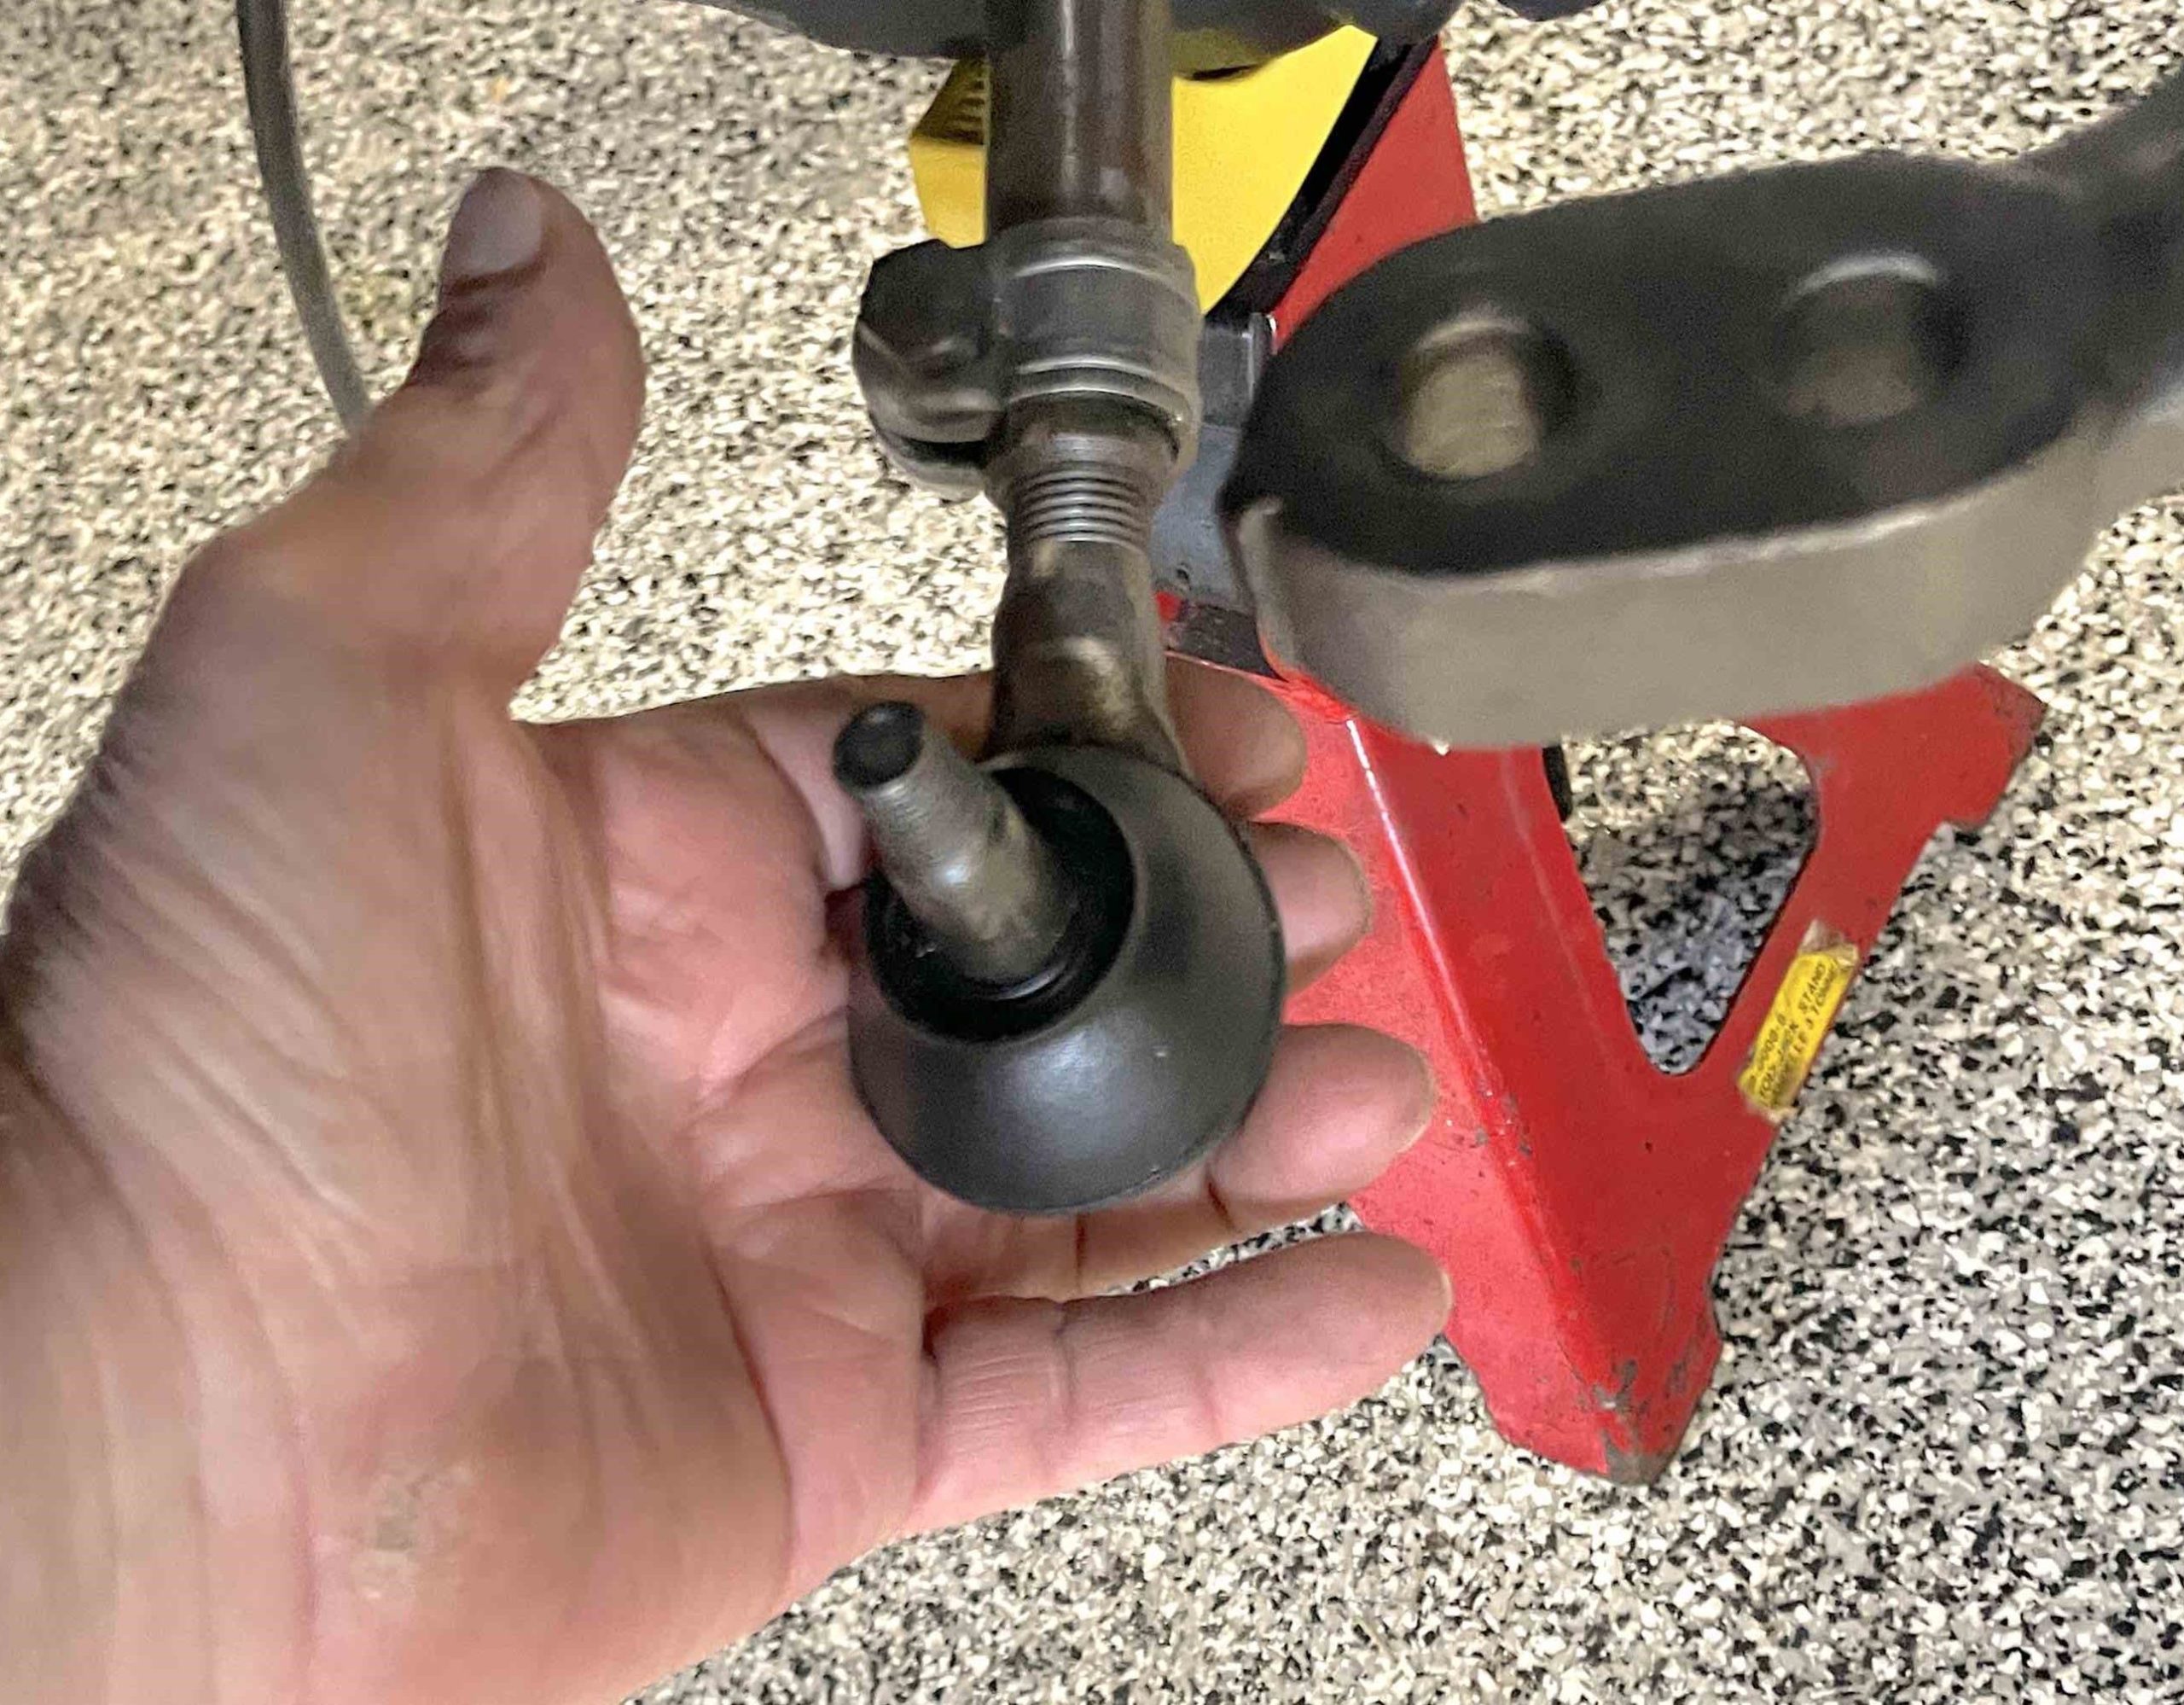
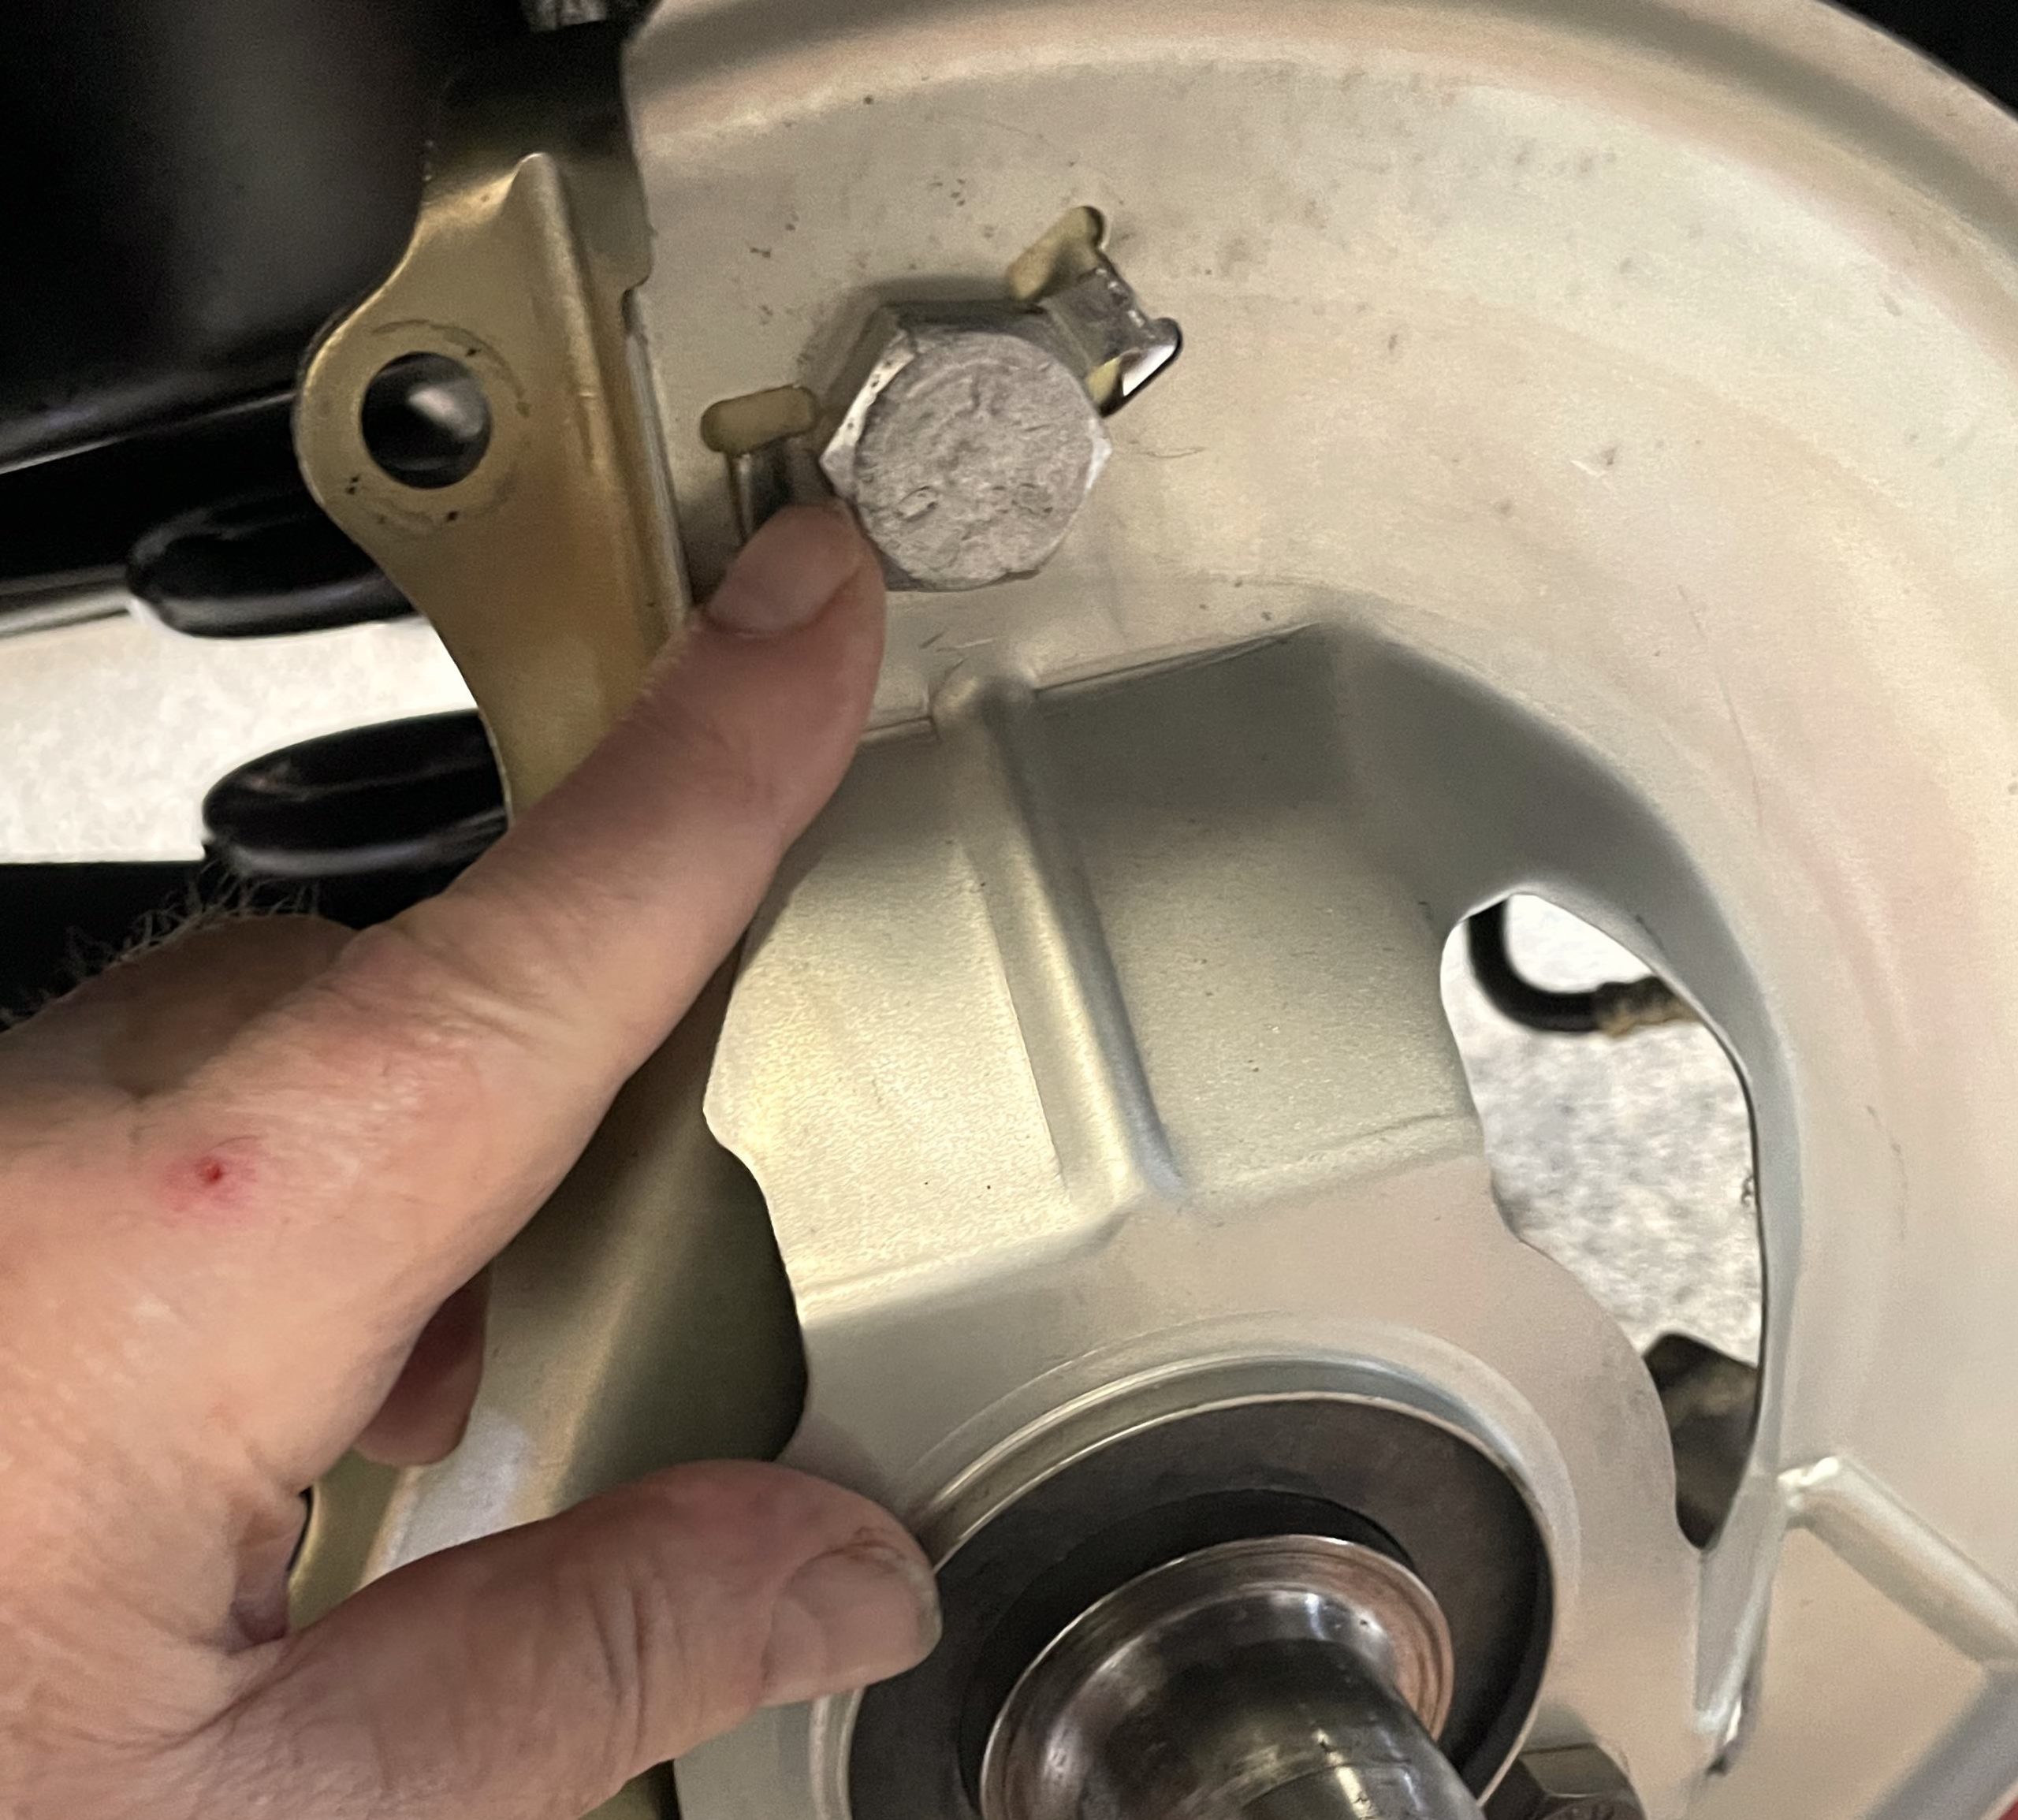
I didn’t have to dig too deep to discover the cotter keys for the spindles at the upper and lower control arms were missing. Not good! The nuts weren’t properly torqued either. At least it saved me the time of digging out the cotter keys or finding my breaker bar.
I pulled out my tie rod end splitter and began to set it up. But I quickly discovered the nuts on either end of the tie rods were never torqued. On the passenger side, the tie rod end popped out of the steering arm with my hand. On the driver side, I just had to give the tie rod end a little love tap with a small soft face hammer. The ball joint nuts were never torqued so they popped out with a simple tap of a soft face dead blow hammer. That’s scary stuff.
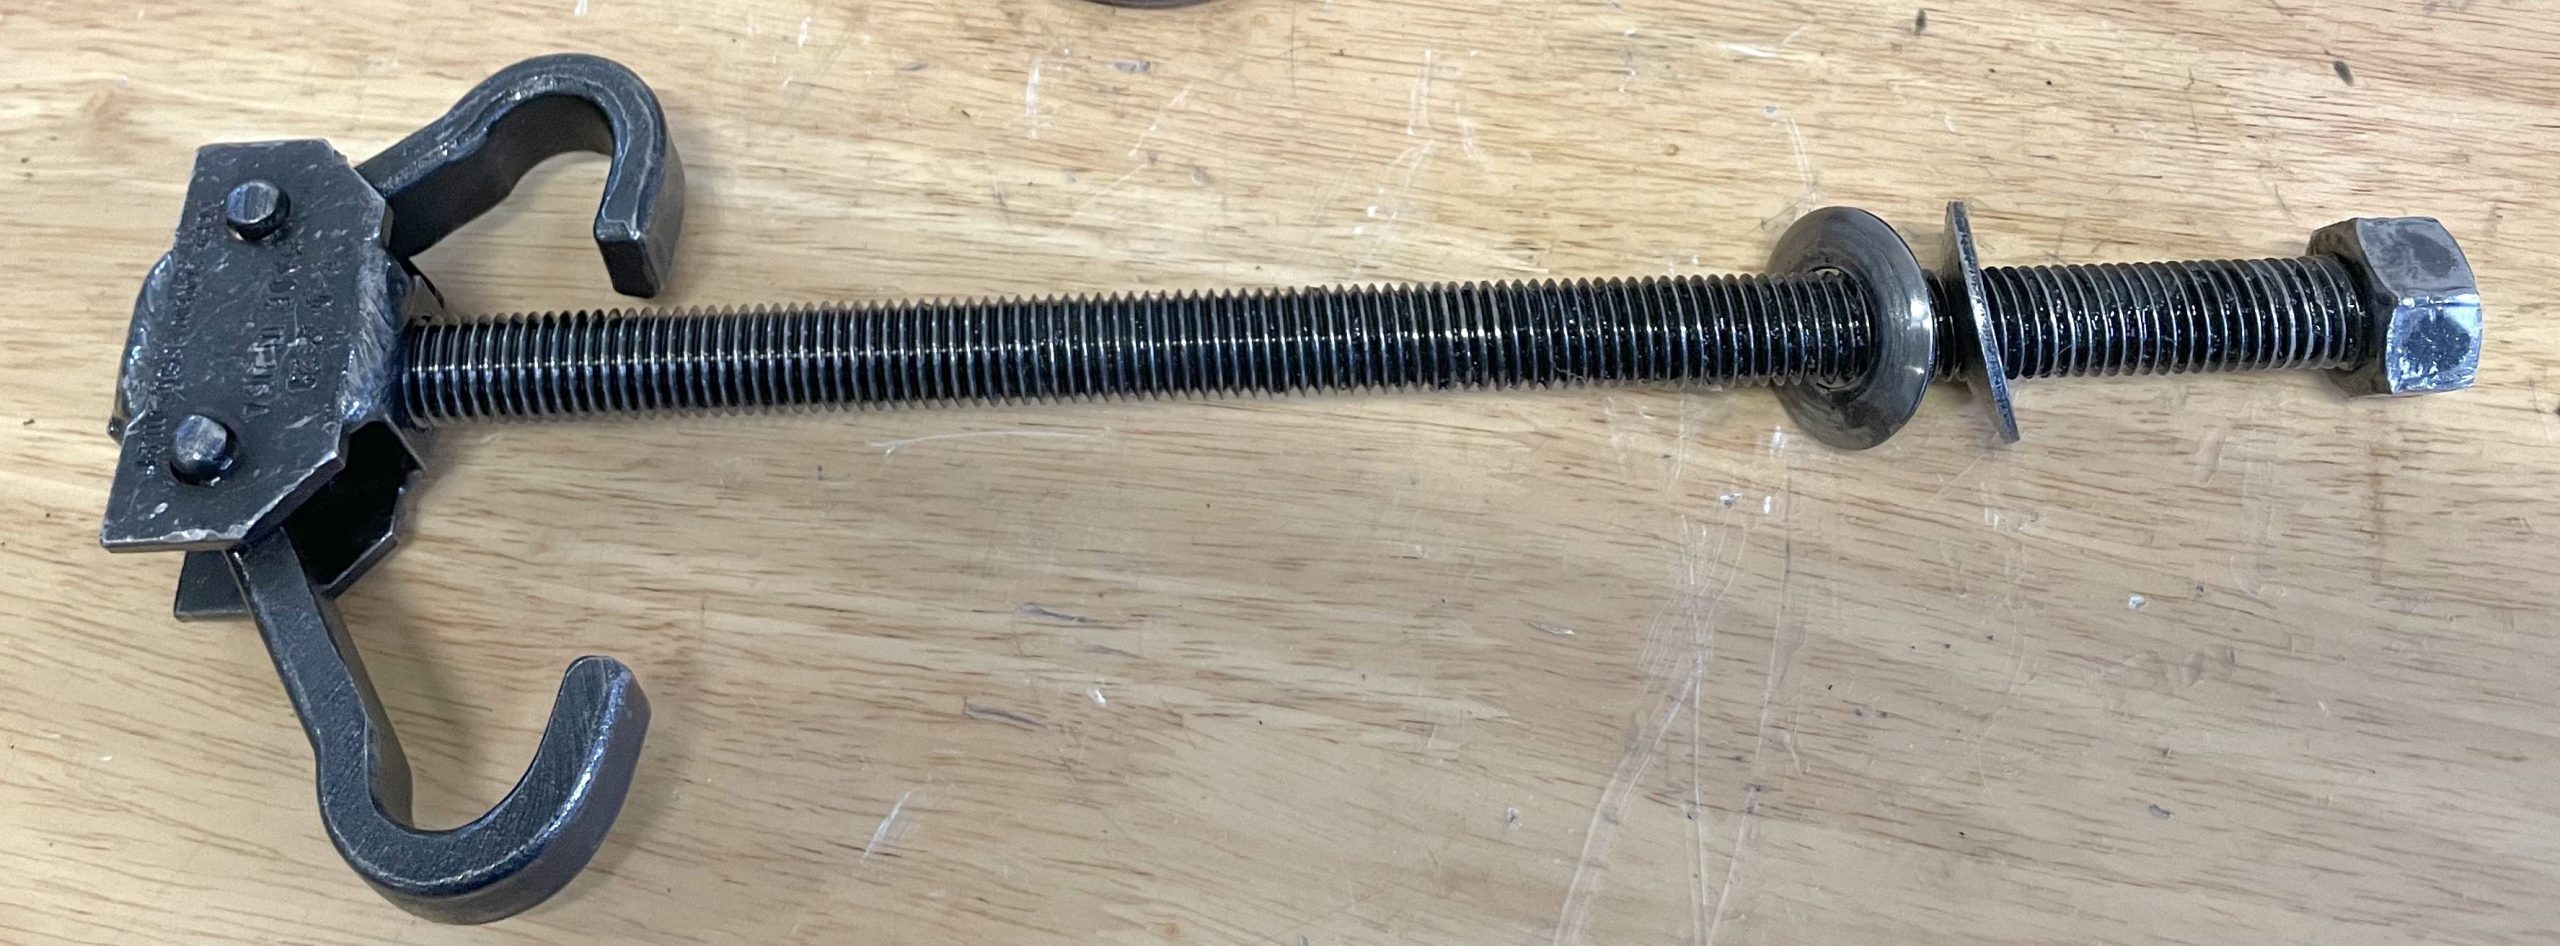
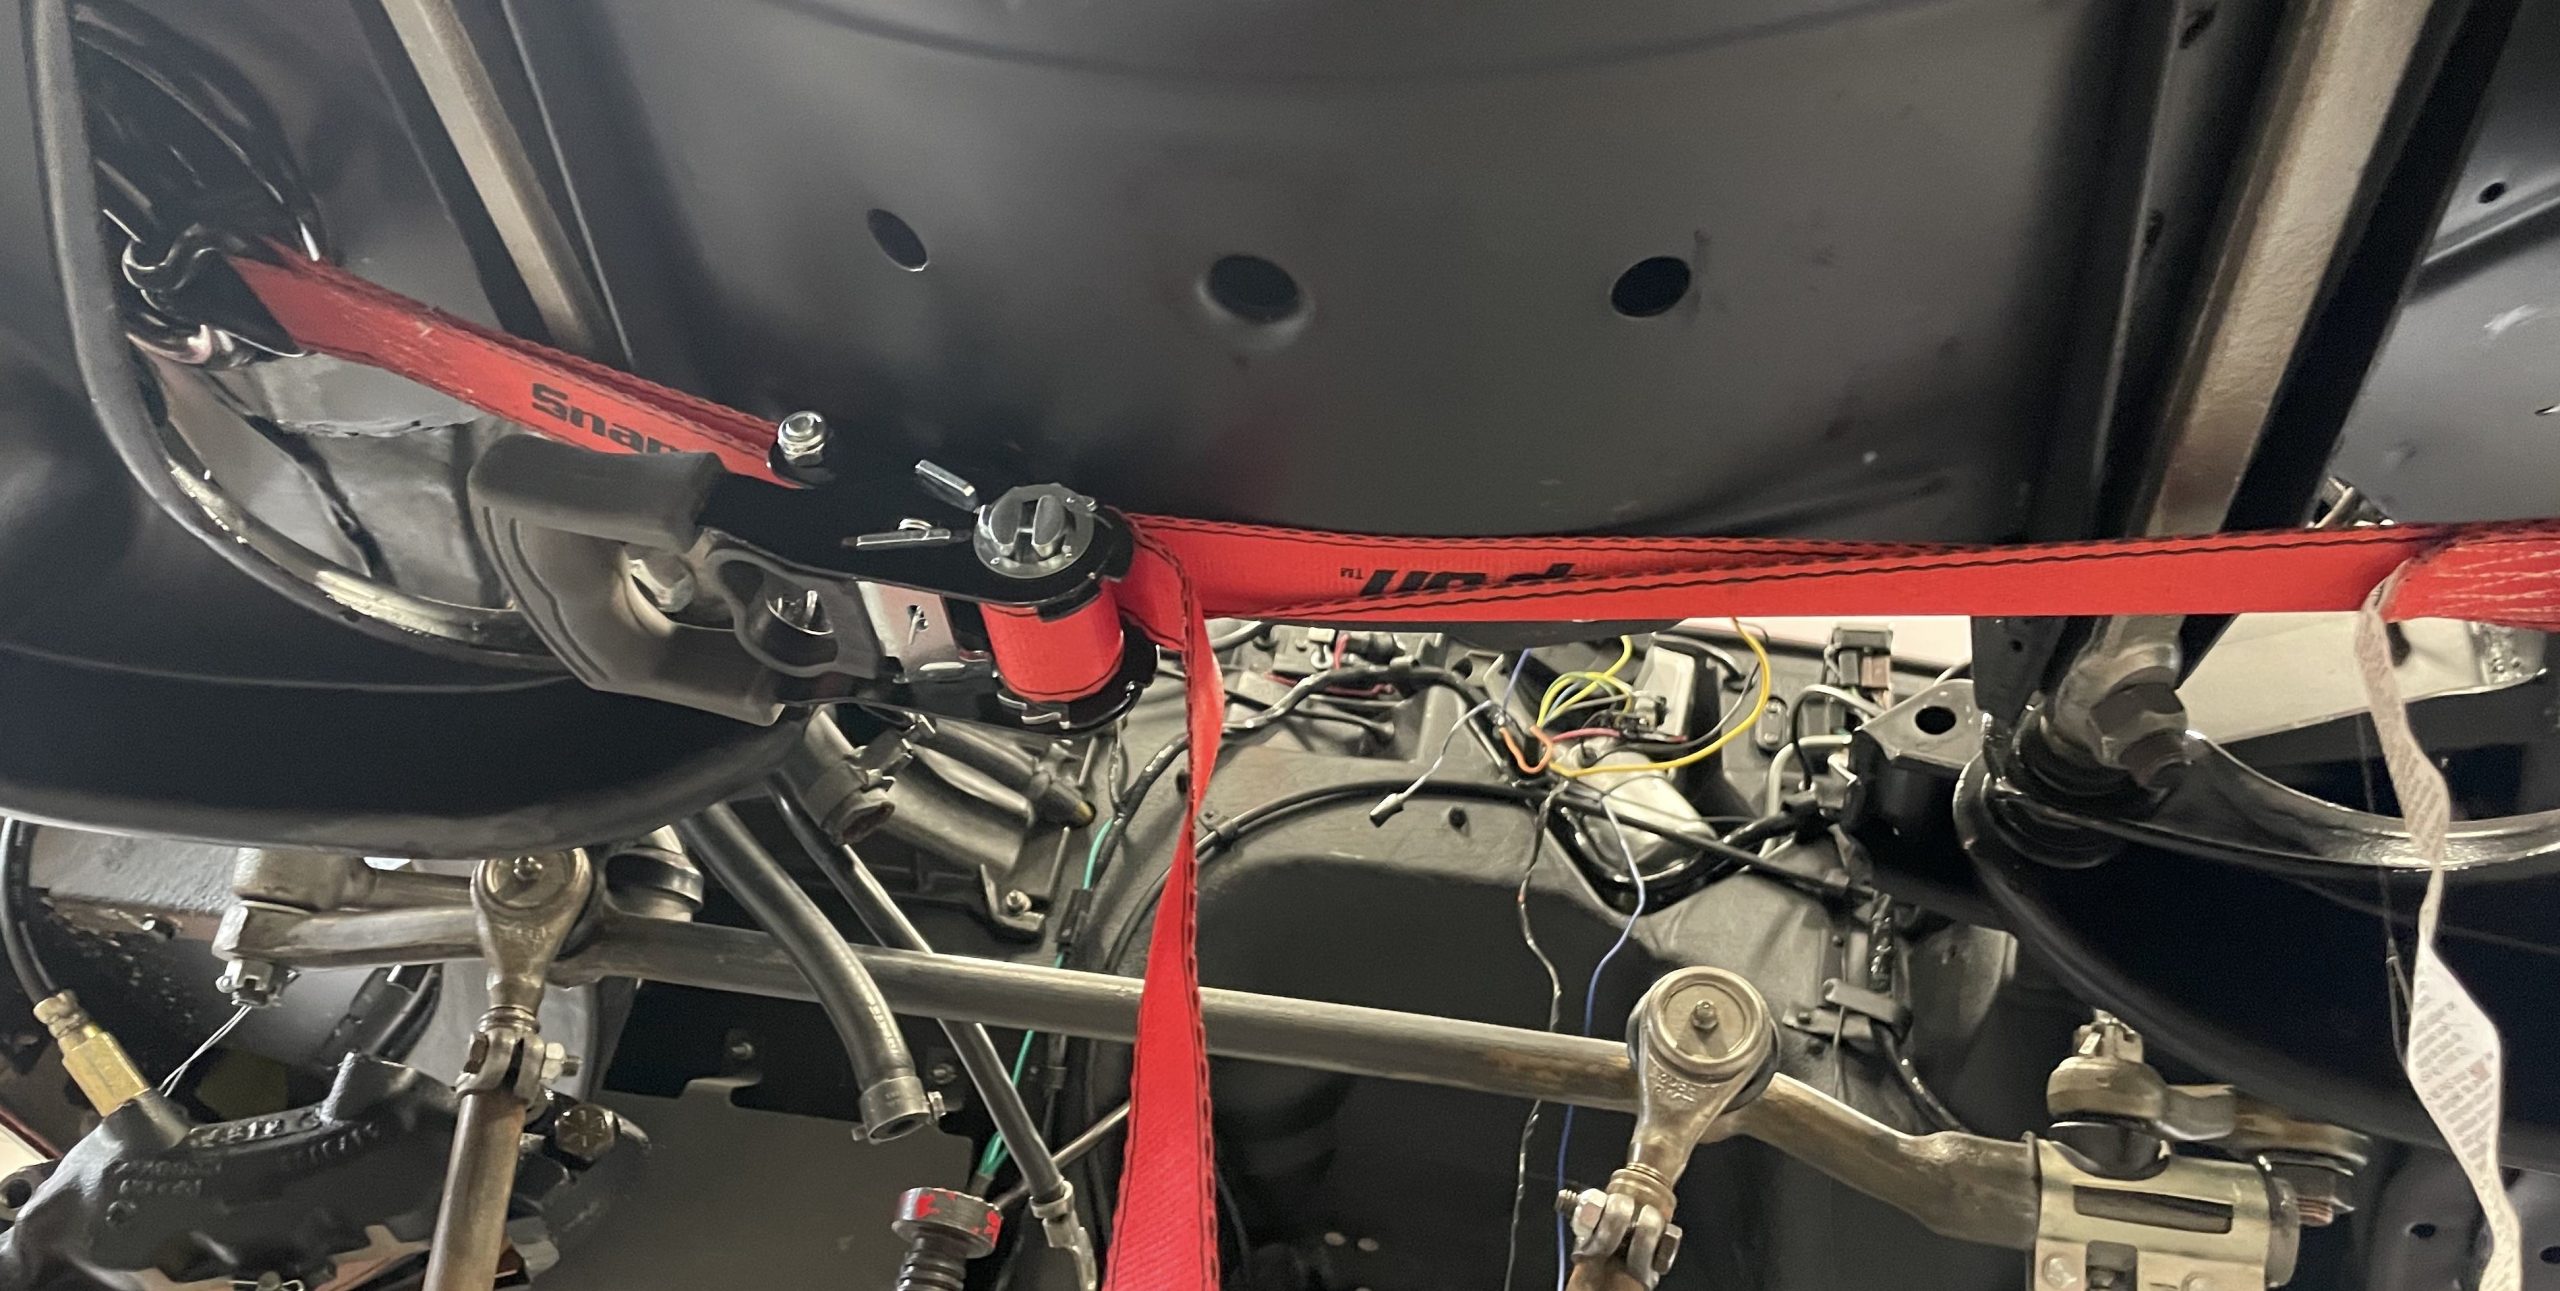
With everything apart, it was actually pretty easy to remove the front shocks and swap out the springs. I use an old KD spring compressor from my tool box that fits inside the spring. It has a big nut and bearing/washer that protrudes through the top shock hole in the frame. I lubricated the compressor threads with heavy assembly lube (grease works great too). I positioned a floor jack under one of the control arms and ran a ratchet strap looped from one coil back to the control arm on the opposite side of the car. This adds an extra layer of protection if the spring compressor slips.
It’s pretty easy to install the 550-inch pound big block springs in a Corvette because they’re much shorter than the OEM small block springs. There’s hardly a need for a spring compressor—just slide them up into the pocket. The ratchet strap is perfect for pulling the bottom of the spring inward to align it with the lower control arm spring pocket. That allows you to jack the lower control arm up and easily install the spindle nuts.
There are two places where you can index the spring end on a C3 Corvette–one in the top spring pocket and one in the lower control arm. There’s an inspection hole in both ends that allow you to check the spring tang index.
More Surprises
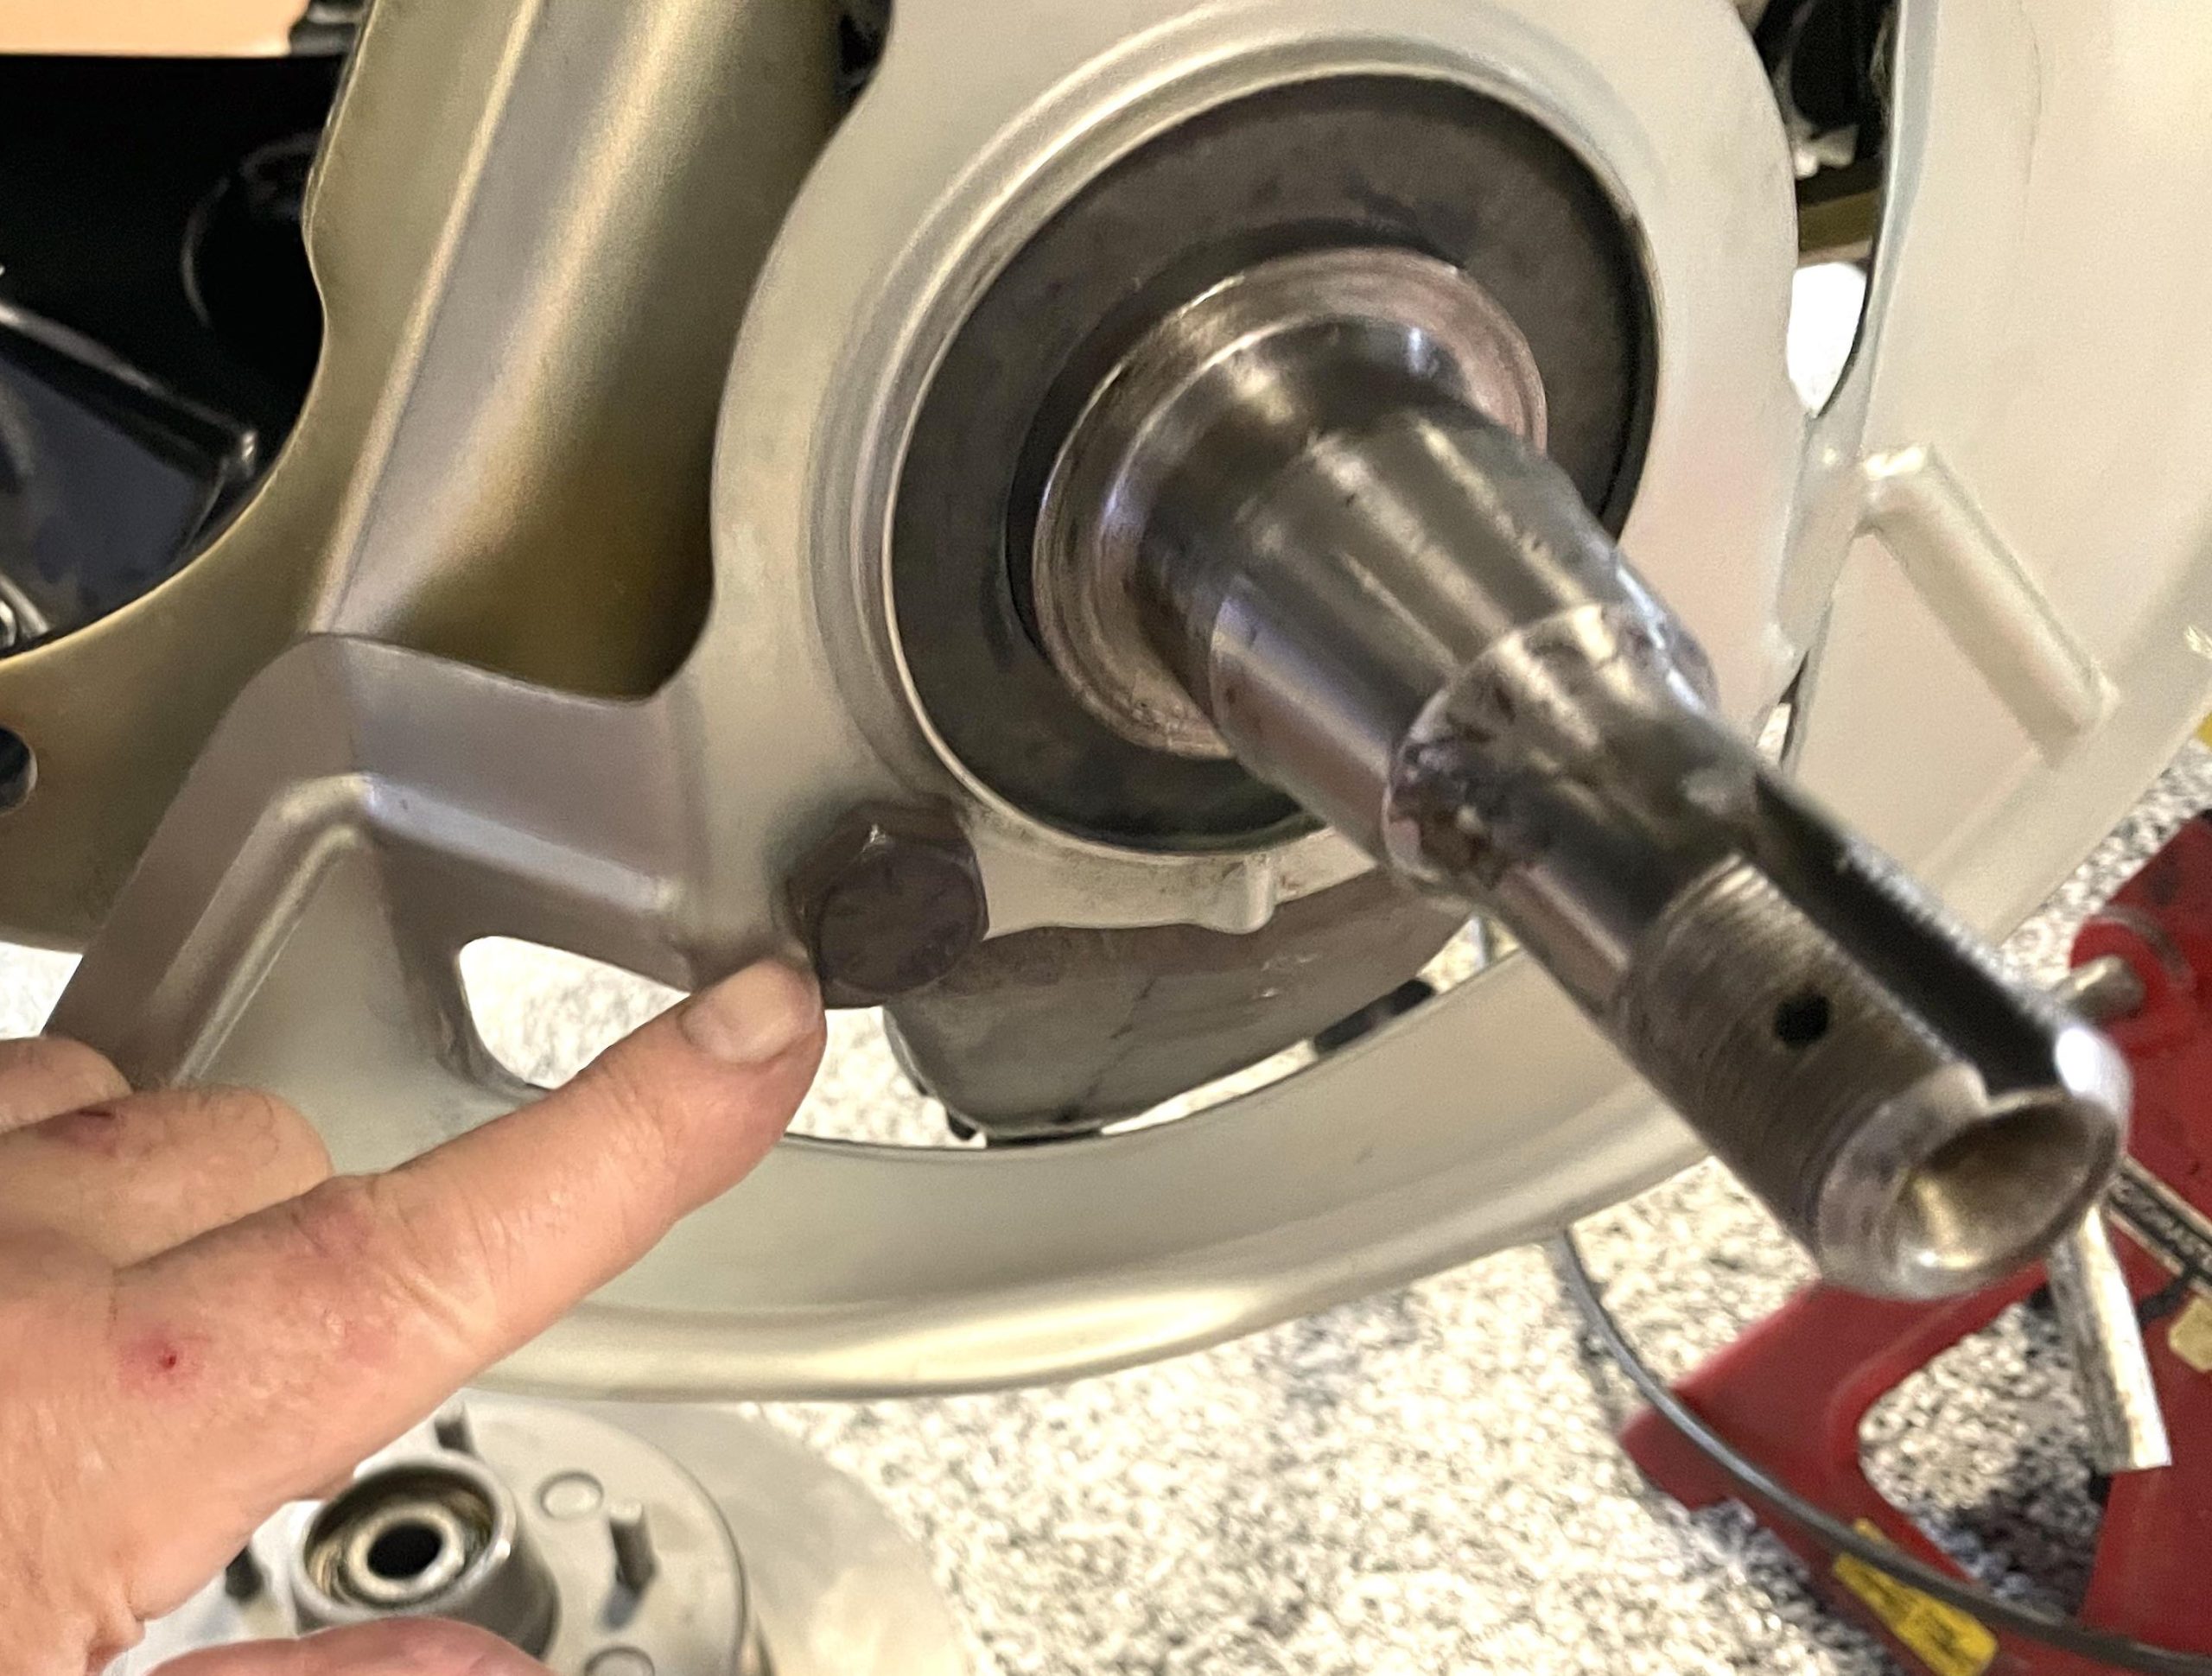
The brake calipers came off with ease because the pair of bolts attaching them to the mounts weren’t tightened. Equally bad, the French locks used on the main brake anchor bolt (to the spindle) were never peened over. What was interesting was the fact the wheel bearings weren’t over-greased. In fact, they looked like they were installed by someone who knew what they were doing.
The same couldn’t be said for virtually every other fastener in the front end. Each and every one of them was loose, including the three steering box to frame bolts. And not one single grease point in the front end had grease in it. Nothing. Not a drop. All of this was relatively easy to fix, but tedious.
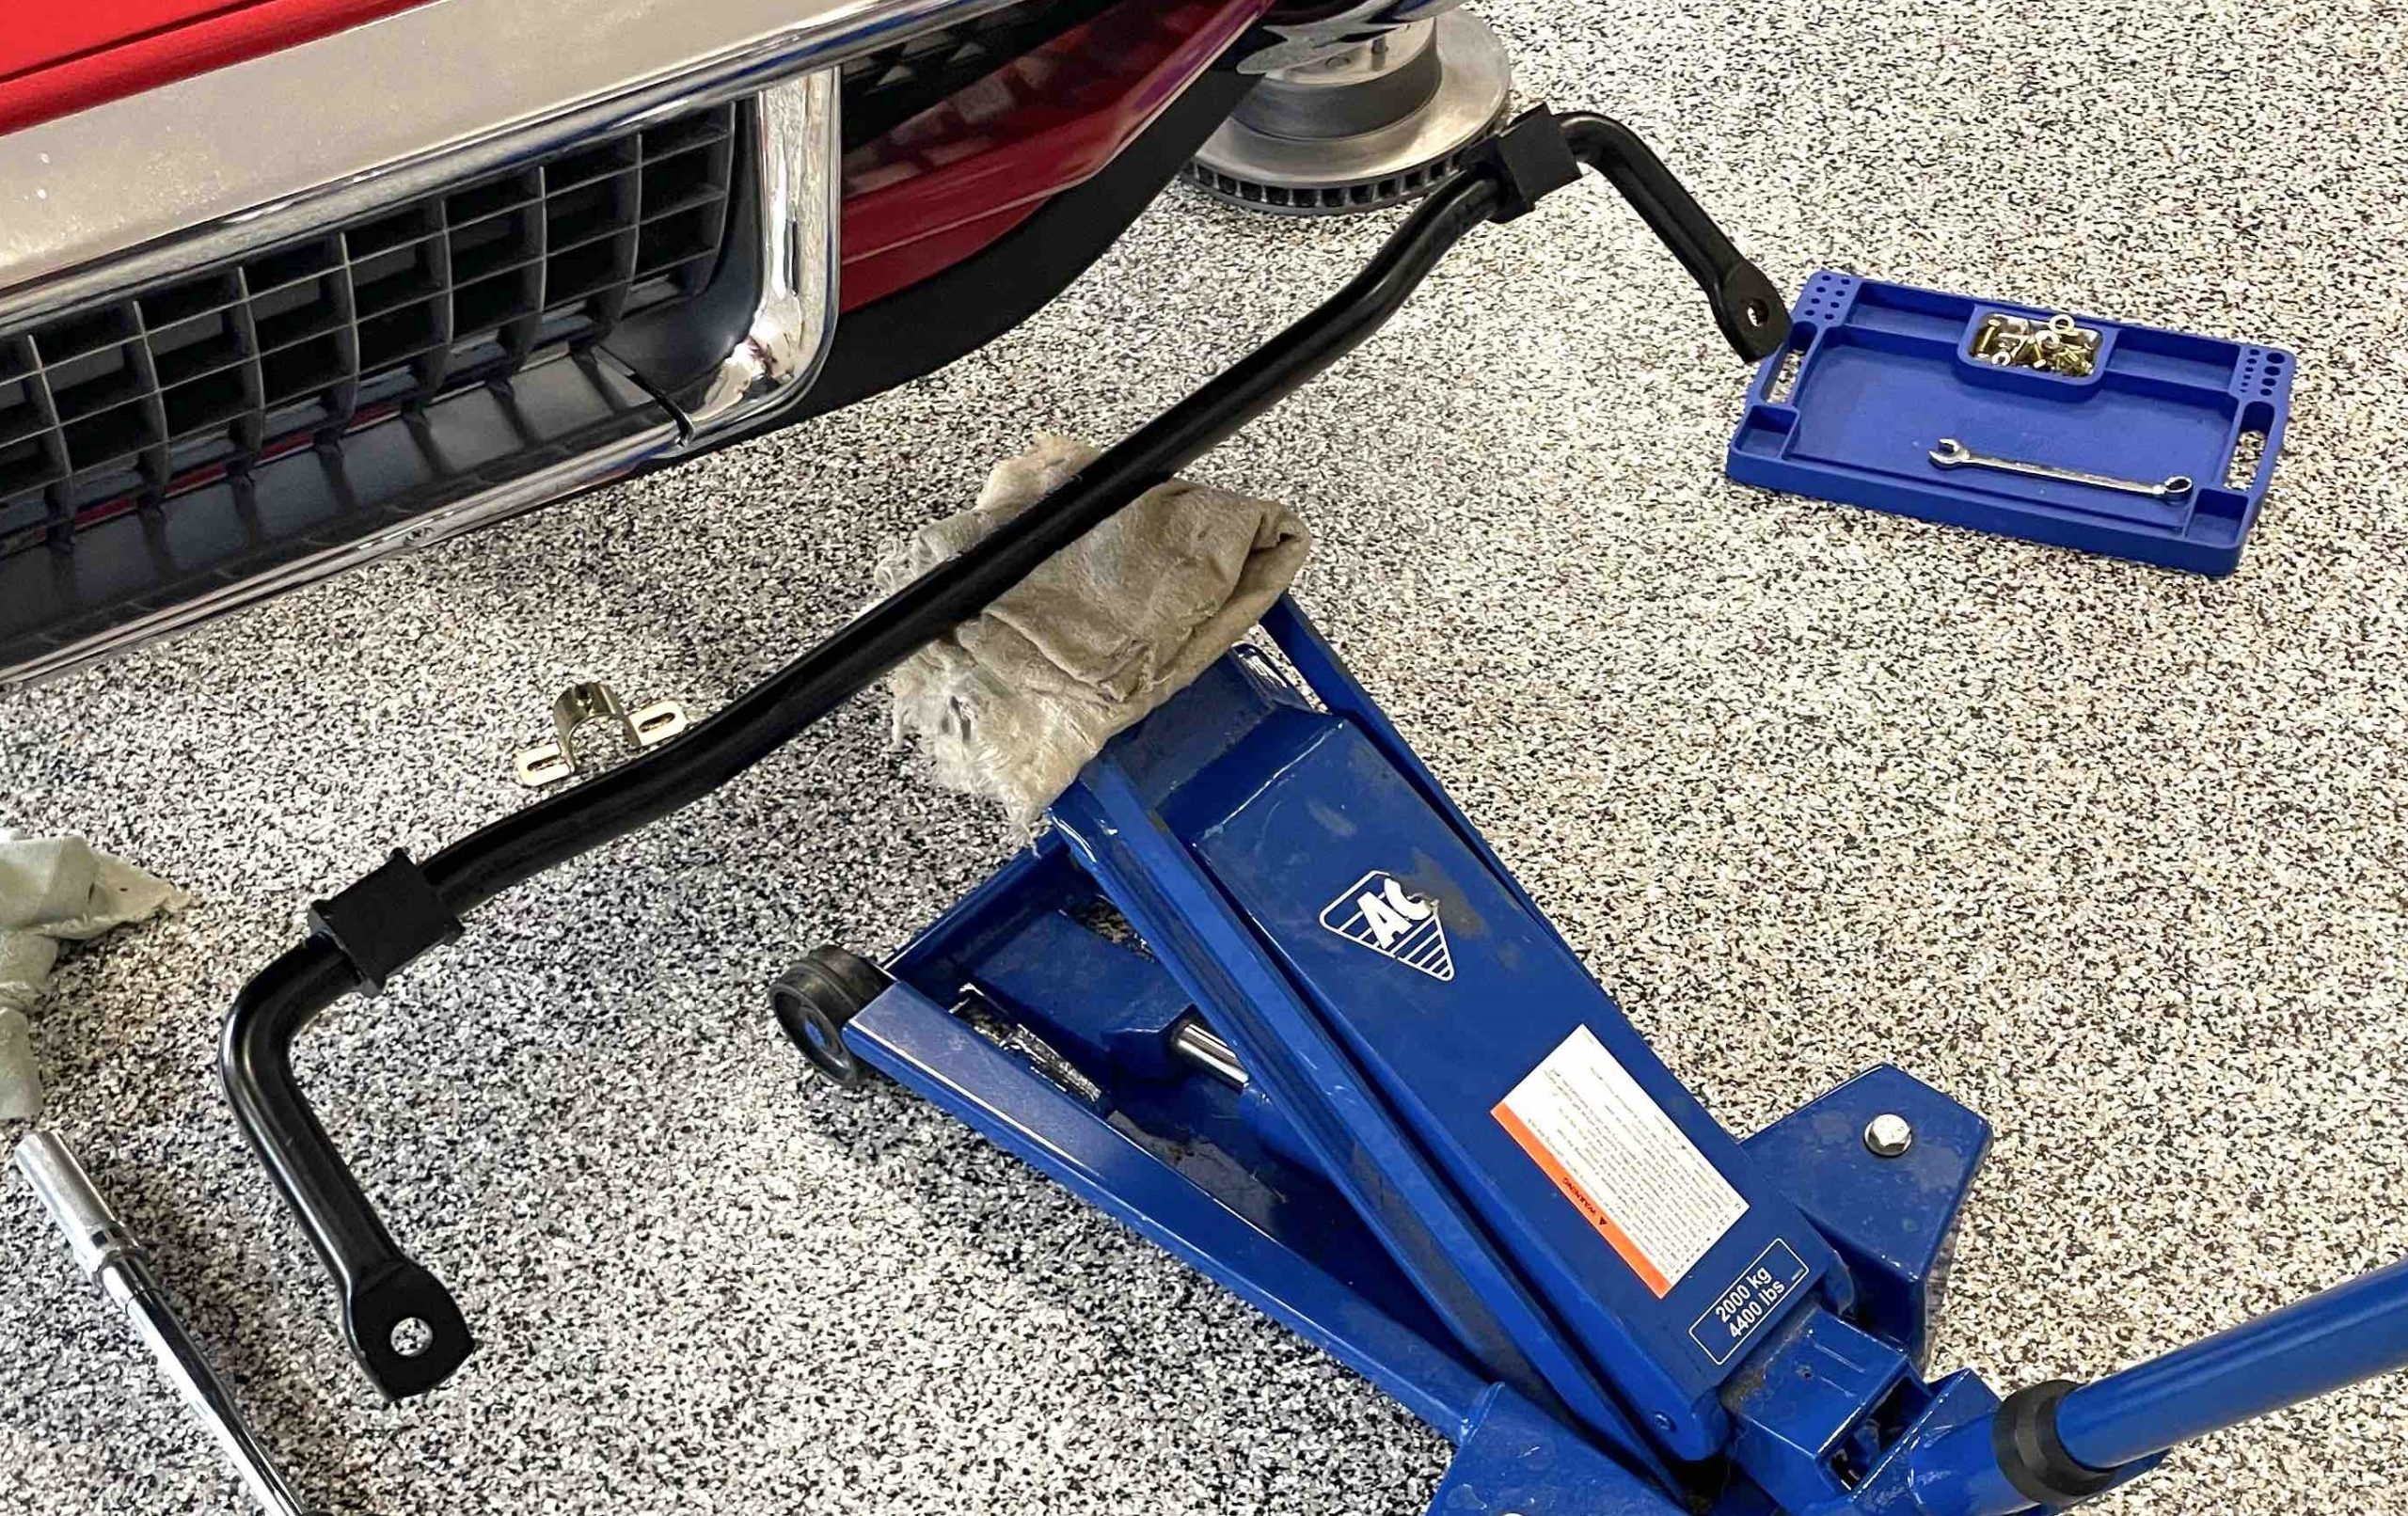
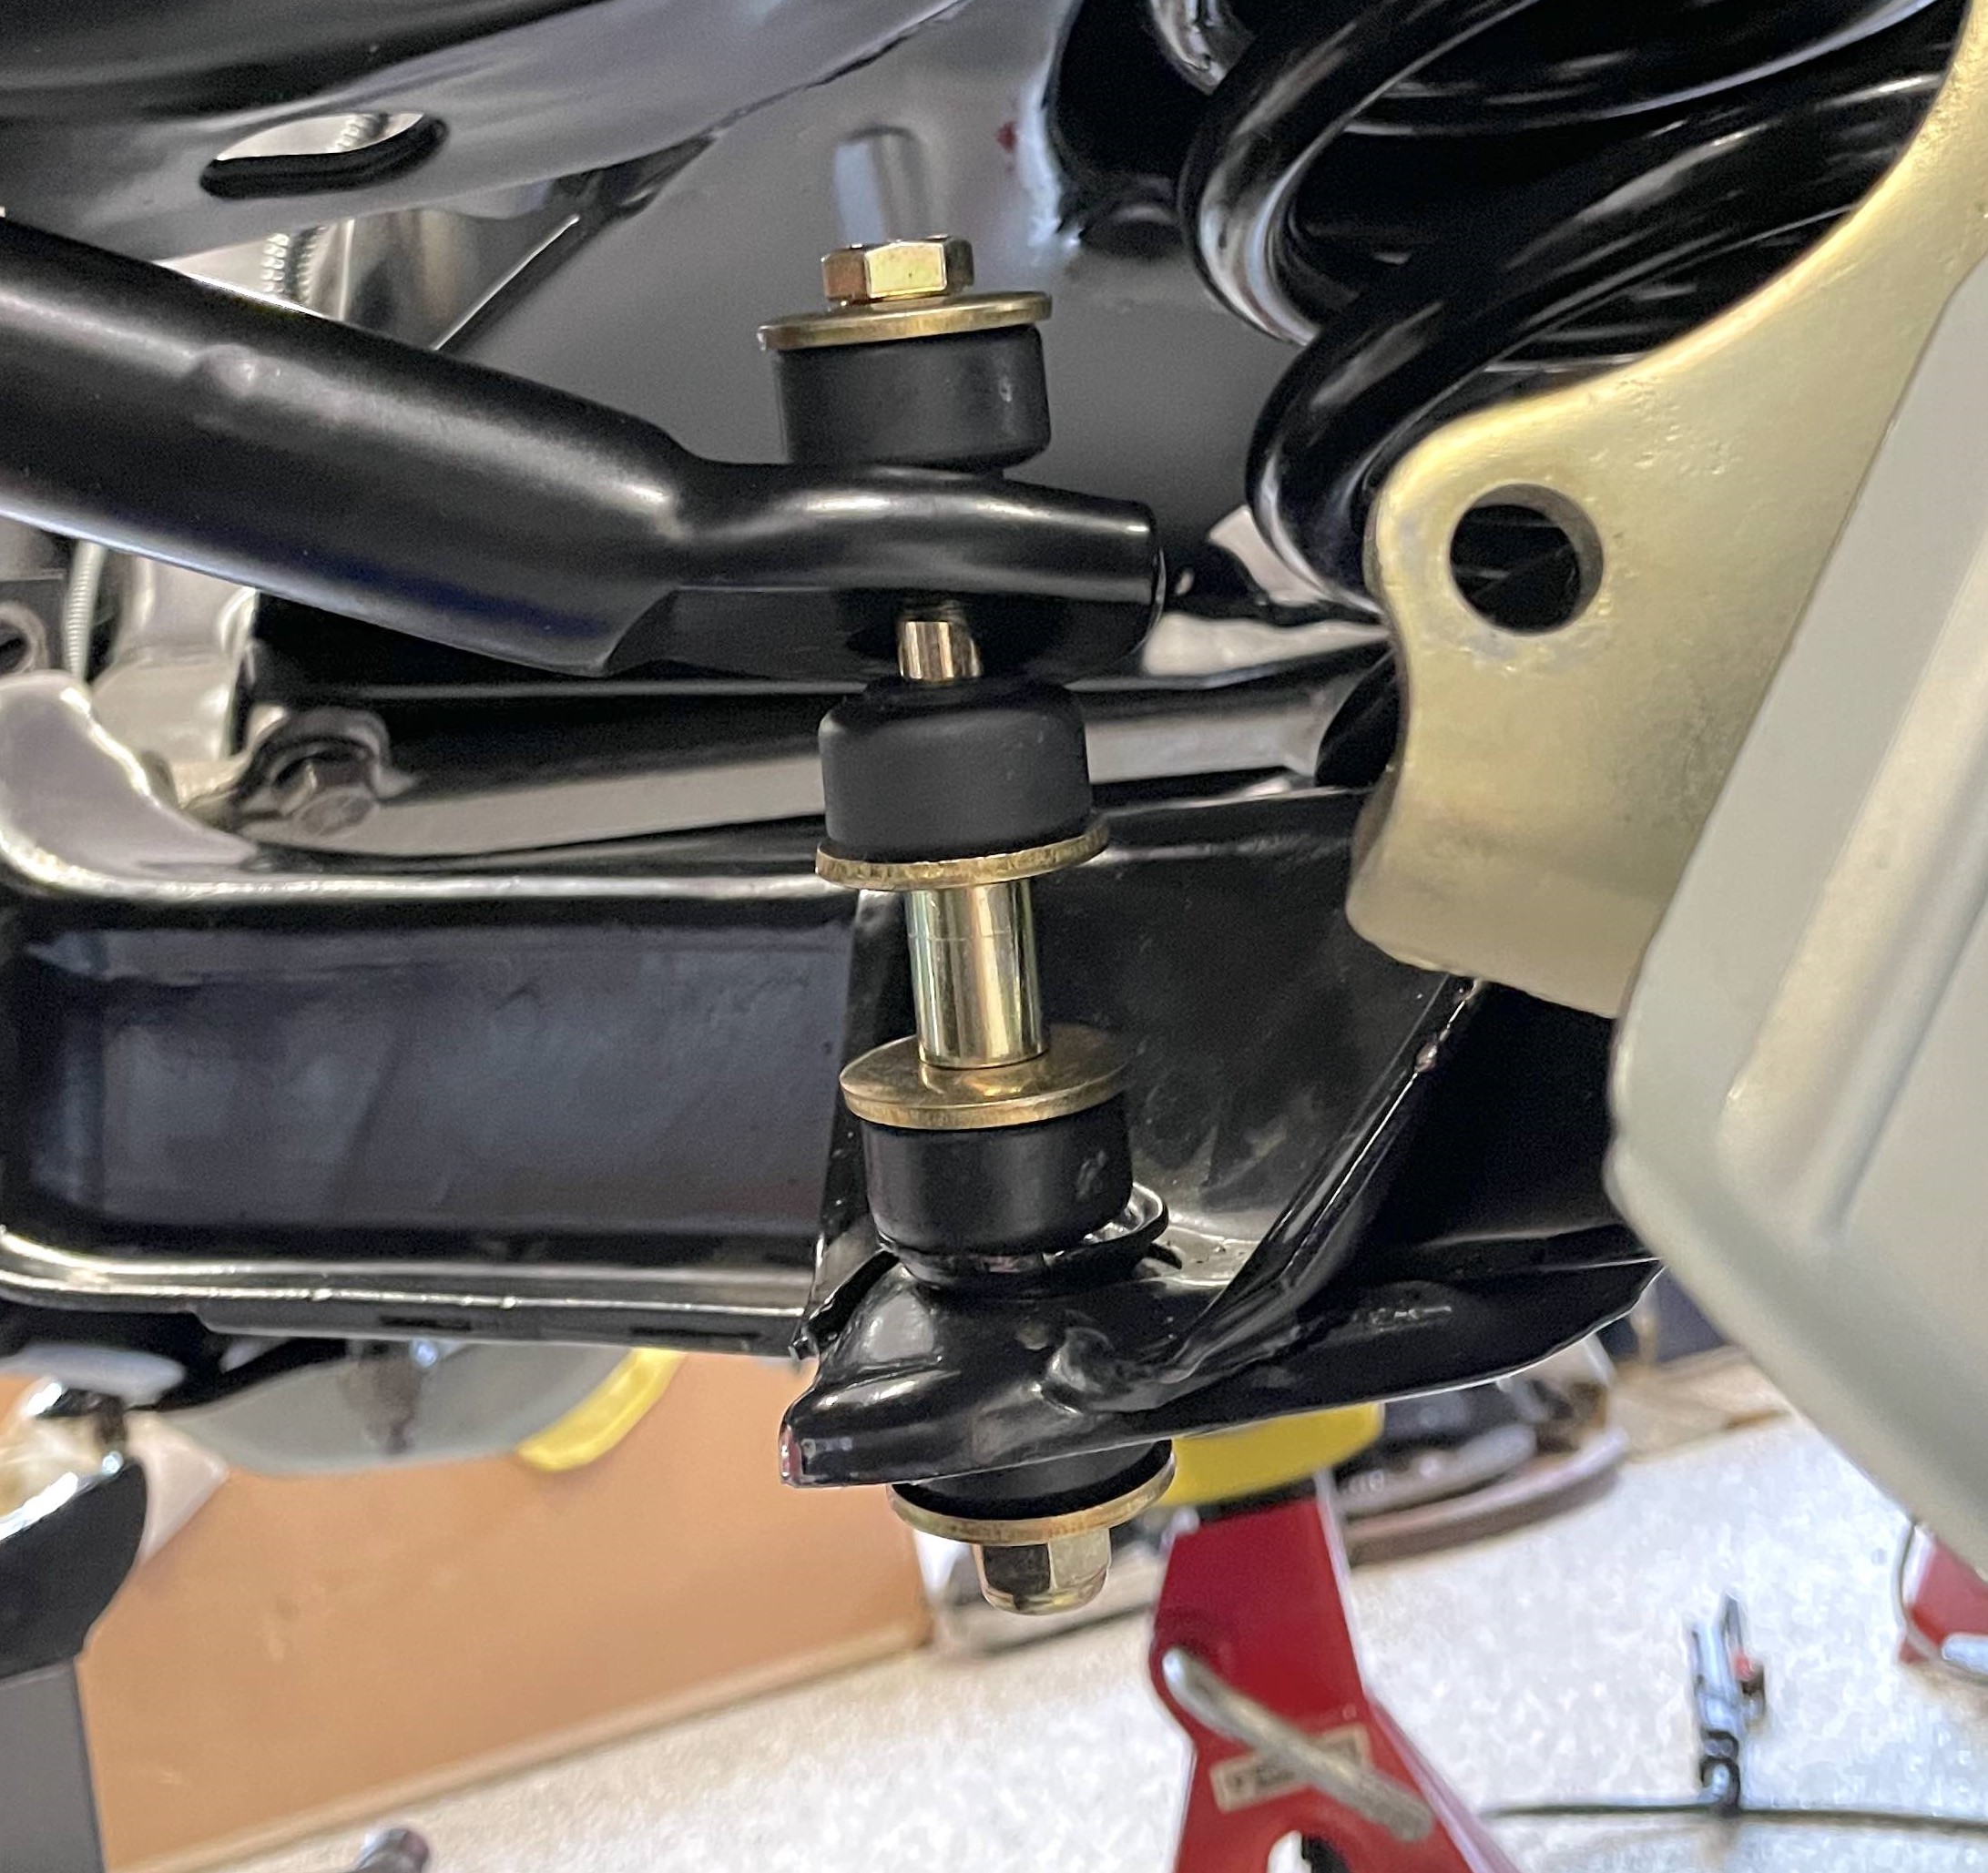
Sway Bar Upgrade
With the springs installed, I turned my attention the front sway bar. I swapped out the factory bar for a 1.25-inch diameter bar from Van Steel. Here’s how to do it according to Van Steel:
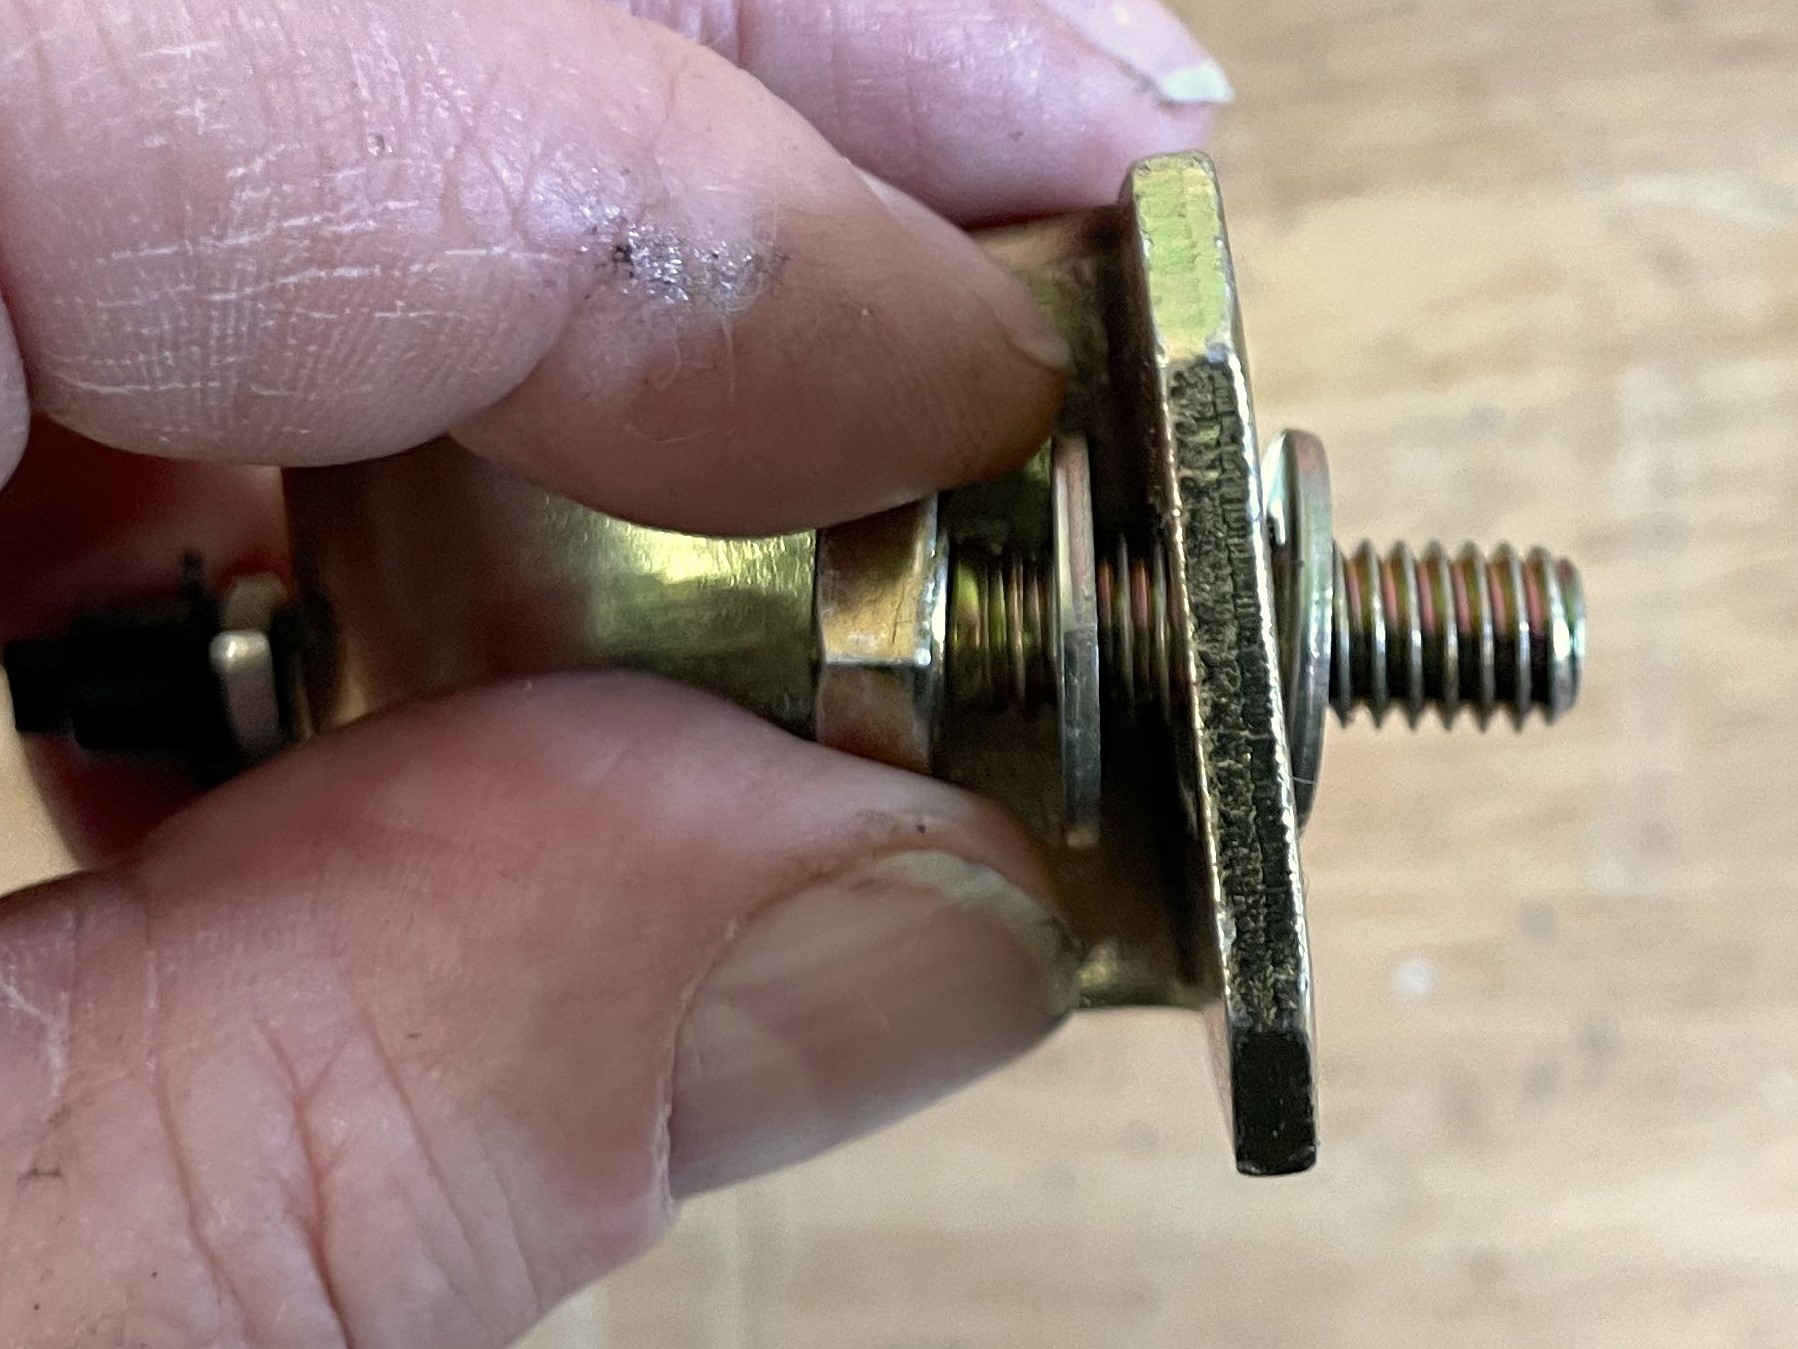
- Take note of how the bushings, washers, and sleeve are sequenced. Remove the end links located at the end of the sway bar
- Support the center of the sway bar with a jack. Remove the frame mount brackets and bushing one side at a time
- Install the new polyurethane bushings in the sway bar and install the frame mount bushing brackets.
- Raise the bar to the frame and adjust the bushings left or right to line up with the frame rails. Tips of the sway bar should face upward
- Install the flat washers between the frame and the frame mount bracket on all four 5/16-inch bolts. This should allow the sway bar to move freely when you rotate it. Torque the bolts to 30 ft.-lbs.
- Install the end link bushing kit, noting the orientation. You may need to lift the front wheel in order to start the nut on the end link threads. Pulling down on the bar will also help as well. Tighten the nut so you see about a 1/4- to 1/2-inch of thread. Repeat on the other side
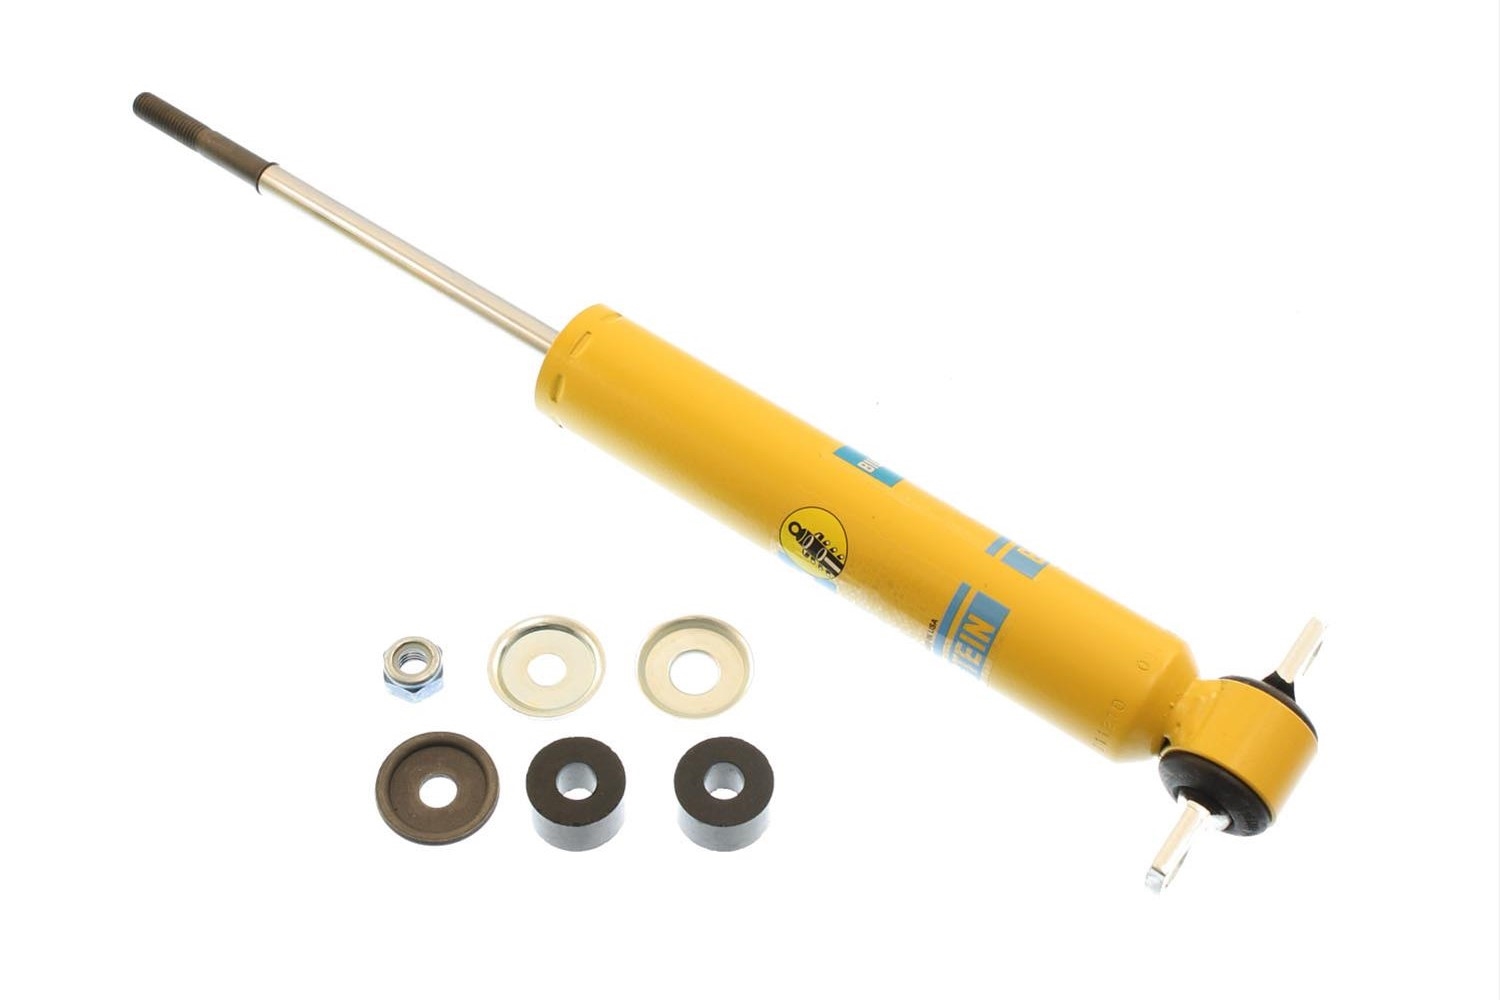
Shocks
The last thing on my list was to install a set of Bilstein B6 Performance Series shocks. In essence, the combination of the stiff 550-pound front springs and ‘soft’ Van Steel 360-pound composite rear spring works better with B6 Series shocks up front and B8 Series shocks out back. You can get more detailed info on the shocks along with several installation tips in this OnAllCylinders story.
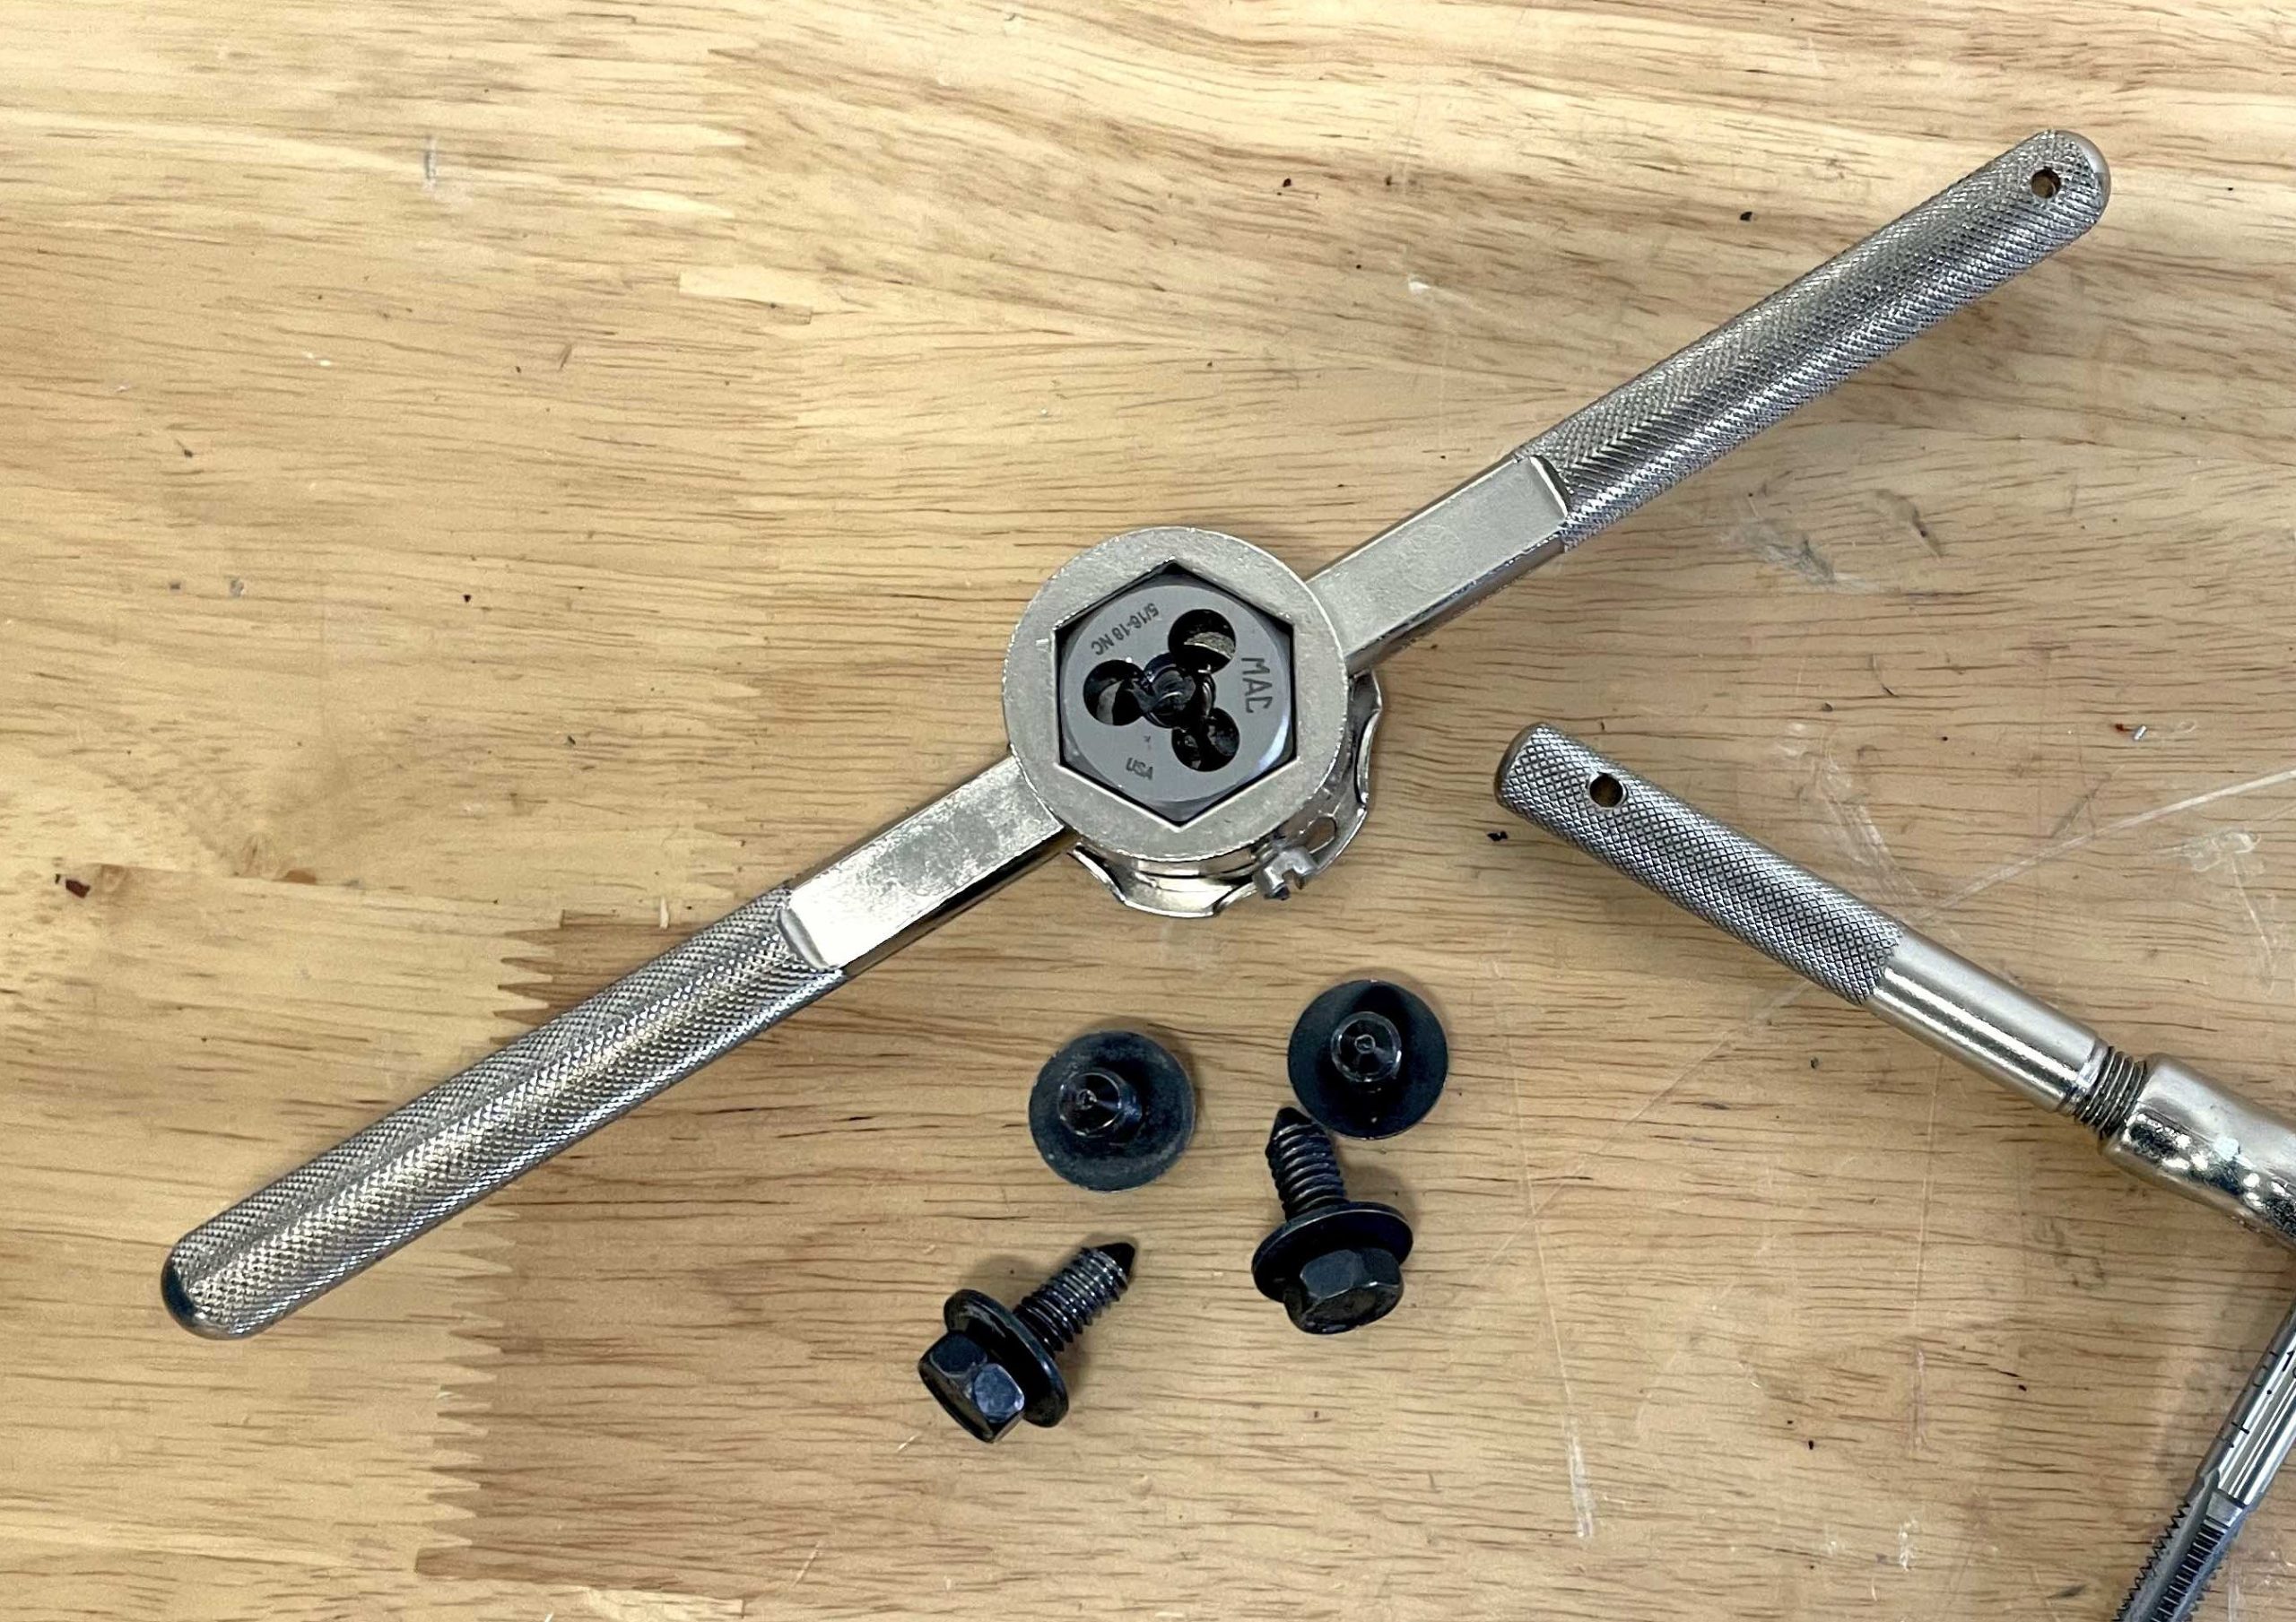
Of course, I had a wee bit of drama. The threads in the lower control arms were piled up, so I ran a tap through them to straighten them out. I also ran a die over each thread in the new shock bolts to make sure I’d have no issues during assembly.
I’m glad I blew that front end apart and started from scratch. Otherwise, it would been an accident waiting to happen. Check out the accompanying photos for a closer look at the process.
Parts List
Van Steel 550 lb.-in. Front Coil Springs VAC-FS-17B
Van Steel 1.25-Inch Front Sway Bar VAC-ASB-F-761
Bilstein B6 Performance Series Front Shock BSN-24-009461
Shocks Off road raicing I have chevy Blezer k5 1970.motor 6.0 trass.4L
Shocks wiht coil tanke from extra gas in ea Shocks.
¿?????????