There are a lot of ways to make a drag car quicker and faster. One way is by adding more power. The trick is getting all that horsepower to the track. Get the chassis and suspension settings wrong and it will just go to waste.
One place where a bracket racer can pick up performance is by modifying the front suspension and steering. Instead of swapping in a high-dollar front clip or a bunch of costly components, let’s look at what NHRA Stock Eliminator racers do. They base their front suspension and steering on stock or slightly modified stock parts. There’s little to no fabrication required so you can do the work in your garage. The stuff works, too—the majority of Stock Eliminator cars are incredibly quick and very consistent on skinny nine-inch wide tires.
Story Overview
- Friction in a drag race car’s front suspension can limit movement and weight transfer
- Stiction is another name for parts friction in a suspension
- Bracket racers can limit suspension friction using parts that fit factory suspensions
- Changing the pivot point on the outer tie rod to make them parallel with the control arms is the easiest way to fix bump steer
There is no exact set path here–it’s all trial and error. I will provide you with some direction, but you might have to try different combinations of parts to come up with something that works for your car.
What the Heck is Stiction?
The general idea for a Stock-class style front end is to make it loose, but controllable. That translates into easy, no-stiction suspension travel. Stiction is the ‘stick,’ or friction, caused by suspension parts as the system moves through its travel. Penske Racing coined the word when they discovered this phenomenon actually slowed a race car down. The Penske folks postulated if stiction was completely removed, you could then ask the shock to do its job, which is to control suspension movement.
I’ve personally tested this on a Stock-class race car. I swapped out the original GM control arm bushings for a set of urethane jobs. With no spring or shock installed but everything torqued to spec at a set ride height, it took a considerable amount of force to move the suspension through its travel. In fact, it would stick exactly at the point we stopped forcing the movement. We fixed the issue swapping out the bushings for disguised spherical bearings.
Control Arm Bushings
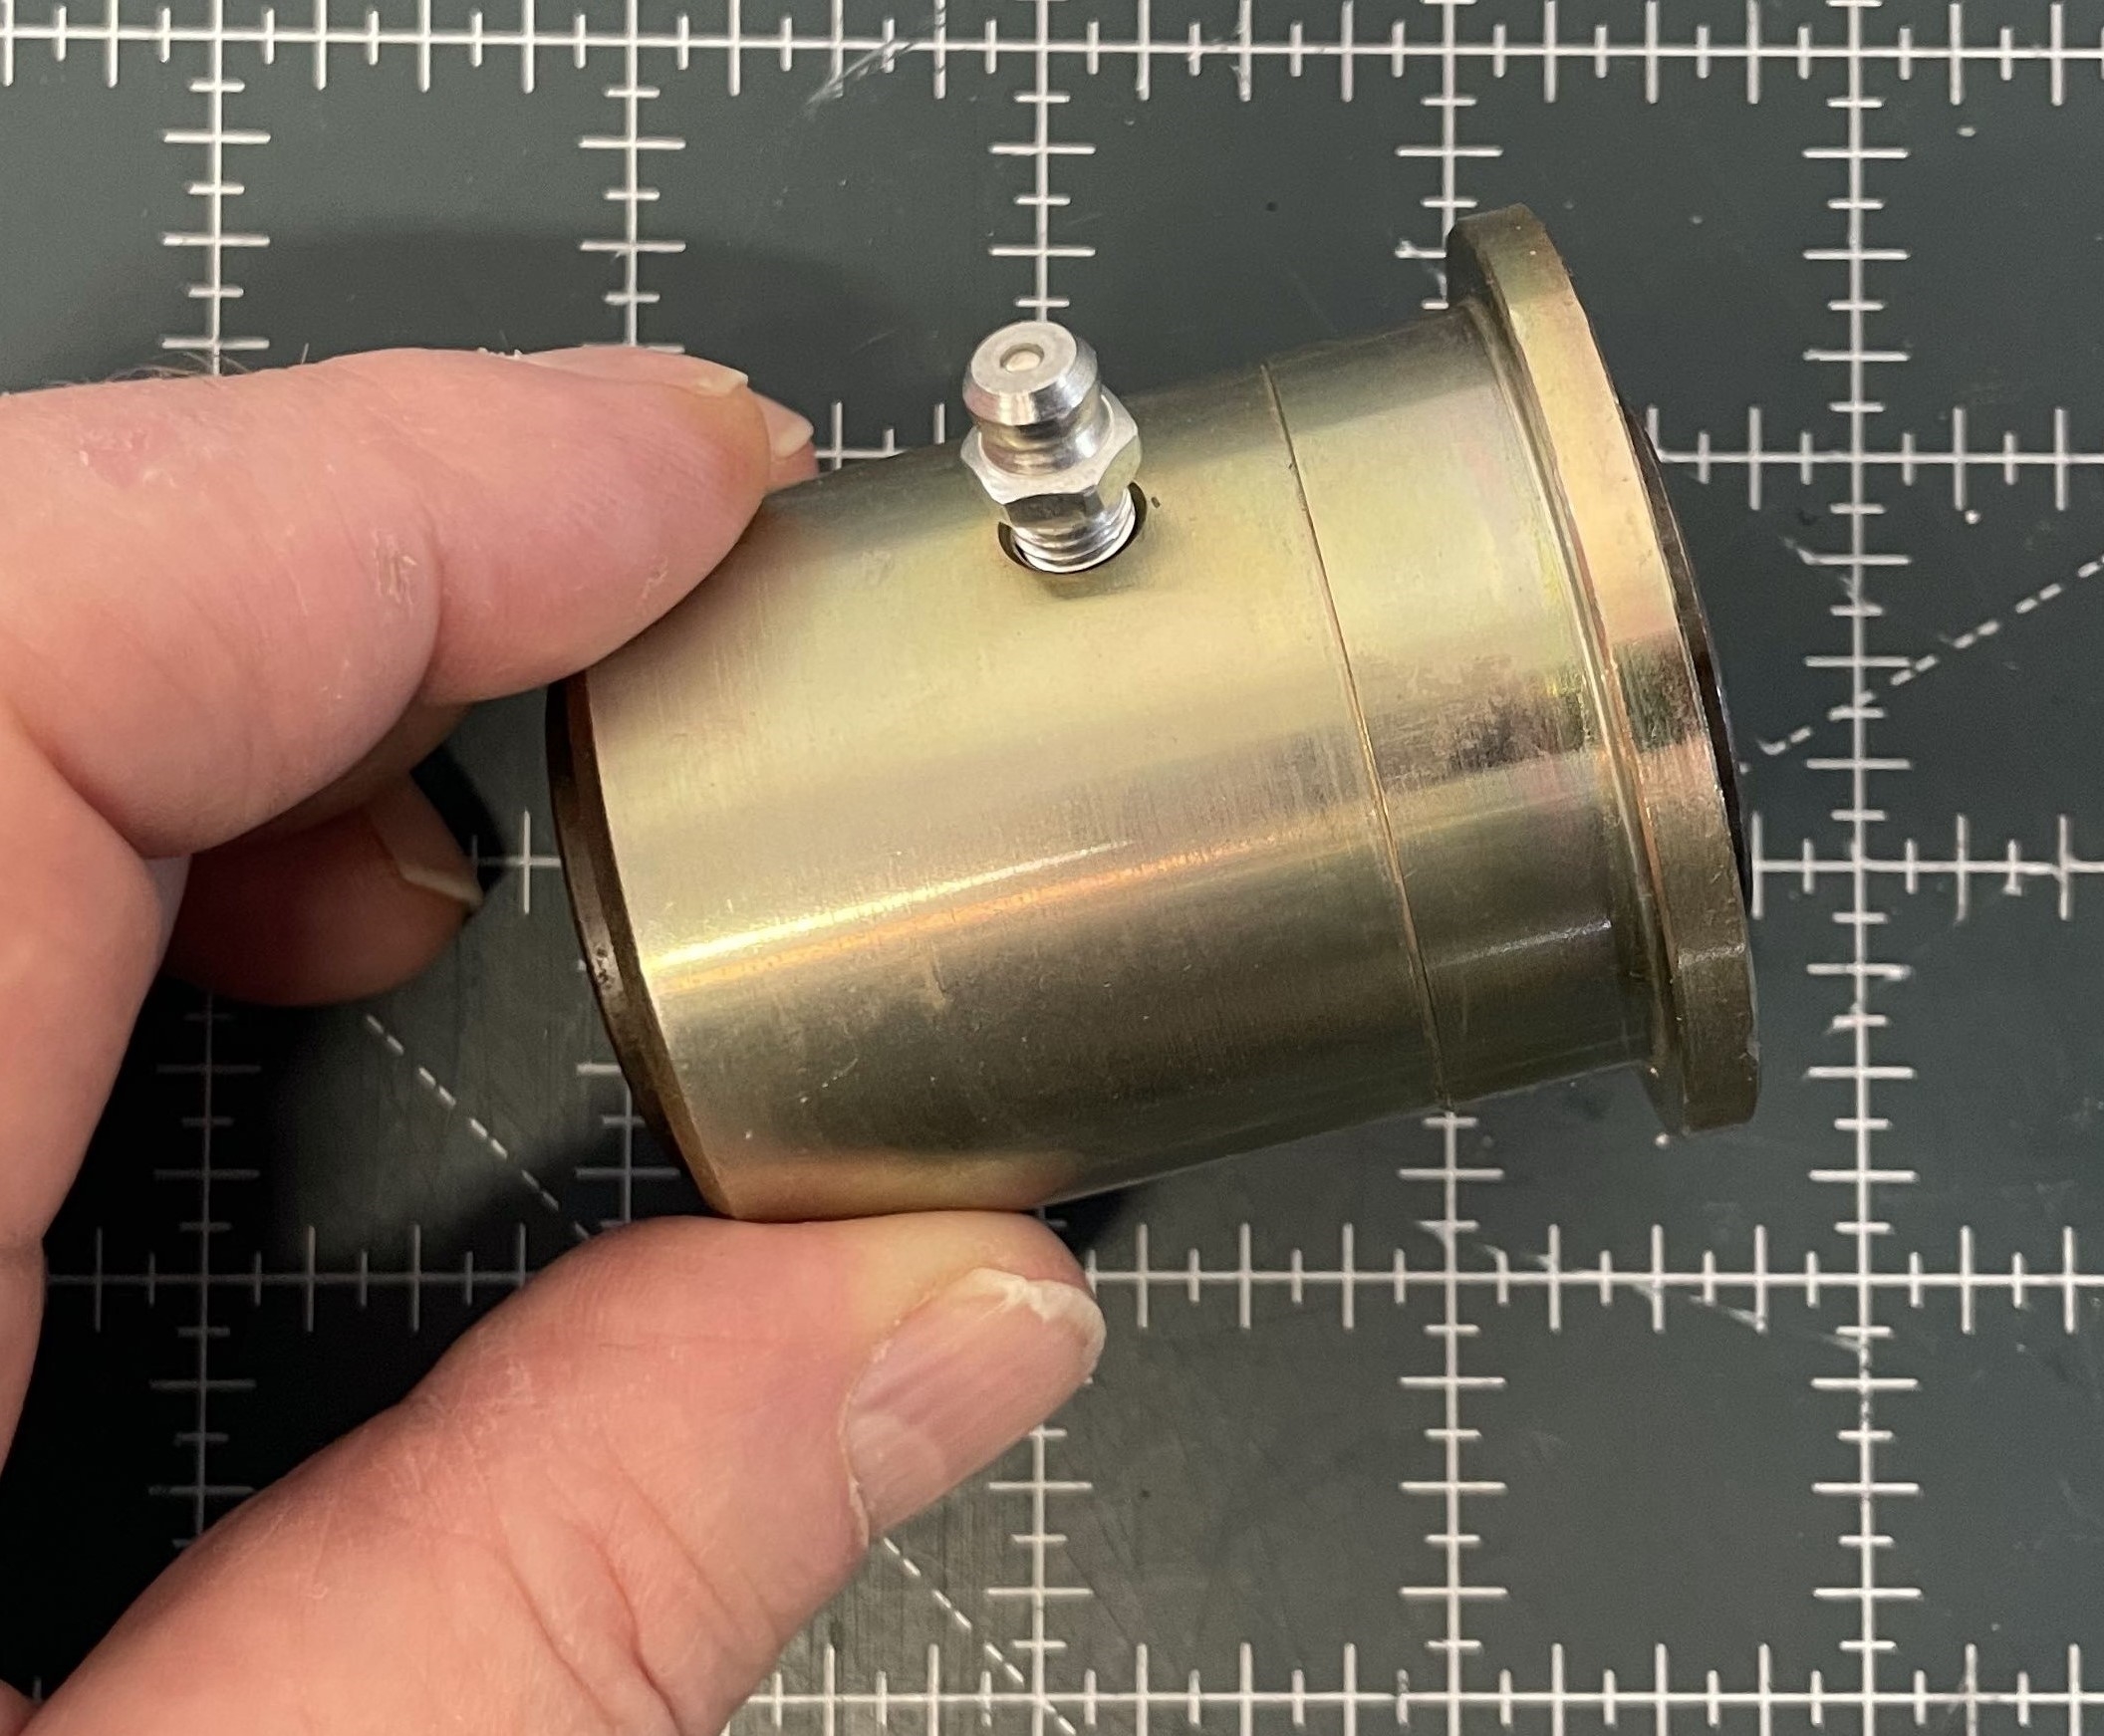
The parts to build a loose, stiction-free suspension are not hard to find. For example, Summit Racing sells some slick roller bearing lower control arm bushings for GM cars. Allstar Performance makes some that have a steel body with roller bearing internals and hardened inserts. They’re direct swaps for the bind-prone GM rubber and steel bushing and accept a common 1/2-inch bolt. There is a zerk fitting for greasing the bushing, so keep that in mind during installation.
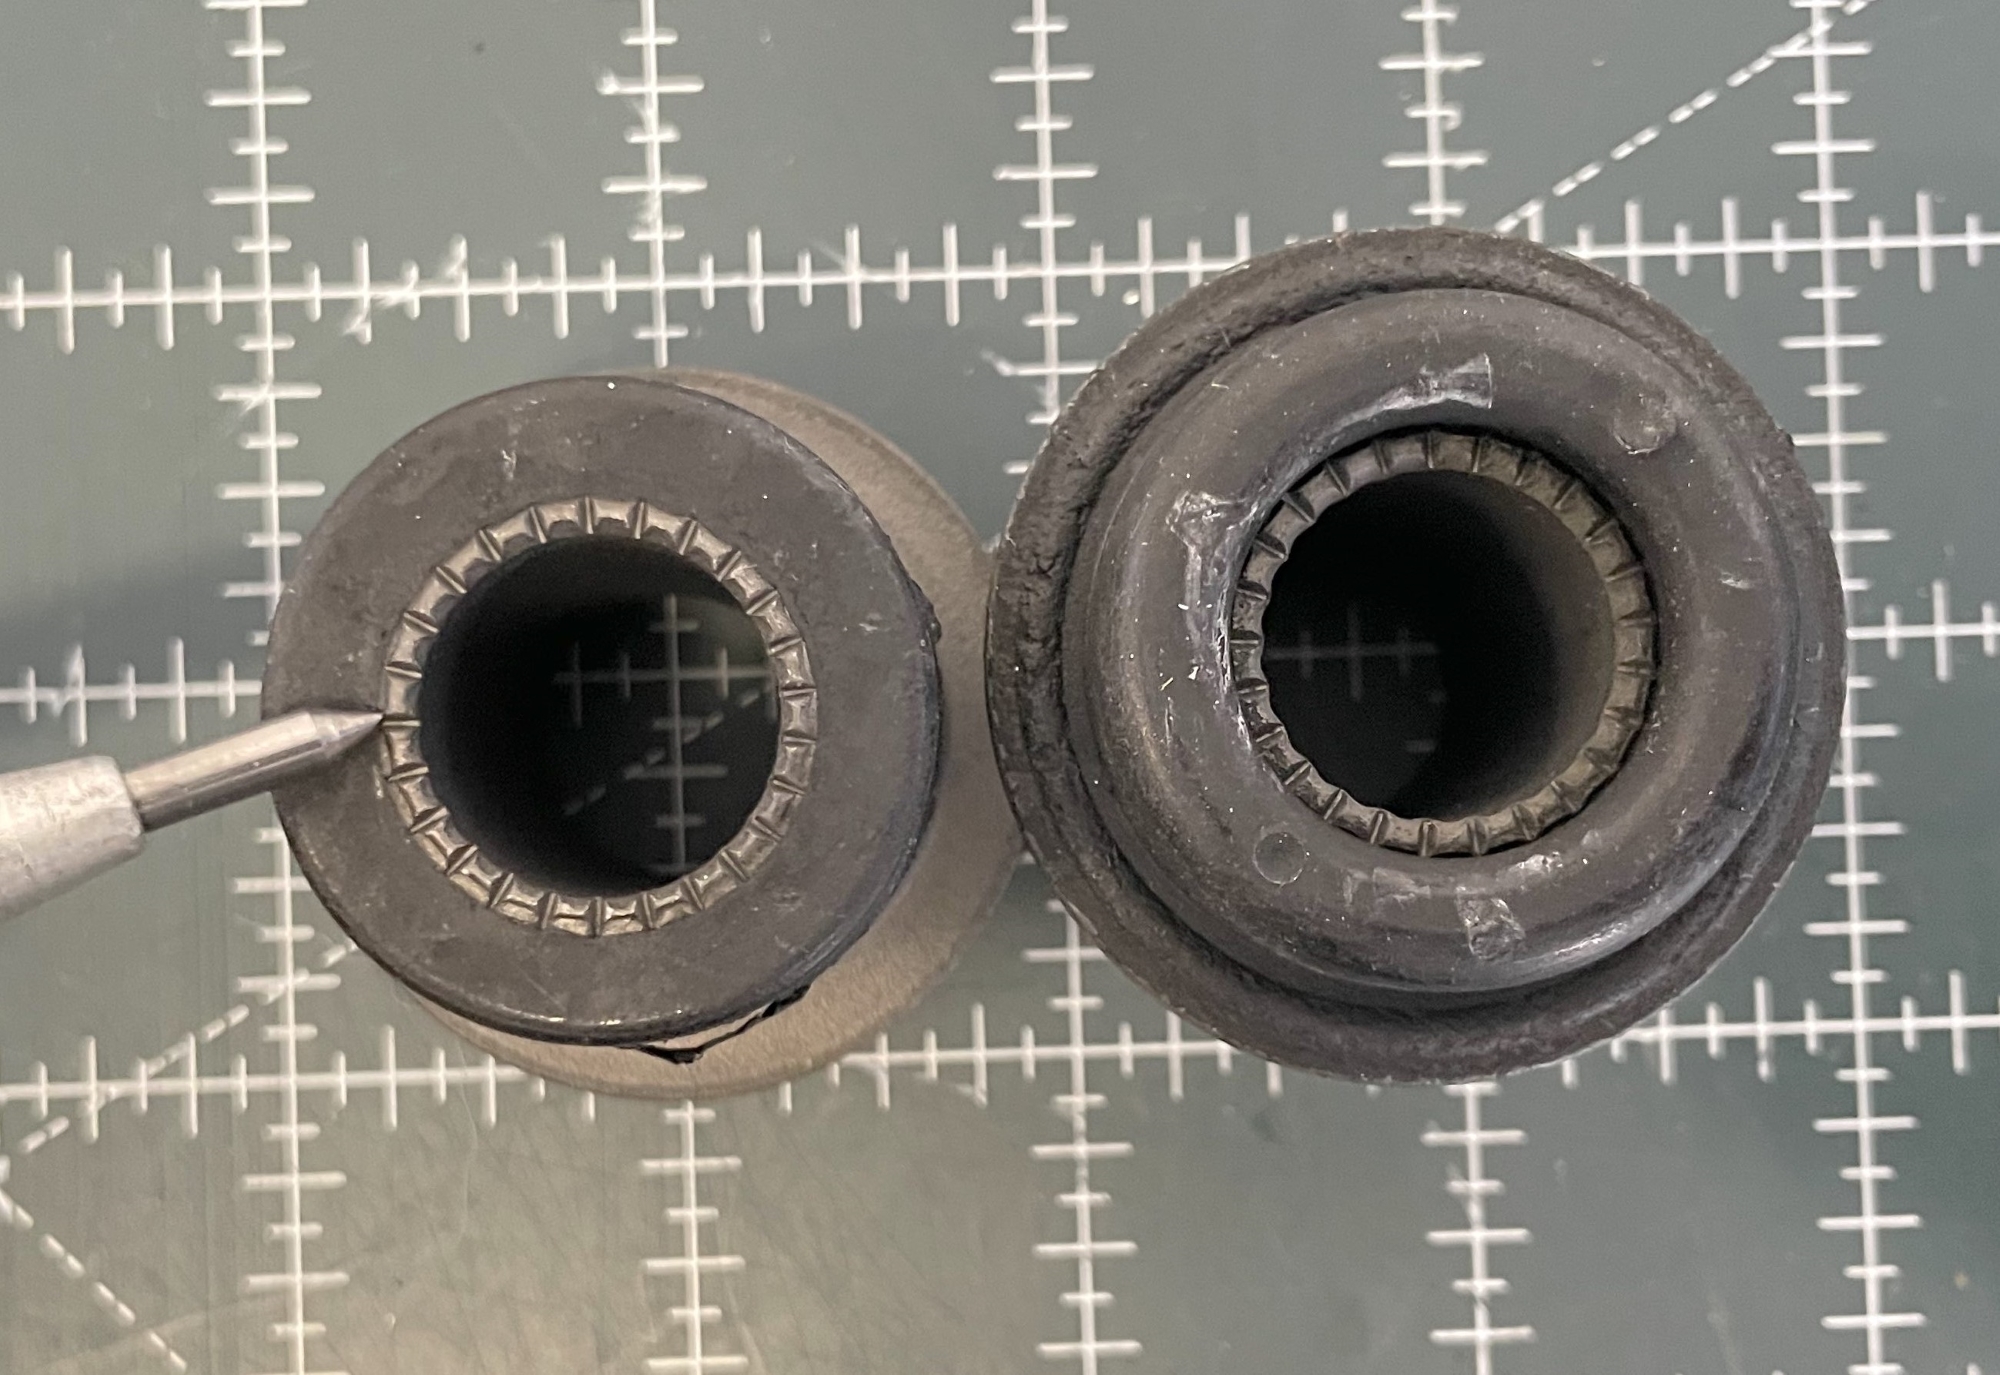
There are bushing options for the upper control arms too. In the old days, we’d use conventional replacement bushings with the serrations ground off so the rubber bushing could rotate, which eliminated another friction point. You would grease the bushings, tighten the nuts take up the slop, and test the up and down motion. Worked great. For some applications, a washer was added on each end to take up the space.
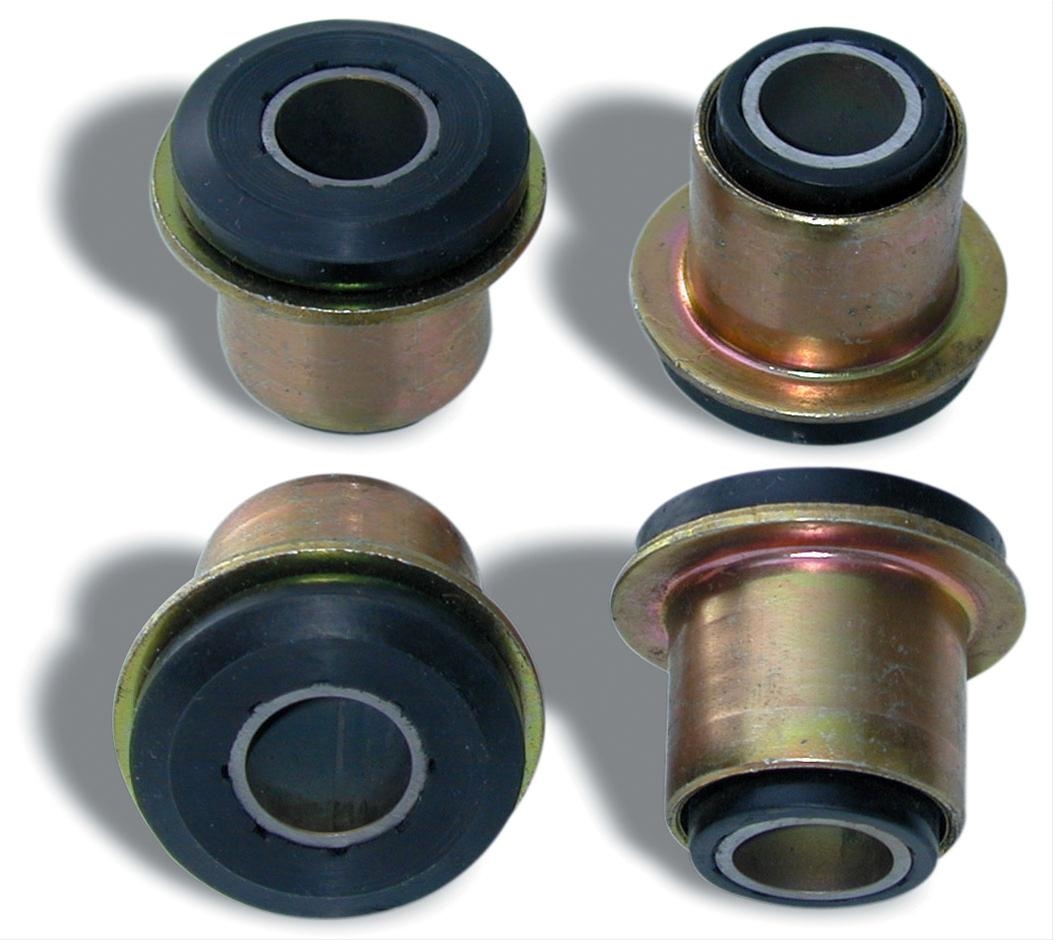
Competition Engineering polyurethane upper control arm bushings will save you all that work. The bushing is not bonded to the steel inner sleeve and outer shell so it’s free to rotate. That allows the control arm to easily pivot on the cross shaft through its range of travel for faster front-end lift and better weight transfer.
Ball Joints
If you try to move a brand-new replacement ball joint around, chances are very good you’ll find it sticks. The folks at AFCO say it can take as much as 40-foot pounds to get an OEM ball joint to break away. Factor two ball joints per side into the equation and you have a lot of stiction.
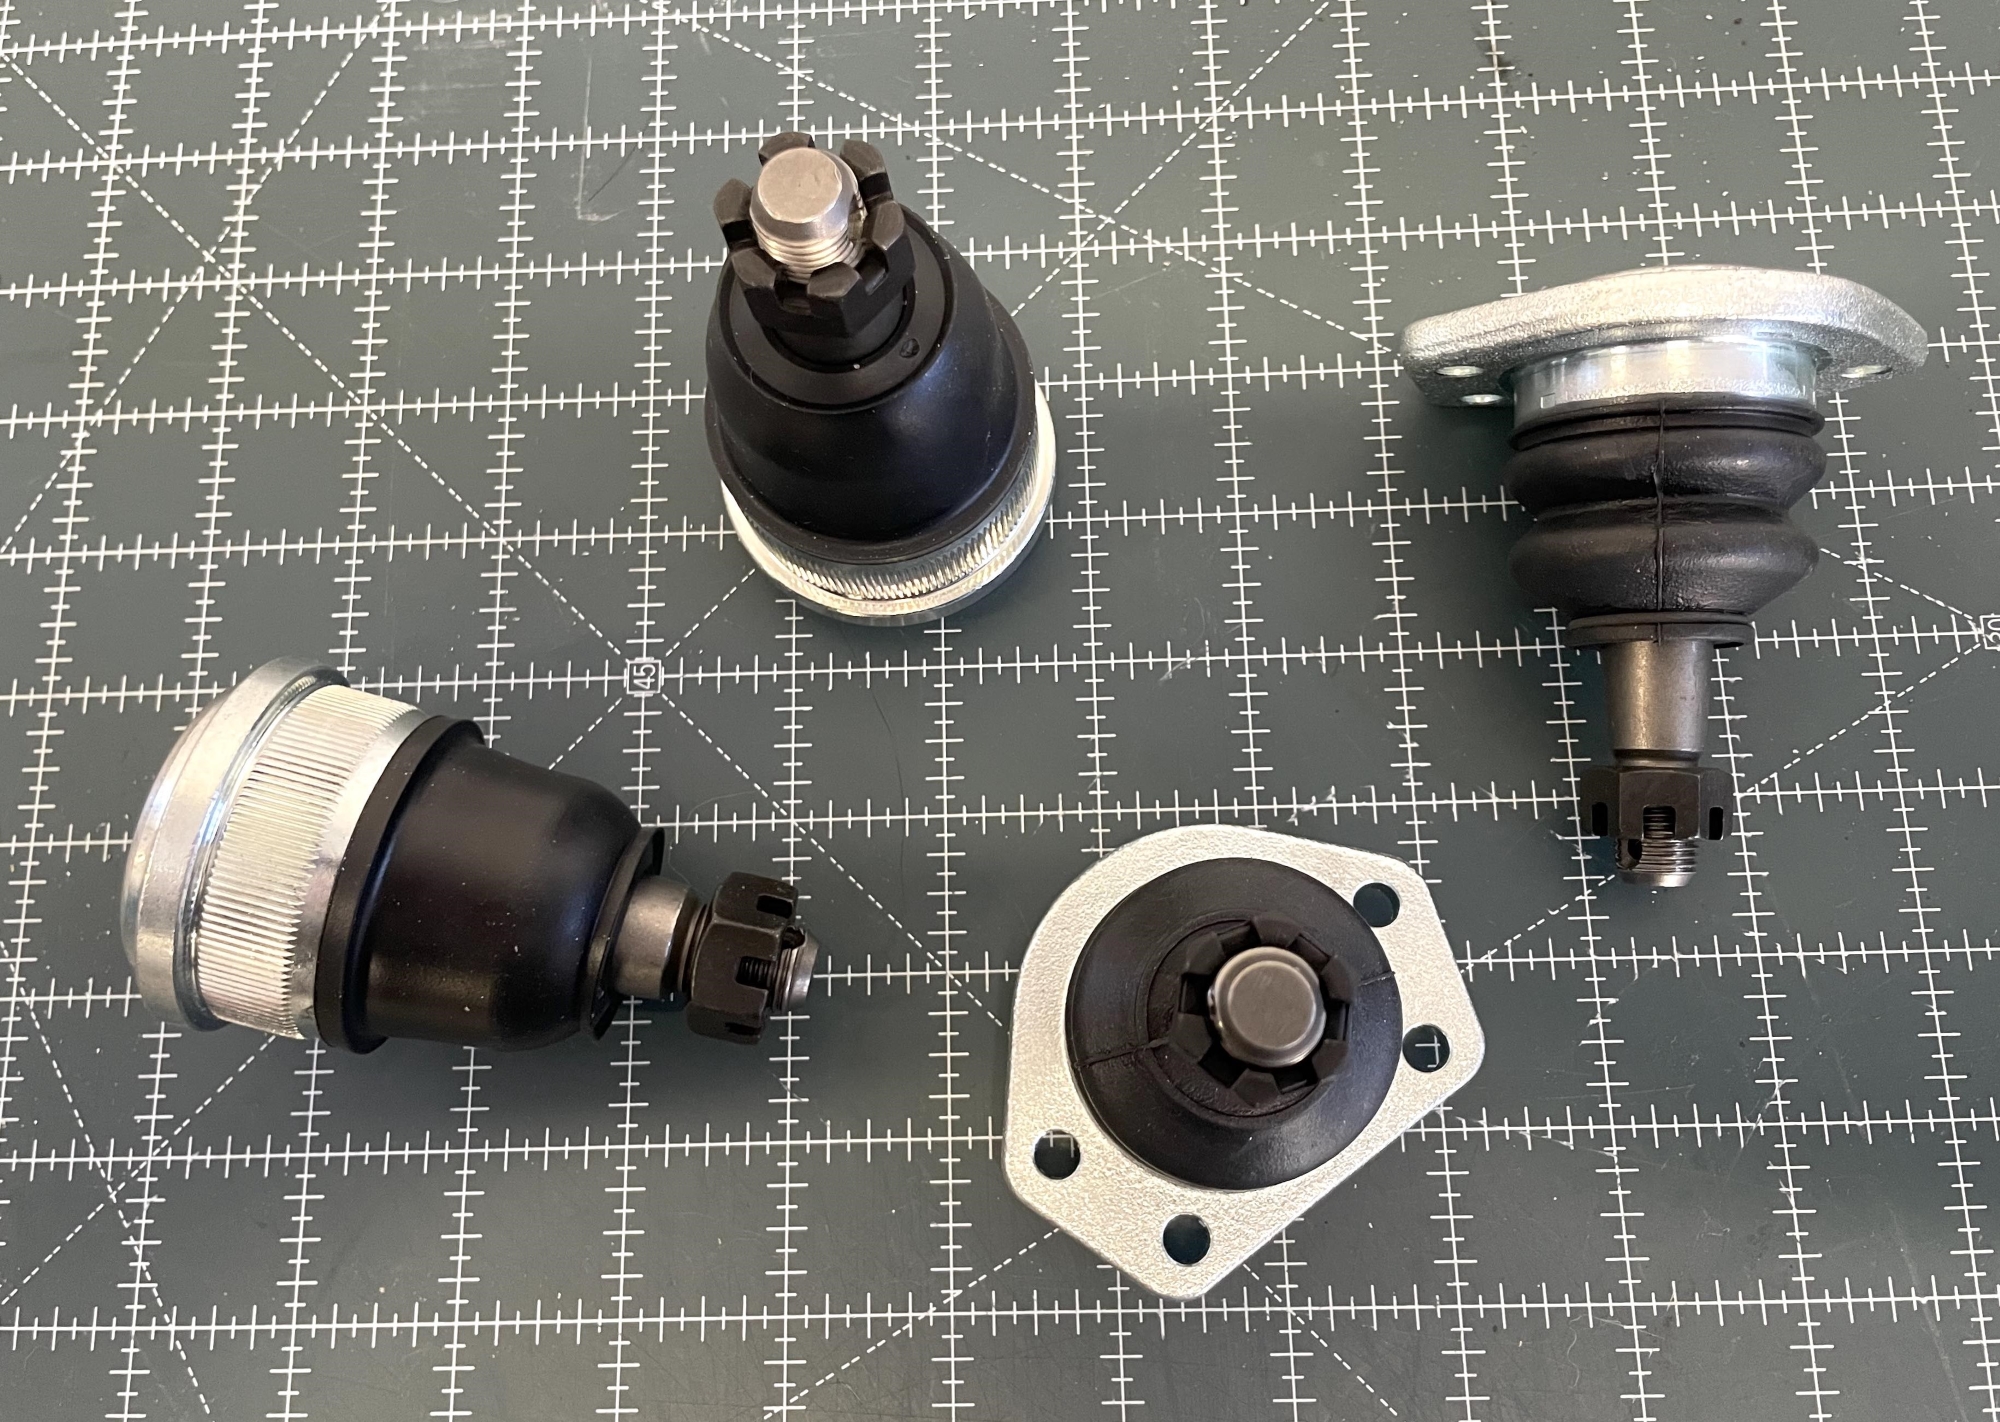
There are two ball joint options to remedy that issue:
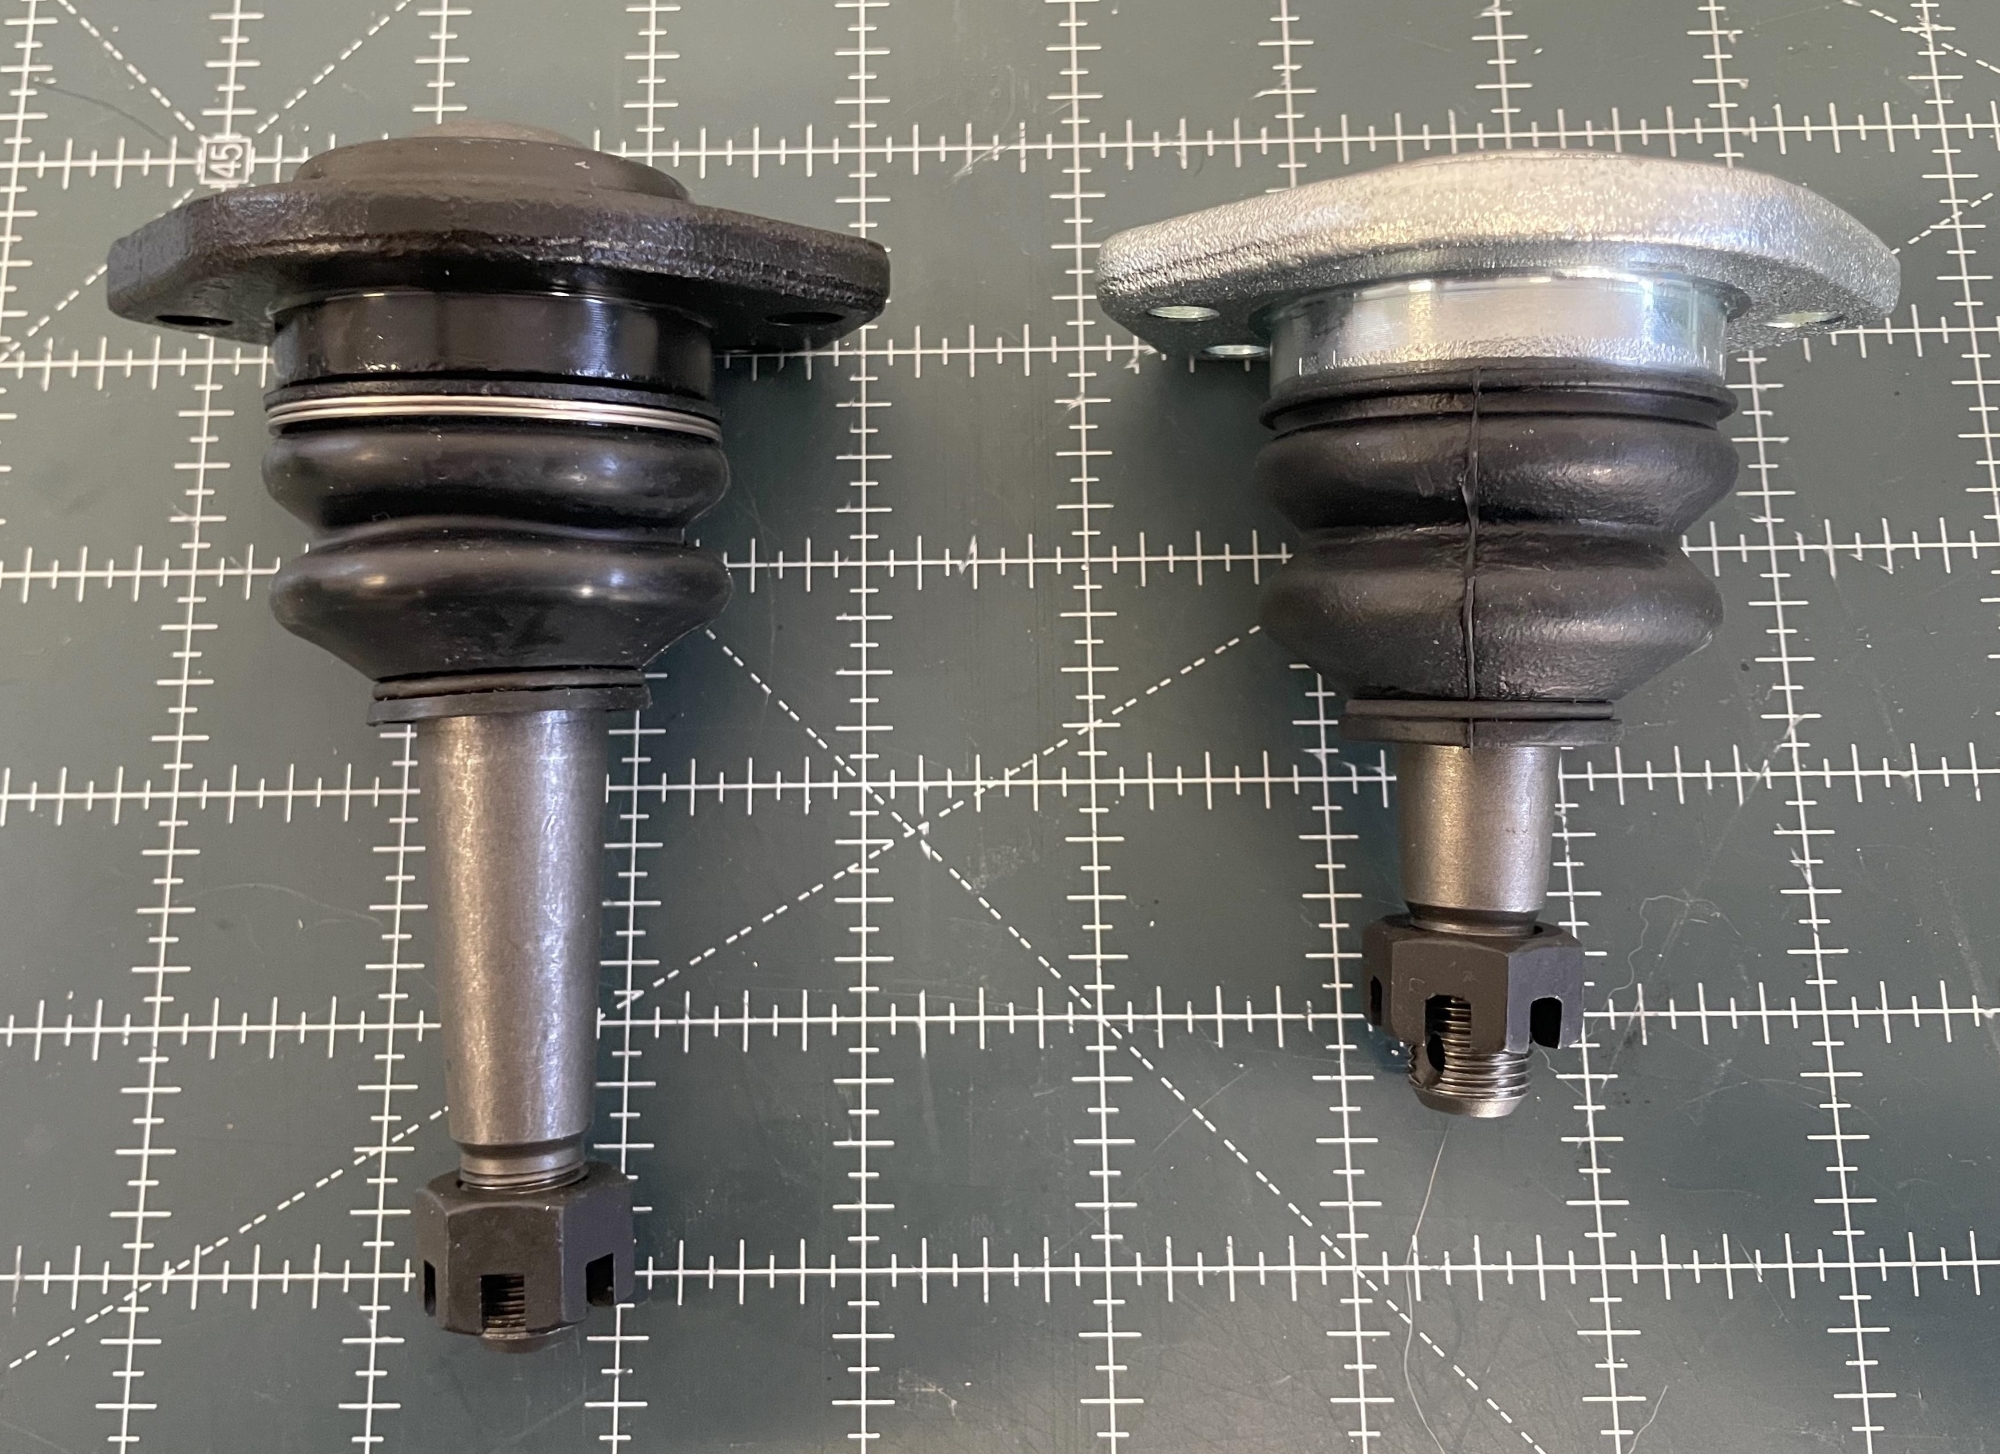
Low-friction ball joints install just like stock (press in lower, bolt-in upper) and need little force to move them. Keep in mind that these are race parts. They won’t go 40,000+ miles before replacement, but that’s not the intent.
Extended ball joints are taller than stock joints. They allow more suspension travel and more initial weight transfer. A tall lower ball joint can potentially reduce bump steer as well.
Bump Stops and Travel Limiters
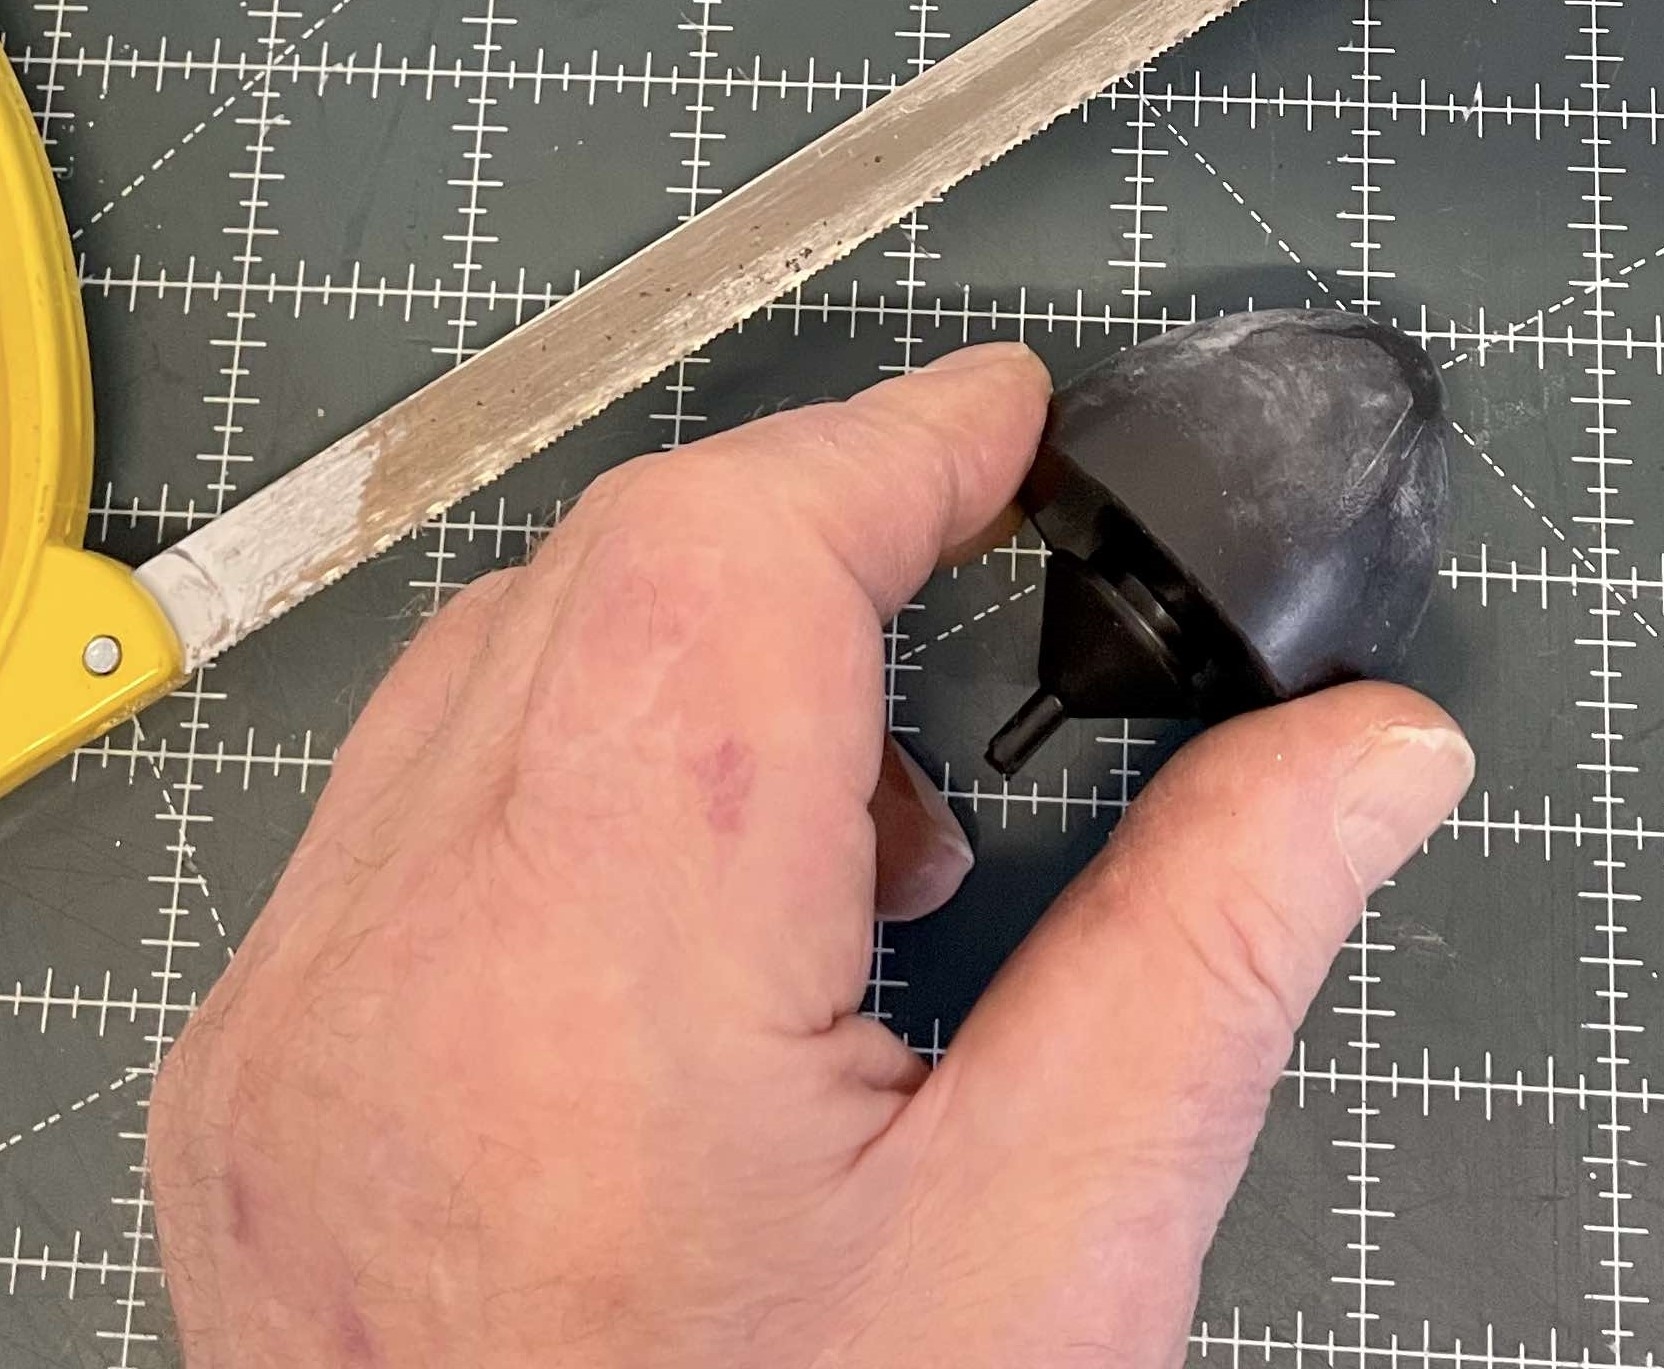
There are other ways to increase front suspension travel without breaking the bank. For example, many 1960s and 1970s GM muscle cars have upper control arms that use a large rubber bump stop. It looks like a traction bar snubber. If you remove that bump stop completely, you’ll increase the range of suspension motion by quite a margin.
But you still need a bump stop of sorts. Many racers simply trim them to fit their specific travel needs. When trimming bump stops or adding longer than stock ball joints, it may be necessary to swap the existing front brake hose for a longer one.
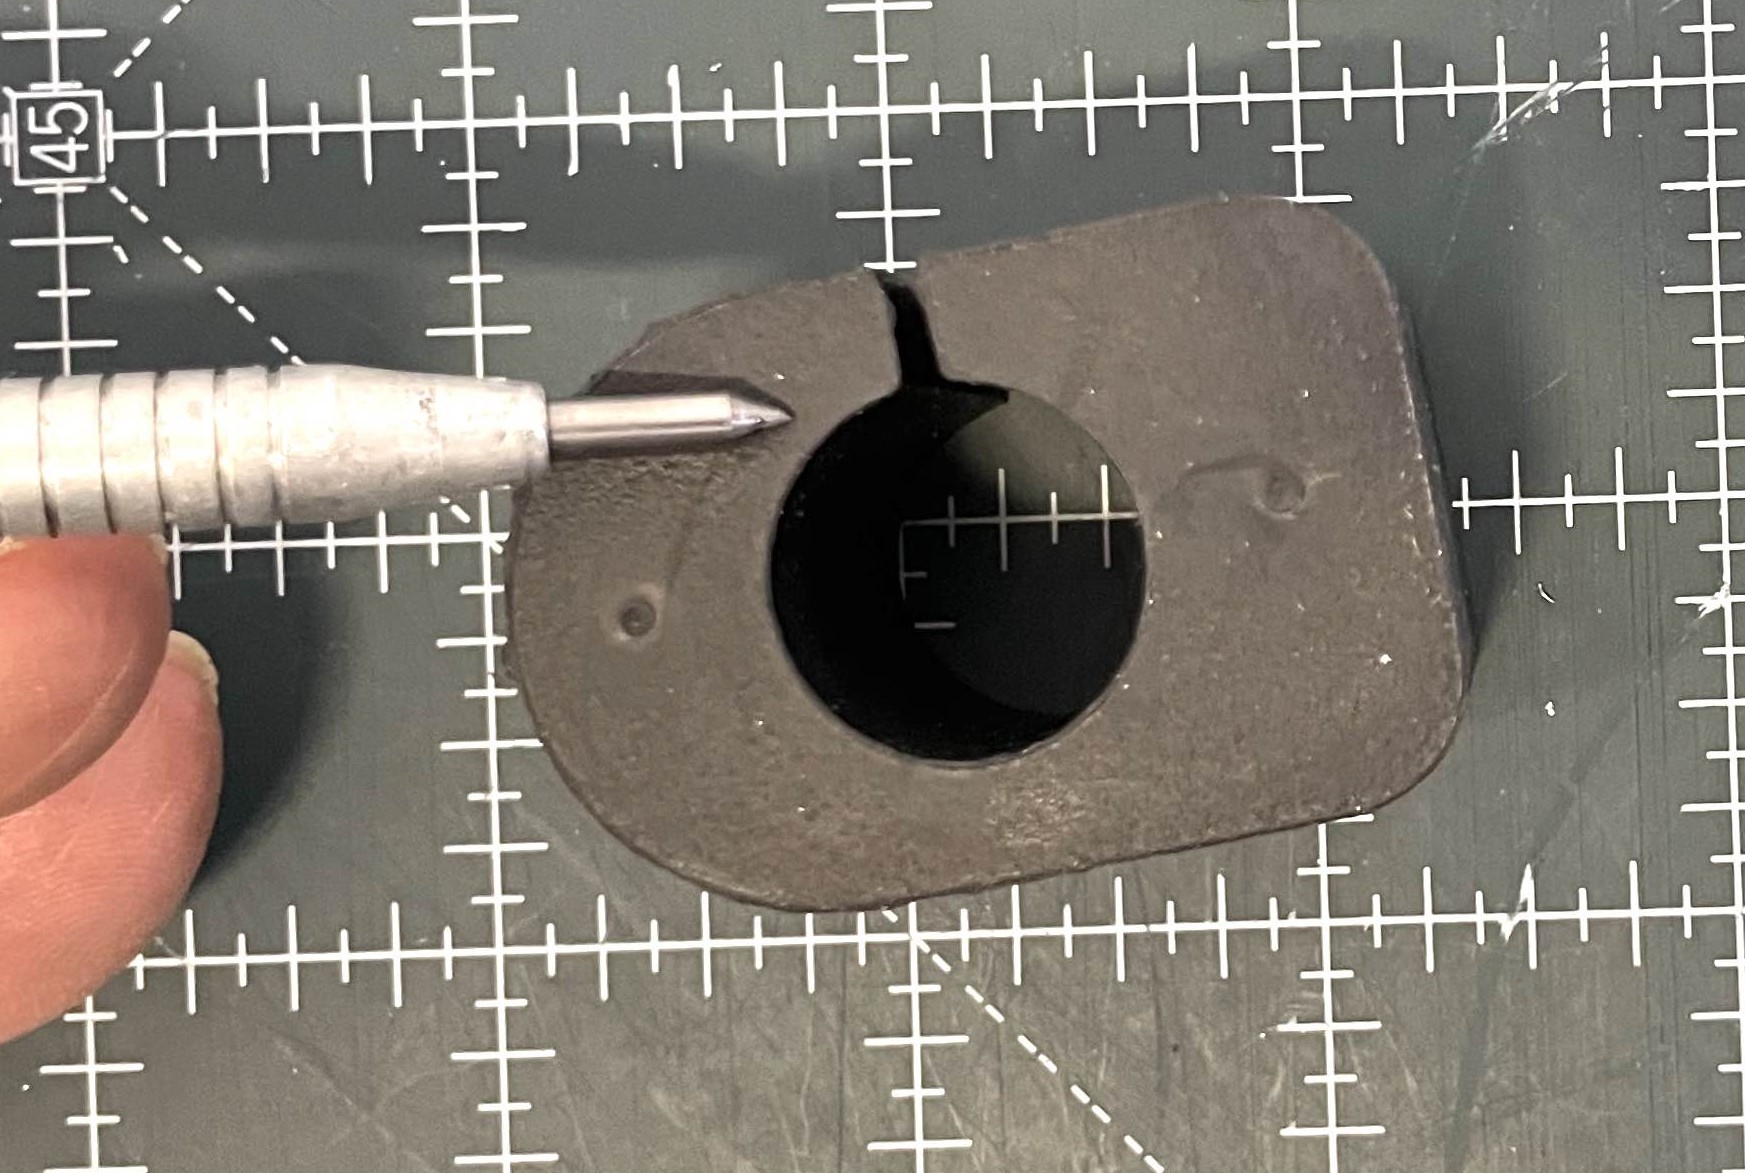
You could run into a situation where there is too much suspension travel, especially for a car with big horsepower. A very easy solution is a tuneable travel limiter like this Competition Engineering limiter. Just push out the factory bump stop in the upper control arm and thread the adjuster bolt through the hole. The travel limiter’s configuration allows you to dial in the amount of front-end lift required. It’s perfect if you have a car that wheel stands excessively on some tracks but not at others.
Bump Steer
Now we’ll get into bump steer. On a drag car, bump steer is the condition where the front wheels steer themselves as the front end lifts during the launch and then drops back down. This causes tire scrub and increased drag, which can increase elapsed times.
As you change the ride height of a car, the tie rod angles change. If the tie rods and lower control arms are not on the same plane, they will have different ranges of motion as the suspension compresses. This can cause toe to go in or out depending on the severity of the bump steer. If a drag car hoists the front wheels and the wheels toe-out bump steer on the landing, you can lose control of the car.
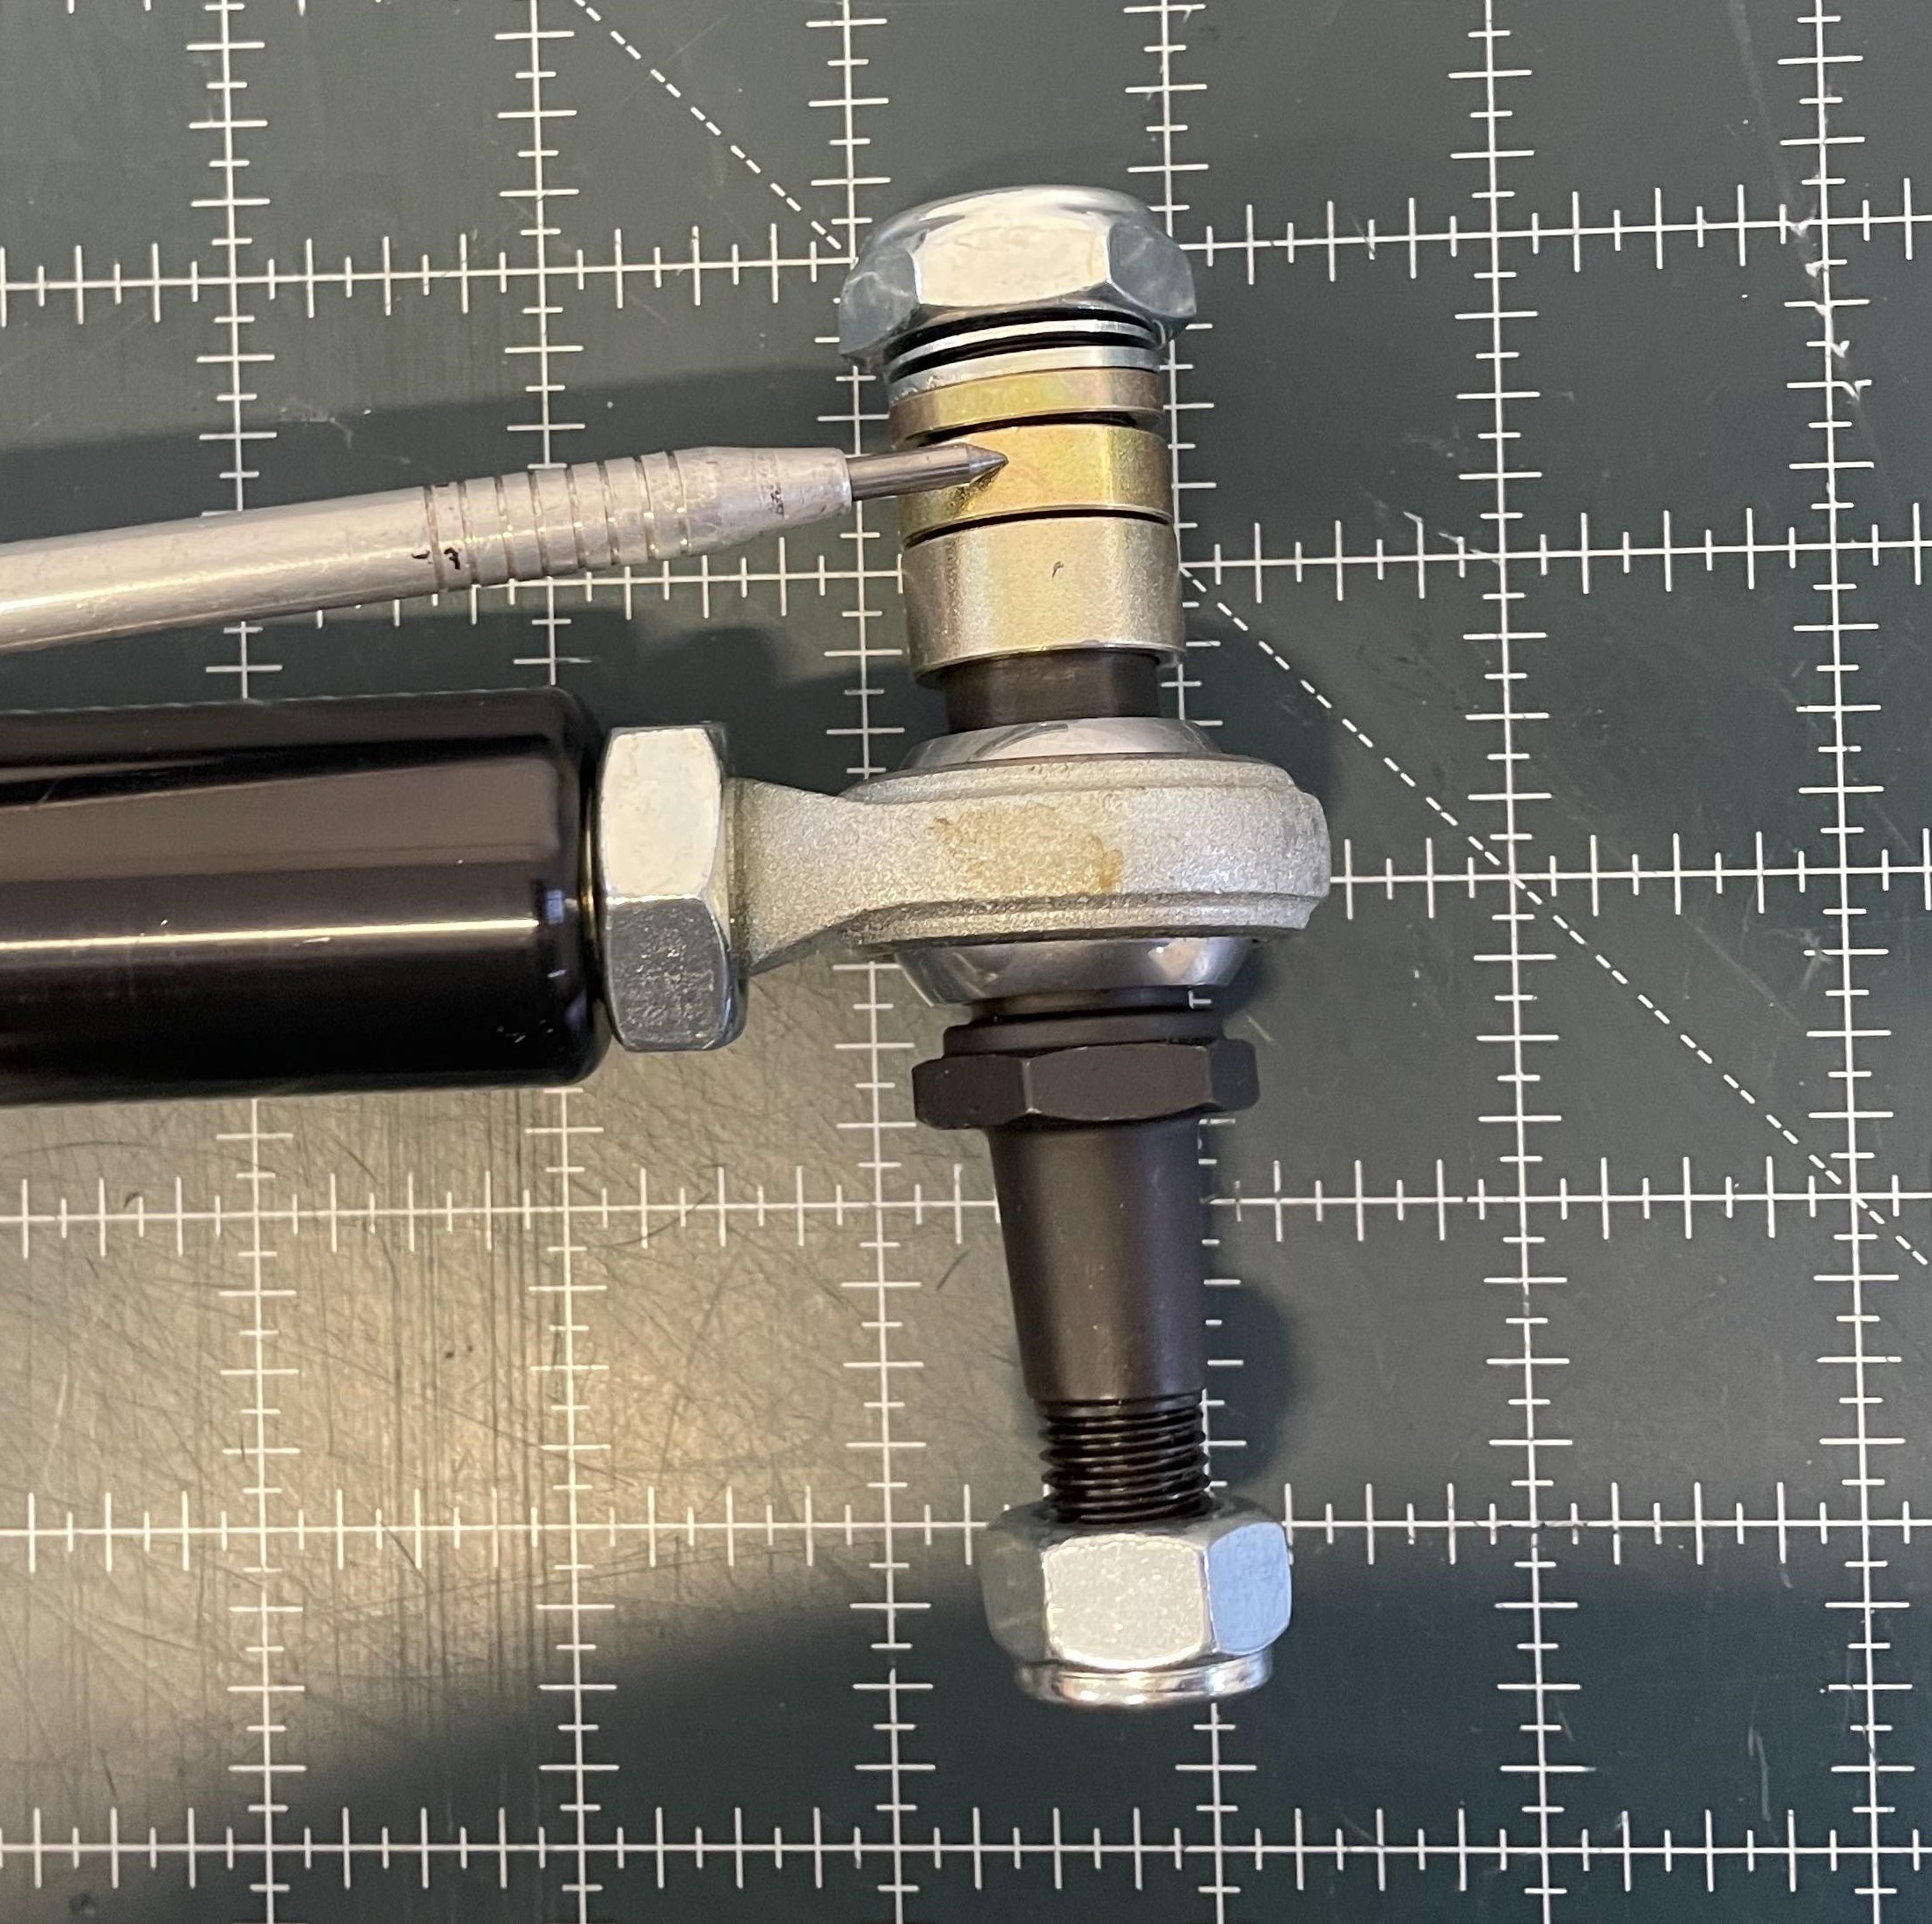
Changing the pivot point on the outer tie rod ends (where they attach to the steering arm) to make them parallel with the control arms is the easiest way to fix the problem. This is where a bump steer kit like the Baer Tracker can help. The Baer kit replaces the stock tie rod ends with adjustable units. The pin at the steering arm is adjustable for height. Setting it at the proper height will minimize toe changes as the car goes through the range of suspension travel. The Baer Tracker kit also eliminates the need for OEM tie rod adjuster sleeves, which can be a pain to adjust.
Proper wheel alignment is crucial to keeping bump steer at bay. I usually do my own wheel alignments. It’s possible to plot toe changes with the front suspension assembled, minus springs and shocks, with the car positioned at ride height. If you don’t perform your own alignments, Baer Brakes suggests finding an alignment shop that understands bump steer:
“To properly perform this alignment, the technician will put your car on an alignment rack with the front wheels on movable tables. He will then likely hook a come-along to the crossmember and one to the floor. That will allow him to pull the car throughout its suspension travel to measure the change in toe (bump steer). He will then rearrange the spacers as necessary to minimize the problem.”
Billet Tie Rod Sleeves
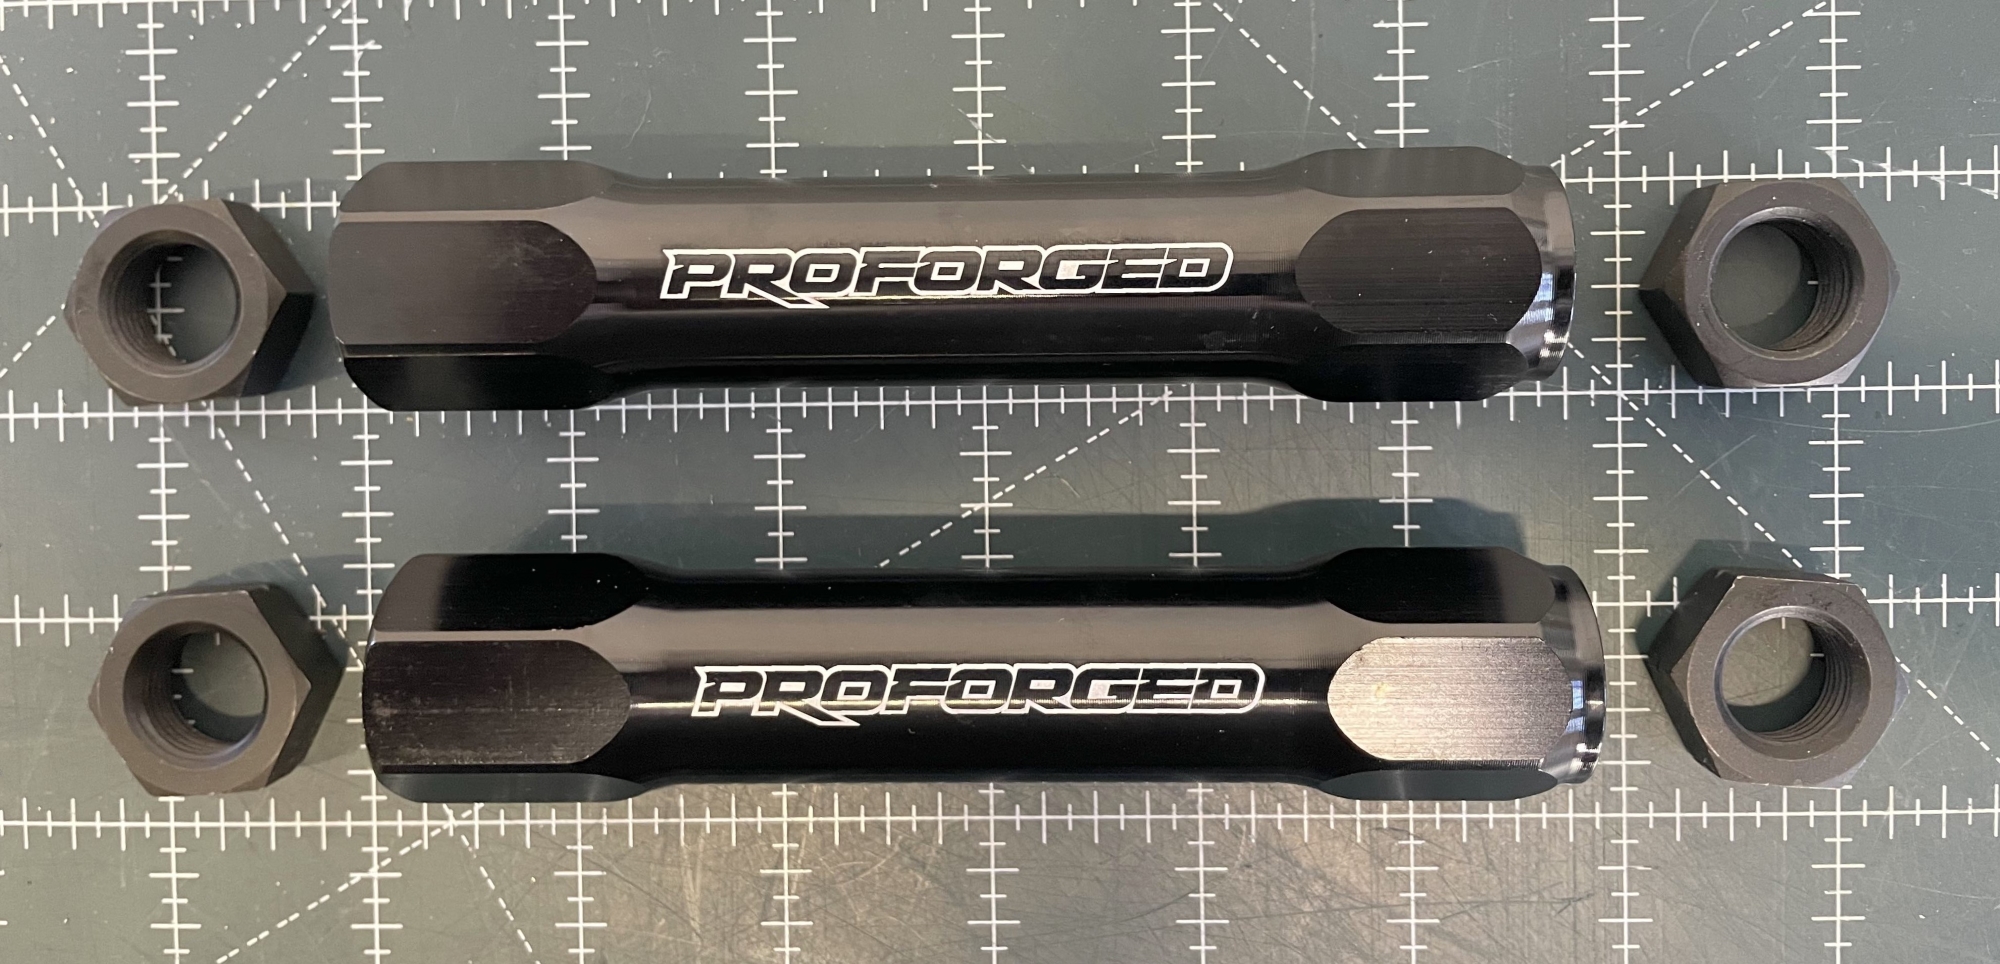
Even if bump steer is not an issue with your car, it’s still a good idea to use billet tie rod sleeves to adjust toe. They’re light, strong, easy to adjust, and not prone to failure after a hard landing like OEM sleeves are. Summit Racing offers all sorts of billet tie rod sleeves such as the Proforged examples shown in the photos.
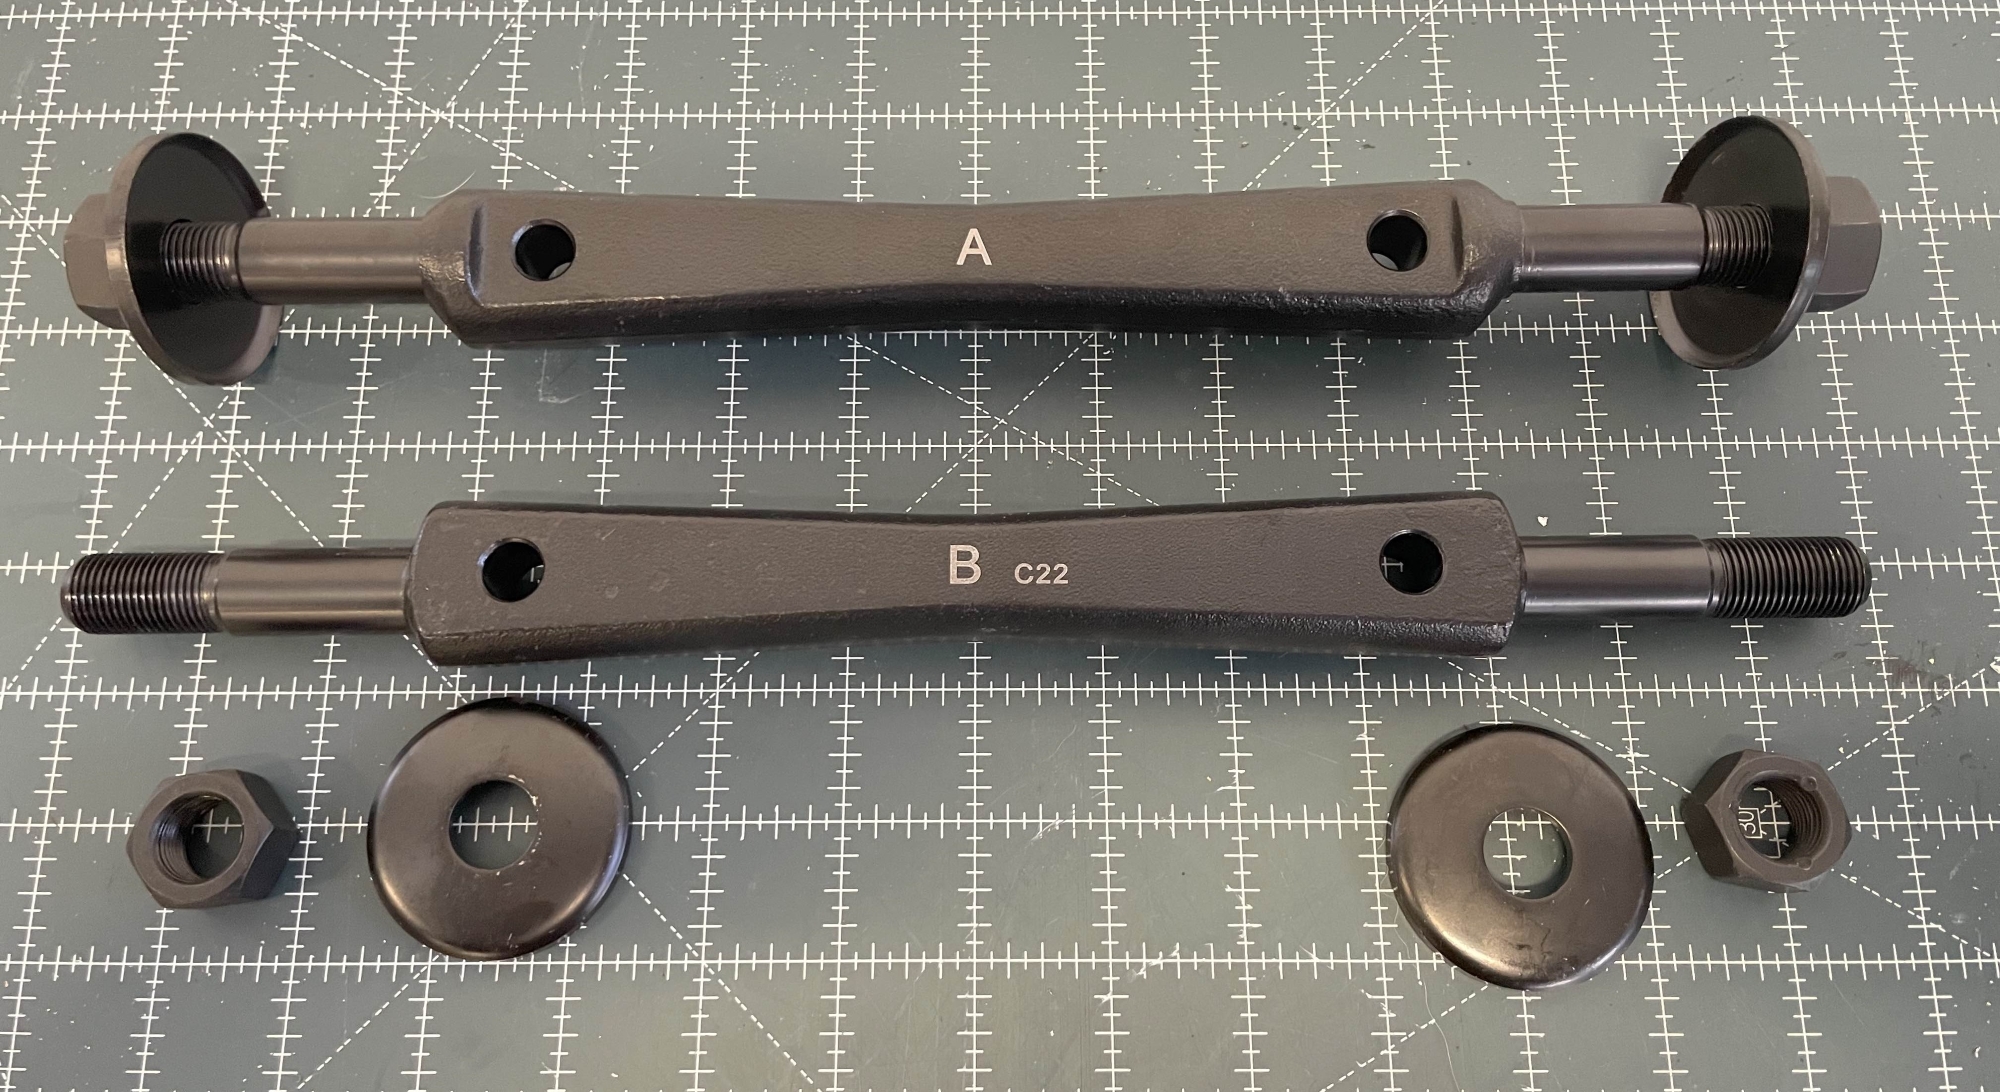
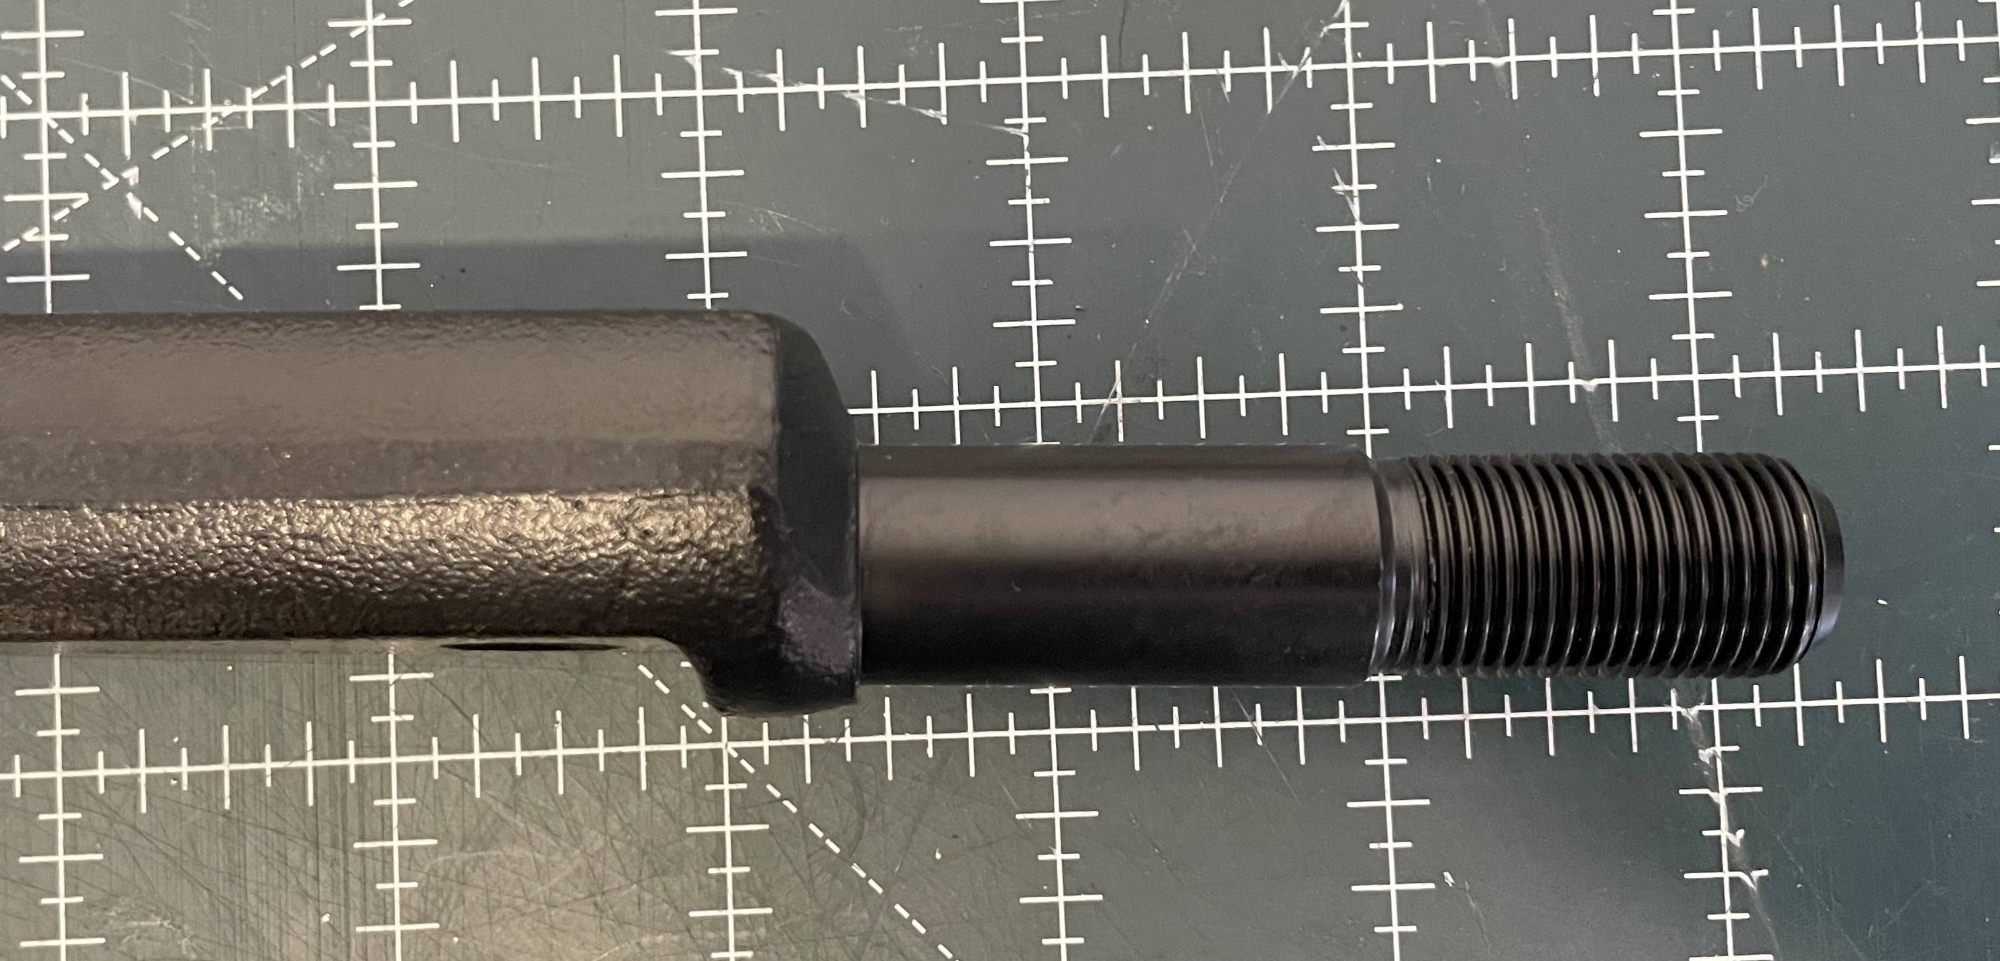
Offset control arm cross shafts are designed for use on “accident tweaked” cars or where the frame (or subframe) has sagged. They allow more front-end adjustment—perfect for adding more positive caster in a drag car. Positive caster is important because it really helps make the car go straight. It will also help the car self-center a bit as it goes down the track.
When installing offset control arm cross shafts for drag racing, set them up so the tires move to the outside of the wheelwell. Here’s how, right out of a 1969 Chevrolet Service Manual:
Caster
The transfer of one shim to the front bolt from the rear bolt will decrease positive caster. One shim (1/32″) transferred from the rear attaching bolt to the front attaching bolt will change caster 1/2-degree positive.
Camber
Adding an equal number of shims at both the front and rear of the support shaft will decrease positive camber. One shim (1/32″) at each location will move camber approximately 1/5-degree.
The Right Numbers
What sort of wheel alignment numbers should you shoot for? You want to dial in as much caster as possible and make every effort to get the camber curve under control to eliminate bump steer.
This is what I strive for in something like a first-gen Camaro or similar Nova. I tend to use either zero or a small amount of negative camber, around six degrees of positive caster, and less than 1/8-inch of toe-in. This tends to make the car stable at speed. The little bit of negative camber also helps the car when it’s turning.
You might come close to these settings with offset control arm shafts. It’s possible you will need aftermarket control arms as well. You’ll never get six degrees positive caster with a bone stock first-gen Camaro control arm arrangement with straight cross shafts. You might be lucky to come up with 2.5 degrees of positive caster.
Improving the front suspension and steering on a bracket race car really boils down to working with parts and adjustments to get the suspension “loose” and wheel alignment dialed-in. Next time, we’ll take a look at affordable shock absorbers for the front end of your race car.
Comments