Editor’s Note: In 2019, our friends at Summit Racing posted some parts combos for Herb Stuart’s 1969 Shelby GT500 Mustang. The 428-powered car has been in the Stuart family since Herb’s father bought it in 1970. Like most of these stories go, the Shelby was eventually parked until Herb dragged it out of storage and rebuilt it from the wheels up as a Pro Touring/HPDE/autocrosser. Shelby purists may get the vapors, but we thinkdad would approve.Normally we would wax poetic about the car’s history and resurrection, but this time we’re going to shut up and let Herb tell the Shelby’s story in his own words and photos. After all, who knows the car better than the man that built it?
…
By Herb Stuart
My father was a safety engineer at A.O. Smith, the company that made the fiberglass parts and assembled the cars for Ford.
He purchased the GT500, a demonstrator at the A.O. Smith corporate headquarters in Milwaukee, WI in 1970. Dad used it as his daily driver for years, including Wisconsin winters with all of the snow and salt.
Dad was diagnosed with Alzheimer’s disease in the early 1980s.
My mother asked me to come get the Shelby because she was afraid dad would try to drive it, so I took it back to Great Falls, MT where I was stationed at Malmstrom Air Force Base. Over the next 30 years I stored the car as I transferred from base to base during my career in the U.S. Air Force.
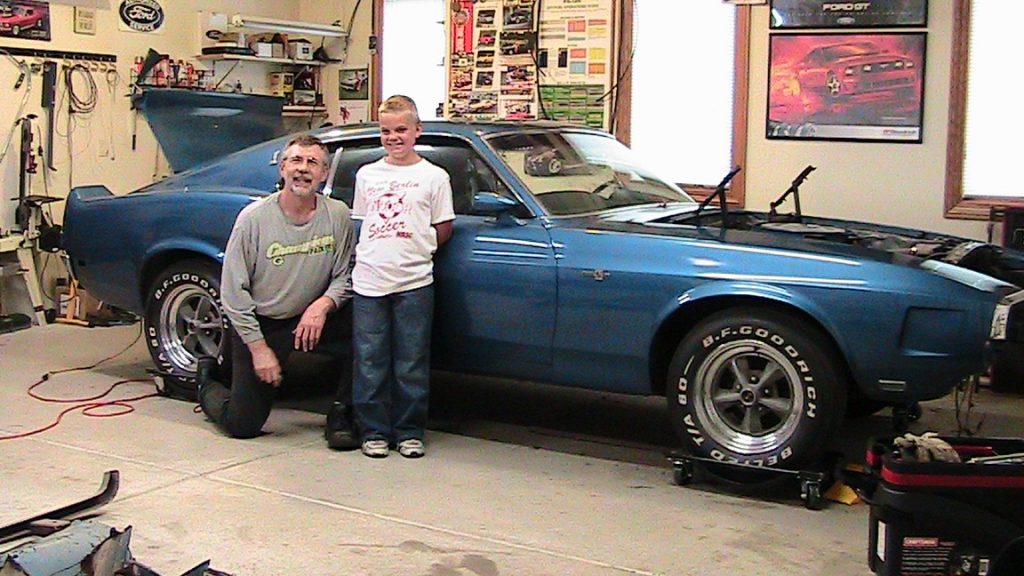
I moved back to Wisconsin in 1997 and worked as a high school Automotive Tech Ed instructor at Oconto High School. In 2010, grandson Mitchell and I pulled the car cover off to begin the restoration.
I do a fair amount of HPDE events with the Northwoods Shelby Club, so we decided to do a street and track event car.
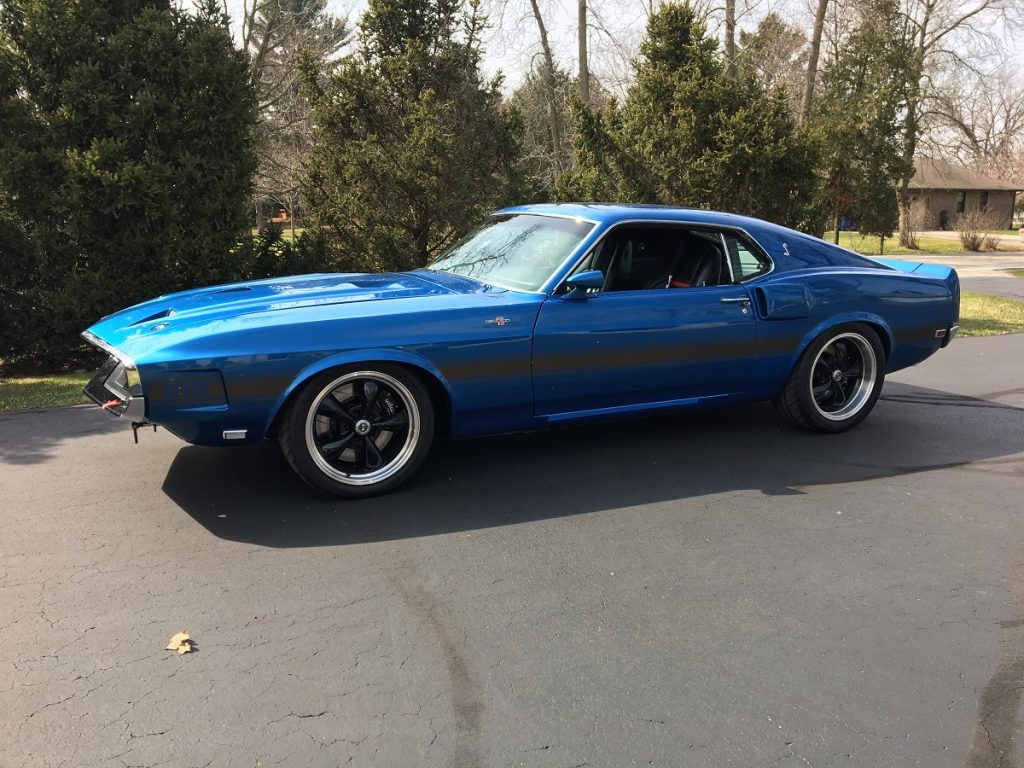
The Shelby has the original 428 block with fuel injection, updated brakes, suspension, and steering. The body and interior are as stock and original as possible — repainted in the original Acapulco Blue. The majority of the build has been done in my garage (except final fit and paint) with the help of some very good friends.
It was a long, sometimes frustrating process, but the GT500 turned out just as I had hoped. I think dad would be proud.
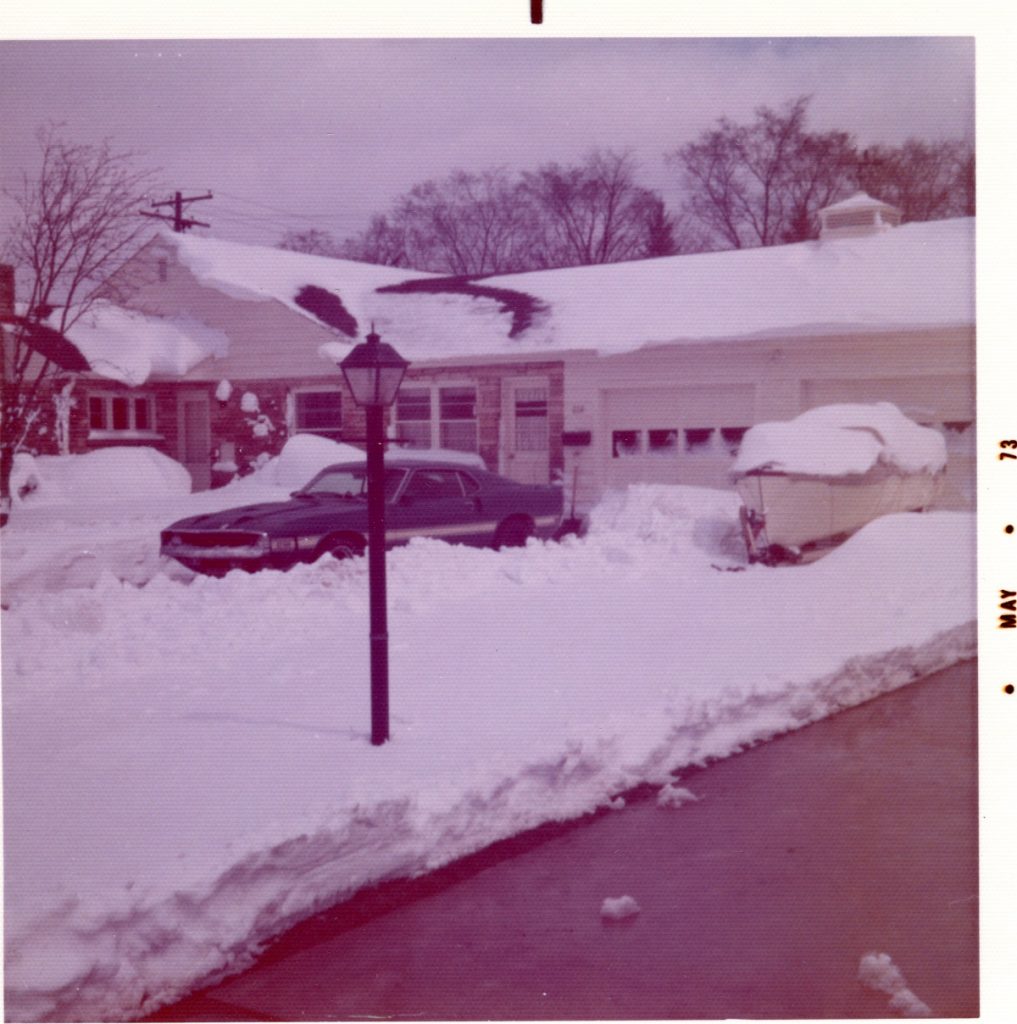
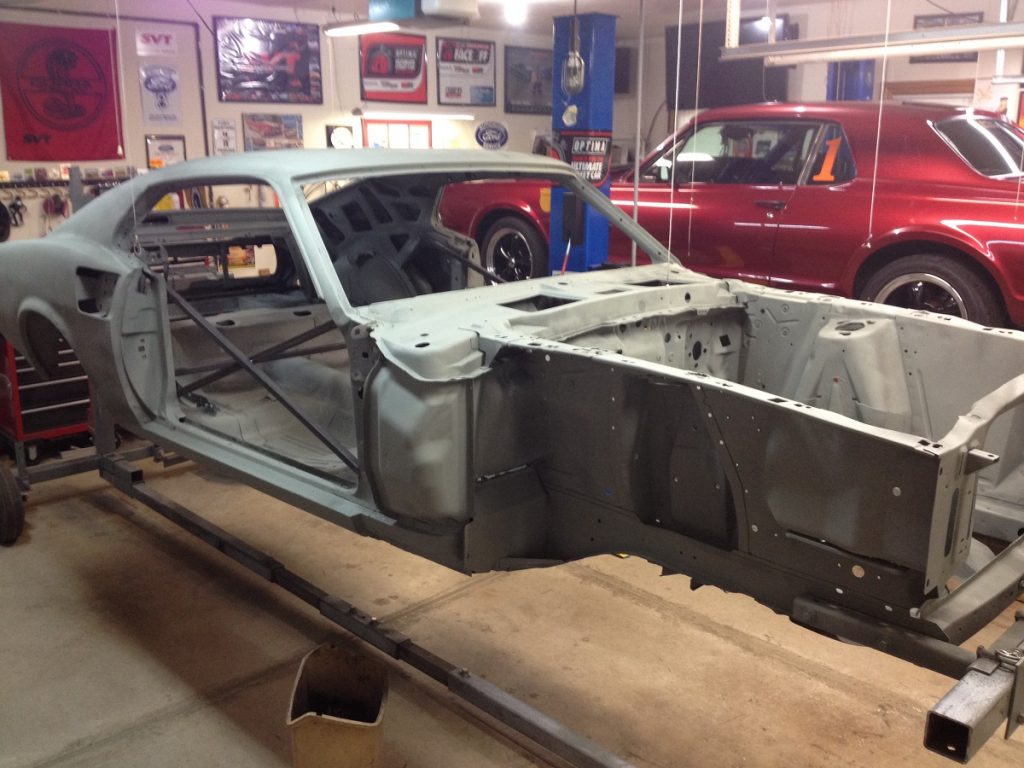
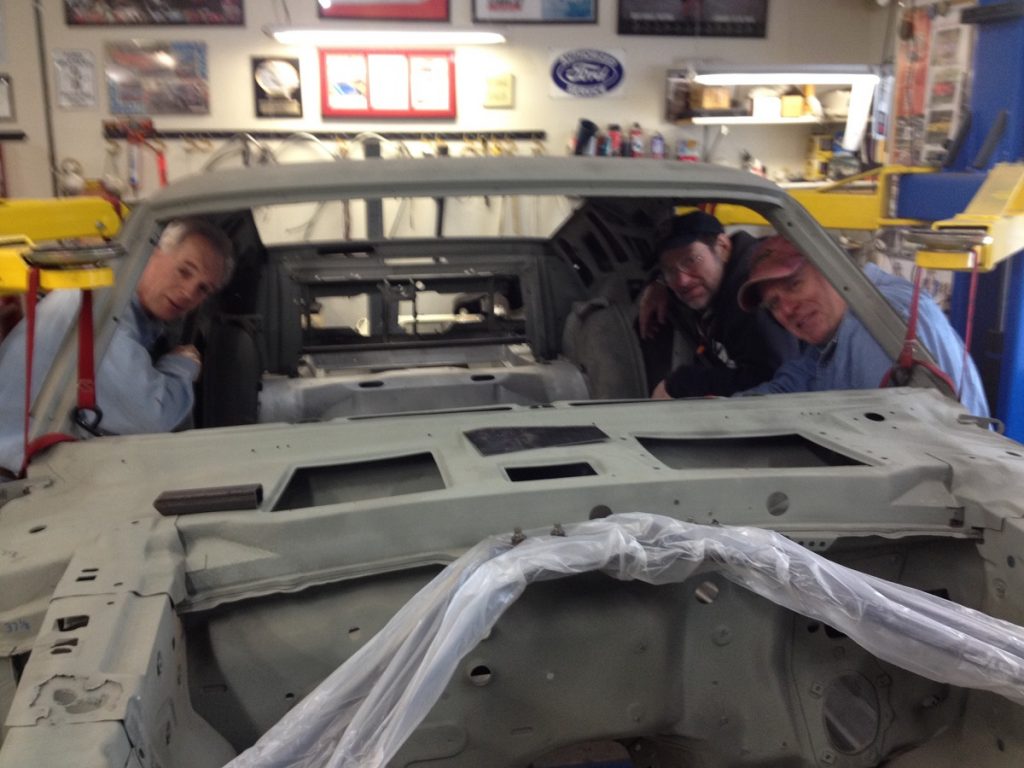
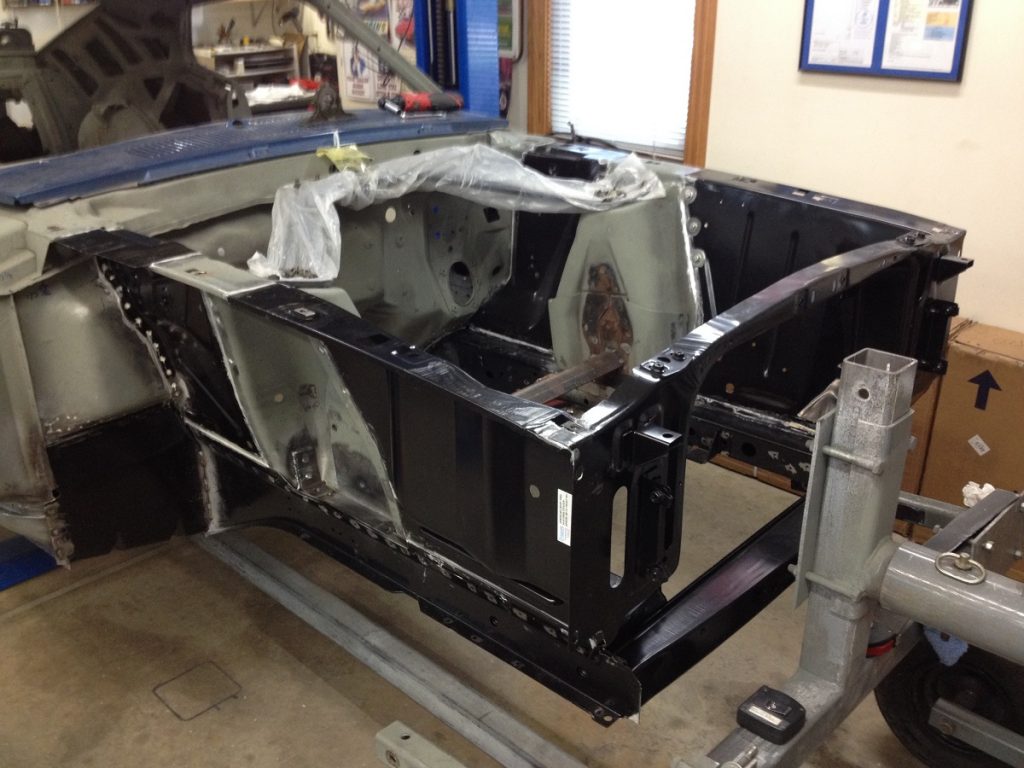
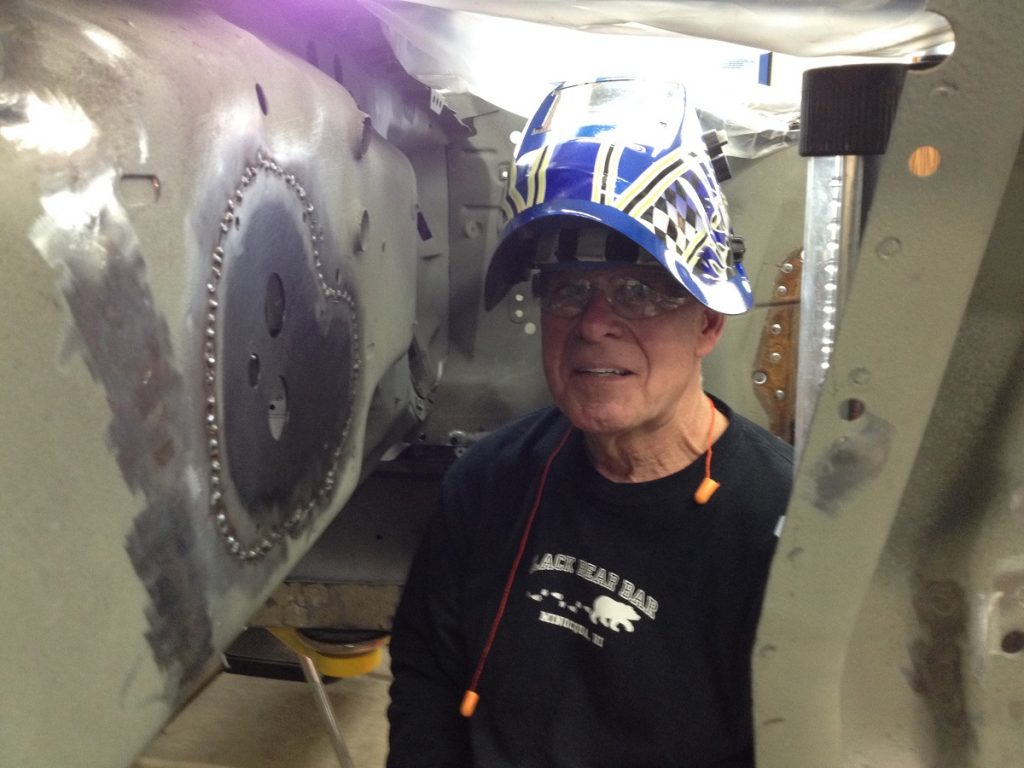
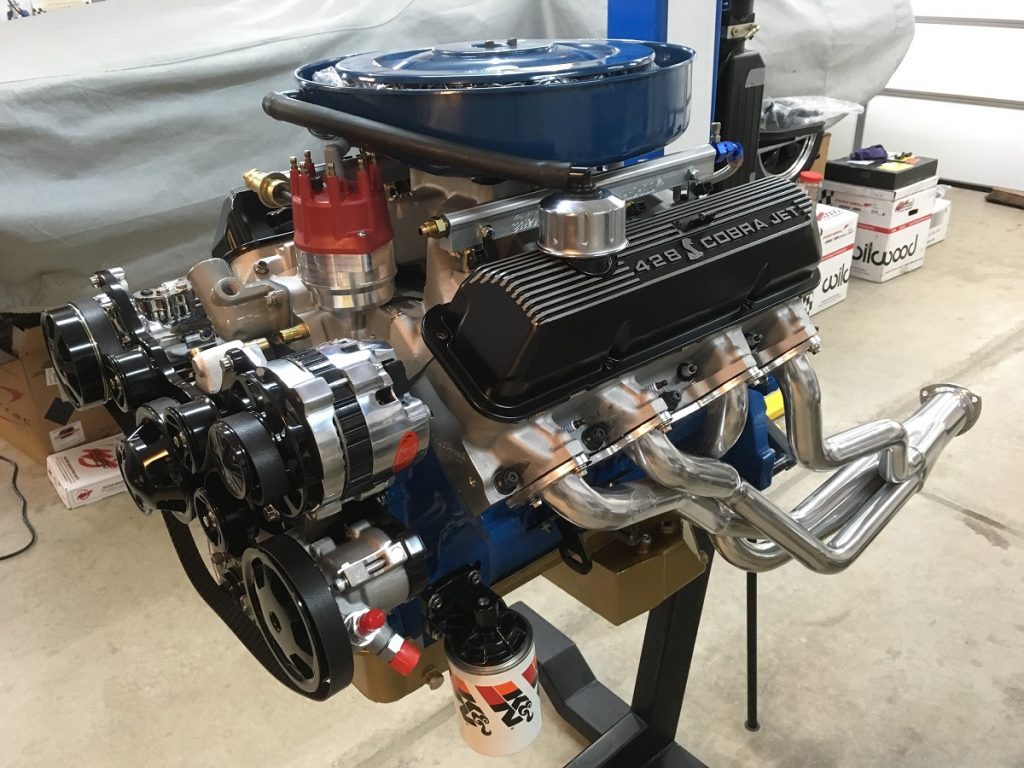
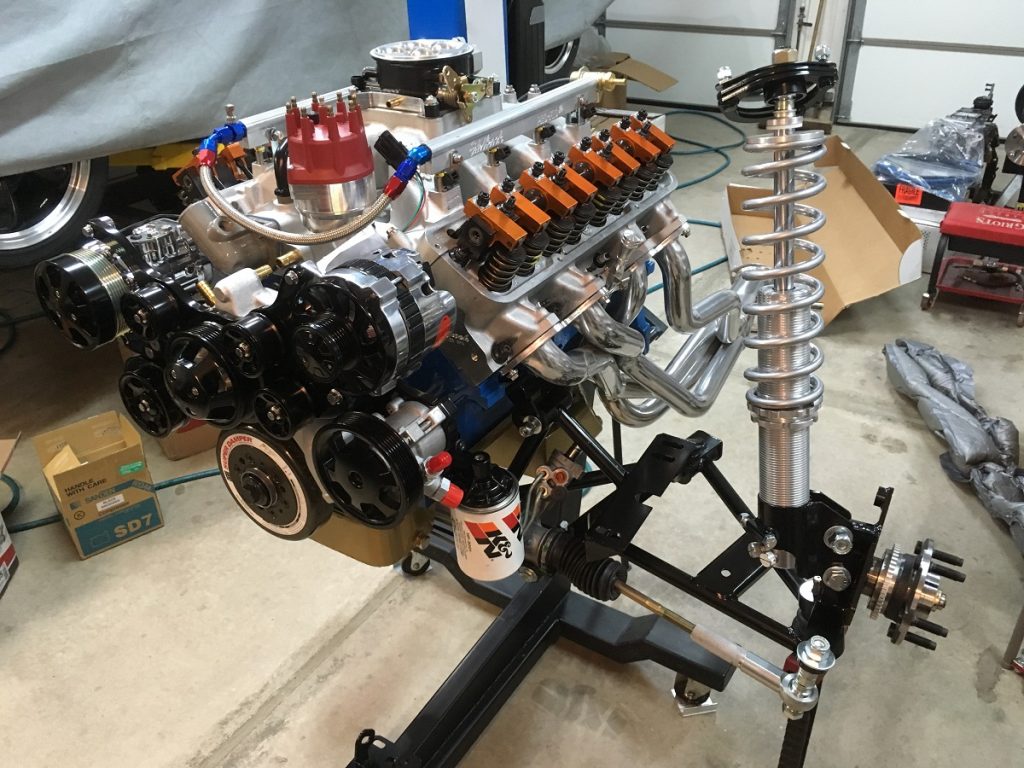
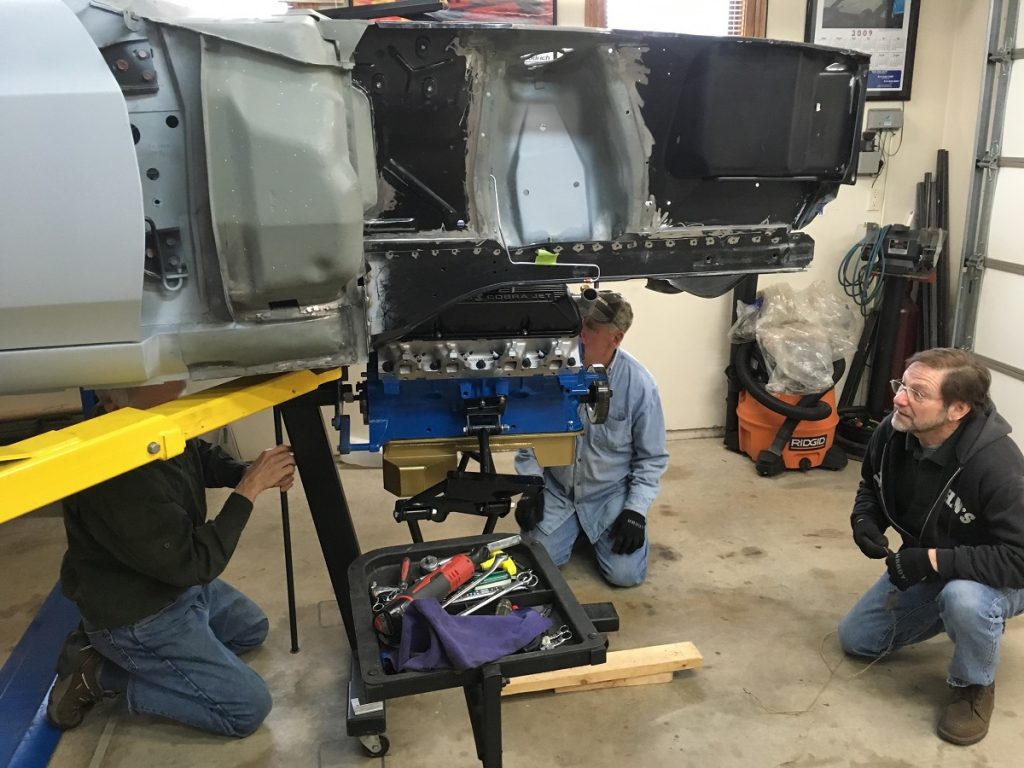
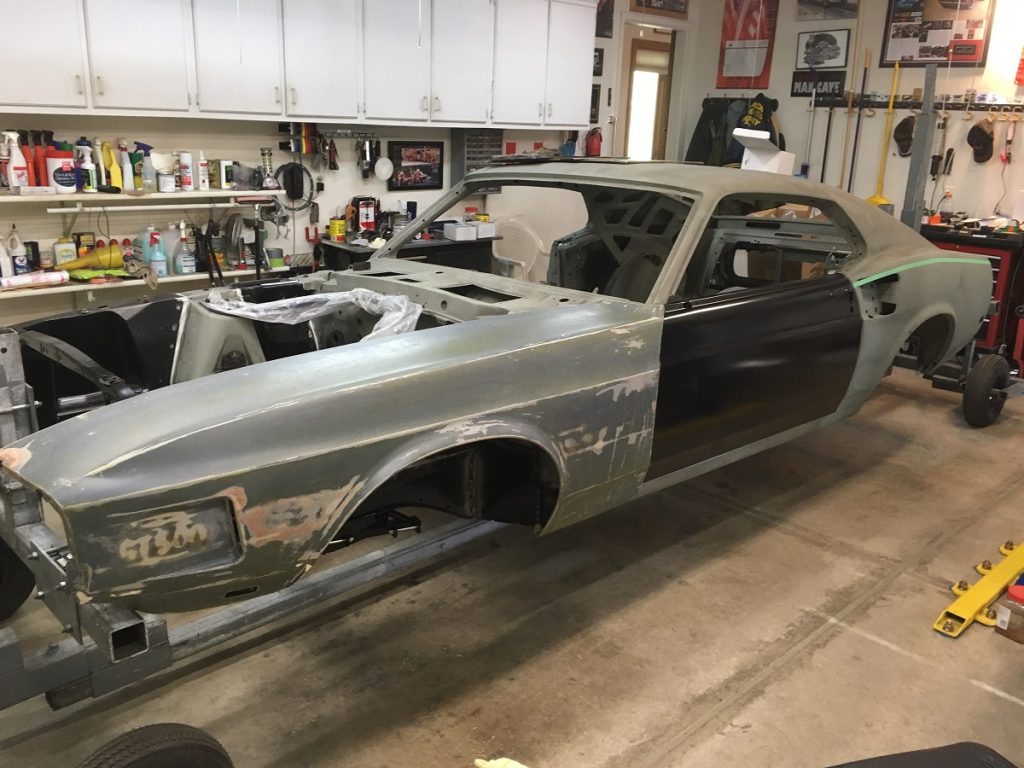
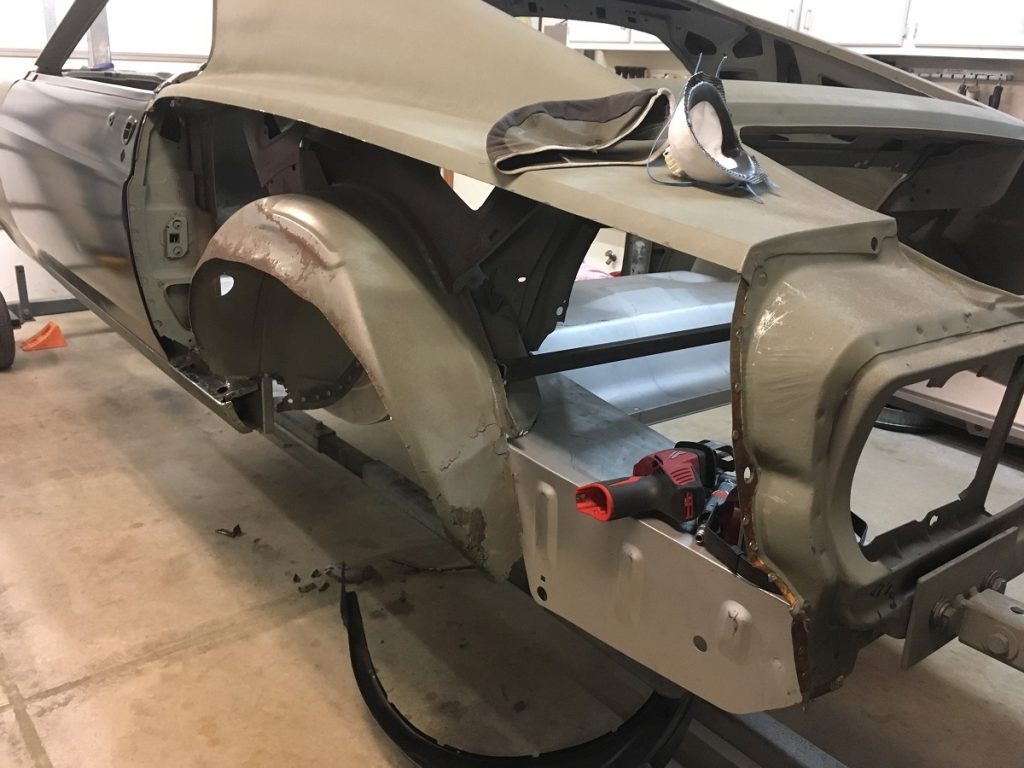
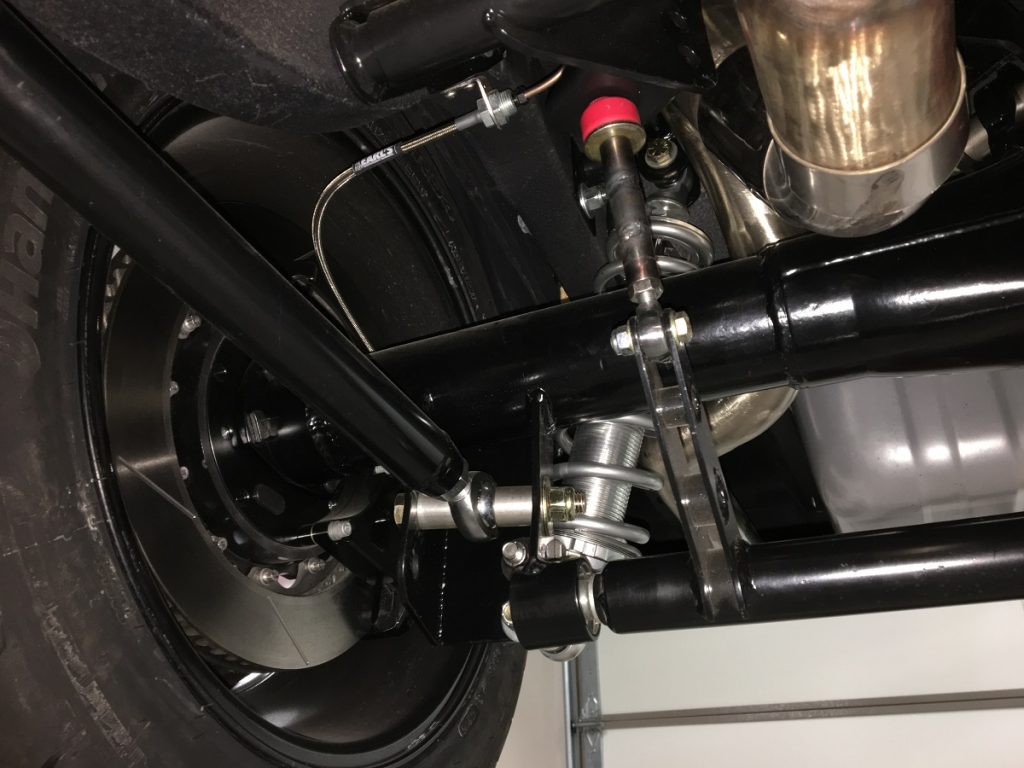
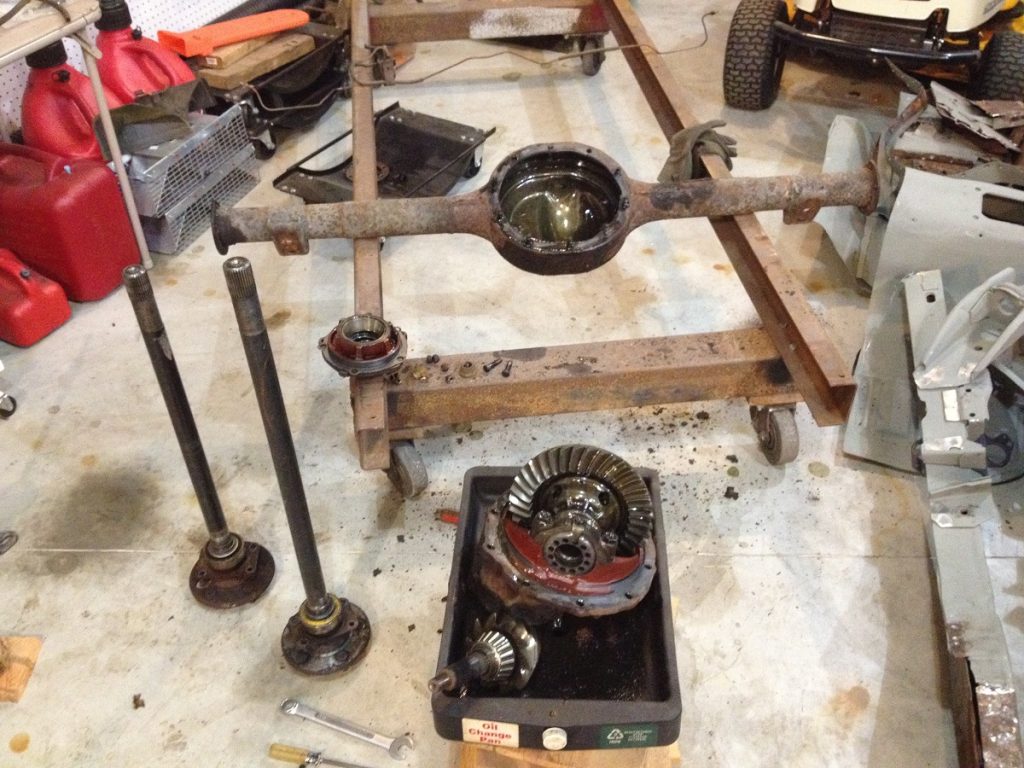
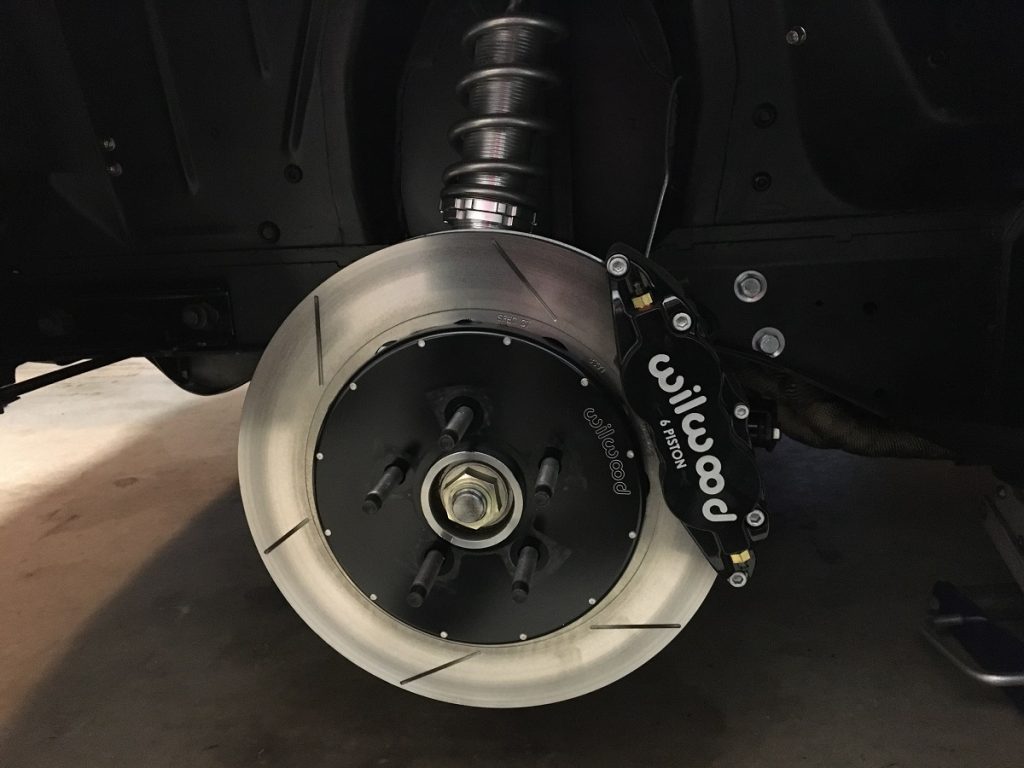
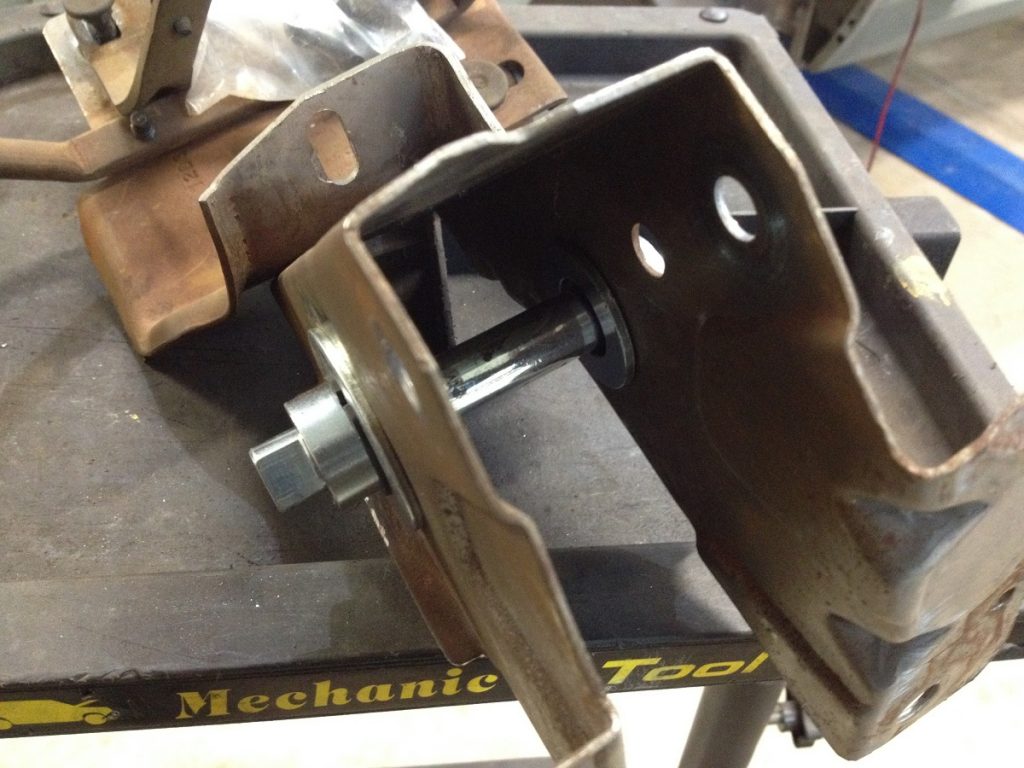
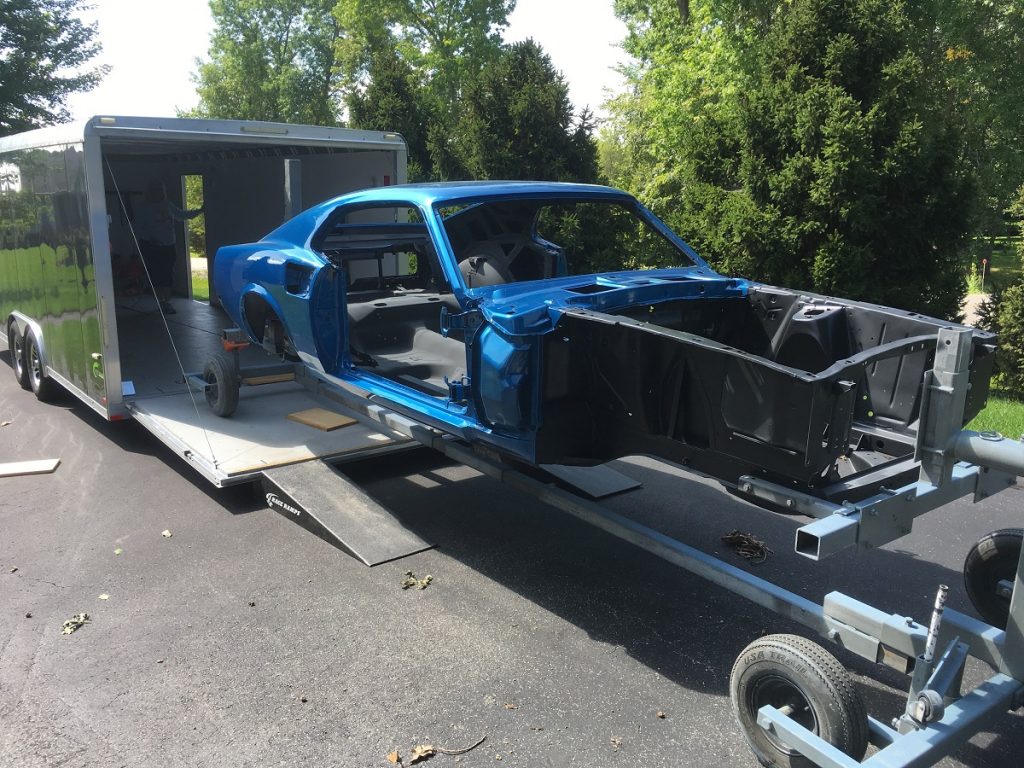
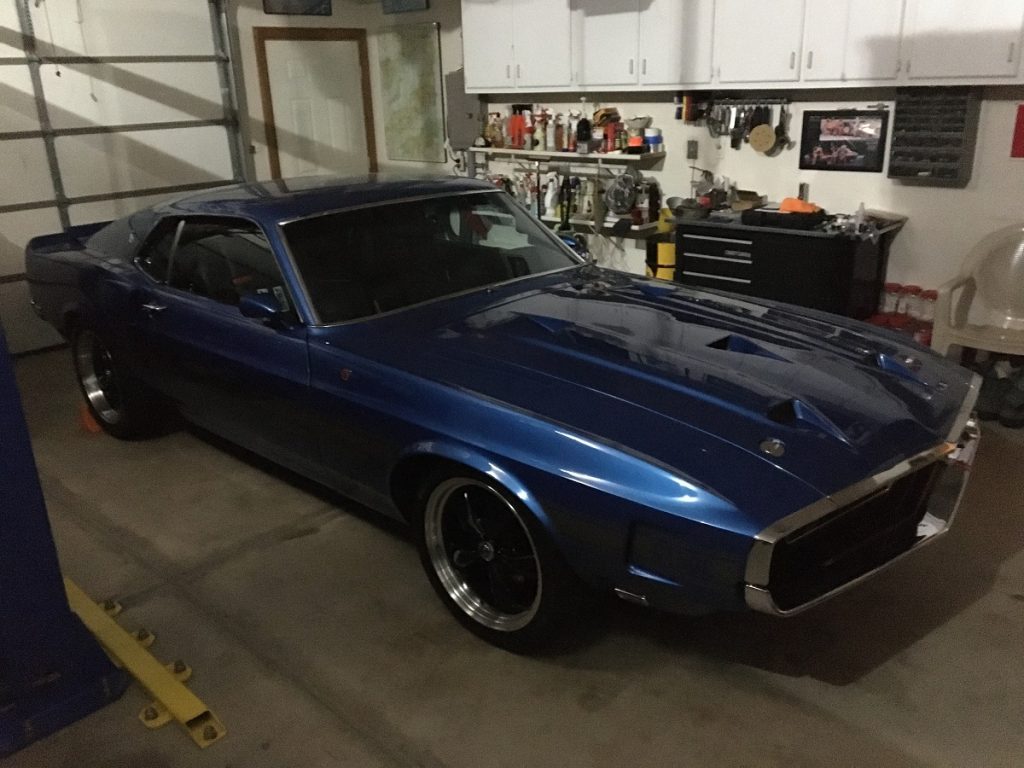
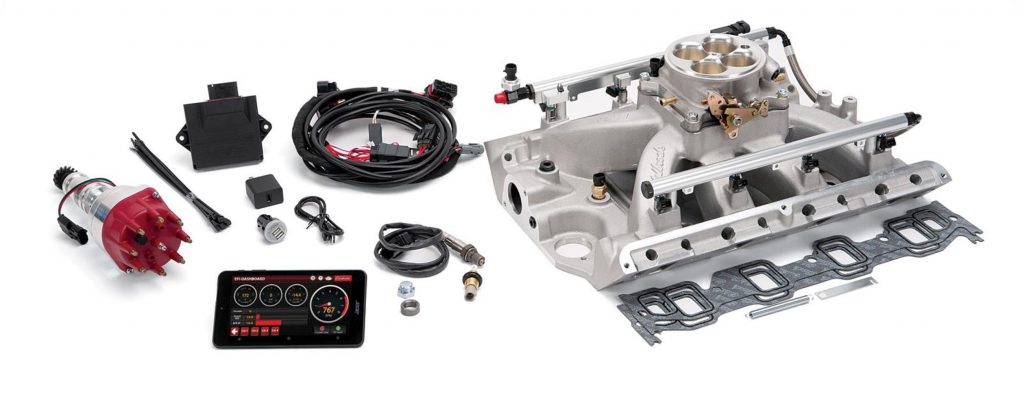
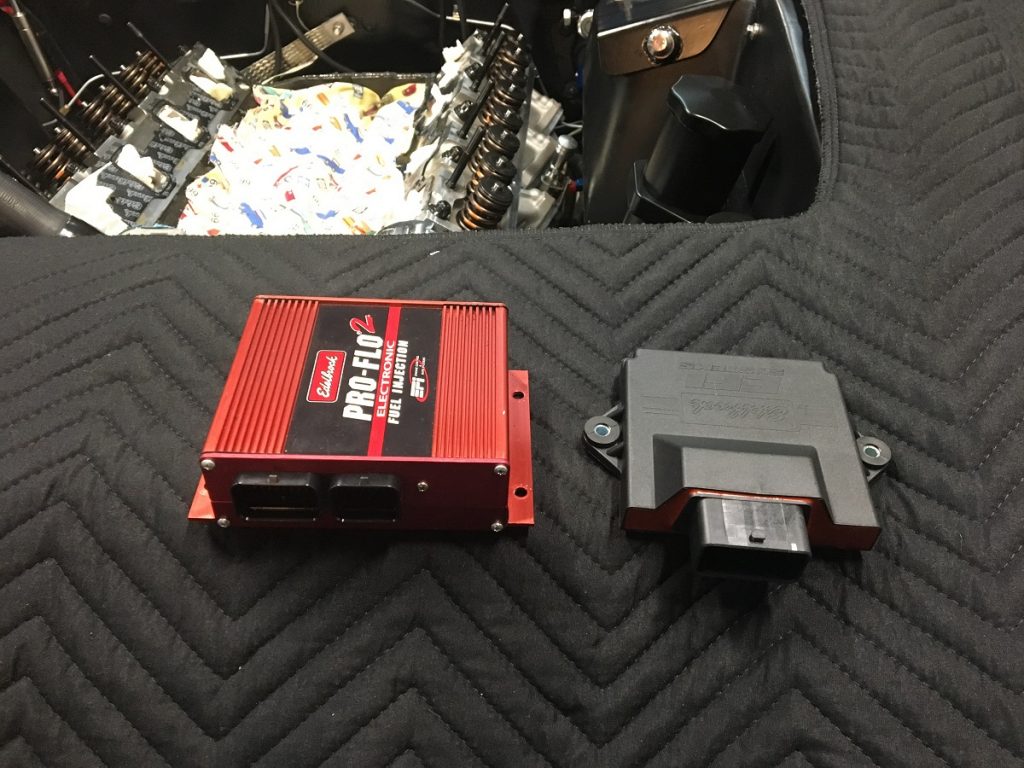
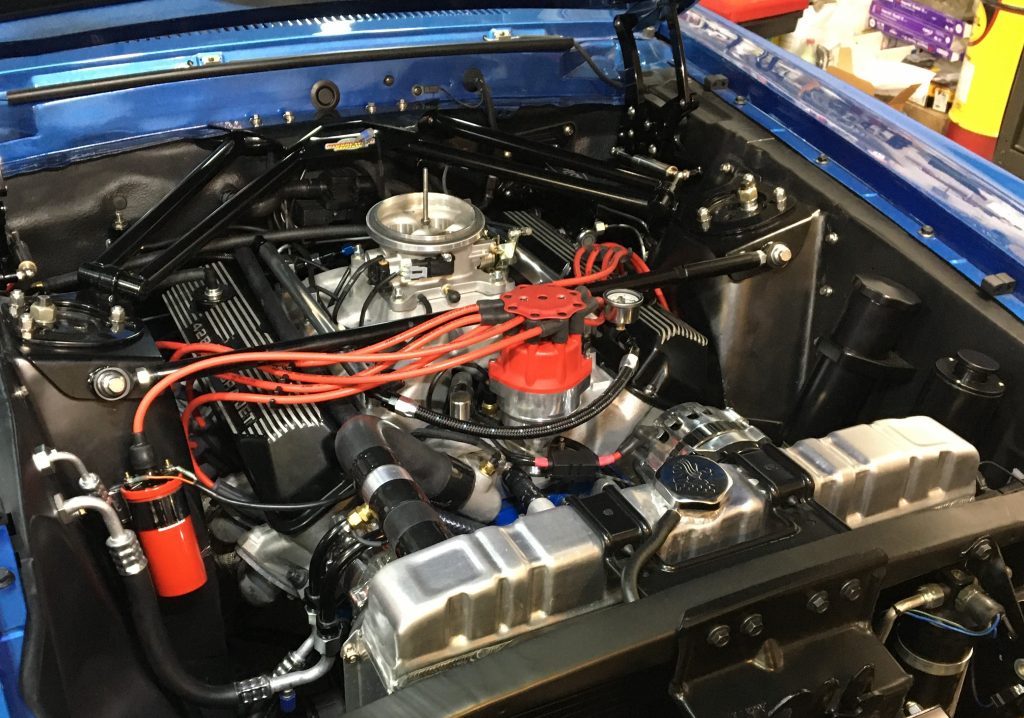
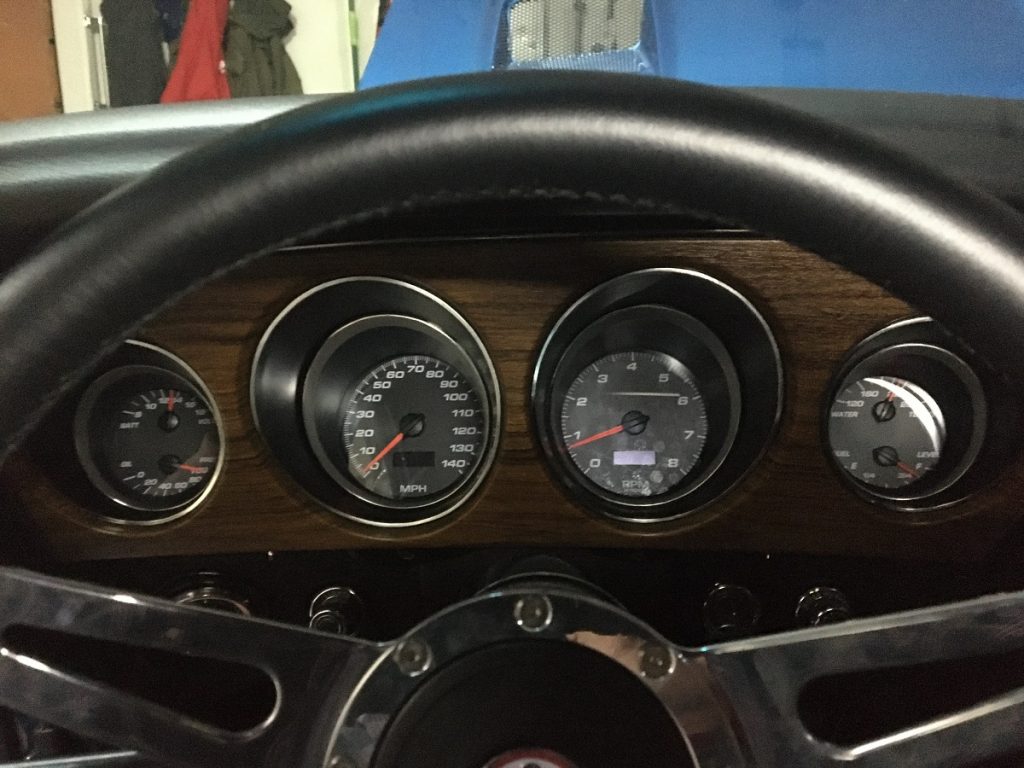
I got a couple of pictures in the mail from Margo (my sister) that I don’t know if I’d ever seen before. This is a picture of our Dad’s Shelby taken in front of my parent’s house in Thiensville (north side of Milwaukee) and underlines why I had to replace lots of bodywork. Looks like he’s got the snow tires on the back. I would have been stationed at Korat Royal Thai Air Force Base in Thailand around this time. (Image/Herb Stuart) This is what the GT500 looked like when the cover was finally taken off in 2010 and my grandson Mitch and I started the tear down. Time and especially the Wisconsin winters certainly took their toll — not to mention the collision with a snow plow. My dad took good care of the interior and it was mostly stored inside with a cover, but the down time took its toll on the engine and two cylinders needed to be sleeved. (Image/Herb Stuart)I disassembled the car before sending the body out to be blasted. I took the right inner rocker panel off and found a nice big mouse nest — and one resident that didn’t make it out. After examining the corrosion damage on the rear portion of the front frame rails, I came to the conclusion that it was best to just replace them, considering the fact that I’m going to track event the car with a whole lot more horsepower. (Image/Herb Stuart)When the body was prepped for the new floor, my buddies (left to right) Rick, Curt, and Geno came over to get it put in. Who knew that four old farts could have so much fun working in the shop? (Image/Herb Stuart) The radiator support and fender aprons got a test fit-up with the fenders. The original shock towers were retained because they have the original VIN numbers and I wanted to keep an original look to the engine compartment. The towers were eventually trimmed for more header clearance. (Image/Herb Stuart) The Vintage Air HVAC unit comes with a patch plate that screws over the heater box hole in the firewall. That wasn’t going to be acceptable, so Geno cut a hole out the size of the patch and we welded and smoothed it into the firewall instead. (Image/Herb Stuart)The 428 cubic inch FE big block got bumped to 462 cubic inches with an Eagle Specialty rotating assembly with forged Mahle pistons. The custom COMP Cams hydraulic roller cam is rated at 228°/234° duration @.050″ and .634/.627 inches of valve lift. The Edelbrock Performer RPM cylinder heads were upgraded with Harland Sharp 1.76 ratio roller rockers and COMP Cams valve springs better matched to the cam profile. (Image/Herb Stuart)The assembled 428 mounted in the AJE K-member and strut suspension unit. We did this before mounting the assembly in the body so we could measure power steering hoses and steering linkage length and check clearances. After trimming the Canton oil pan for the Hooker Super Comp headers, there was plenty of room for the steering without header modification, and the rack and pinion fit with no problems. (Image/Herb Stuart)Rick, Geno, and Curt helped me get the engine/K-member assembly in the car. We quickly discovered that installing the headers with the stock shock tower reinforcements was irritating at best. We also discovered the engine sat too high in the K-member, so the motor mounts were modified to bring the engine down to within 3/8″ of the rack and pinion. The combination of the lowered engine and a transmission crossmember spacer provided the correct 5-degree tilt and location to accommodate the stock air cleaner, Shelby cold air hood scoop system, and Edelbrock EFI. (Image/Herb Stuart) Here you can see how the shock towers were modified for more room. While the towers could have been angled back, I chose to use 11-gauge flat plate attached to the subframe for more strength and less flex. Add in the Detroit Speed subframe connectors, custom Monte Carlo bar by Scott Laakonen, and Global West export brace, the front end should be as solid as a 1969 Mustang unibody can be without a full cage. (Image/Herb Stuart) Out came the engine and on went the fenders and driver’s door in preparation for the quarter panel and wheelhouse repair/replacement. At this stage the new torque boxes are welded in, the K-member is fitted, and the floor/firewall patches are panel-bonded. (Image/Herb Stuart)I wasn’t sure if the Detroit Speed wheeltubs would work with the original fold-down rear seat, and I wanted the interior to be very close to stock. I ended up keeping the stock wheeltubs—for now. (Image/Herb Stuart) Probably the biggest challenge we faced was locating the AJE coilover rear suspension at the desired ride height while maintaining an acceptable pinion angle and instant center. With the help of fabricator Scott Laakonen, we modified the rear suspension frame to relocate the sway bar links and allow the axle to ride higher in the chassis. We also changed the axle shock mount to center it in the wheelhouse. Thanks, Scott! (Image/Herb Stuart)I pulled apart the original 9-inch rear axle to see what could be saved. The nodular iron third member and 31-spline axles were good, but I decided to get a new housing due to rust on the old one. Disassembly of the third member found chipped gears and the Traction-Lok differential in need of rebuilding. I ordered a set of Richmond 3.50 gears, a Detroit Truetrac 31-spline differential, and a Ratech installation kit from Summit Racing. (Image/Herb Stuart)I had the new John’s Industries rear axle housing modified by AJE for their rear suspension package. Here it is with the rebuilt gear carrier and Wilwood Superlite 4R disc brakes. Right next to the axle is the American Powertrain TK600 five-speed transmission. (Image/Herb Stuart) Up front is a Wilwood Superlite 6R disc brake setup with 15-inch rotors and six-piston calipers. Stopping power a Shelby owner could only dream of in 1969. (Image/Herb Stuart)When I built the Cougar I installed a hydraulic throwout bearing, Ram twin-disc clutch, and Scott Drake swing arm roller bearing conversion. The clutch was as smooth as silk with a whole lot less pedal pressure required. The Shelby got an American Powertrain Atomic twin-disc clutch, a Hydramax hydraulic throwout bearing, and the Scott Drake bearing conversion. Don’t miss the opportunity to do this modification! (Image/Herb Stuart)It was a big day when the Shelby body came back from Jim Stoll’s shop with a fresh coat of black epoxy primer, Lizard Skin ceramic insulation, and Acapulco Blue paint! (Image/Herb Stuart)Skipping a ton of steps and the Shelby is finished, waiting for its first test drive… (Image/Herb Stuart)…which did not go quite as planned. To make a long story short, on the dyno the 428 would go excessively rich and lose power above 5,000 RPM, and there was valve clatter on deceleration. The stiffer valve springs from COMP Cams solved the clatter problem, but the power issue remained. On the street I had idle issues; the engine would fall flat on its face when I gave it some throttle. (Image/Herb Stuart)The only thing we could think of was we had an EFI tuning issue. The Edelbrock Pro-Flo 2 system was the best available when we originally installed it. Admittedly I am no EFI expert, but we found the software hard to use and could not set up a proper tune. Fortunately, Edelbrock recently introduced the Pro-Flo 4 EFI system, which promised to be much more user-friendly. (Image/Herb Stuart)There is virtually nothing from the Pro-Flo 2 system that can be reused with the Pro-Flo 4. The ECU, throttle body, harness, and just about everything else has been upgraded. My friend Curt noticed the intake manifolds for each system share the same casting number. We did some measuring and damn if they weren’t the same. If you’re not familiar with Ford FE engines, the valvetrain has to be taken apart when intake manifolds are changed because the pushrods go through the manifold, not the heads. If I had known the intakes were the same, I would have saved myself a lot of unnecessary work. Live and learn. (Image/Herb Stuart)The Pro-Flo 4 ECU is smaller than the Pro-Flo 2 unit, and it has one harness plug instead of two. The new wiring harness has much larger plugs, so the firewall was modified to allow the harness to pass through. The fuel system had to be changed to return system with an adjustable pressure regulator; the PF2 came with its own regulator. (Image/Herb Stuart)Another upgrade I made was installing the New Vintage USA 1969-70 Mustang Gauge Package in the original gauge bezel. Getting rid of the mechanical speedometer is a plus, as is having an accurate tachometer and temperature gauge. I also like the vintage appearance. (Image/Herb Stuart)On a gorgeous Sunday in March, I grabbed the opportunity to drive the Shelby for the first time with the Pro-Flo 4 installed. I’m VERY pleased with it so far—it’s got some grunt! The idle is spot on and throttle tip-in is much, much better. The WiFi for the Pro-Flo 4 system setup and control is eons ahead of the Pro-Flo 2, and it’s so much easier to modify and view the tune features. There’s a few issues that need to be addressed, but assuming the Pro-Flo 4 learning capability is solid, the engine will be more than just fine. Bring on the late model stuff at the track! (Image/Herb Stuart)
Herb, It was an adventure getting to watch your dream come true. Your project, the nicest looking 69 Mustang Shelby Cobra GT 500 on the road today. I was so lucky that you allowed me to come over and help you from time to time. You are an excellent teacher and mentor. Your attention to detail, parts of the rebuild that most guys will never see, was remarkable.
Geno
[…] Editor’s Note: In 2019, our friends at Summit Racing posted some parts combos for Herb Stuart’s 1969 Shelby GT500 Mustang. The 428-powered car has been in the Stuart family since […] Read full article at http://www.onallcylinders.com […]
Well what else to say is Impressive and perfect, but I don’t want to be party water for this project. But with money everything is possible, I would like to know how much the start-up cost was for this project .. !!
Great job … building a 65 fastback and will be using AJE front k member as well… also will be running pro flo 4 on sbf … would appreciate talking with you… thanks John Cortina


Herb, great job, it’s beautiful. I’m doing a lot of the same with my ’70 RS Z28. I have a 427 small block going in, I’ll race you when I’m done!
Jeff
Have fun building Jeff!!!
Sign up to run with us (All makes tolerated!): http://www.nwshelbyclub.com/
Very impressive work done on a very impressive car. You should be proud just as I am to call you my friend…….along with those other 3 knotheads!
Herb, It was an adventure getting to watch your dream come true. Your project, the nicest looking 69 Mustang Shelby Cobra GT 500 on the road today. I was so lucky that you allowed me to come over and help you from time to time. You are an excellent teacher and mentor. Your attention to detail, parts of the rebuild that most guys will never see, was remarkable.
Geno
[…] Editor’s Note: In 2019, our friends at Summit Racing posted some parts combos for Herb Stuart’s 1969 Shelby GT500 Mustang. The 428-powered car has been in the Stuart family since […] Read full article at http://www.onallcylinders.com […]
[…] Read full article at http://www.onallcylinders.com […]
Well what else to say is Impressive and perfect, but I don’t want to be party water for this project. But with money everything is possible, I would like to know how much the start-up cost was for this project .. !!
Great job … building a 65 fastback and will be using AJE front k member as well… also will be running pro flo 4 on sbf … would appreciate talking with you… thanks John Cortina