Editor’s Note: Perhaps the only things Travis Jones loves more than his 1986 Monte Carlo SS are autocross courses and a good challenge. That’s why Travis is on a mission to transform his Monte Carlo from an underpowered, ill-handling daily driver to an Autocross hero. A self-described “GM guy through-and-through,” Travis is a regular on the site OppositeLock, has documented his project on his Instagram page (@sslow6.0), and will give us a first-person account of his build here as a guest writer.
Travis has owned the Monte Carlo since high school. Although he’s thought about selling it from time-to-time, Travis has held on to it for sentimental reasons, even though the car has often sat idle. After his girlfriend inspired him to try Autocross for the first time, Travis started to look at the Monte in a whole different way.
“I became obsessed with taking a 1980s boat and making it handle,” Travis said.
We’ll let him pick up the story from here:
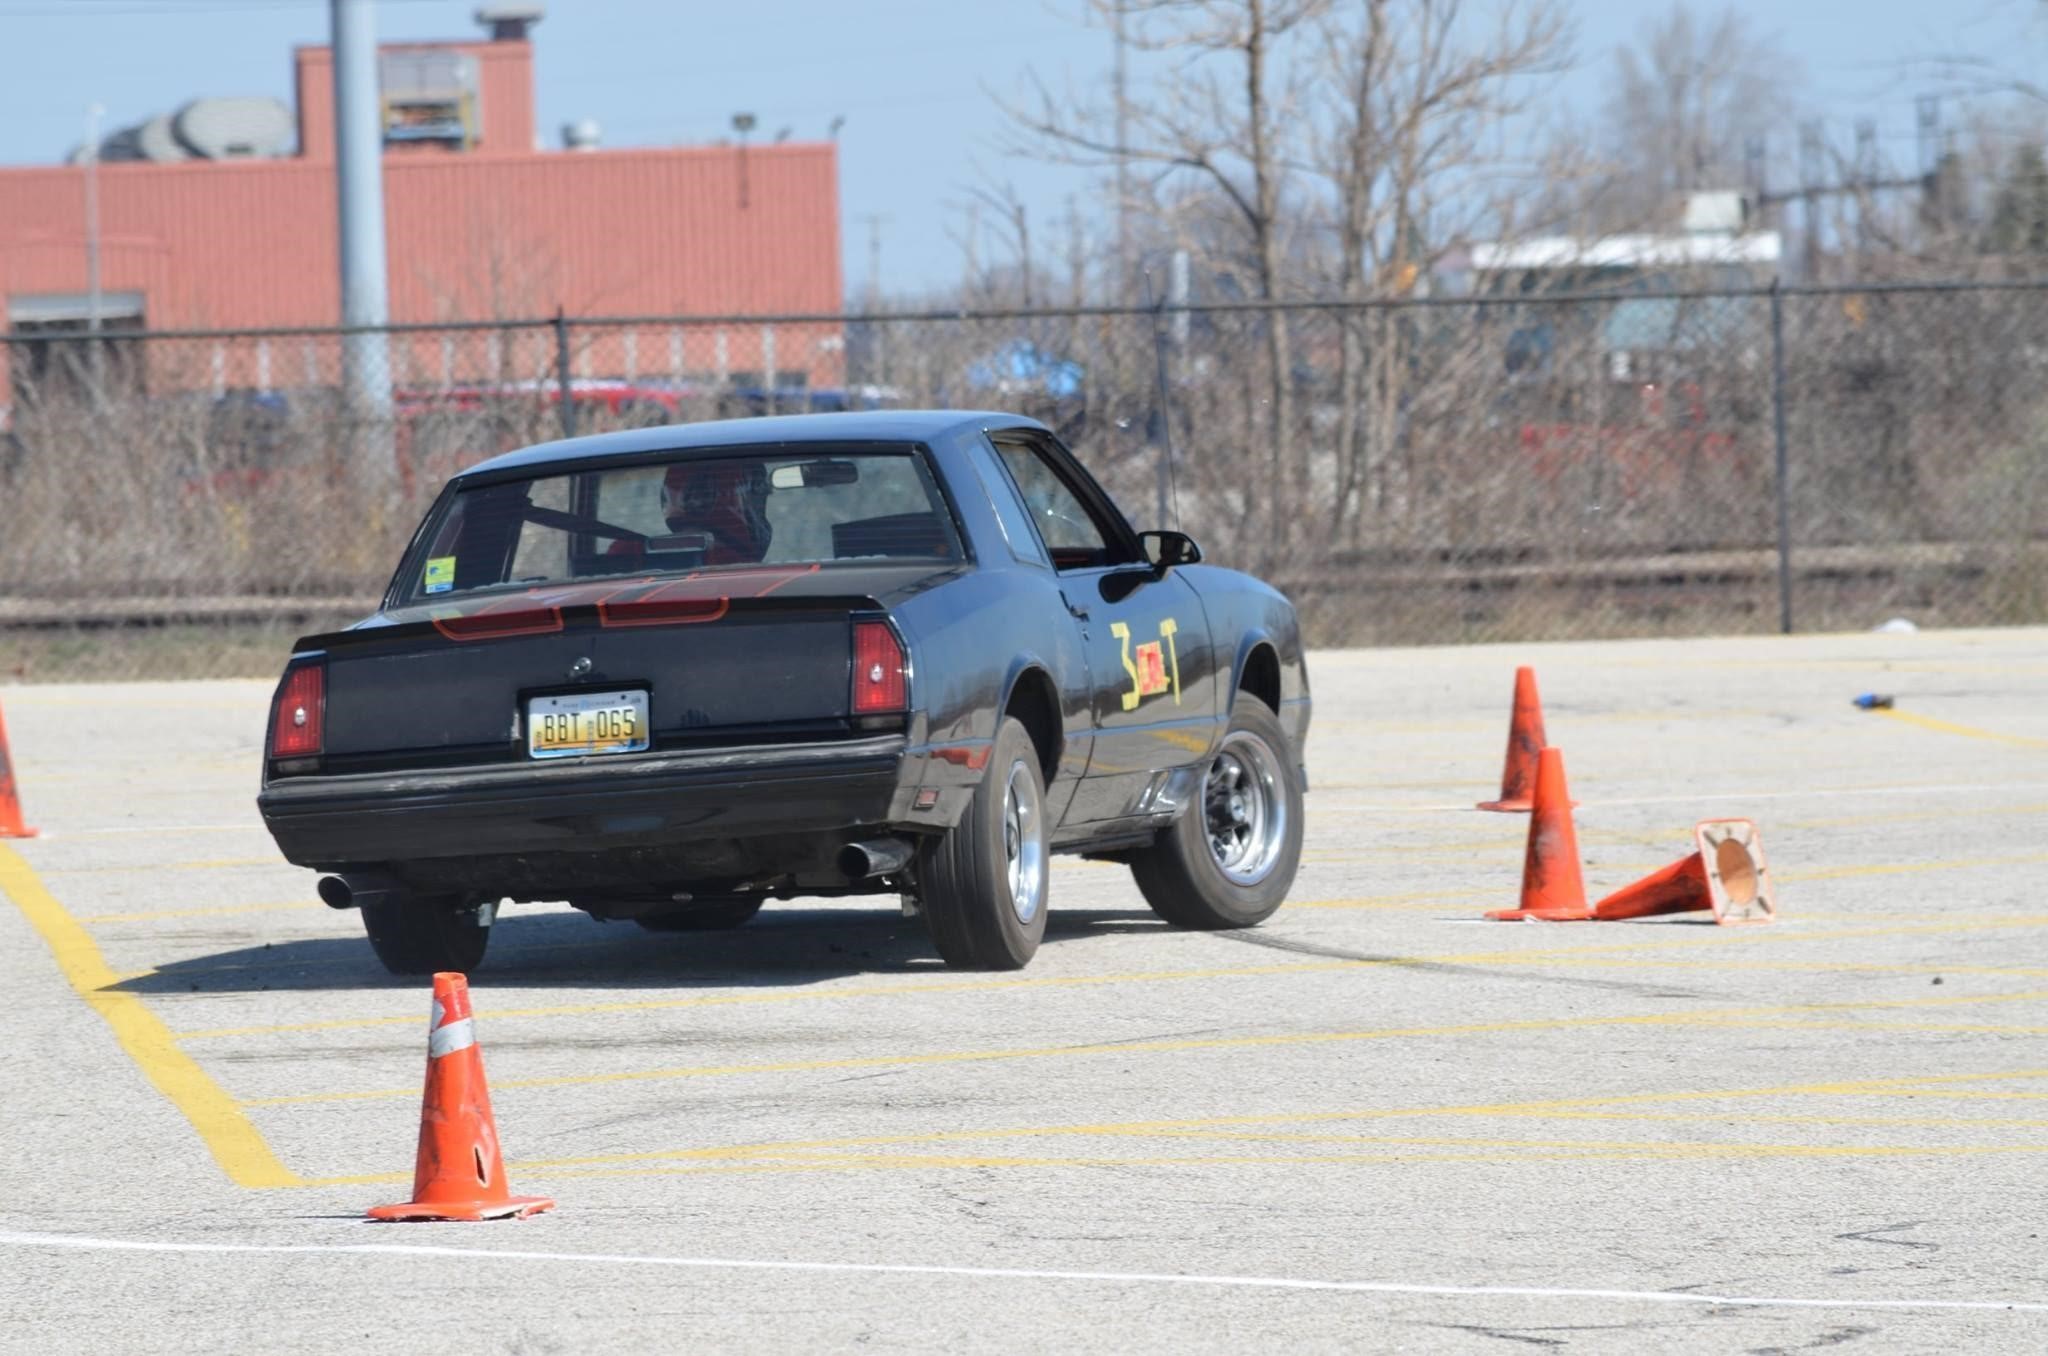
Race day came and went, and I learned several important things.
First, there is no one “silver bullet” to make the car an autocross monster.
Second, thousands of dollars of suspension upgrades don’t mean much if you’re on 215mm tread width, 480 treadwear tires on 15-inch wheels.
There were also things I wish I had known when I bought my suspension components. The QA1 kit was a good value—it’s extremely well made in the USA—but the spring rates offered for my car were limited and affected my ride height adjustability.
When you toss coil-overs on a car, you expect a good range of adjustment, but with the 550-pound springs, the car sat higher than it did on the factory springs. I had to lower the coil-over adjustment to the bottom few threads to get the car to roughly a stock ride height. You can use drop spindles with this kit if you want the car to sit lower than stock, but the spindles do offer some limitations when it comes to suspension geometry on G-bodies—especially if you run a lot of caster in your alignment.
Also, the QA1 rear coil-overs bolt into roughly the same location as the factory shocks. So, if you want to run disc brakes, the caliper will interfere with coil-over spring, and you’ll need to use a relocation bracket. I bought some UMI brackets that seem to work well.
I opted for a Cardone remanufactured steering box, but soon realized I would have been better off putting my money toward a new Borgeson 800 Series Power Steering Box. Unfortunately, the Cardone steering box was dead from the box and would end up taking two power steering pumps with it. And even after I exchanged it, I decided the steering feel wasn’t right for me.
Still, I’m happy with the suspension, and the adjustable shocks are fantastic for dialing in the car. If you do get adjustable shocks, make sure you carry a notepad in your glovebox to take notes on your different setups. I have three different shock setting combinations jotted down: a “comfort” setting for navigating SE Michigan’s rough roads, a “fast course” setting, and “technical course” setting.
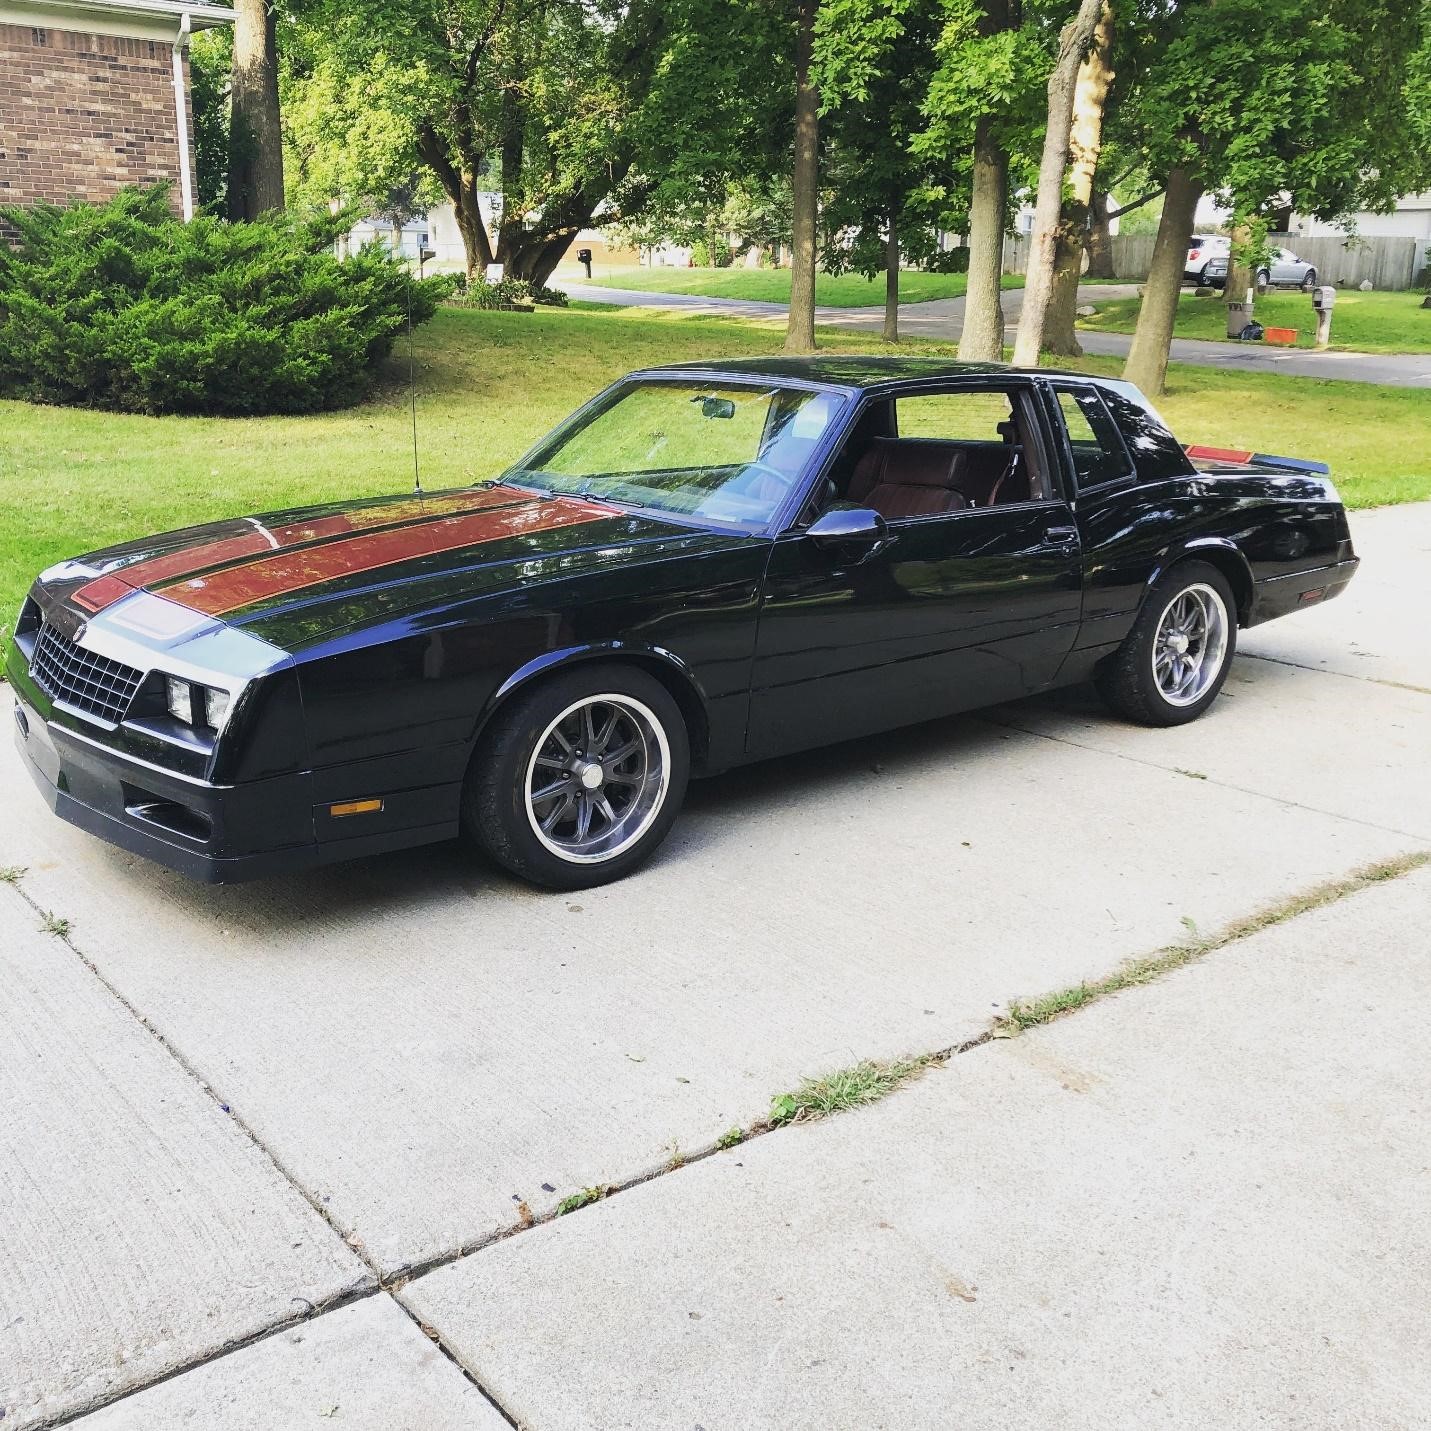
Like I said earlier, good wheels and tires are essential. After my first outing with the new suspension, I ordered a set of 17×8 U.S. Mags Rambler U111 and some Bridgestone RE-71R tires in 245/45/17. Looking back, 18’s might have been a better choice for future brake upgrades, but I prefer the look of 17-inch wheels on my car as opposed to 18s.
Here’s the car on the Ramblers:

The last bit of suspension and chassis work I did was to install the UMI Performance Front Reinforcement Braces.
Honestly, for something as simple as a brace, this made a huge difference in the performance and feel of the car. That’s because the G-body frame isn’t particularly rigid, especially if you have 30-year-old body mounts like I do, and going over rough roads or loading the chassis in a corner can cause the front frame rail to move vertically as the whole frame flexes. Since the steering box is on this portion of the frame, its relative movement results in slop and inconsistency in the steering.
Another issue inherent to the A-body and G-body platform is the triangulated four-link rear suspension setup (the Fox body Mustang also uses a similar setup). In a triangulated four-link live axle, the lower two links converge in on the chassis, meaning the axle mounting points are further from the centerline of the vehicle than the chassis mounting points. On the upper links they are the opposite, the chassis side mounting points are further from vehicle centerline than the axle side mounting points, the “ears” on top of the differential.
This design was meant for comfort and cost effectiveness, not traction and carving corners. The converging links do two things, first, they provide suspension travel in the vertical direction. Second, they do their best to locate the rear end under the center of the car. The problem is that when they are compressed or ride height is lowered they bind up.
The factory solution to avoid bind is to include control arms that are soft in torsion and have large soft rubber bushings. When you install boxed or tubular aftermarket control arms with stiff Polygraphite or Delrin bushings, triangulated four-links have a bad habit of lifting the inside rear tire around a tight corner, but typically launch very well for drag racing.
One solution to avoid lifting the inside tire around a corner is to run an extremely high rate front sway bar, and no rear sway bar with very stiff springs. This can lead to a less comfortable ride than someone might want for a Pro-Touring or multipurpose car. There are control arms with specialized ends, like UMI’s Roto-Joint, Currie’s Johnny Joint, and Ridetech’s R-joint, as well as spherical rod ends all help mitigate bind, but that bind is engineered into the system to help locate the rear axle under the center of the vehicle.
Bottom line is the triangulated four-link is a compromise.
If you understand the four-link’s function and limitations you can still make your car very quick with one. That being said, in the future I’m going a different route and plan on using a three-link style rear suspension (similar to an S-197 Mustang) with a narrowed version of the 8.8 rear end found in a 2013 Mustang GT.
Be sure to keep your build goals realistic and potential upgrade paths open when you plan your build.
For instance, does it make sense to buy a set of trick double adjustable shocks when what you want down the road are coil-overs? You’re probably better off buying something like the Bilstein B6 shocks for now and using them until you’re ready for coil-overs.
Based on my experience, I recommend upgrading the wheels and tires first if you’re starting from scratch. I’d advise either 17s or 18s, depending on your preference, with sticky tires like Bridgestone Potenza RE-71Rs, BFG Rivals or Kuhmo V720s. I would also suggest the aforementioned UMI braces, a larger front sway bar like the Ridetech MuscleBar or the QA1 52877 1 ⅜-inch hollow bar, and a body mounted rear anti roll bar like Hellwig’s HEL-55809 or UMI’s UPI-3044-300-B.
The body-mounted bars seem to add a higher degree of roll stiffness control and adjustment than the bars that mount between rear control arms. After that, I go with a set of good shocks, like the Bilstein B6 series, and a more aggressive than stock alignment. The nice thing about suspension upgrades are that you can often do them one piece at a time and see incremental progress in the performance of your vehicle.
Another seemingly weak point of the G-body are the 10.5-inch disc brakes that are on the front of the car. A quick and easy upgrade to the front brakes are Metric calipers with 2.75 inch pistons like Wilwood GM Metric Series Brake Calipers, a stainless steel brake line kit like Russell Street Legal Brake Line Kits, good pads like Hawk HP Plus, and DOT 4 synthetic fluid.
This will be more than enough for most autocross situations, but might leave you wanting more at a track day or HPDE (High Performance Driving Event).
I ran a similar setup for a while and then decided to go a little further and design a custom front setup with a friend of mine who is a brake systems engineer at Fiat Chrysler. This setup used AC Delco factory replacement Cadillac ATS Brembo calipers (ADO-172-2777)/(ADO-172-2768) and Raybestos C7 Corvette base 12-inch brake rotors (AGB-581612R)/(AGB-581612).

When I installed these new brakes, I installed them on new Belltech 2-inch drop spindles (BEL-2100)and QA1 taller upper and lower ball joints (QA1-9029-205)/(QA1-9029-209) to get the ride height of my car where I wanted it.
Here’s the car after the brake kit and drop spindles with the ride height set:
For the rear brakes, I considered pulling the trigger on a Right Stuff Detailing Rear Disc Conversion Kit (RSD-AFXDS78): however, once I made the decision to change direction with the 8.8 rear end and three-link, I didn’t want to spend any more money upgrading a 7.5-inch ring gear 10-bolt seeing as I had already rebuilt it once as an emergency stopgap.
I’ll tell you that story another time.
Nice looking Monte Carlo, Travis. You might enjoy reading Mark Savitske’s book, “How To Make Your Muscle Car Handle”, if you haven’t already. It explains the GM G body system pretty well along with its limitations and fixes to improve them – drastically. Have fun!
Thanks James! It’s been a long road to get it this far. I’ve read Mark’s book. It’s pretty much required reading when dealing with any old muscle car.
Travis, Great story on your car. It’s obvious you have spent quite a bit of time learning how your system works. I’ve spent the last 25 years working on my ’65 Chevelle which has a very similar triangulated rear four-bar system. As you have learned, a big spring rate in the front and very light in the rear works. Also look at spherical bearings from Global West that will virtually eliminate rear suspension bind. When we did that to my car – it now is a completely different animal on the autocross and on a road course. Also, it’s a common misconception that hgh spring rates ruin the ride – but I’ve found that shock tuning on the street will mitigate most of that harshness – it’s more about shock tuning than the spring rate. Just some thoughts on making these big cars work.
Jeff thanks for your comment.
You’re right that the spherical bushings do help A LOT when it comes to suspension bind, however there’s still nothing to positively locate the rear end in the center of the car like a Watts Link or Panhard Rod.
There are Watts Link Systems out there, but they too have their limitations when bolted to a triangulated four link.
I think for 90% of the people out there spherical uppers and lowers are the way to go. That being said because I need a stronger rear axle than the 7.5, the S197 8.8 rear end presents a novel solution to my needs and should offer a leg up on the competition that will still run triangulated 4 link style rears.
Why use the spoke wheels that are on your car? I do like them and thinking on putting them on my 86 vette street car I sometime take to the drag strip.
Thanks for your comment Fred. The reason for the 17 inch wheels is purely for tire selection. Unfortunately these days finding high performance tires that will fit a 15 inch wheel is almost impossible. I think that US Mags Ramblers would look killer on a C4 Vette.
Hey there – this is a great post.
I am on a similar transformation with my 86 Monte Carlo LS.
I had the frame removed and boxed / reinforced and all new biody bushings
The rear is Hotchkis connecting roda with tubular connecting arms and a xtra wide ford 9 inch 31 spline with stock located spring and shock mounts to manage 12 inch rear wheels without changing frame or body.
I am now working the front end with 2 inch drop spindles new oem springs and coil over shocks (non-adjustable). Tall ball joints and stock upper and lower control arms. Sway bar is 1-5/8.
The question now is how to widen the track on the front 2 inches and provide 12 inch brake rotors.
The car has a 450hp 5.3 LS in it. Slporting a tesla panel with engine management system on a 2012 Lacrosse console with funtional shifter etc.
Also a t-top car The pan-hard connecting the rear package area has extra bracing so frame is very rigid with enough flex to not brake.
Only thing is it would be nice to have a way to connect with or locate auto shops
So I discovered rather embarrassingly that the sway bar was on incorrect. Now that the sway bar is correct I am going to review your post above and read that book to figure out springs and control arms. The car ride height is so low it almost drags the ground in the front. All I have is 2inch drop spindles in the front and some Monroe gasmatic with load coils on them. Too low in the front need to stiffen it up. If a set of coil overs does the trick then that is good easy.
Any pointers appreciated.
Got the moog springs and bilstien shocks and car ride is great much improved.
I am looking at a custom front suspension with lower control arm and spindle with a coil over strut something like that to enable the car to handle better in corners.
Having the frame boxed and rear control arm connectors with reinforced frame mounts / cross braced has enabled the car to maneuver and drive exceptionally.
Those calipers and rotors just bolt on? Did you change the master cylinder also?