Call us soft, call us lazy, but we like power stuff on our cars. We can’t think of any sane reason to use old-fashioned cranks and handles when there are kits on the market that let you open doors, roll down windows, and pop open trunks at the touch of a button.

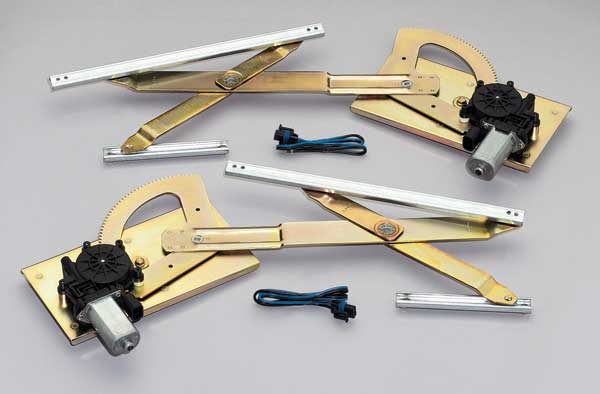
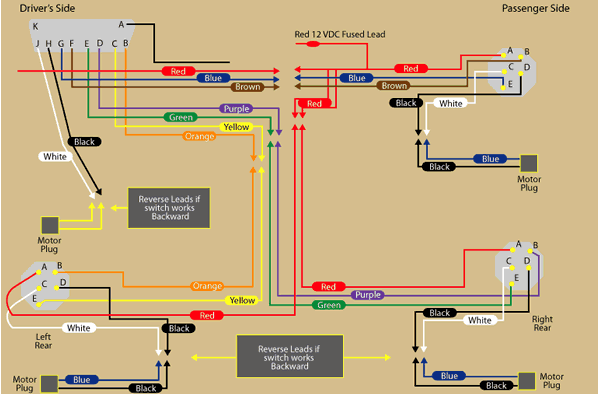
Electric-Life, for example, makes power window conversions for 1950s and ’60s cars, popular 1970s and ’80s trucks, and street rods. The theory sounds simple—take out the old mechanical window guts, install Electric-Life’s new regulators, hook up some buttons and wires, and voilà—power windows.

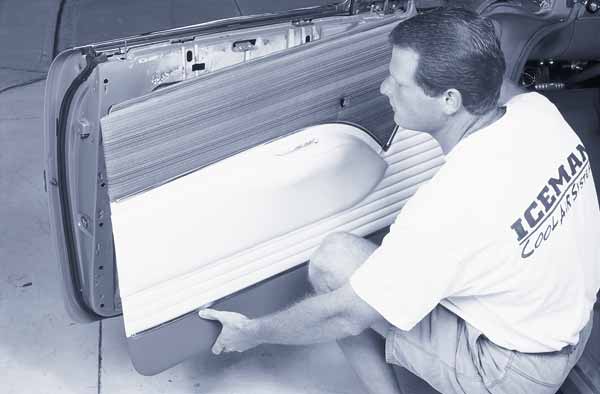
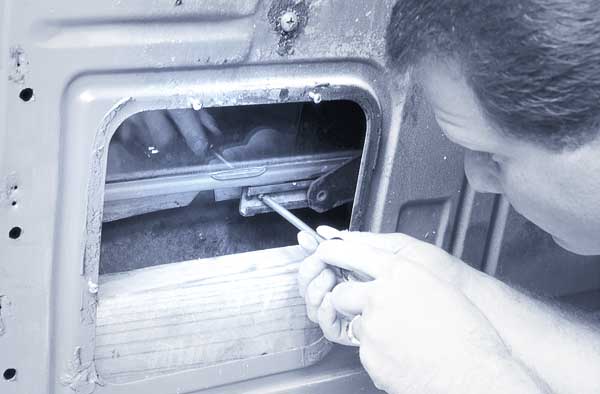
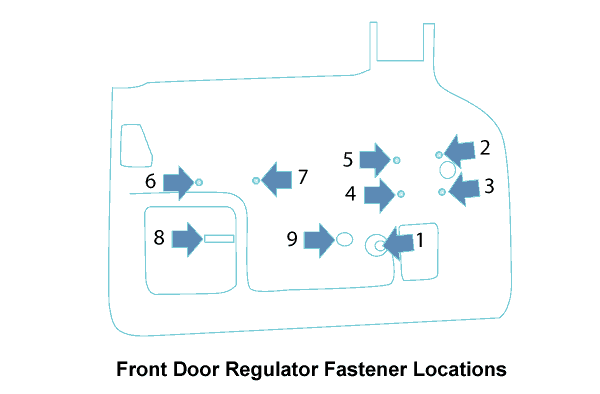
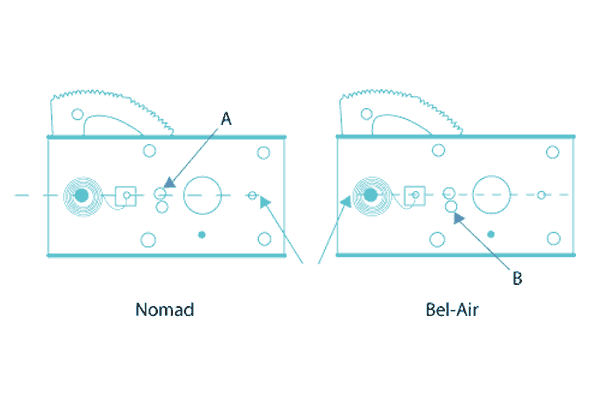
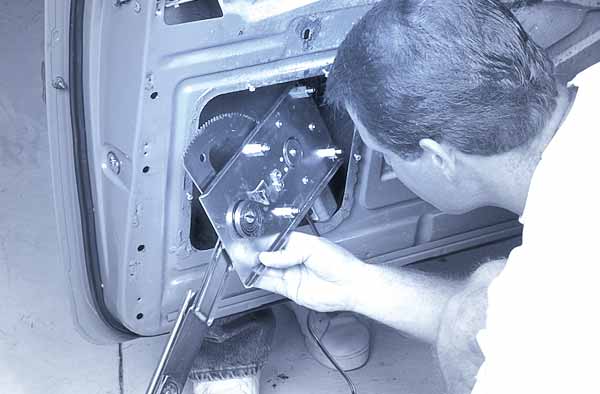
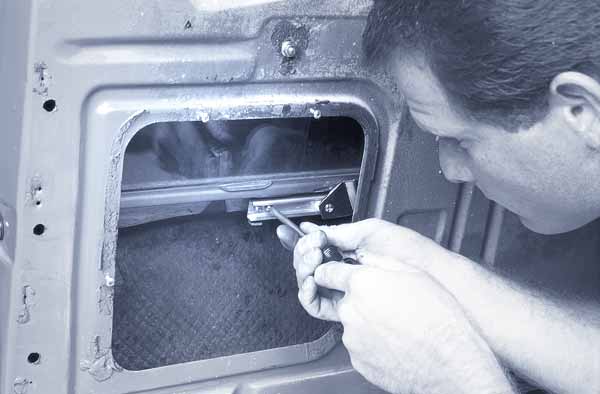
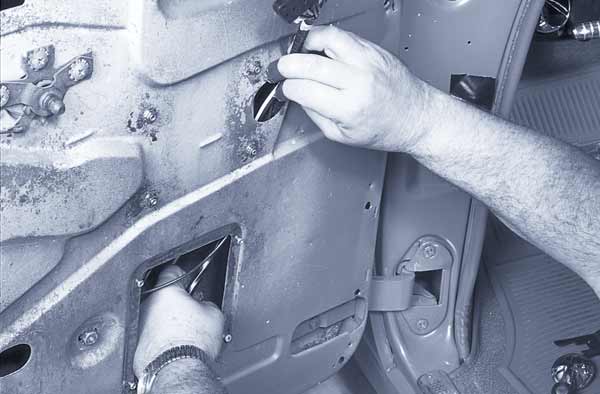
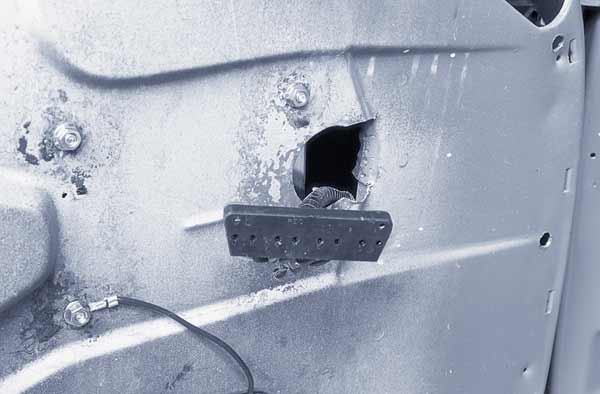
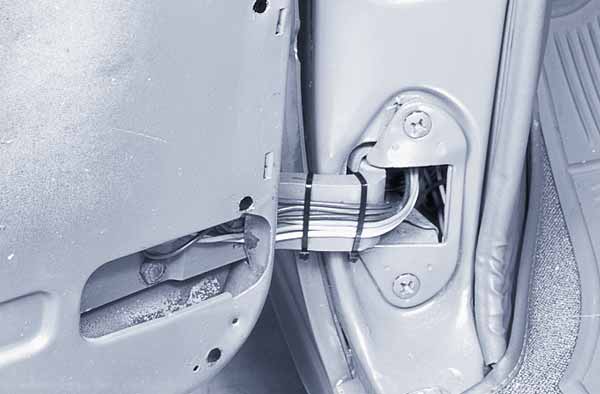
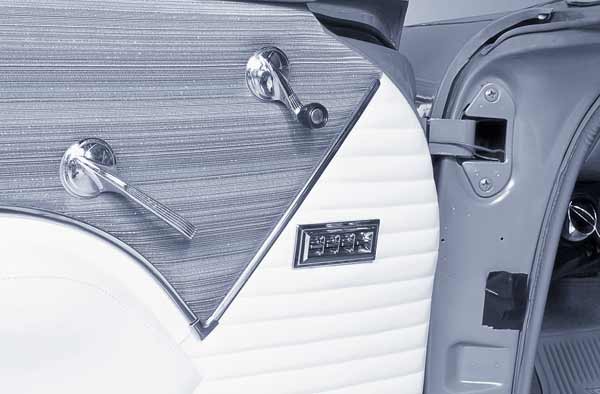
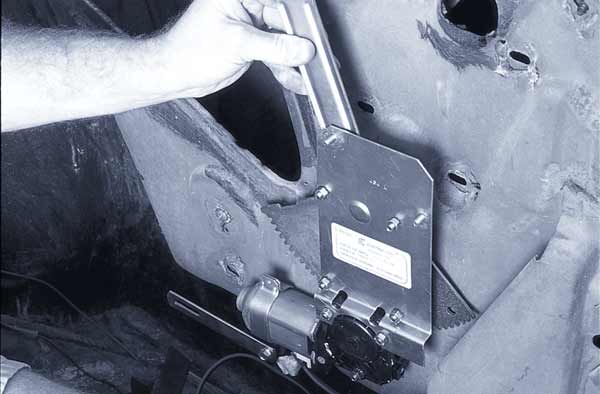
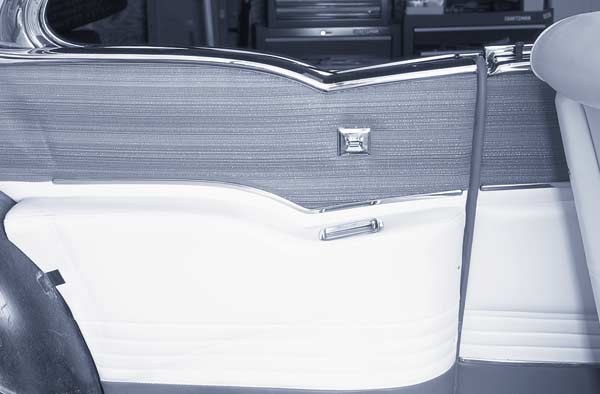
We decided to test that theory by installing an Electric-Life kit in a 1955 Bel-Air. The conversion is not difficult, but you do need to exercise some patience getting the old mechanisms out and routing the wiring. But the effort will be worth it the first time you press that button and the windows magically glide up and down.
[important]

Parts List

Electric-Life Power Window Kit for 1955-57 Chevy, front windows

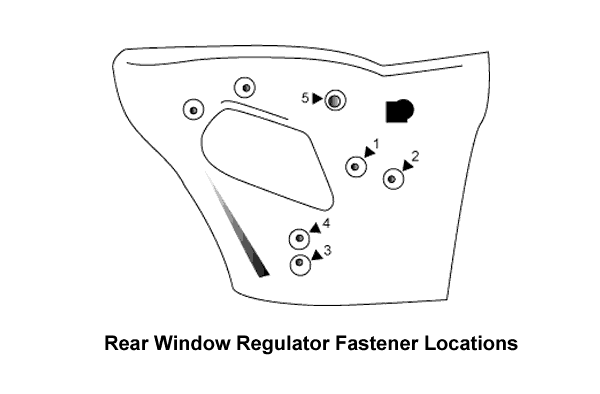
Electric-Life Power Window Kit for 1955-57 Chevy, rear windows

Electric-Life GM Style Chrome Switch Kit

[/important]


electric window conversion kit
removing door card from a classic car
installing an electric window regulator in a car door
door fastener locations for electric widow retrofit
Electric-Life window regulator illustration
removing window regulator from an old car door panel
installing an electric window regulator in a car door
pulling electrical wire through a car door panel
feeding wires through a hole in sheetmetal
wiring for electric window retrofit zip tied to door hinge
electric window switches retrofitted in a classic car door card
electric window conversion kit
removing window regulator out of an old car door
illustration of a vehicle door sheetmetal
installing electric window brackets in a classic car
vintage door card for a classic car
electric window wiring diagram

This is Electric-Life’s 1955-57 Chevy power window conversion kit for Bel-Airs and Nomads. The kit includes new replacement regulators with prewired electric motors for both front doors. The switch panels aren’t included, but several styles are available from Electric-Life, complete with the required wiring harness.

To begin the conversion, roll the window down, remove the window cranks, door handles, and trim from the outside door panel, then carefully pry the panel off the door. You will need to remove the plastic pocket in the grab handle to access two screws.

Put a piece of wood in the bottom of the door to keep the window from falling when the old regulator is removed. Make the wood tall enough to keep the window from cocking in the door.

Next, remove the nine fasteners that hold the mechanism in the door. The illustration shows you their locations. Be careful with these 40-year-old fasteners, as you will need to reuse most of them when installing the Electric-Life regulator.

The Electric-Life regulator is set up for a Nomad. If you are installing it in a Bel-Air, you need to move the window stop from position A to position B as shown.

Once the fasteners are removed, carefully slide out the old regulator. Plug the blue and black power wire harness into the motor on the Electric-Life regulator, then slide the regulator into the door. It will take some finesse to do this, so take your time. It helps to have a pair of extra hands to hold the door steady.

Referring to the diagram in Slide 4, attach the regulator to the door at positions 2, 3, 4, and 5. Attach the short upper slide at positions 6 and 7, reinstall screw 1, then lower the glass and attach the long lower slide in positions 8 and 9.

With the regulator in place, run the wiring harness for the switch panel through the door. We used a GM style switch kit that includes a four-switch master panel for the driver side and three one-switch panels for the passenger door and rear windows.

Since the panel goes where the window crank used to be, the connector comes through the crank hole in the door. Note the ground wire attached to a mounting bolt at lower left.

For the time being, we routed the red power wire through the upper door hinge and the other switch wires through the bottom hinge, securing them with zip-ties. We’ll figure out a better-looking way to route the wires after we install all the new regulators.

Using the switch as a template, mark and cut an opening in the outer door panel for the switch. Snap the switch in place, then hook up the red power wire to make sure the new regulator works properly. If the regulator checks out, reattach the door panel, trim, vent window crank, and door handle. Repeat the assembly procedure on the passenger side door.

This is the Electric-Life power regulator kit for the rear quarter windows. Like the front window kit, it comes with two preassembled regulators with motors. Make sure to plug in the blue and black power wire harness into the motor before stuffing the regulators in the car.

Remove window crank, trim, and outer panel, then remove the old regulator. We had to remove the rear seat to gain better access to the outer panel.

Referring to the illustration, remove the fastener in position 3 and loosen (but don’t remove) the fastener in position 4. Remove the factory window stop in position 5 and discard.

Insert the Electric-Life regulator in the door and fit the plastic wheel into the glass slide. Refer to the diagram in the previous slide and secure the regulator to the panel in positions 1 and 2 with the supplied nuts. Secure the regulator’s motor bracket to the car by tightening the fastener in position 3. You can adjust the regulator’s position by loosening the nuts in positions 1 and 2 and sliding the unit forward or backward.

With the regulator in place, run the wiring harness for the new switch through the manual crank hole, then reinstall the outer panel, trim, and the switch. This is what the end result should look like. Now, move over to the passenger side and do it all over again.

With all regulators in place, it’s time to hook up all the wires. This is the basic wiring diagram for a four-window system like ours. The regulator motors are wired into the switches, while the main 12 volt switched power wire for the system is taken off the passenger side. The windows should operate only when the ignition key is at the on or accessory positions. The ground wire on the driver side serves as the main grounding point for the entire system.