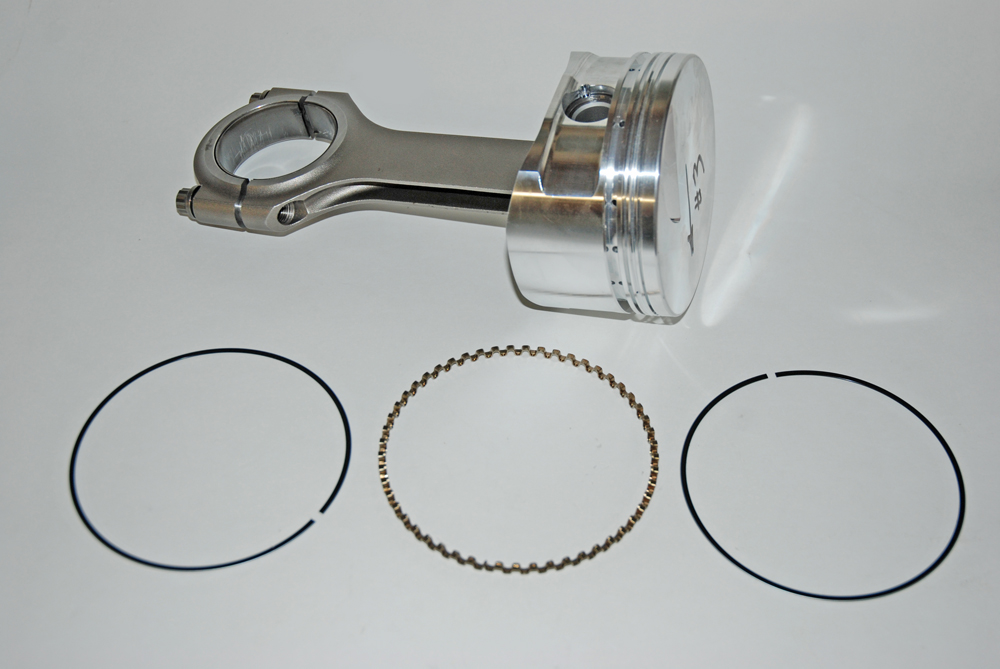
When you shop for high performance piston ring sets, you’ll no doubt find there are many different sets and styles available (no big secret). And many of these ring sets are designed to be hand-fit to each cylinder bore. Typically, file-fit rings are designed so they measure 0.005-inch oversize (obviously larger than the cylinder bore size). By design, it’s up to you to measure and set the end gaps. This only applies to the top and second rings in each ring set. The oil ring package can’t be file fit. Even in file-fit ring packages, the oil ring package is simply installed as delivered by the manufacturer (we’ll get to this later).
Why do you need to file fit a ring set?
The reason a compression ring is file-fit in a high performance engine is because the gap affects performance. Too large a gap, and cylinder pressure leaks through the gap and the engine loses power. Too small a gap, and the ring ends will butt together as the engine heats and expands. This can damage your engine.
According to decades-old Speed Pro research (which is still valid today):
“Comparative tests using a 350-cubic-inch small block Chevrolet engine reveal definite improvements in blowby control and horsepower as top ring end gaps were decreased. Blowby was reduced by approximately 50 percent, and horsepower increases ranged from 5 to 13 percent. The baseline test was run with top ring gaps set at 0.024-inch.
In the second test, top ring gaps were reduced to 0.016-inch. An additional test was made with the top ring gaps set to 0.010-inch. In this final test, the results again showed a reduction in blowby; but a noticeable loss of horsepower was observed at higher speeds. Examination of the rings indicated that the top rings were butting. Running with ring gaps butted will result in scuffing of cylinder walls and/or flaking of moly from the ring face.”
As you can see, getting the gaps right makes more power.
So what’s the correct ring gap for your engine?
In reality, there isn’t just one answer to that question. The top ring gap will change based on the amount of heat introduced into the engine. Most folks say the gaps on the second ring are driven more by the cylinder bore diameter. Adding nitrous or boost (turbo or supercharged), or building a combination that runs abnormally hot, will affect the gaps. As a basic rule of thumb, a gap of 0.004-inch of end gap per inch of cylinder bore diameter is a good place to start. Some second ring sets can be set slightly looser, but that depends on the ring configuration and the manufacturer specs.
The following is a recommended gap chart for conventional (gap style) rings from Total Seal Piston Rings:
| Street, strip, circle | Gas, Alky, E85 | Bore x .0045” | Bore x .0045” | Min .015” |
| Nitrous up to 150HP | Gas, Alky, E85 | Bore x .0055” | Bore x .0055” | Min .015” |
| Nitrous 150HP-350HP | Gas, Alky, E85 | Bore x .0065” | Bore x .0065” | Min .015” |
| Nitrous 350HP+ | Gas, Alky, E85 | Bore x .008” | Bore x .008” | Min .015” |
| Mild boost up to 15lb | Gas, Alky, E85 | Bore x .0055” | Bore x .0055” | Min .015” |
| Medium boost 15-30lb | Gas, Alky, E85 | Bore x .007” | Bore x .007” | Min .015” |
| High Boost 30lb+ | Gas, Alky, E85 | Bore x .008” | Bore x .008” | Min .015” |
| Mild boost up to 15lb | Nitro | Bore x .006” | Bore x .006” | Min .015” |
| Medium boost 15-30lb | Nitro | Bore x .008” | Bore x .008” | Min .015” |
| High Boost 30lb+ | Nitro | Bore x .009” | Bore x .009” | Min .015” |
Total Seal notes that these are general gapping recommendations and should not be considered absolute. State of engine tune, operating environment, and personal experience should also be considered.
How to Measure & File Ring Gap
So how do you measure gap?
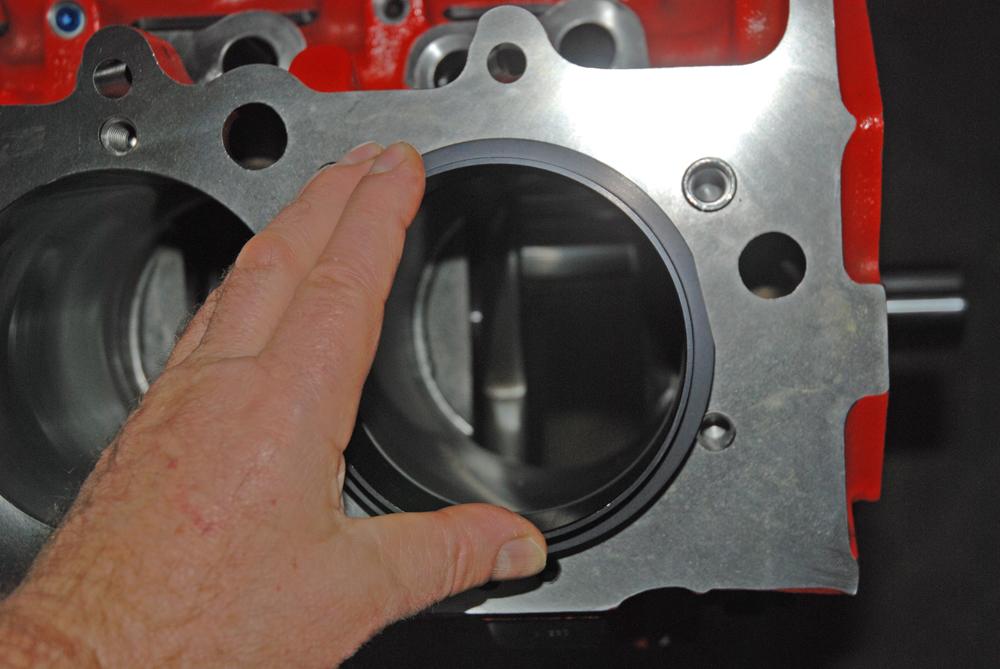
First, install the individual ring into a specific cylinder (we typically begin with cylinder #1 in the engine firing order). The ring must be squared in the bore. You can accomplish this with the end of a dial caliper (the depth gauge portion at the back of the scale), but it’s far easier and more convenient to use a commercial ring-squaring tool (Summit Racing has more than 30). In this case, the ring is inserted in the bore, followed by the squaring tool. Since most tools are hollow, or have internal access (see the accompanying photos below), you just pull the ring back up square to the face of the tool, and you’re done.
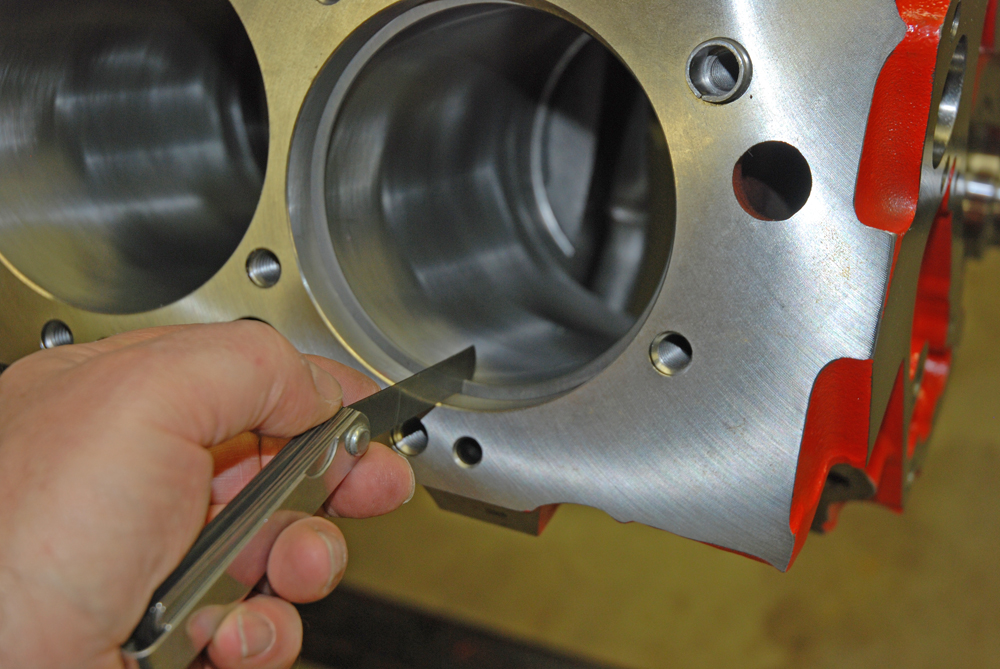
In order to check the gap, a common feeler gauge is used. Insert the feeler gauge in the gap (if one exists) to determine the dimension. If you’re beginning with rings that are 0.005-inch oversize, then there’s likely zero gap and the rings may even overlap. To reduce the ring size (increase the gap), you have to file fit the ring with a ring gap tool.
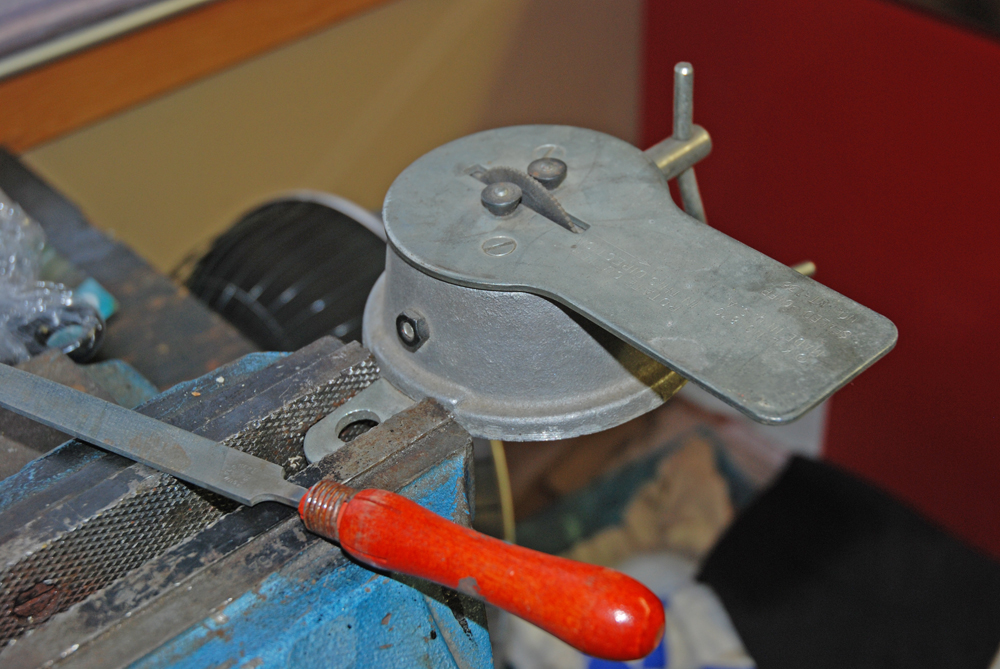
There are sophisticated gapping tools available, but they’re also expensive. A relatively inexpensive and easy-to-find alternative is available from Sealed Power or Summit Racing. This particular tool has a hand crank that turns a rotary carbide, which in turn trims the ring end gap (see the photos below).
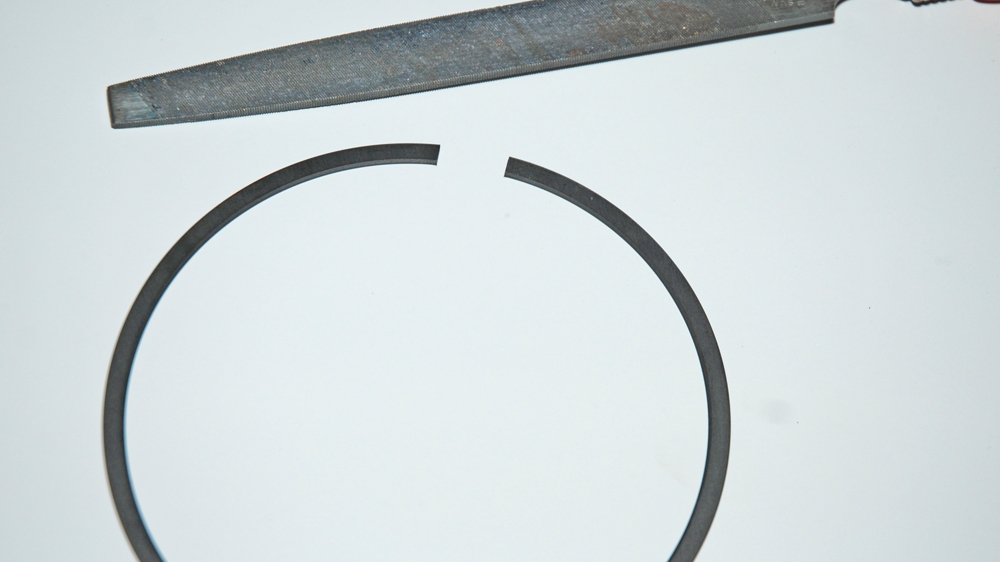
Go slowly when filing your rings. File a small amount, check the gap in the respective bore, and then file more as necessary. The idea is to effectively “sneak up” on the gap. Once the gap is set, you should gently deburr the end gap with another small, fine-tooth hand file. If the end gaps are excessive, you’ll have to purchase a new ring or ring set, so take your time!
When you’re filing rings, you should fit each ring for each specific cylinder. When you do it this way, you’ll end up with a custom-fit top ring and custom-fit second ring for each cylinder. To keep everything organized, we mark a large white poster board with each cylinder number and set the gapped rings aside for later installation onto each piston.
Installing Your Piston Rings
Piston rings should be installed after the piston–pin-rod package is assembled. There are many ways to install rings, but a favorite method is to carefully wind the rings onto the pistons.
Is there a tool to do this?
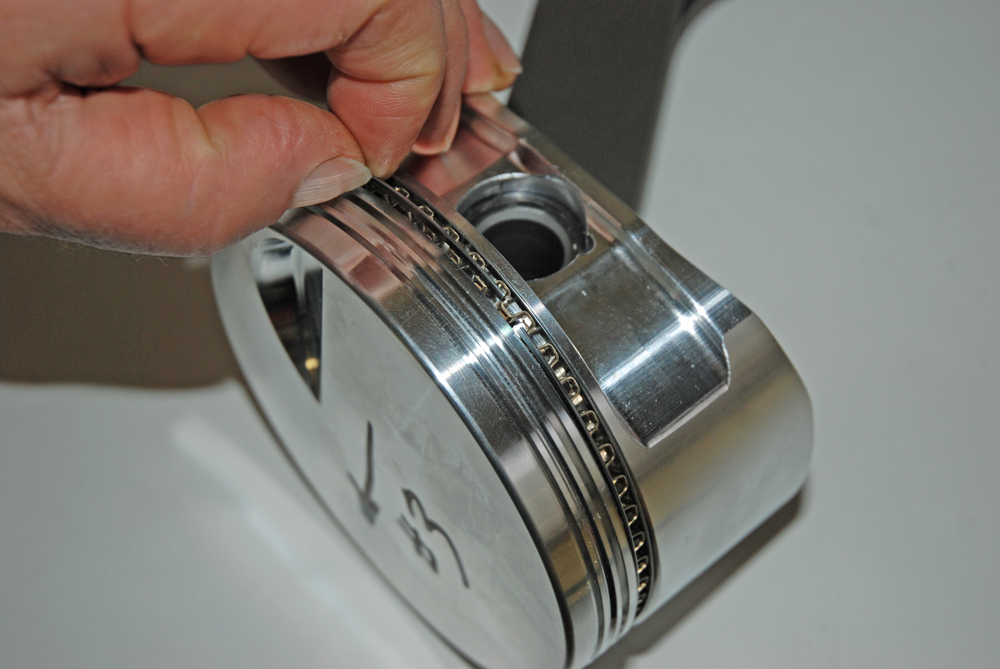
Yes! In the past, piston rings were thicker, much higher-tension versions than we see today. Back then, some engine builders installed the rings on the piston by way of a special set of pliers. Today, with lighter tension and thinner cross sections, piston rings can be installed on the piston by hand. The oil ring pack is simple to install, starting with the oil ring expander. It doesn’t matter which direction it faces; simply wrap it over the piston and insert in the oil ring groove. Next, carefully wind on the oil ring scraper rail. One goes to the bottom of the oil ring groove; another to the top. Each gap on the oil ring package (includes expander and set of upper and lower scraper rails) should be positioned 120 degrees away from each other. You have to be careful with the expander since the ends tend to overlap. Once installed, the oil ring package should be able to float easily from side to side in the groove. Be sure to double (and triple) check the expander prior to pushing the piston into the bore.
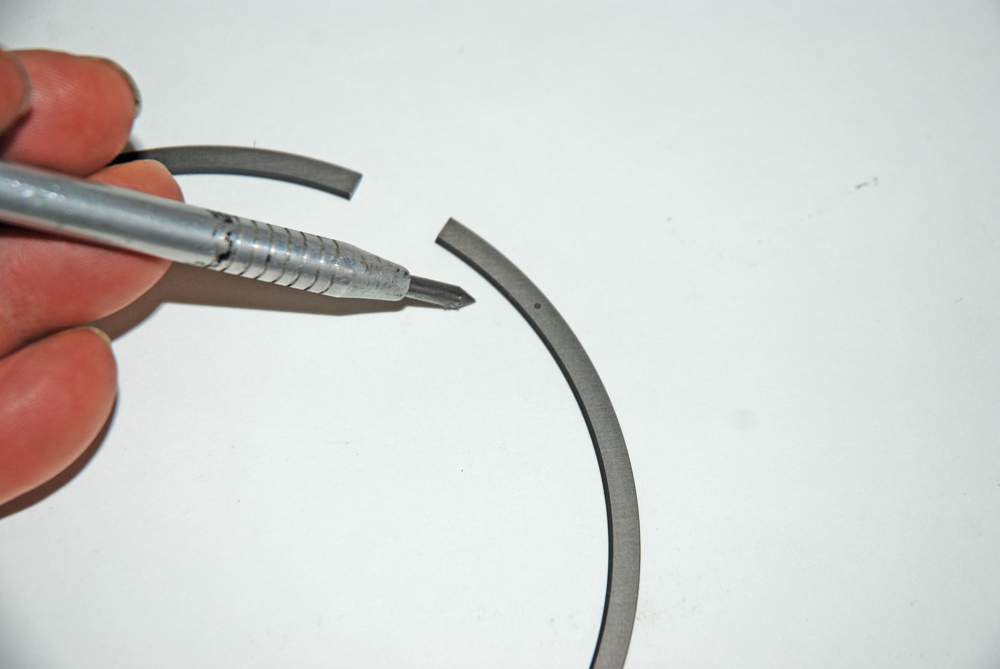
The second ring is installed next and the top ring, last. If you examine the ring package, you’ll almost always find a set of round indentations called “pip” marks on both the top and second ring. These pip marks are installed facing up. When “winding” compression rings downward, it’s a good practice to use a small screwdriver to keep the gapped end of the ring away from the piston. This prevents the ring gap from scratching the piston.
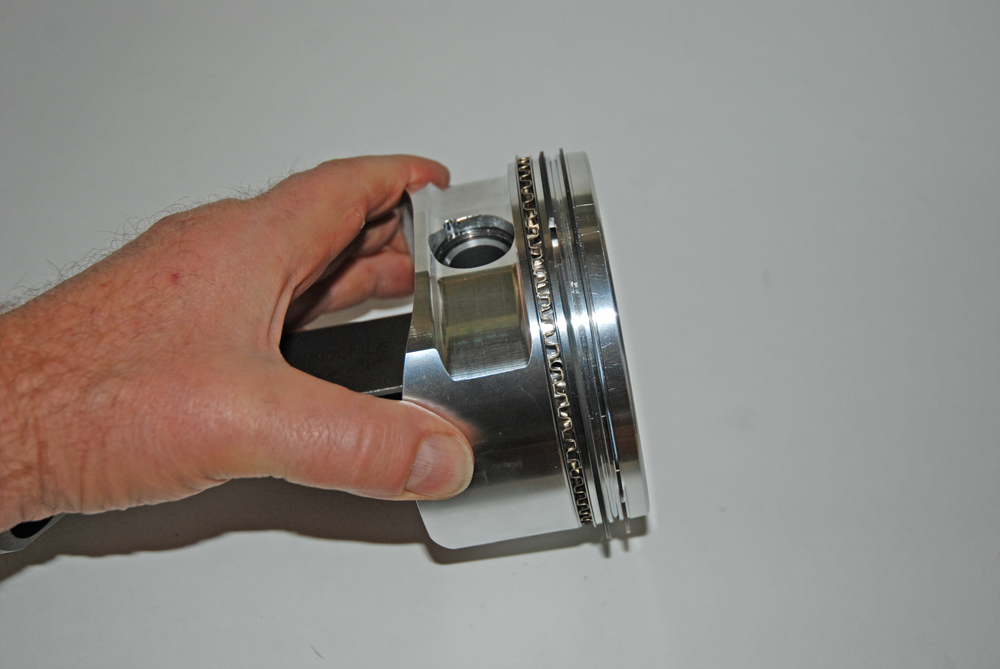
Once installed, rotate the gaps so they don’t coincide. Keep in mind, though, that piston rings actually spin within the piston groove during operation. Keeping the gaps separated minimizes the amount of oil fouling that can occur during initial engine fire-up, but you can’t control the location of the gaps once the engine has started.
For a closer look at how to set ring gaps, check out the slideshow below.


I’ve made an attachment for my lathe for precision gapping of piston rings. The angle of the cut is controlled by the compound slide and the actual cut is taken on the rotary swivel of the compound slide so that the end angle is always in line with the centre of the ring. I always keep one end untouched for reference. The dial test indicator shows exactly how much has been removed.
The grinding wheel is mounted on an arbor between centres. It’s very accurate, currently increasing gaps from 10 thou (as supplied) to 16 thou.
http://i1057.photobucket.com/albums/t386/Vulp53/P2052850_zpsuwqsw96u.jpg
http://i1057.photobucket.com/albums/t386/Vulp53/P2052848_zpsgnyx8ay6.jpg
very informative and detailed, thumbs up!
Thanks a lot.am just up coming and i need more help from u
Thanks for the information,it is powerful and helpful , we need more of this.
Rebuilt 6,5td chevy on pull down 6 7 8top ring warp gap new ring top25 thou on start up blows white smoke not near enought compression all cyc down can’t find right gap spec all were done at 004 thou per inch of bore still white smoke
What is the actual formula to figure out the piston ring end gap. I have a 40 thousands over bore, need to buy a bore gauge to measure to make sure the machine shop did their job correct, which I do not trust them and so I have peace of mind. The rings they got me are after market and don’t supply any specs with them. Need to measure the cylinder walls and do a formula for each cylinder, if you can give me a formula, so I can get the right end ring gap I would appreciate it, Thanks Michael
That’s good news to know
Measuring the piston ring gap is a thing of concern. Measuring the piston ring gap accurately is a very necessary process. Thanks for sharing these guidelines with us which users can visit https://www.resumehelpaustralia.com/cv-saviour-review/ to manage their work. All the guidelines and steps are easy and well written. Keep sharing more.
Do you file the oil ring also?
Why 120 degrees? Why not 180, then they are all at 90 degree marks.
i have a 400 chevy dstrocked to a 377 run in my dragster i need to re ring it what should the ring gap be at running alcohol