


Plenty of racers use ballast to meet specific class weight breaks.
Clever racers use the ballast as a tool to effectively tune the car too. As we covered in Weight Plan (Part 1), the best way to build any race car is build it as light as you can, then use ballast to make the specific class weight break or to make it work under varying conditions. When you take this approach, you can move the weight to a specific spot that does the most good. The reality is, tuning with ballast might be a wee bit more important than you think.
In this article, we’ll look specifically at ballast placement for drag racing.
Sanctioning body regulations often disallow ballast in plain sight. Because of this, class racers (Stockers, Super Stockers, etc.) don’t have a lot of choice when it comes to ballast location. Locating ballast in the trunk is the most obvious option, but there are a few others, especially if the chassis builder is creative (you’ll see some in the accompanying photos). In most cases, the rulebook also prohibits ballast mounted higher than the top of the rear tires.
Reflections Of The Past
Back before it became a sanctioning body regulation, racers would hang the ballast either as high as possible or as far back as possible (and regularly both). Some went as far as to line back bumpers with lead. Ballast was also mounted high on the rear roll bar hoop (or hidden deep inside the bowels of the rear quarter panels). For the times, it worked—more or less. But we have to consider, too, that some of those old cars were a handful to drive.
Today, race cars have a much lower ride height. Engines, transmissions, and drivetrains are mounted much closer to Mother Earth. Horsepower is much greater, too. Factor in massive improvements in tire technology, and you can understand how the science of ballast has been transformed, too.
Tube-Frame Cars & Production-Line Cars Are Different
Pretty much everything you see printed that’s ballast-related deals with round-tube race cars (race cars built from scratch for classes like Pro Stock, Pro Mod, Comp, and Super classes). What works on those cars has little to do with a vehicle that originally emerged on a Detroit assembly line.
In contrast to something like a legal Stocker or Super Stocker or even a well-built street car, a round-tube chassis will almost always have a lower center of gravity. Round-tube cars tend to be built with engine/transmission mounted lower and mounted further back (engine setback). The same applies to the driver. He or she is usually parked well back in the chassis. Round-tube cars regularly carry more weight on the back of the car (without ballast), but the percentage of weight on the rear wheels on something like a modern Pro Stock car might be less than you think. Chassis builder, Jerry Bickel notes that some of these cars actually have weight distribution percentages close to 49 percent front/51 percent rear.
Round-tube cars are regularly built with a limited travel front-end (most often a strut or A-arm with a coil-over shock). The ride height is obviously lower, too. Round-tube cars are also regularly built with back tires that measure 16 inches or more wide. In the end, a tube-frame car can tip the scales to the tune of 1,000 pounds less weight (or more) than a typical real door car. All of this usually means ballast is distributed throughout the car. Along with the “conventional” rearward ballast locations, many round tube cars have provisions to carry ballast bars on the door “X” braces and in front of the radiator. Believe it or not, there are some Pro Stock cars out there that carry ballast way ahead of the radiator. Some use a lot of ballast in the most forward location while others use very little. That pretty much tells you all you need to know about the hook capability of a modern tube-frame car.
Ballast For Round-Tube Cars
Bickel is quick to note that in a high-horsepower round-tube car (for example, a Pro Stock car), he wants to mount the weight at the base of the chassis in order to keep the center of gravity low. Bickel also points out that sometimes you cannot fully correct the weight distribution of the car without exceeding the minimum weight.
“This is where you must find a balance between the improvement in the launch versus the slowed acceleration caused by the added mass,” Bickel said.
He reminds us to re-scale the car once weight is added. On a lightweight car, if the driver is heavy, it can create an excessive left side bias. This is troublesome if the car doesn’t have big power (we’re not talking Pro Stock levels here). In this case, Bickel suggests you move ballast to the right in order to compensate.
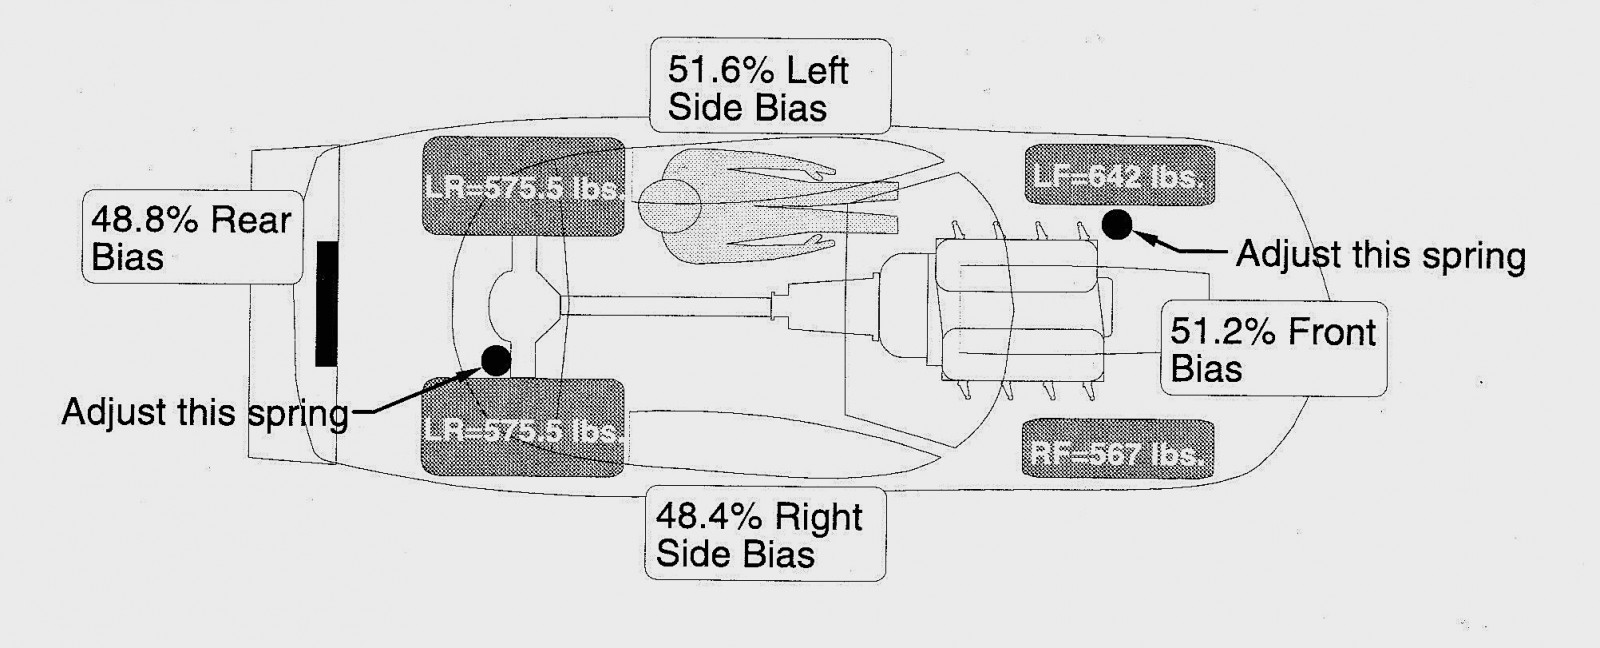
“In order to make the car come out of the water box straight on the burnout, the static weight on the rear tires must be the same,” Bickel said. “This is most easily accomplished by adjusting the corner weights, using the respective coil-over spring as the adjuster. This adjustment places more of the weight on a diagonally opposed wheels. Change the right rear and left front spring heights until the rear scale readings are equal.”
Ballast For Production Line Cars
On a production line car, there are still a number of potential ballast locations.
The most obvious place for ballast is the trunk. When a big load of ballast (for example 200 pounds) is mounted in the trunk of a tube-frame car, it usually takes time for the ballast to be effective.
What does time have to do with it?
Side step the clutch or release the transbrake button and the car will rotate (hook), but given the minimal front suspension travel in a Pro Stock-style chassis coupled with other chassis factors we looked at earlier, the effect of the ballast in the trunk will take a longer time to physically work. In a tube-frame car, this sometimes can mean a slower reaction time. When the effect of extreme rear ballast kicks in, it can also result in uncontrollable wheel stand.
In contrast is a race car that began life on a Detroit assembly line. Here, the overall layout of the chassis determines that the nose will rise, usually to full suspension travel. Don’t believe it? Check out one of the few 1955-57 Chevys that race in Super Stock. The back of the car will separate from the tire (because of anti-squat geometry in the suspension), and the car will leave. When you add a couple of hundred pounds of ballast to the rear two things happen: The nose will lift and the slicks will be driven into the racing surface. In a tube-frame car, this usually means a slow reaction time. In something like a 1955-57 Chevy, it might actually help the reaction time.
Locate The Weight
Lining the trunk with 200 pounds of lead isn’t always the best way to make it down the race track. In plenty of examples, plugging in 100 pounds of ballast is all you’ll need (or all that’s legal-eagle with the sanctioning body).
So where does the ballast go in a car that originally rolled down a Detroit assembly line?
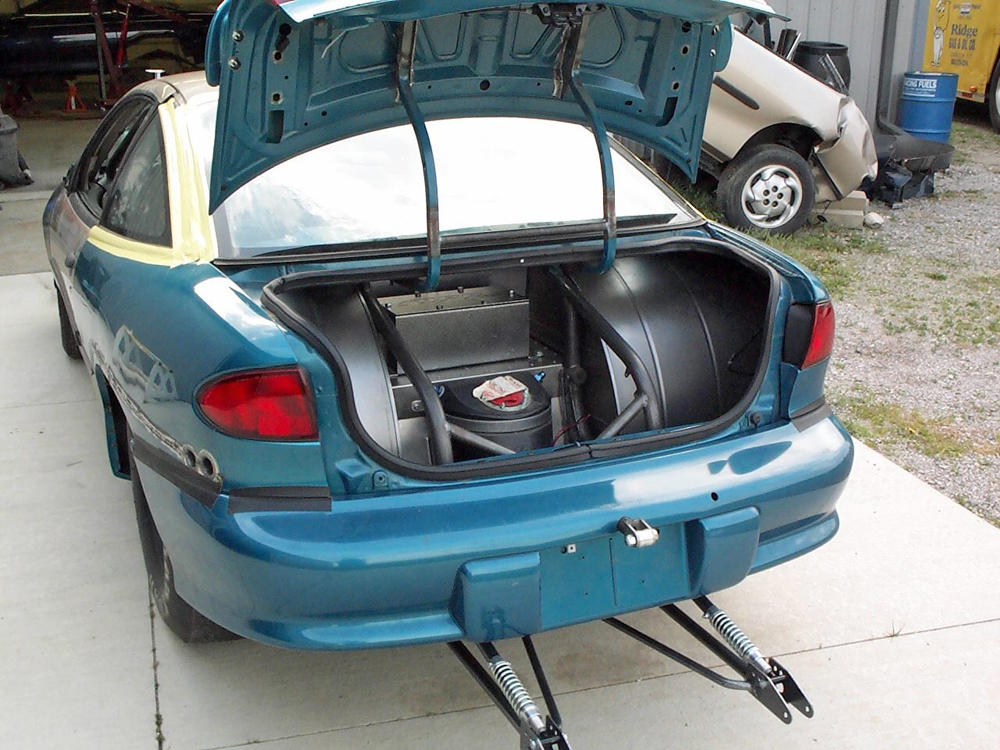
In something like a late model Super Stock GT car, the ballast is regularly mounted in the rear hatch compartment, between the rails and as high as possible. In most cars, this is a location that’s above and forward of the fuel cell (and most often just behind the axle). In an earlier model year S/S car or a legal Stocker—or perhaps in a stock suspension, small tire, fast street car—the ballast is sometimes mounted directly over the rear axle in the trunk. In other cases, the ballast is mounted to the very rear of the luggage compartment. Because of the weight distribution of some S/S cars, it’s still possible to find racers who are forced to disguise 60, 70 or more pounds of weight inside the back bumper.
There are some exceptions though.
Case-in-point are some of the Super Stock Corvettes. These cars can be built seriously light. And some carry more than 700 pounds (no typo folks) of ballast in order to fit a given class. Some of this extra ballast is carried in the front of the car, much like a Pro Stock car. In some of these Corvettes, the ballast is actually alongside the engine, tucked inside the original frame rail.
When you poll door-car chassis builders, many try to keep the weight percentages close to 50/50. Some actually build cars with a little bit more bias on the nose. Additionally, it’s a good idea to ponder a wheel stand. Race cars tend to be fulcrums, and you can use weight to make the fulcrum work for you.
One other ballast location that’s seen in real-door cars is the area just ahead of the rear axle. It seems like an unlikely location for extra weight, but the reason is simple: It’s due to a wheel stand. Race cars that hit the tires hard (for example, a stick shift car), and carry an extreme rear weight bias can sometimes force the slicks to come right off the ground. Here, the wheelie bars bend, the back bumper gets torn up, and the driver sometimes needs a hit of Valium to calm down.
The solution?
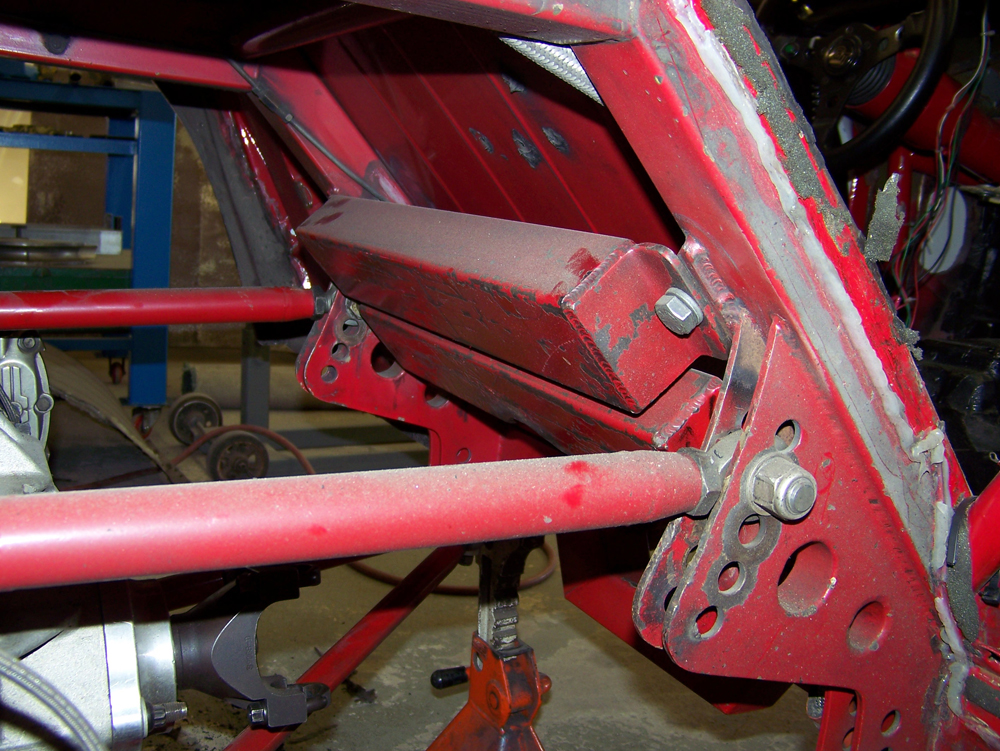
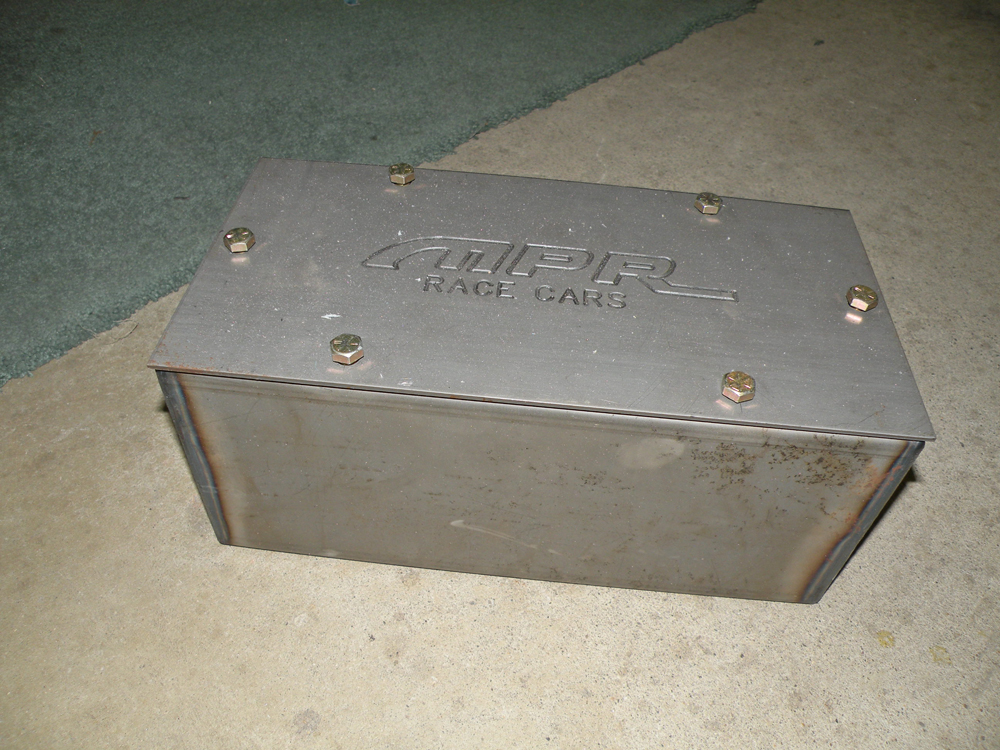
Mount a weight box in front of the axle. Some purpose-built door cars have provisions for forward weight or they can be modified to accept it. If the car has a stock floor pan car, think of mounting ballast over the original rear seat belt mounting points. The factory-built floor is already reinforced.
Some chassis builders distribute the weight across the width of the car. Some of these ballast bars are designed so that they carry two different “stacks” of weight—one on either side of the car. The theory is that moving the weight from side to side on the car (having an unequal “stack” on the ballast bar) can influence the way the car works. This way, the weight is used to compensate for unequal corner weights or to adjust the corner weight to better suit the car (the weight of each “corner” of the car). It can also be used to counteract the natural rotation of a drag race chassis, loading the left rear tire and unloading the right rear tire. Or you can use it to offset the driver’s weight. This arrangement is most valuable in a car such as a Stocker or a bracket car where suspension adjustment capability is rules-restricted, or it’s simply too costly to add adjustable suspension components.
Mike Pustelny of MPR Race Cars has a different take on ballast.
In something like a Super Stocker (or even a modern Factory Stock race car), there is quite a bit of suspension adjustability available to the racer. Coil-over shocks are legal on the rear and in the case of S/S cars, four-link suspensions are commonplace. Plenty of cars even use a fully adjustable stock-style strut on the nose, too. What this means is the suspension components can be adjusted in order to compensate for corner weight. Pre-load can be added to the coil-over shocks, four-link or both. Pre-load can be added to the front, too. That takes away the value of adjusting ballast from side to side.
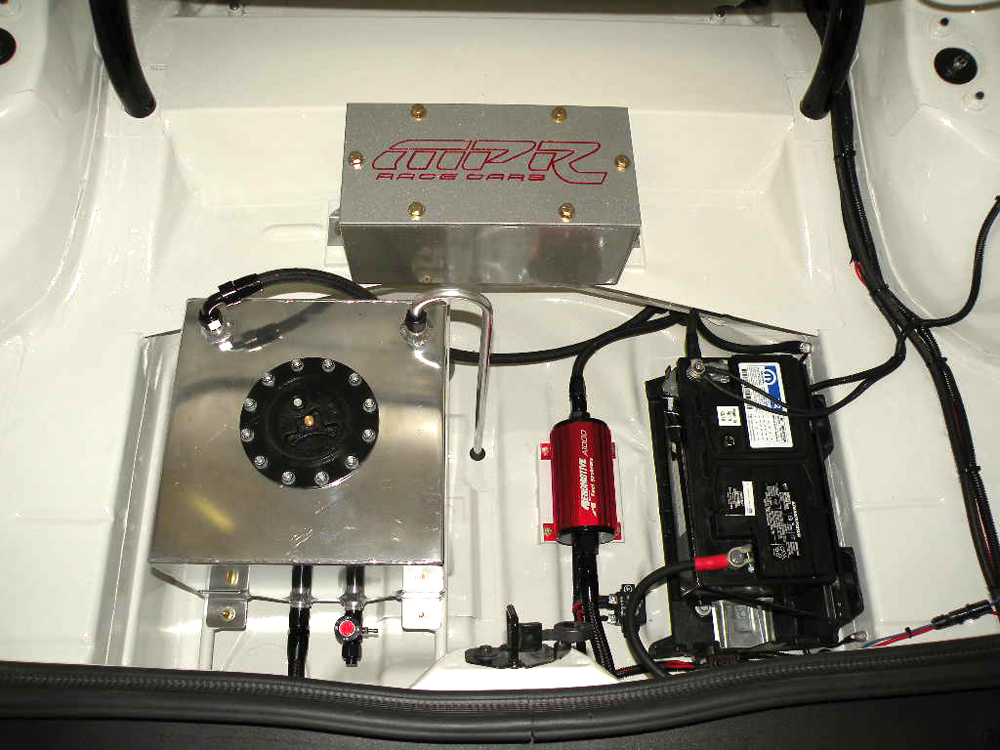
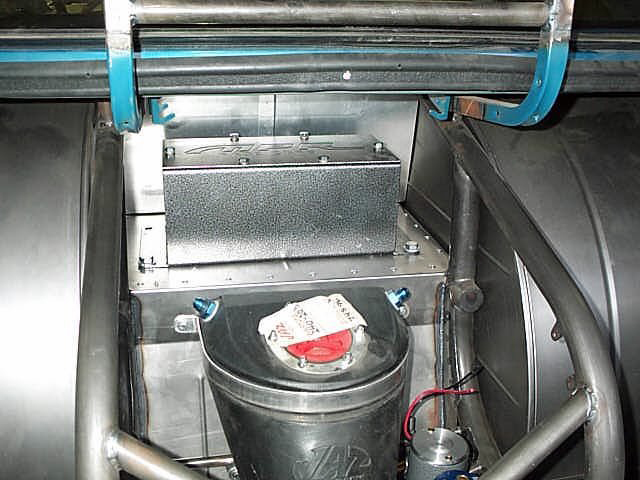
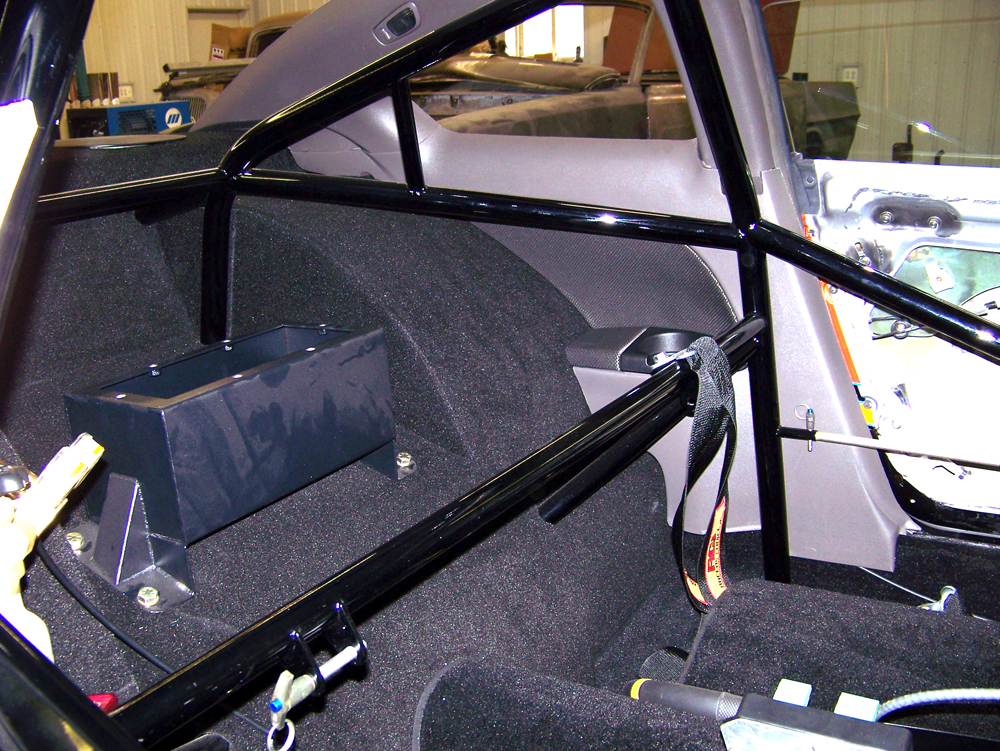
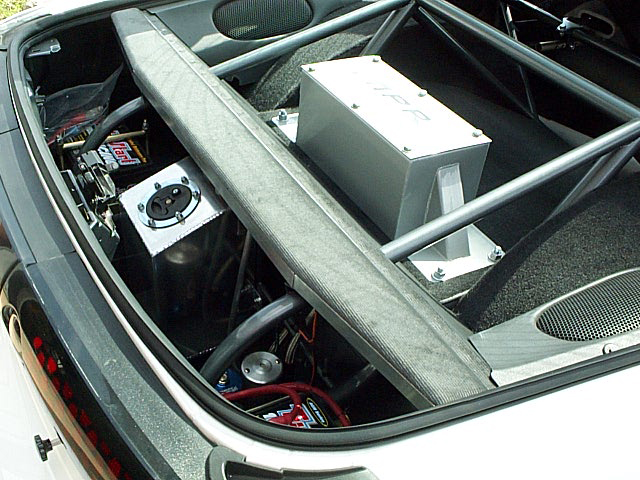
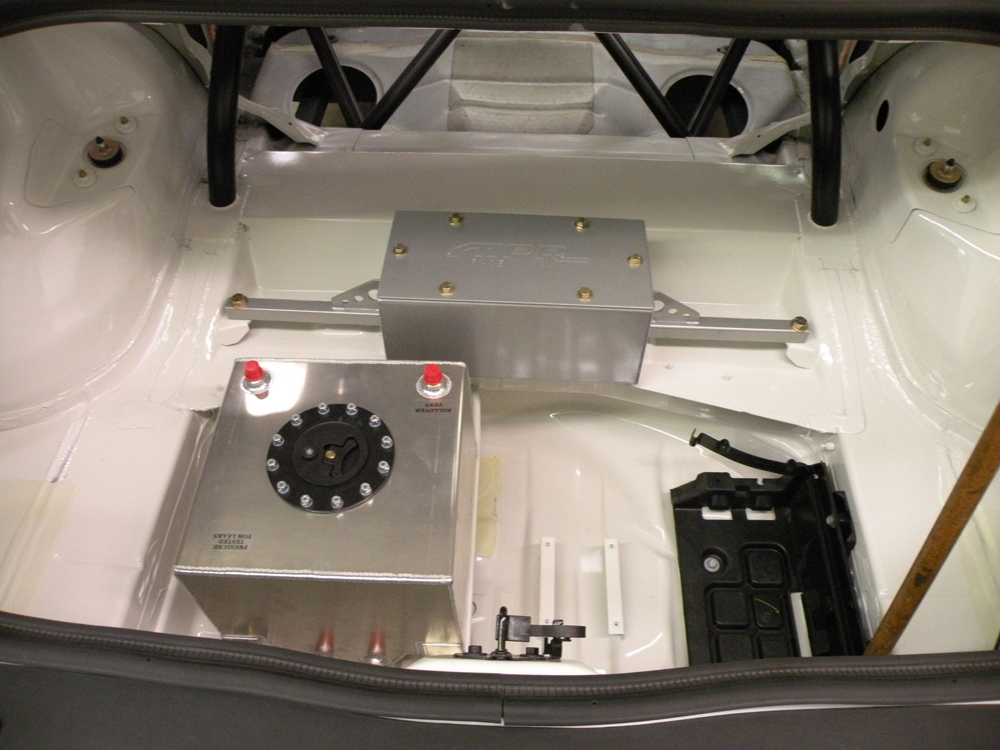
Pustelny tends to build his race cars with weight as centralized (side to side) in the car as possible. The fuel cell, pump, and ballast bar(s) are placed within the frame rails. In some cars (depending upon the car and the class), it’s also possible to mount the weight box where the back seat once took up residence. The batteries are sometimes placed outboard, and Pustelny likes to mount the batteries low and the weight box high. The reason for this is twofold: Battery weight isn’t easily “adjusted,” and mounting the ballast box high means it’s more convenient to reach and adjust.
When it comes to the exact location for ballast, there is no set answer. Each and every race car will be different. Keep in mind that once you add or take away ballast, you change the racecar’s center of gravity. There has been a lot of writing about finding the center of gravity in a race car, but the reality is, this “science” is, at best, a guess.
The only way you’ll determine the proper ballast location is with testing. Some cars respond with only modest amounts of ballast. You shouldn’t use ballast as a cure for an ineffective suspension system, but if your car doesn’t have suspension adjustment, you can use ballast to add a small amount of preload. In a low power car, you can use ballast to offset a heavy driver, and you can use ballast to calm wheelies. You can also use ballast to pick up traction at marginal tracks.
Check out the slideshow above for tips and insight on ballast locations.
[…] in your garage, just where does the ballast go? We’ve examined ballast mounting in detail in this earlier post, so we won’t delve too deeply here. Suffice it to say, the type of car, along with the general […]
[…] Weight distribution […]